


The necessary equipment
To complete this tutorial, you will need:
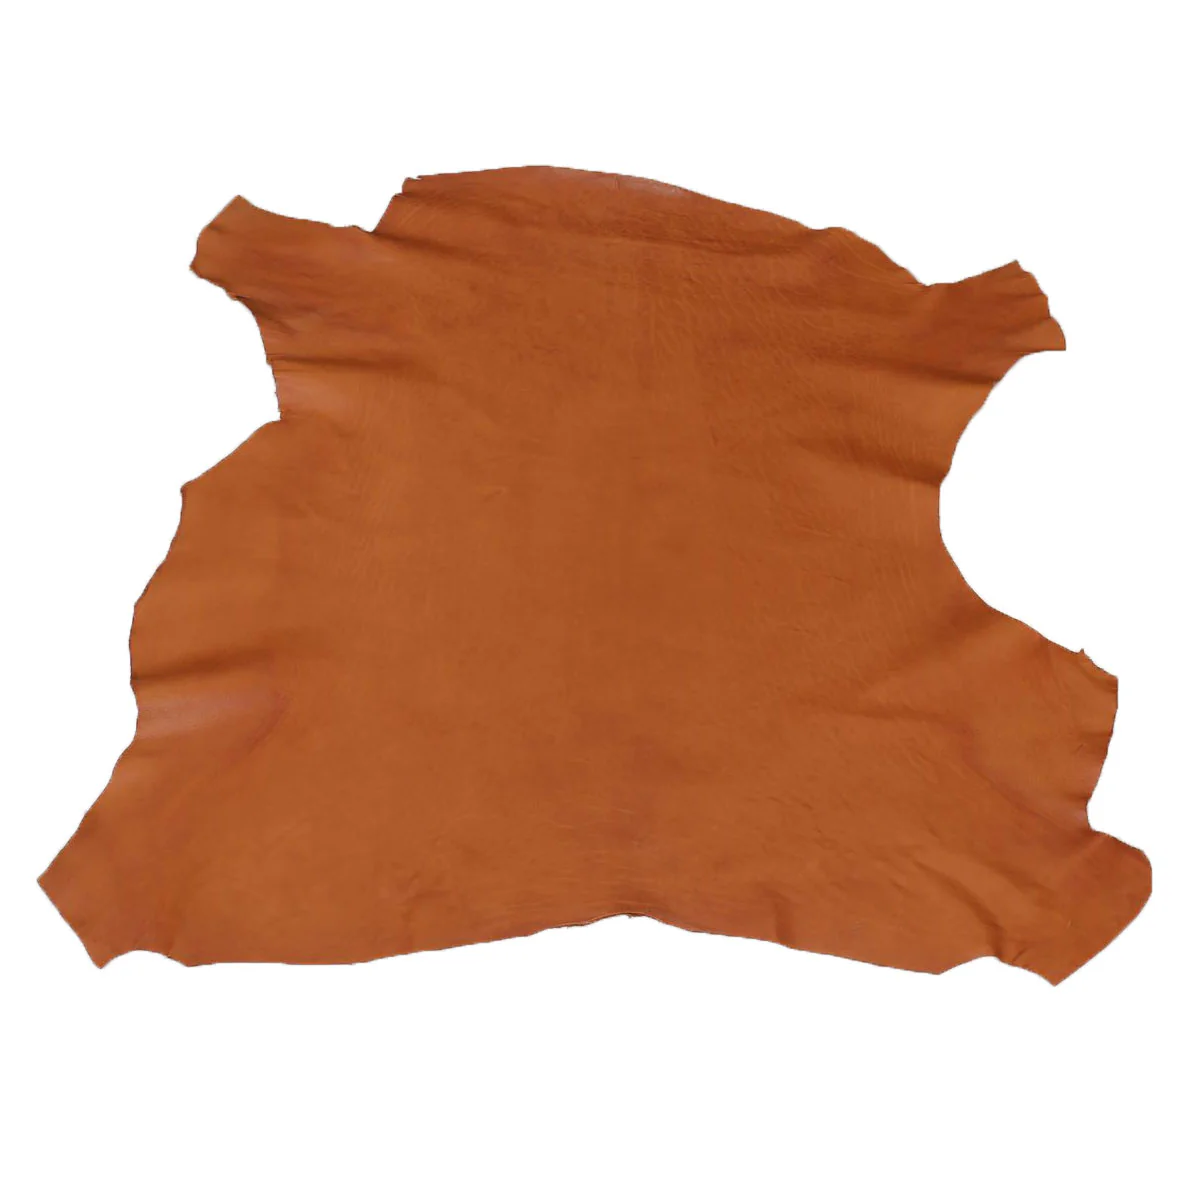
- 1 whole hide of French sheepskin leather - 0.75 m²
- 2 strips of nourished collar leather - coffee brown - Width 29 mm - Length 120 cm
- 1 strip of nourished collar leather - coffee brown - Width 24 mm - Length 120 cm
- 1 meter of flat cut buffalo leather lace - Width 4 mm - Chocolate
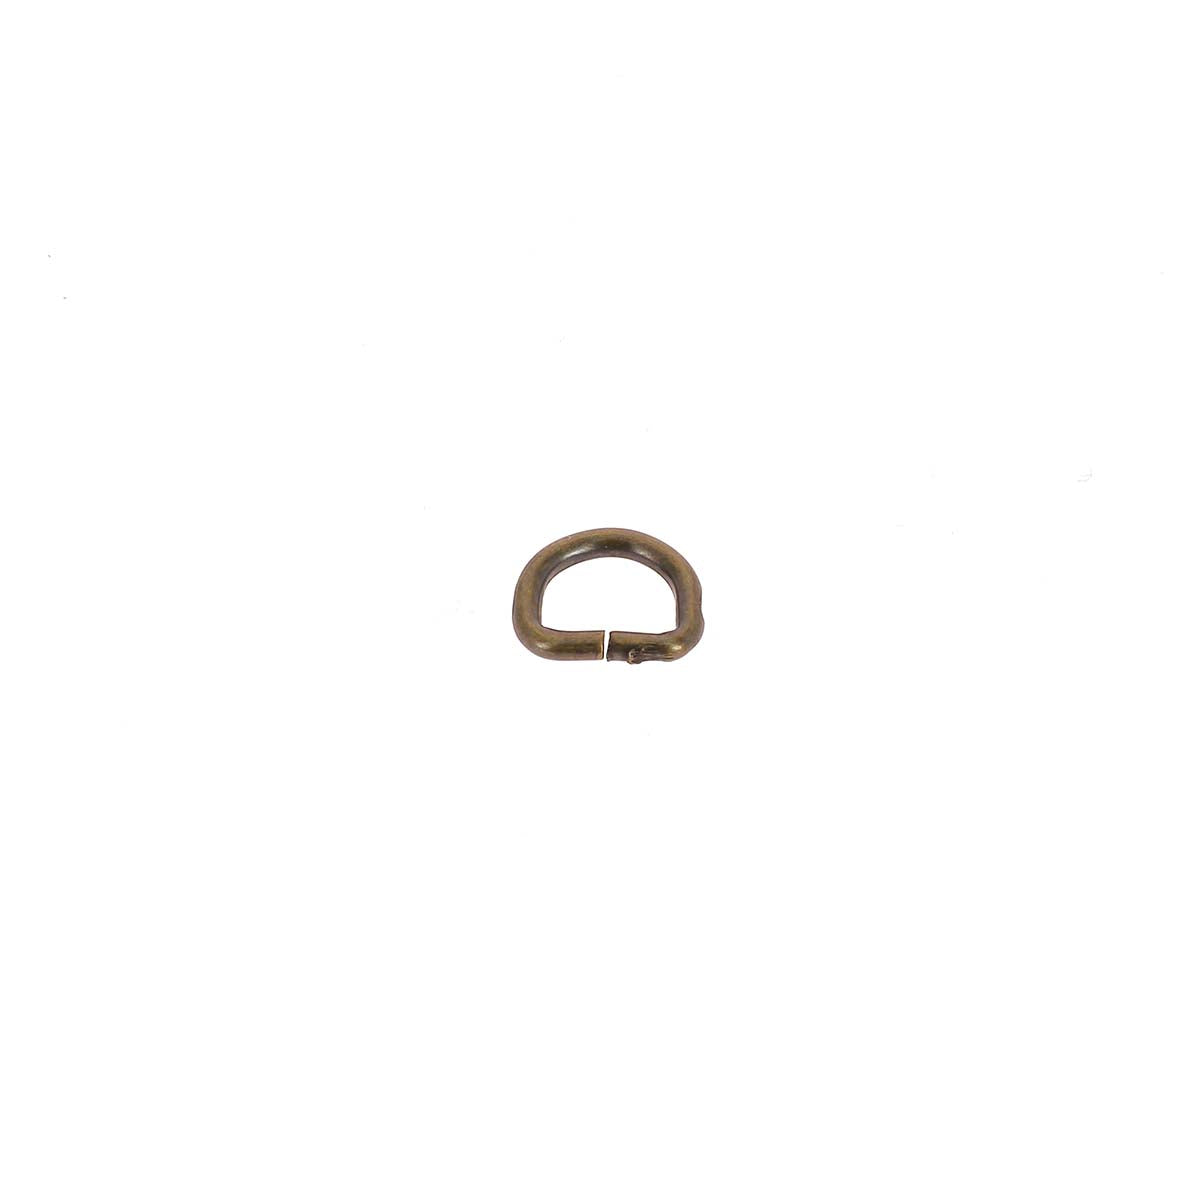
- 1 half-round ring - aged brass steel - 25 x 20 x 3 mm
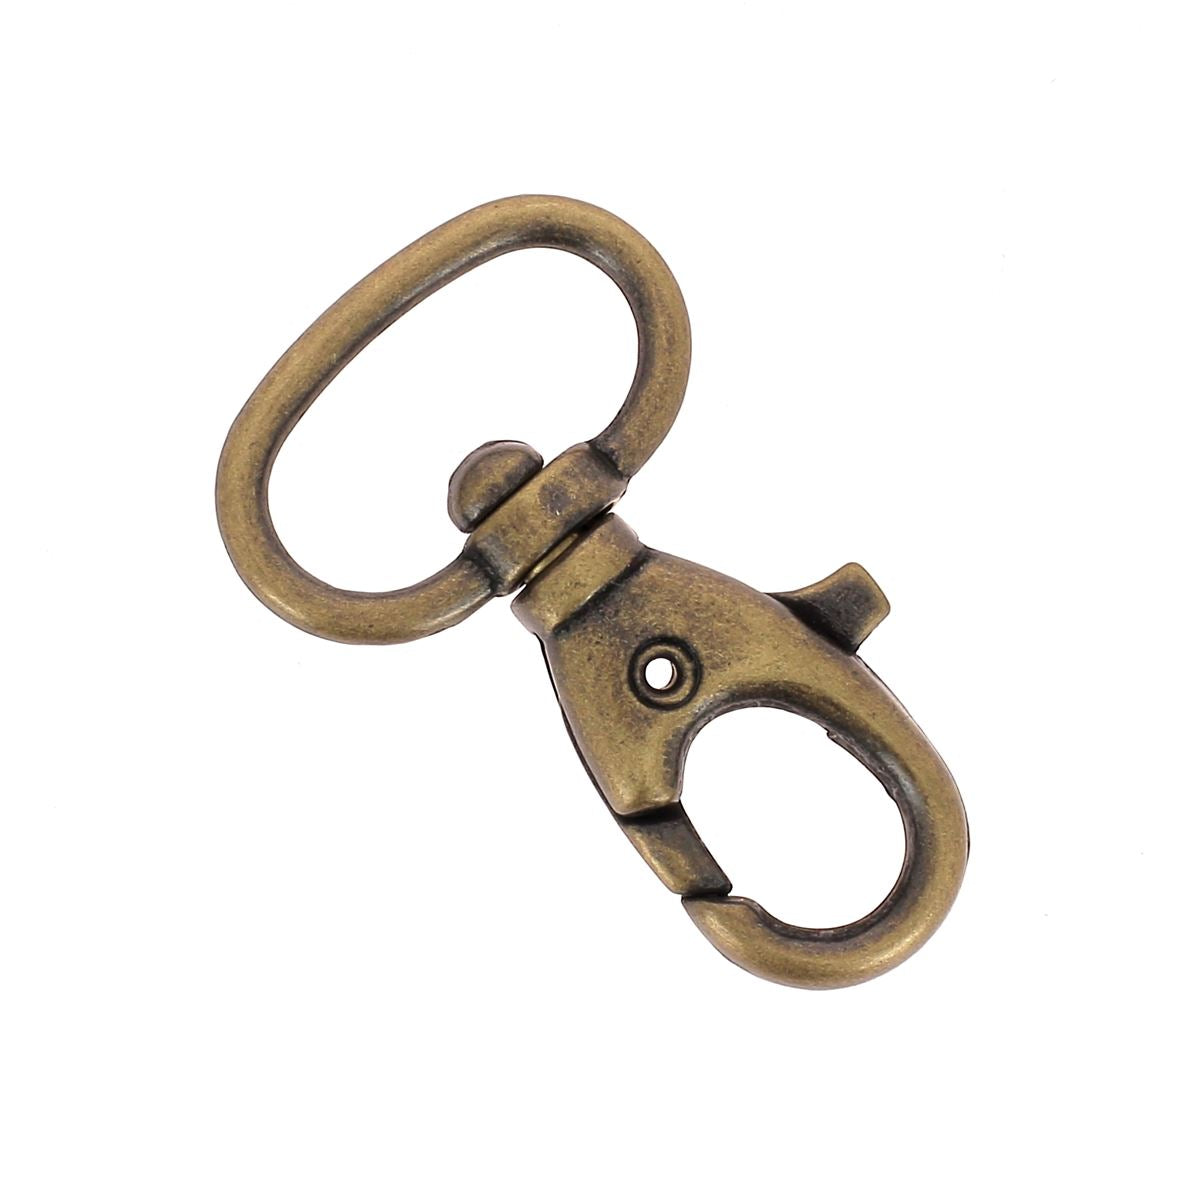
- 1 oval swivel carabiner - aged brass - 60 x 25 mm
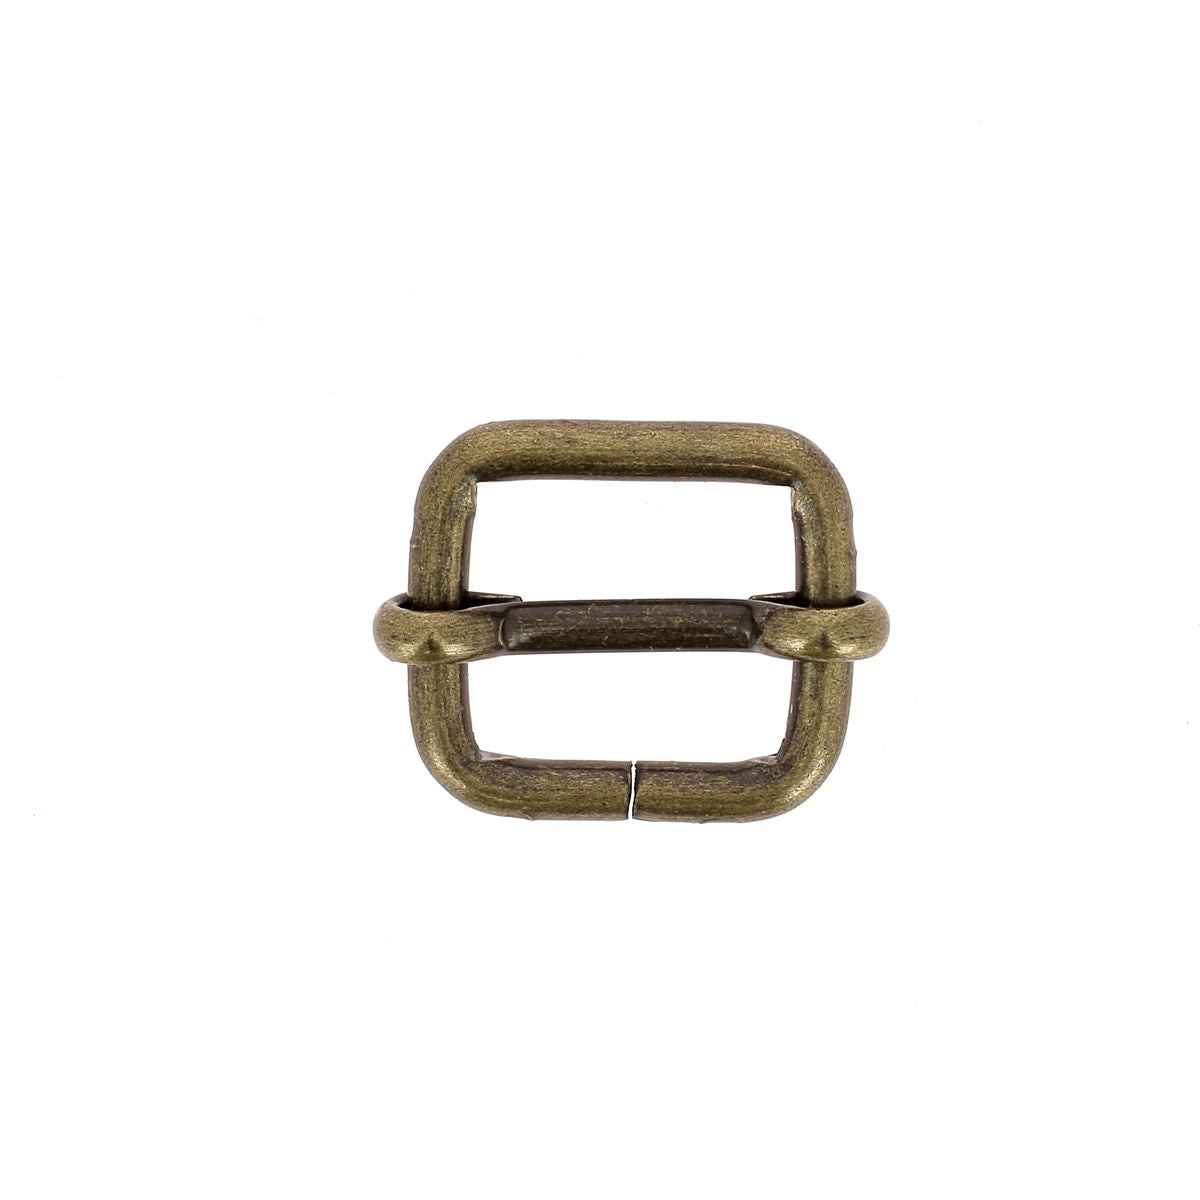
- 2 sliding buckles - aged brass - 30 x 22 mm - 3.8 mm wire
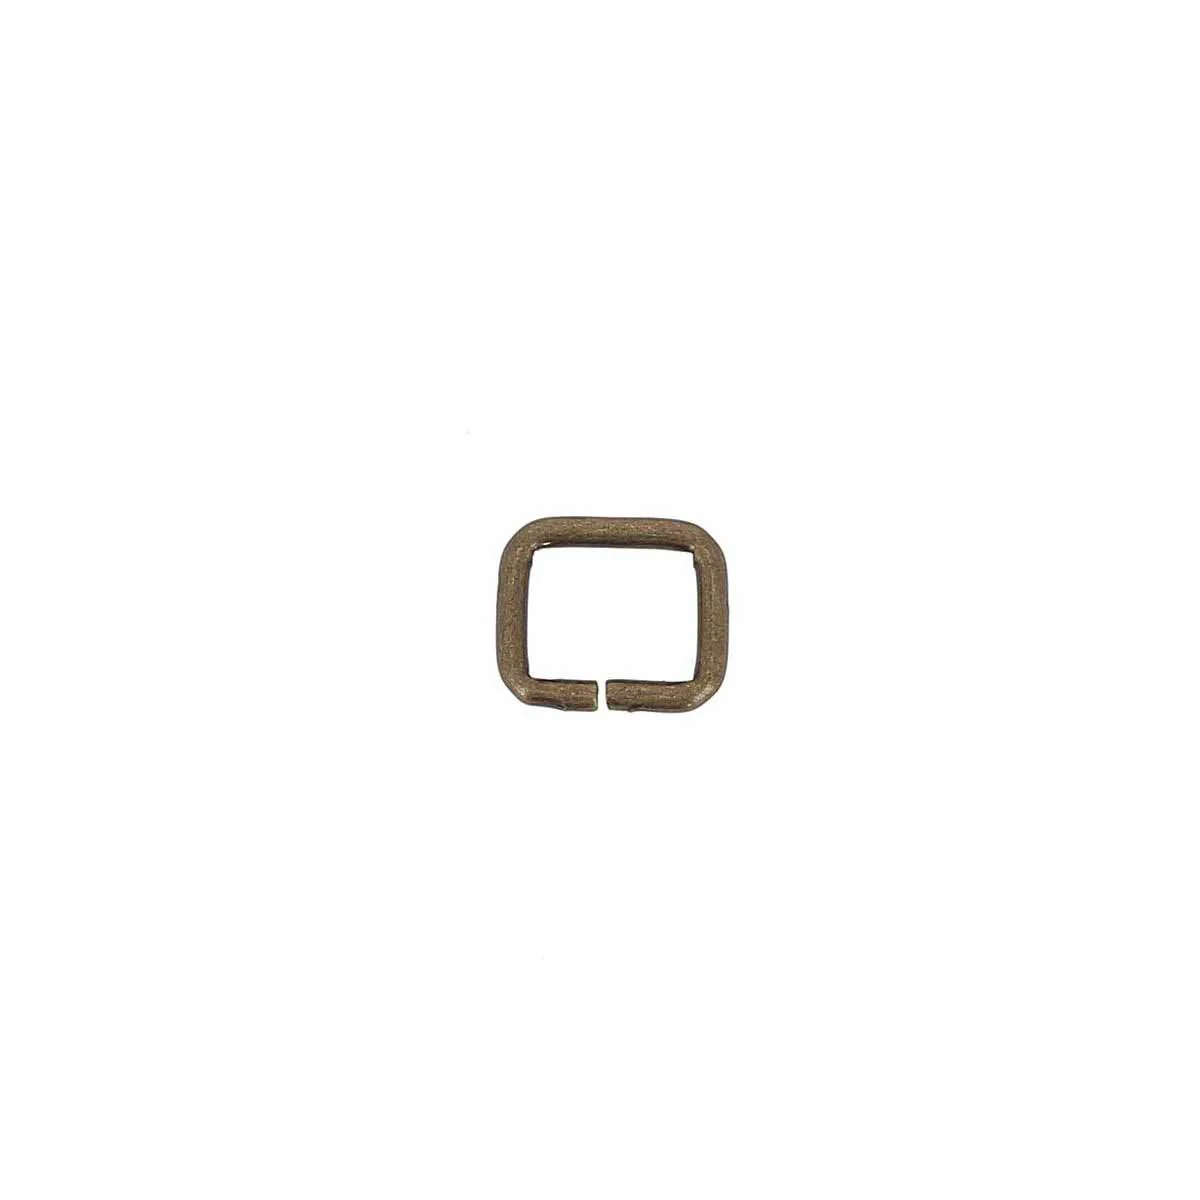
- 2 rectangular loops - aged brass - 30 x 13 mm - 3 mm wire
- 1 set of rolling eyelets and installation tool - 11 m - aged brass
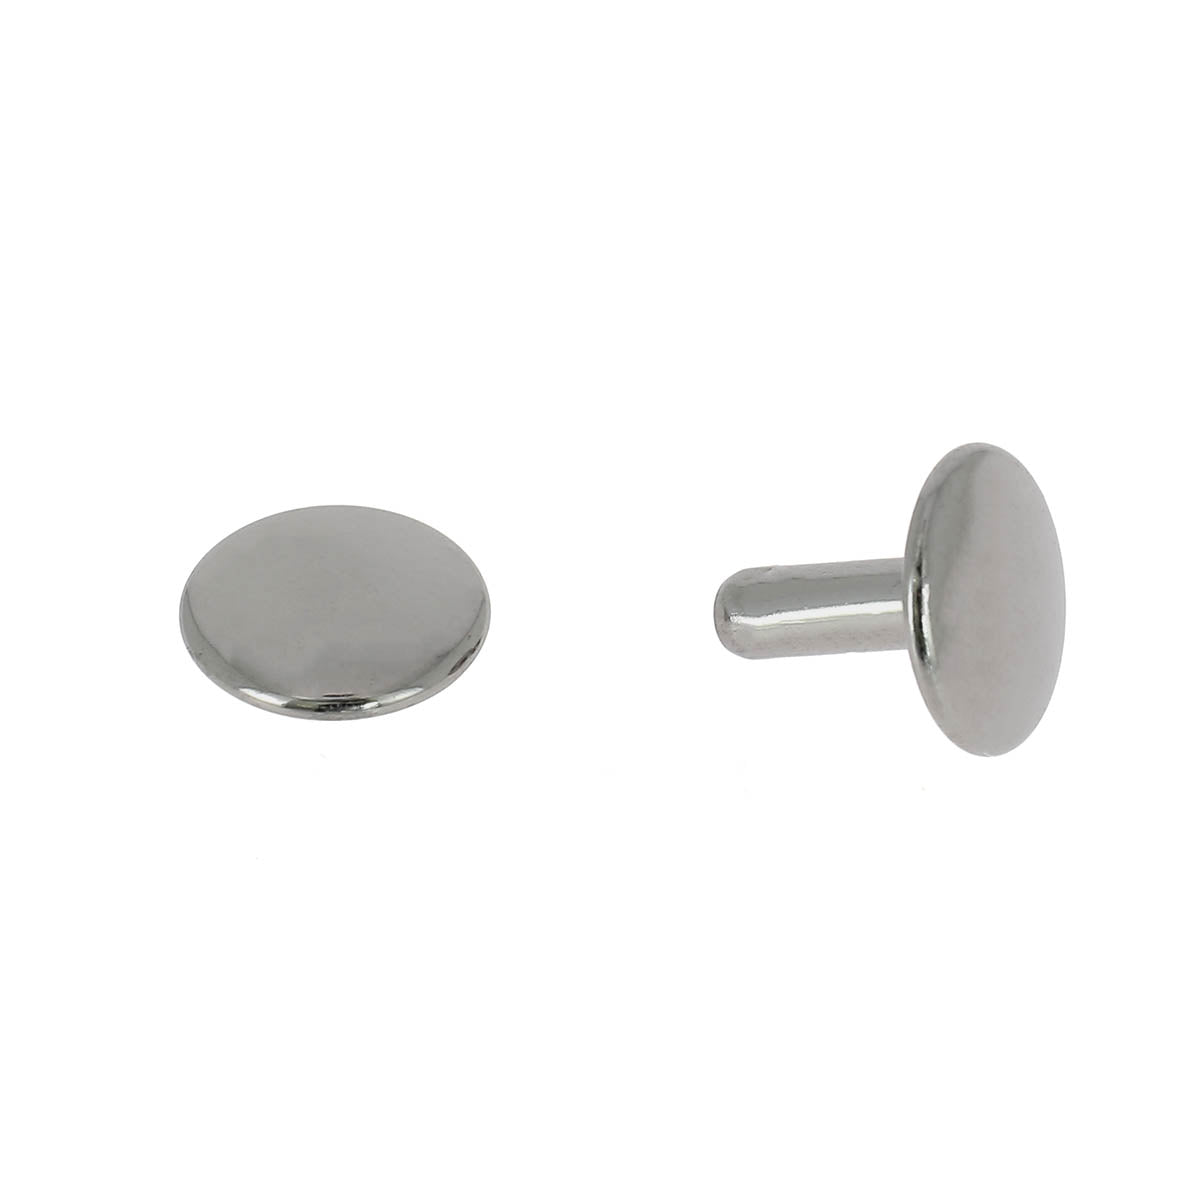
- 1 set of 20 large brass rivets (T6) aged brass finish
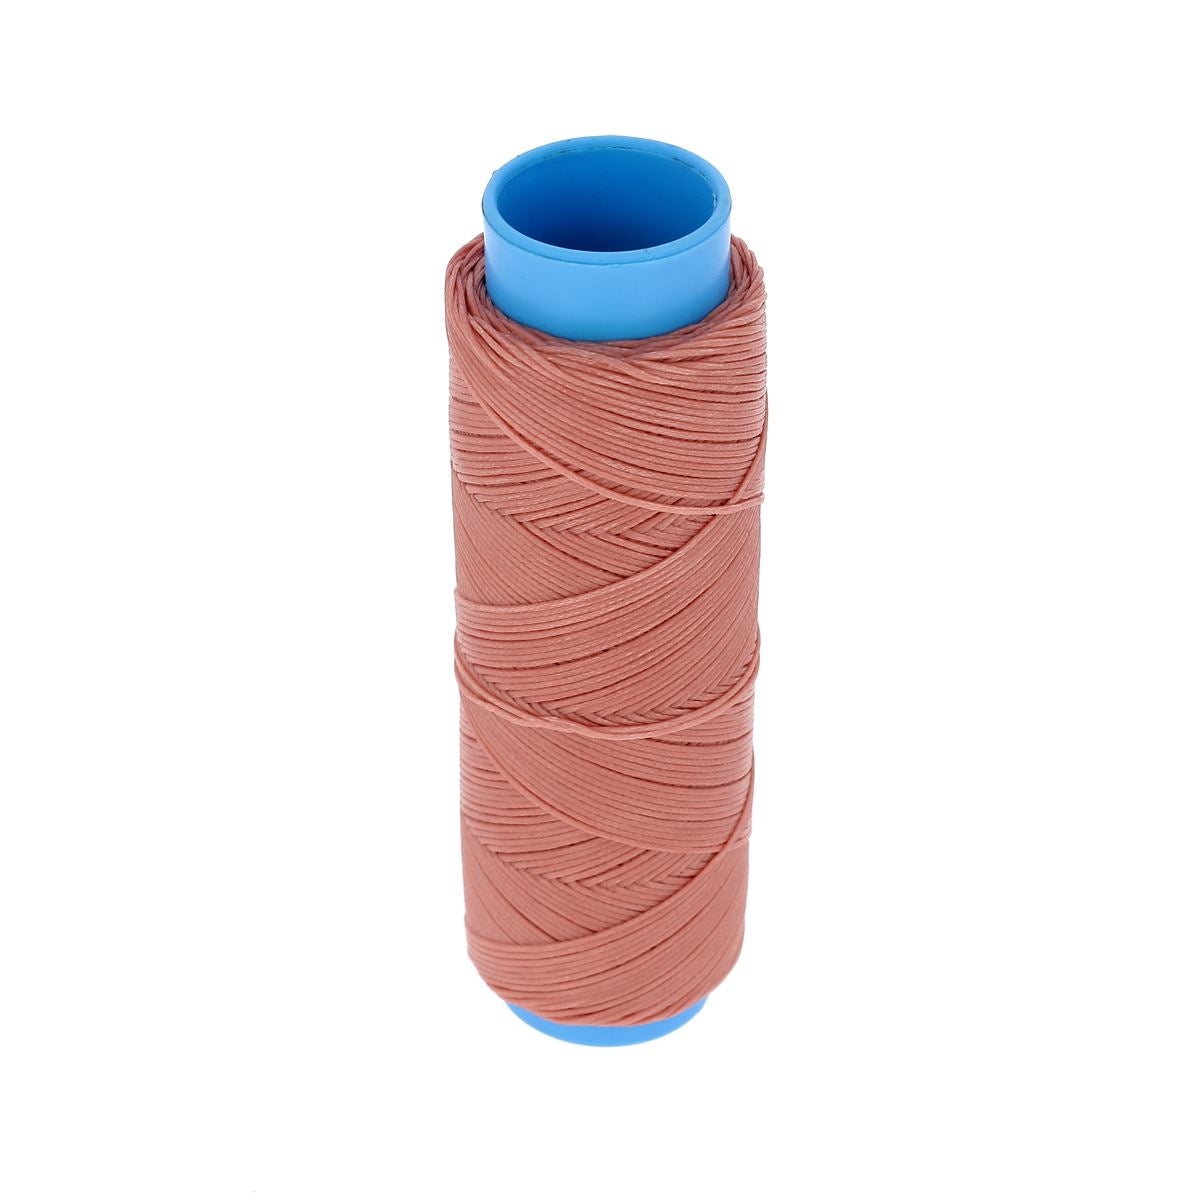
- 1 spool of braided and waxed polyester thread - 500 meters - diameter 0.8 mm - brown
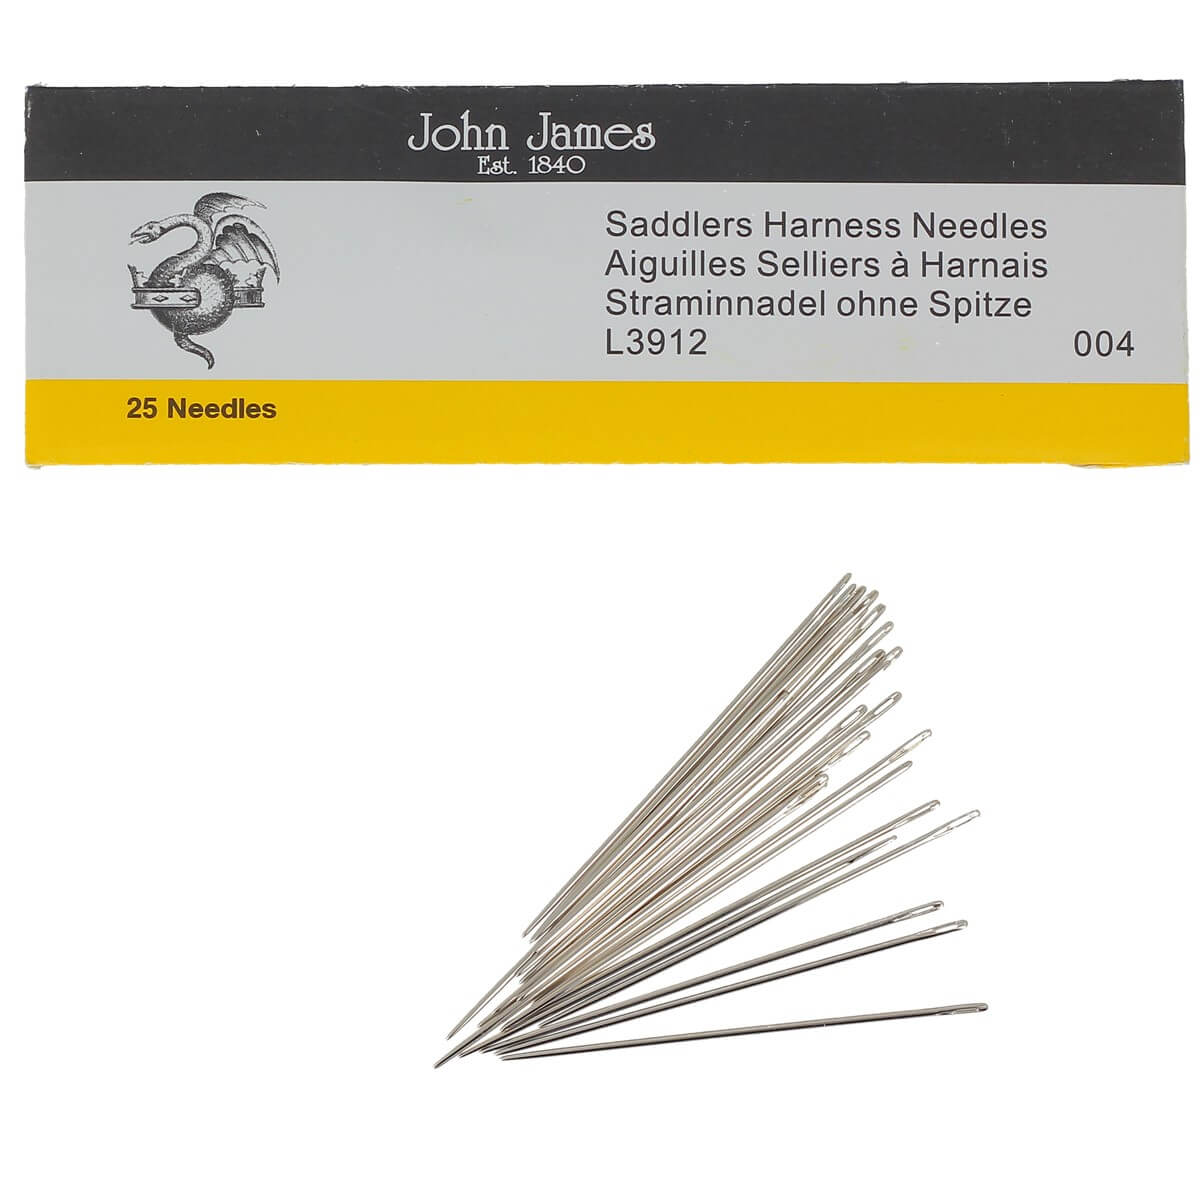
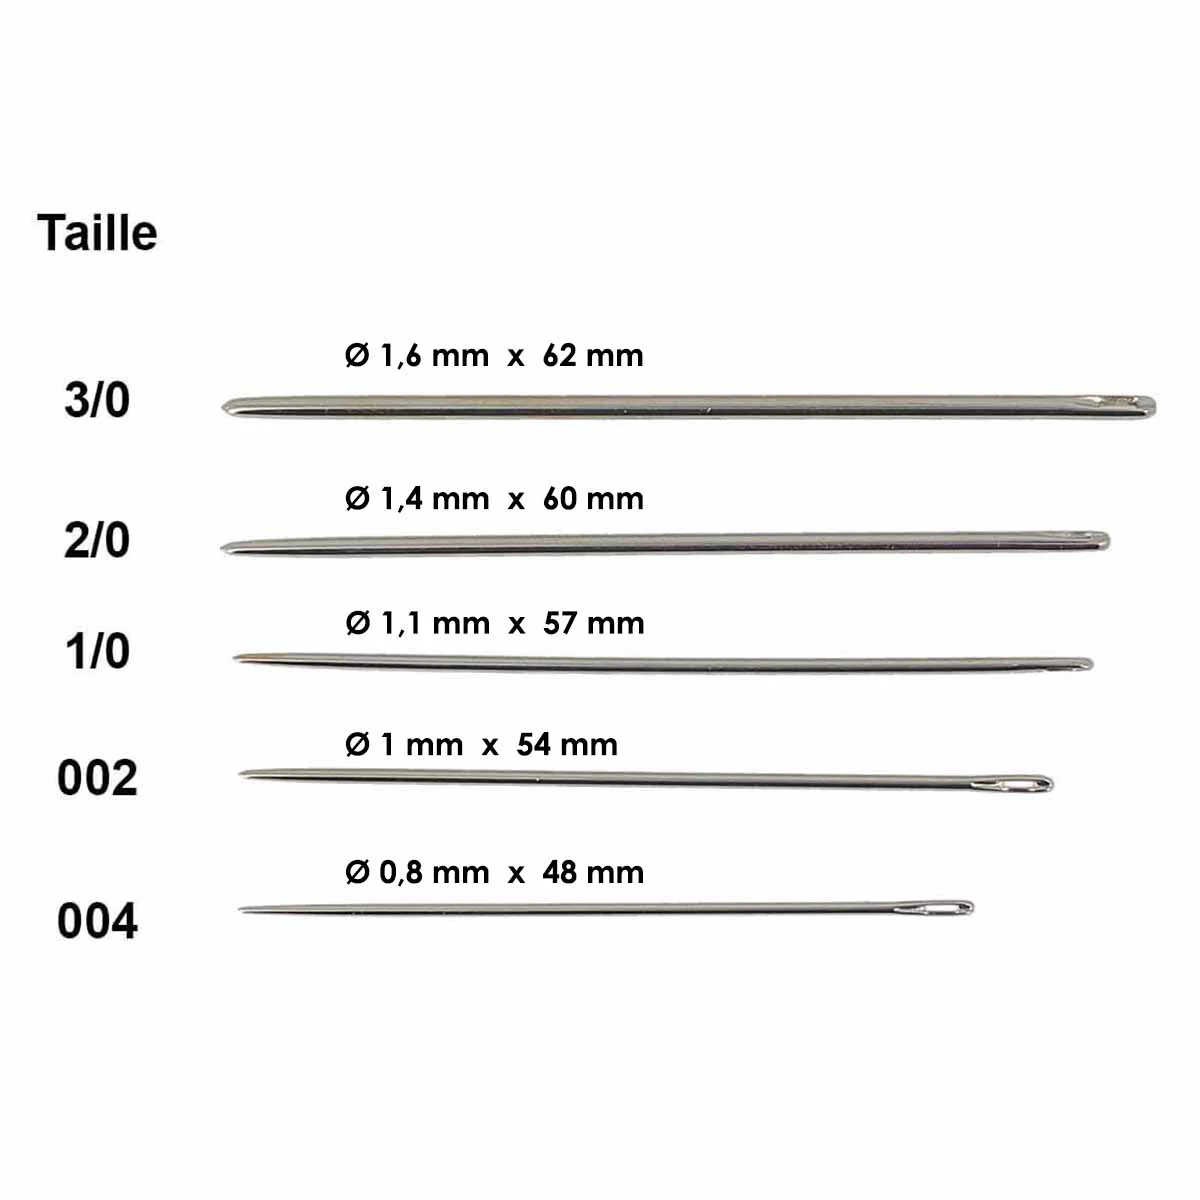
- 25 saddle needles - round tip - Lg = 57 mm - d = 1.1 mm - Size 1/0 (Ref: CA118_011)
- 1 jar of 250 ml of neoprene glue, LIQUID with brush integrated into the cap
- 1 meter of tricolor polyester ribbon with French flag - 15 mm wide
- 1 jar of tokonole - Leather finishing gum - 120g
And the following material:
- 1 Scotch NORTON adhesive masking tape - 19 mm wide - 50 m long (WA079)
- 1 round punch - SEIWA Japan - diam 1.5 mm (TA300_015)
- 1 round punch with straight handle - diam 11 mm (EP_DROIT_11)
- 1 rivet setting tool (TL_8100_00)
- 1 anvil for setting rivets and snap fasteners (TL_8056_00)
- 1 hardening fixative for leather finishing - Deco Cuir
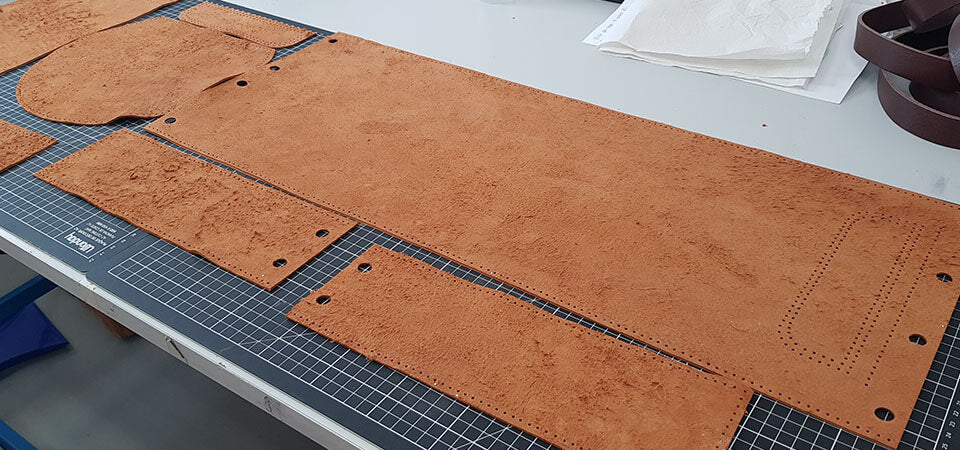
1. Cut out the pattern pieces
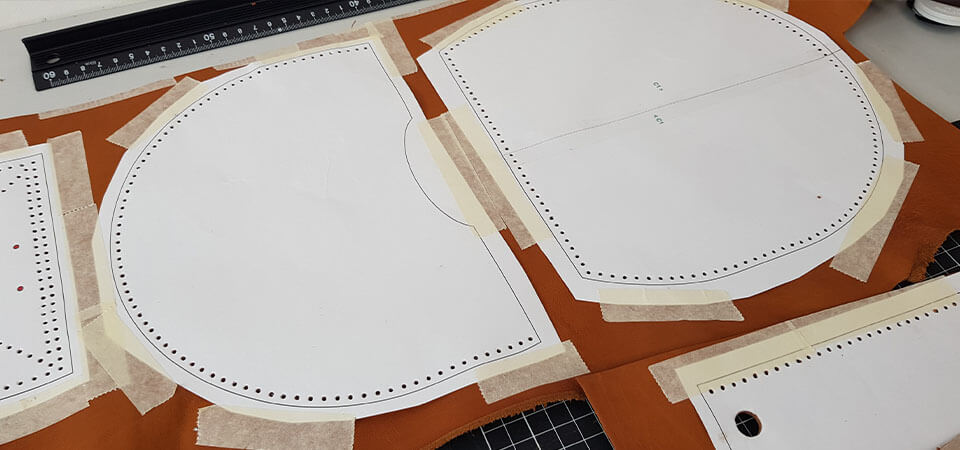
Download the pattern and print it in actual size. Then cut out the pieces, leaving about 1 cm of margin at the edge of the different pieces. Tape (using masking tape to avoid damaging the leather) the pattern pieces to the leather. 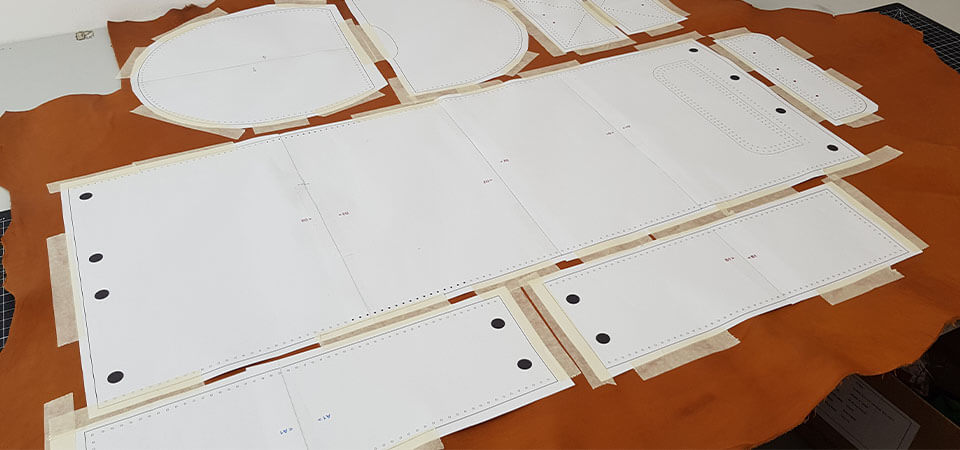
2. Pierce the leather and cut out the pieces
Punch the sewing holes indicated on the pattern using a 1.5 mm diameter round punch. Also punch the holes for the rivets (3 mm) and the holes for the eyelets (11 mm). 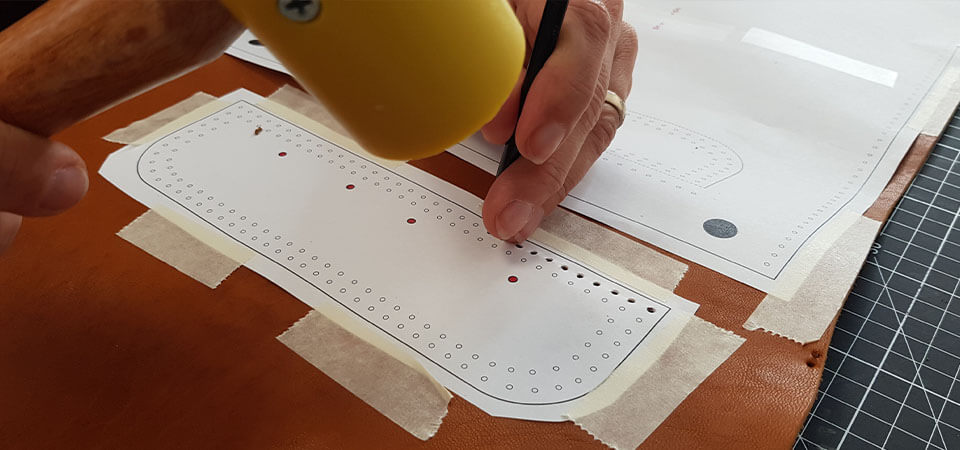
Then, cut out the different pieces, following the lines, with a cutter and/or a rotary cutter. 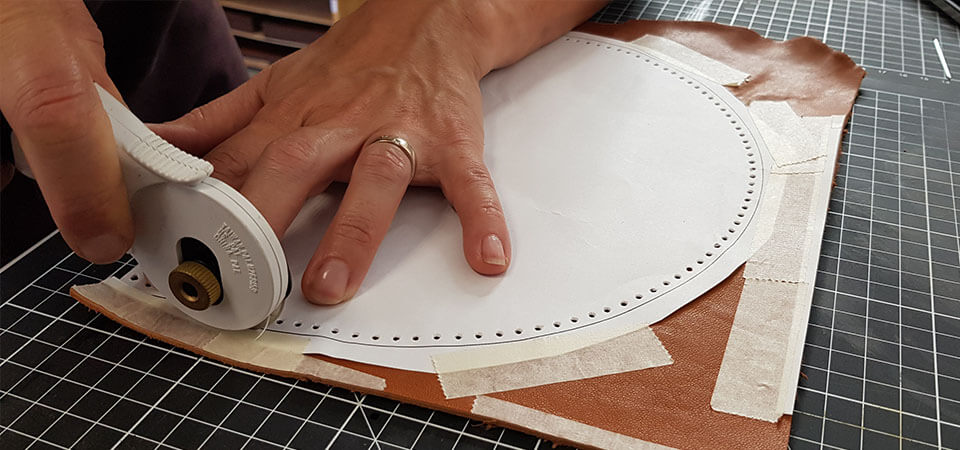
3. Option: Apply hardener to the crust side
Using a brush, apply hardening fixative to the back (split) of all leather pieces. Then let it dry for 24 hours (do not expose to sunlight). The hardener will help the fibers stick together and make the leather firmer. 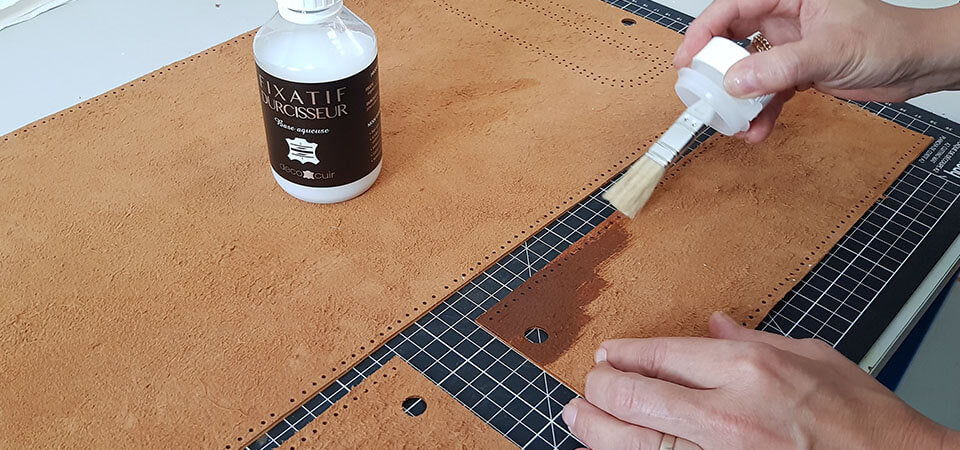
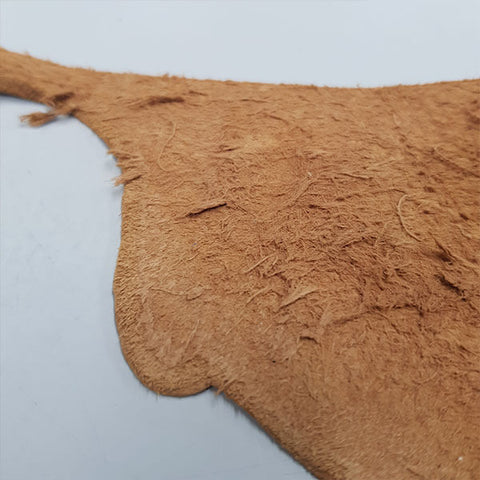
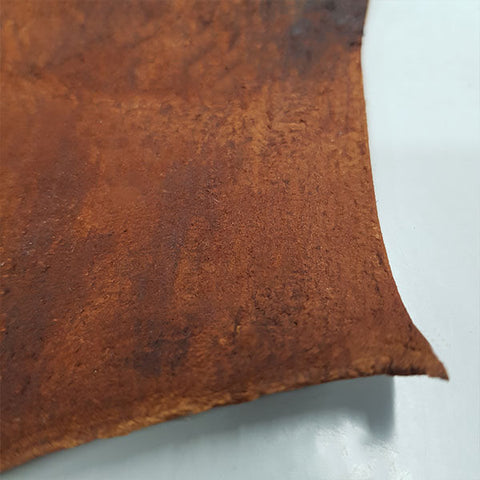
| WITHOUT HARDENER | WITH HARDENER |
 |
 |
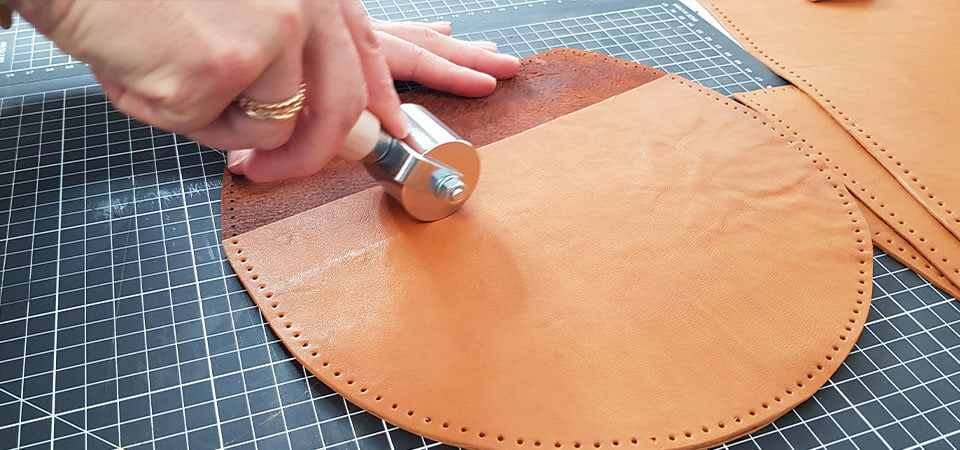
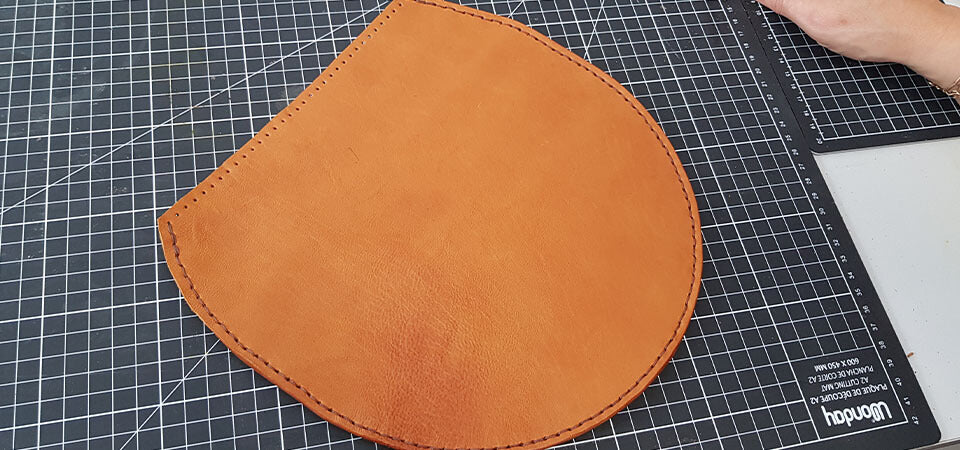
4. Prepare the flap
Glue piece #5 onto piece #7 of the pattern (make sure the holes are facing each other). Apply neoprene glue to the leather crust and then make it easier to glue with a steel roller. 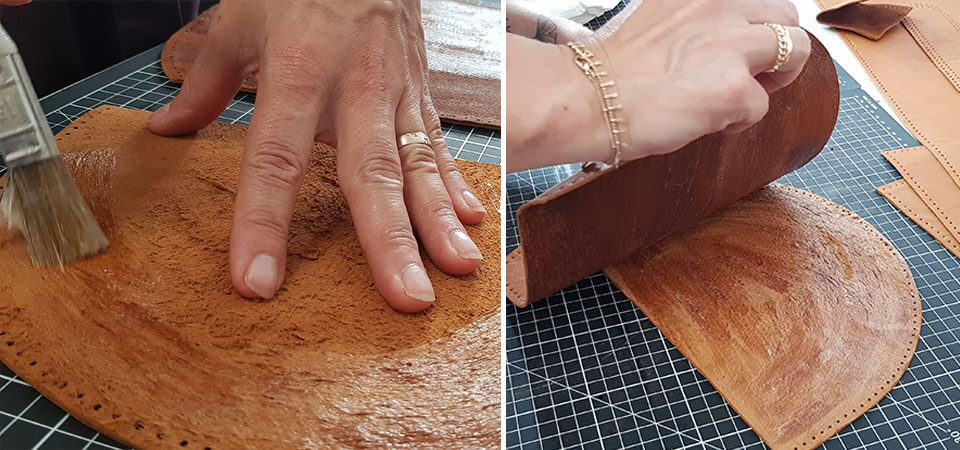
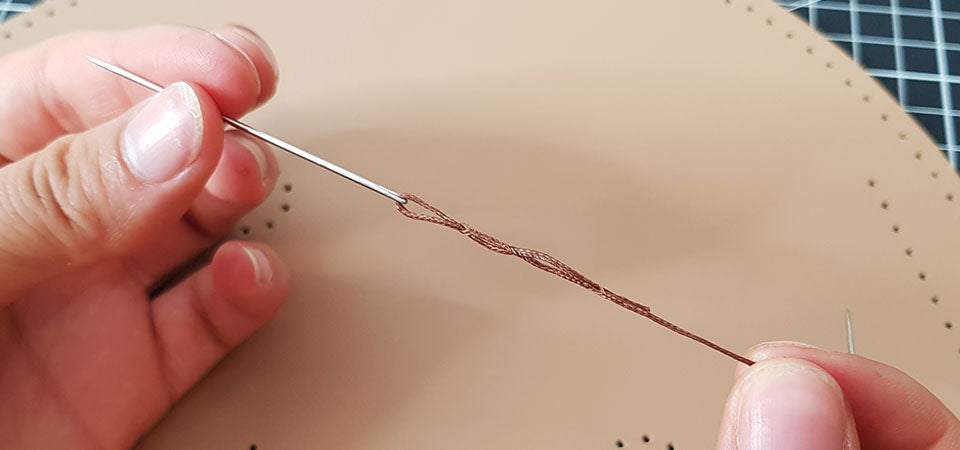
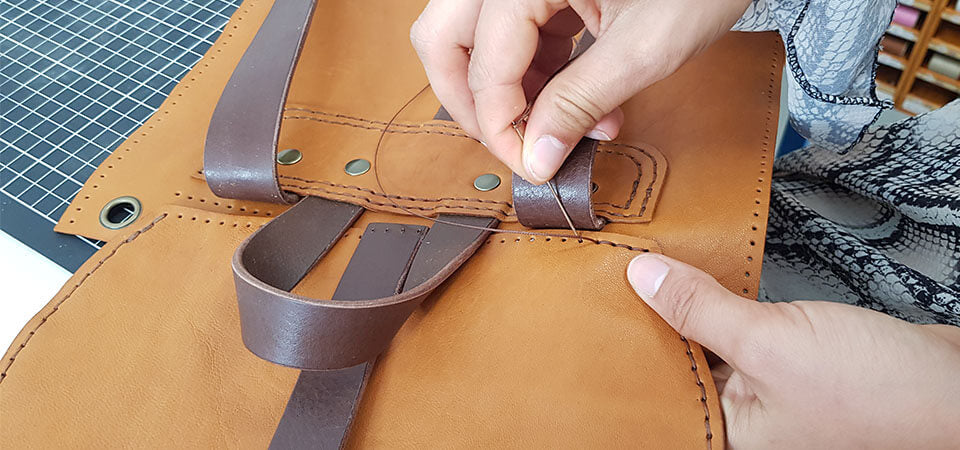
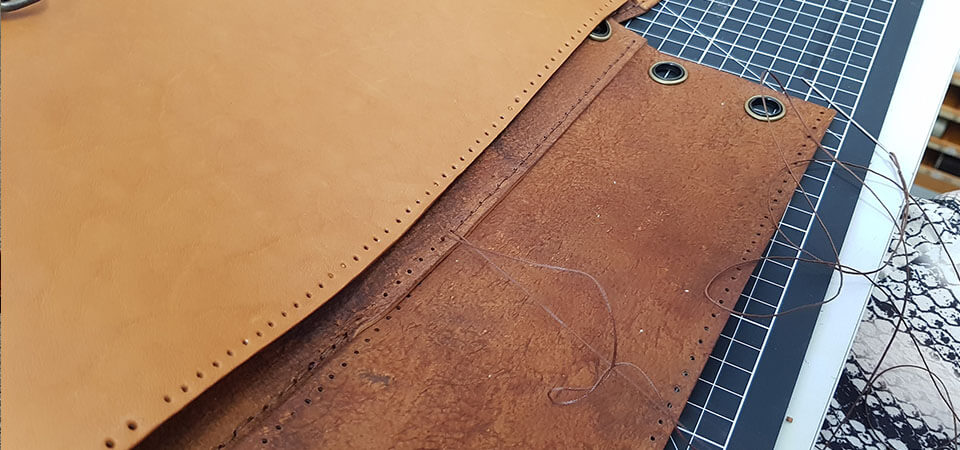
5. Start sewing the flap
Sew the two pieces of the flap together. To do this:
- Cut the thread : generally equivalent to 4 or 5 times the length of the sewing line.
- Thread a needle through each end of the thread (see photo 1):
- Insert the thread at needle height and then insert it twice.
- Crimp the end of the thread and pass it through the eye of the needle.
- Pull the thread to make the knot.
- Do the same thing to thread the other end of the thread onto the second needle.
- Pass one of the needles through the 4th hole and even out the threads.
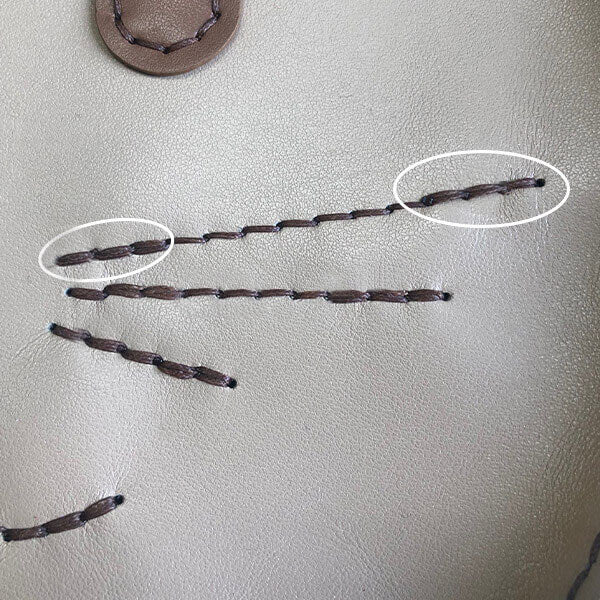
For aesthetic reasons, we started the seam at the 4th stitch in order to make 3 double stitches and thus have symmetry in relation to our end seam (the 3 stopping stitches) => to be done only if the seams do not join. (see photo 2) - Sew by passing each needle through each hole one by one.
- Then tighten the stitch well.
- To finish the seam: make 3 backstitching stitches, cut the thread flush and then burn it (if polyester).
- Finally, hammer the seams with a jointing hammer.
Be careful not to sew the top line of the flap at this stage (see photo 3).
SEE THE GUIDE TO SIMPLIFIED LEATHER SEWING >
6. Work the flap slices
Using a finishing eraser: work the edges of the flap. Start by sanding the edges with an abrasive sponge, then apply tokonole and rub briskly with a smoothing tool or cloth.
For the more experienced, you can choose to work the slices with a rim.
WHAT IS A RUMP?
 BEFORE / AFTER
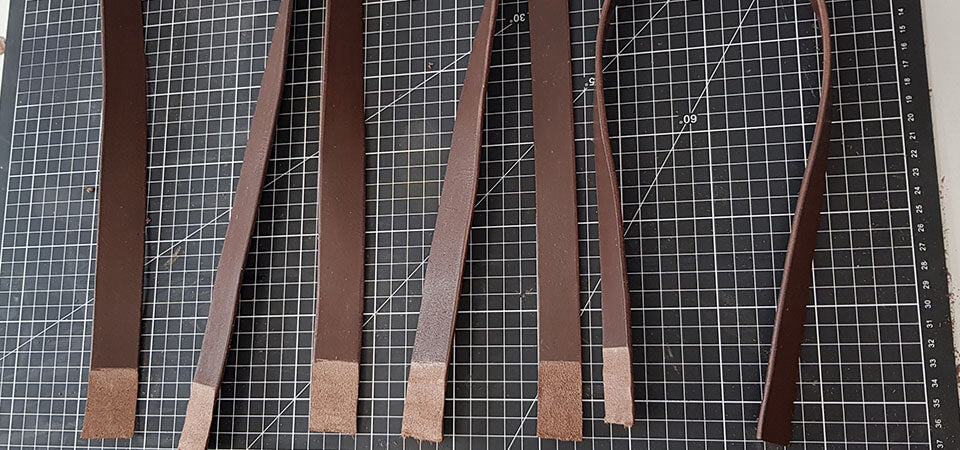
7. Cut the leather strips
Cut the 24mm leather strap into 3 parts:
30 cm for the bag handle
33 cm for the flap strap
43 cm for the bag circumference
Cut the 29 mm leather strap into 2 parts:
2 times 100 cm for the bag handles
2 times 11 cm for the bottom of the handles
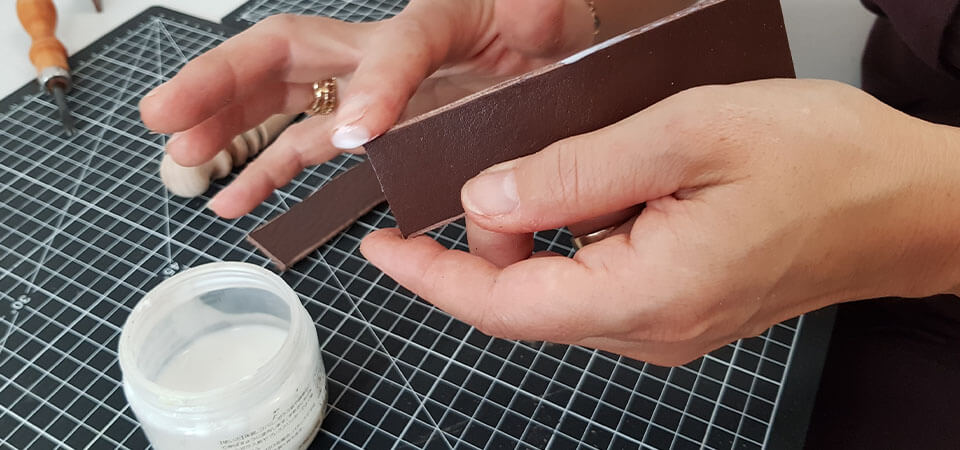
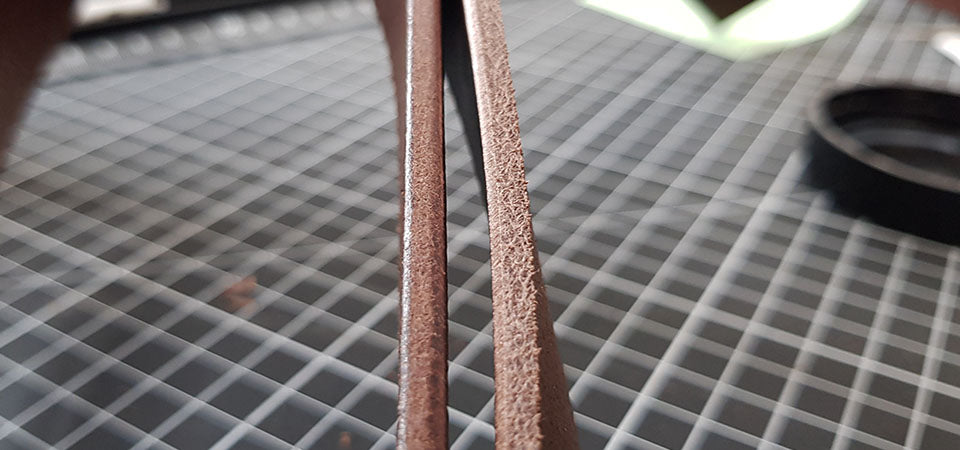
Then work the slices of each strip.
Cut the edges, sand the edges then apply tokonole and rub briskly with a smoothing tool or cloth. 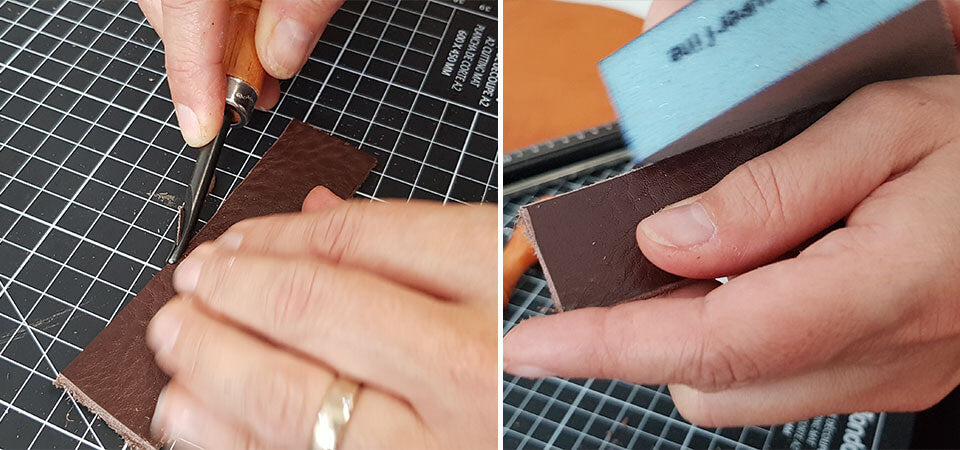
8. Trim the ends of each strip
Trim the ends of each strip by 3/4 cm.
LEARN MORE ABOUT TRIMMING >
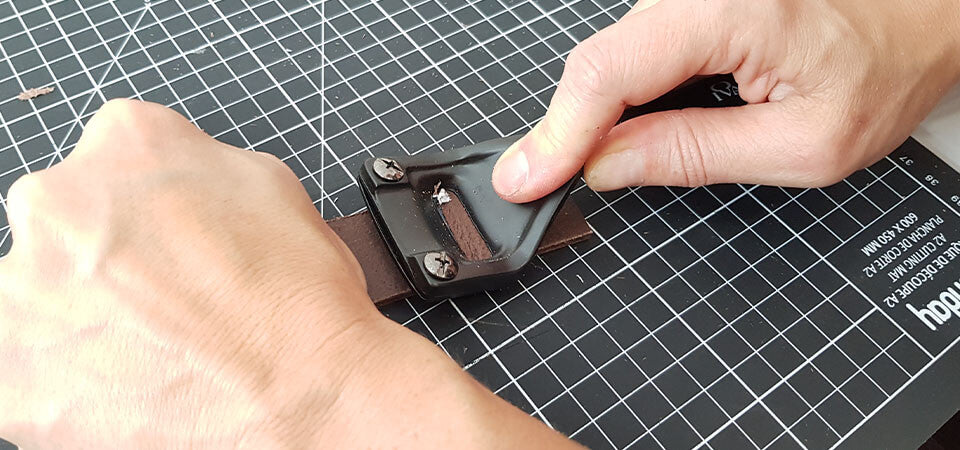
9. Work on the strap hooks
Take the two strips 29 mm wide and 11 cm long.
Pass the rectangular loops through the center of the 11 cm strips and glue the two ends of the strips together. 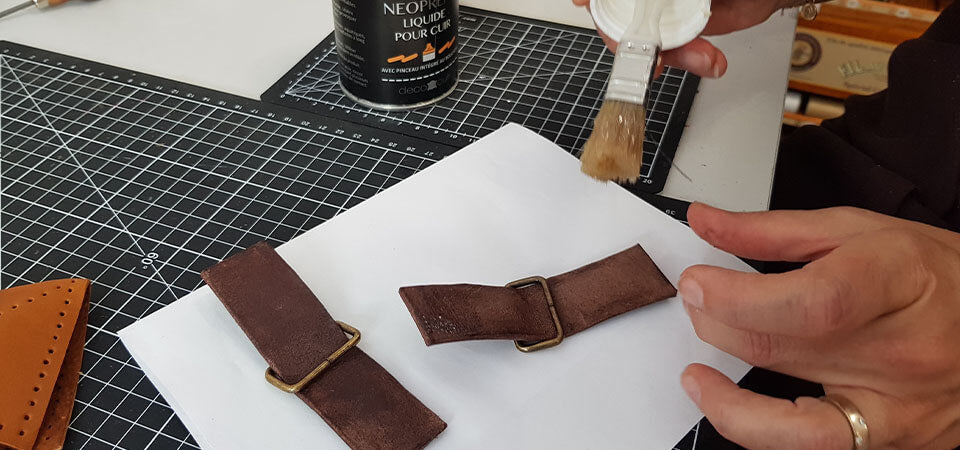
Work the slices with tokonole then fold pieces no. 2 and no. 3 in half. Then, place the 11 cm strips at the hole for the rivet (indicated on the pattern) and leave them protruding about 2.5 cm from the edge.
Using a round awl, mark the location of the rivet and the sewing holes on the 11 cm strips. 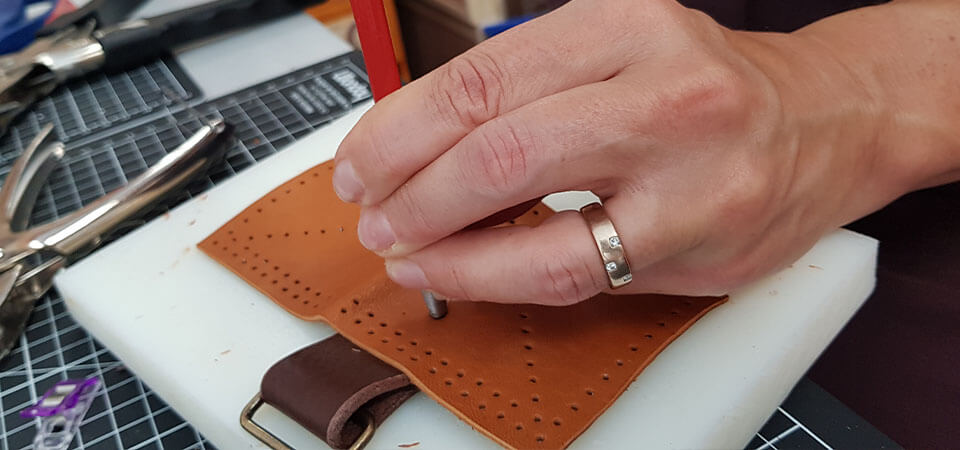

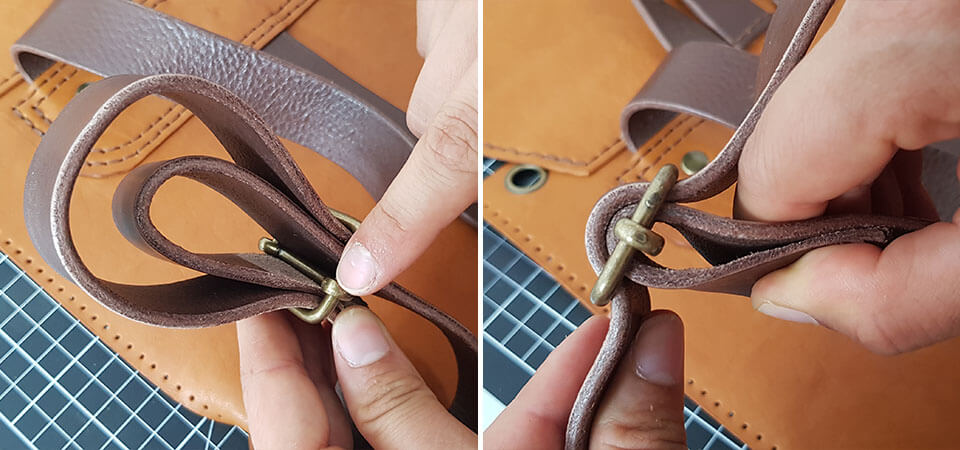
Pierce the strap to place the rivet and make it easier to pass the needle through when sewing. 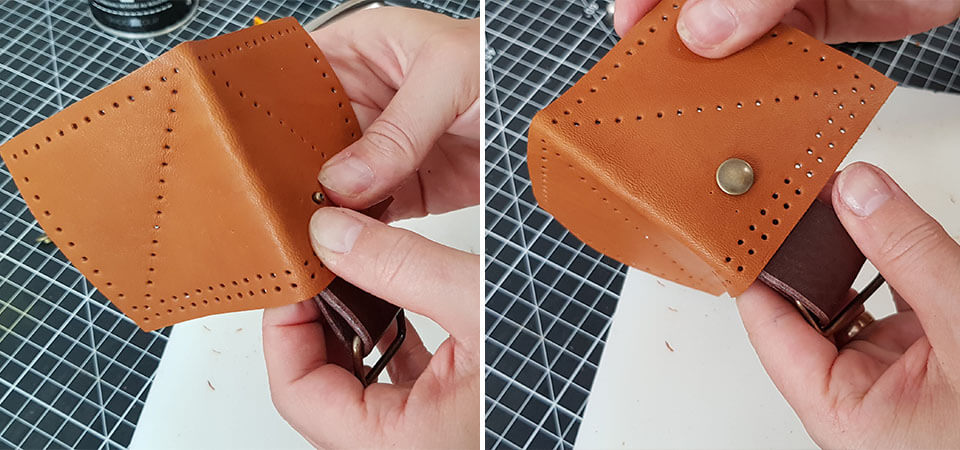
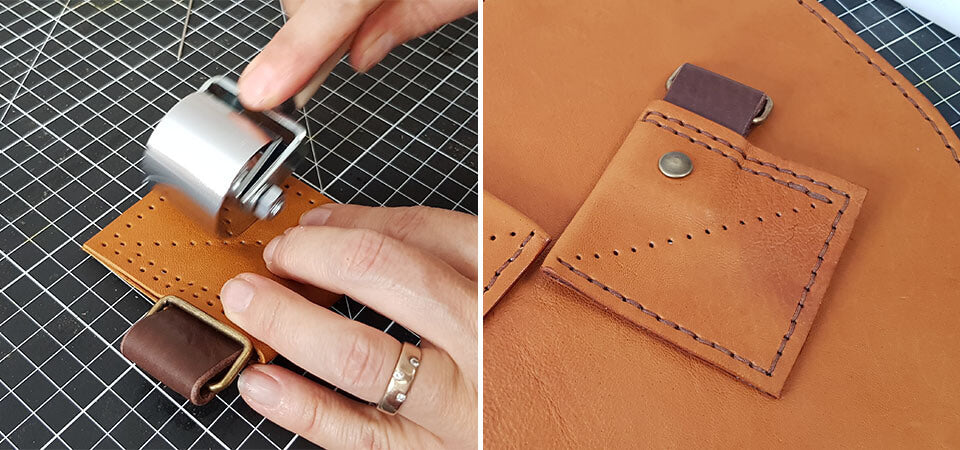
Fold pieces #2 and #3 in half and glue them together using contact glue.
Finally, sew the two squares together. Be careful, you only need to sew around the edges of the square. The diagonal seam will be done during the final assembly.
You can use a steel roller to flatten the piece of leather and allow better adhesion of the contact adhesive. 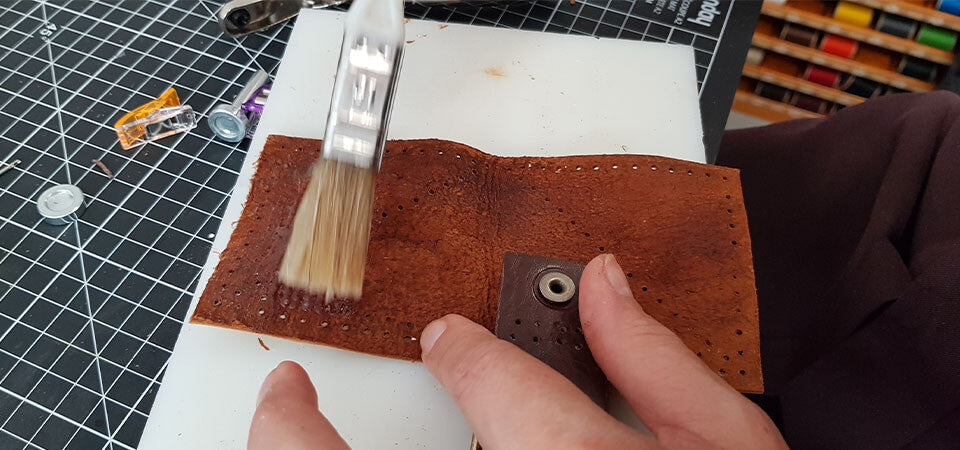
10. Work all the slices of the sheepskin
Finish working all the slices of the sheepskin (with a finishing eraser) before continuing the assembly.
11. Position the straps on the back of the bag
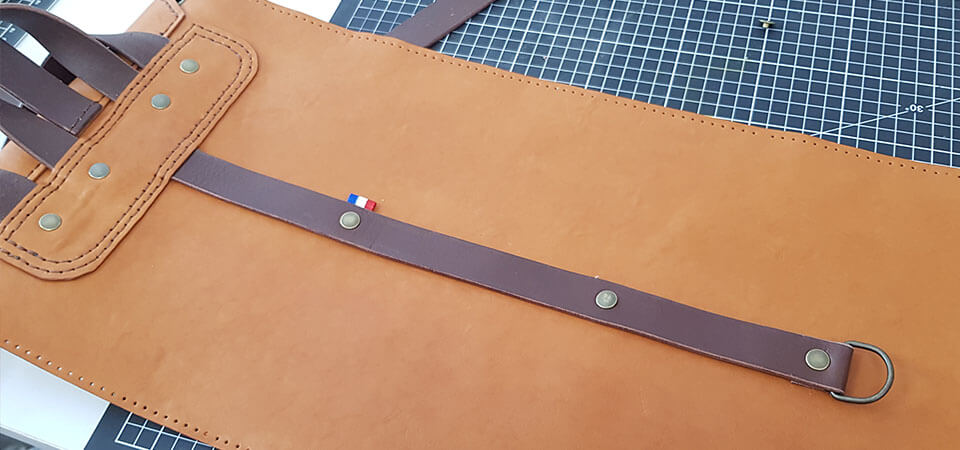
Take the 100 cm, 30 cm and 43 cm strips.
Place the straps on the back of the backpack, in the location indicated on the pattern.
Please note, for the 100 cm strips (at each end of part no. 1): place only 1 end of each strip and place them right sides together.
For the 30 cm strip: place the two ends in the rectangle, also right sides together.
Finally, place one end of the 43 cm strip in the center of the rectangle, with the wrong side of the strip against the right side of the sheepskin. 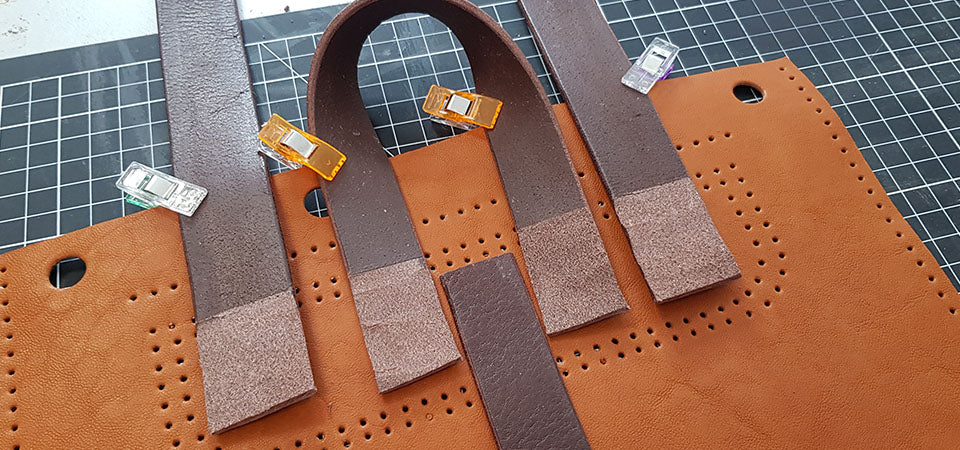
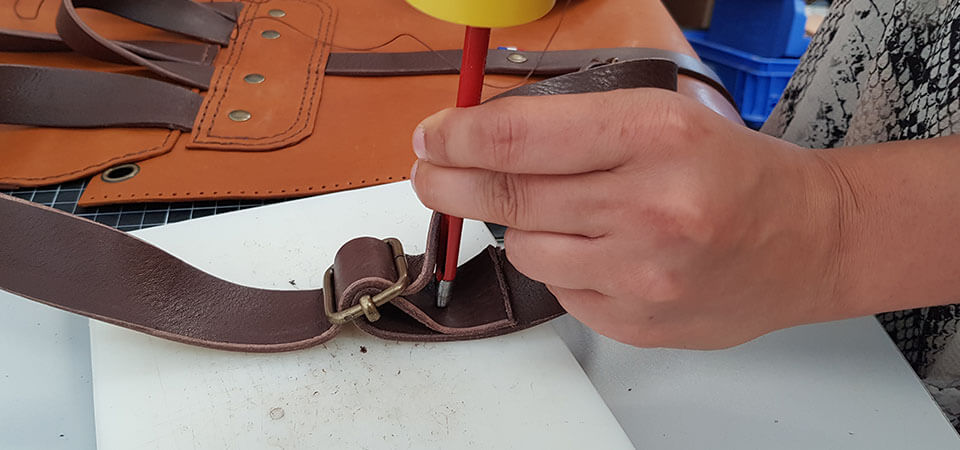
Mark the position of the rivets and the stitching holes using a round awl. Then make the holes for the rivets with a 3 mm punch. 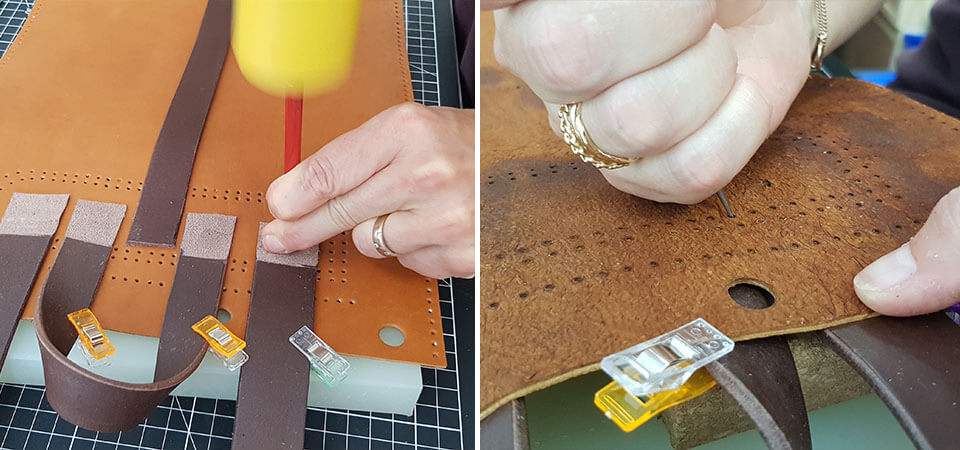
Apply contact glue to stick the rectangle (part no. 1) to the designated location on the back of the bag (part no. 9). 
Then sew the rectangle (piece no. 1) and hammer the seam. 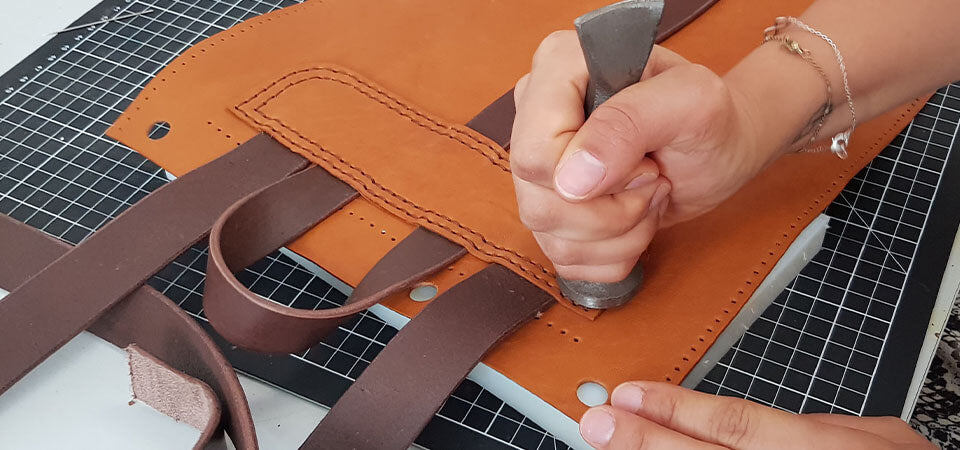
Finally, place the 4 rivets. 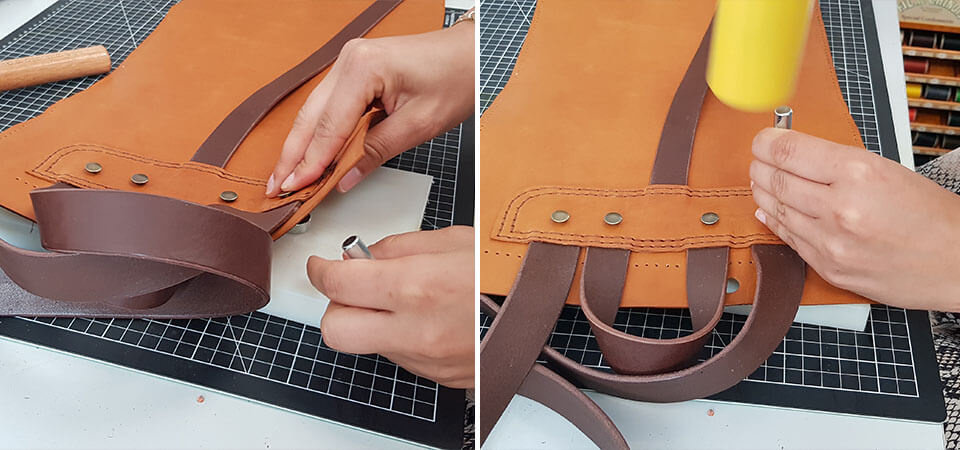
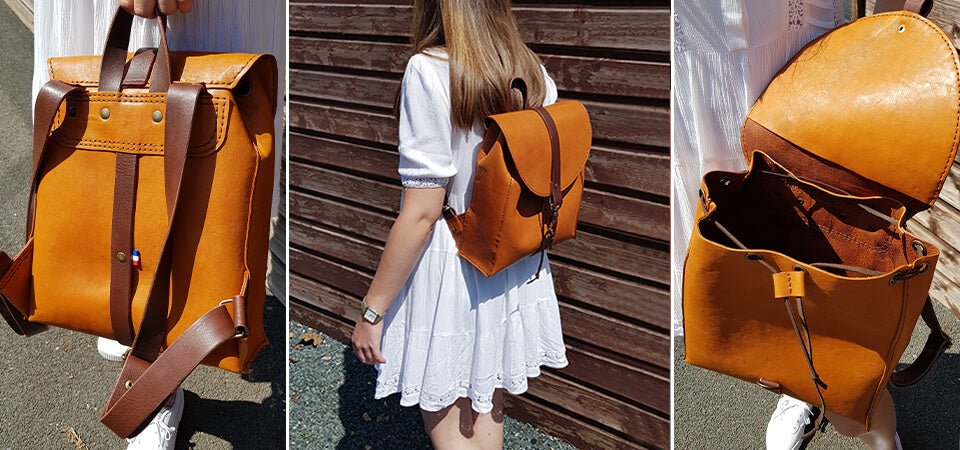
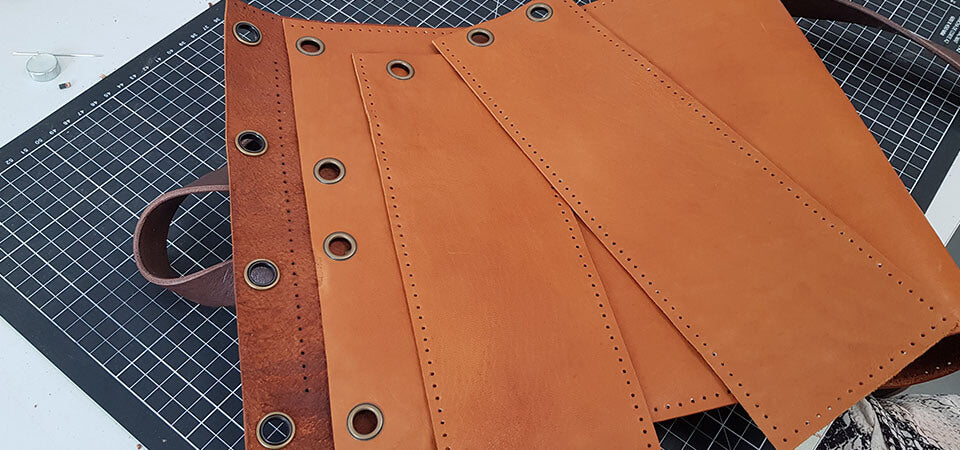
12. PLACE THE 12 EYELETS
Install the 12 rolling eyelets using the installation tool provided in the eyelet kit. 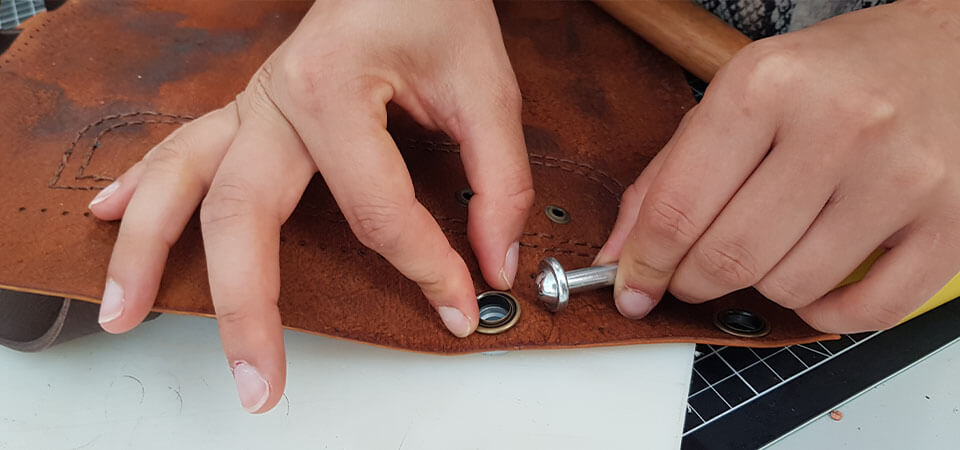
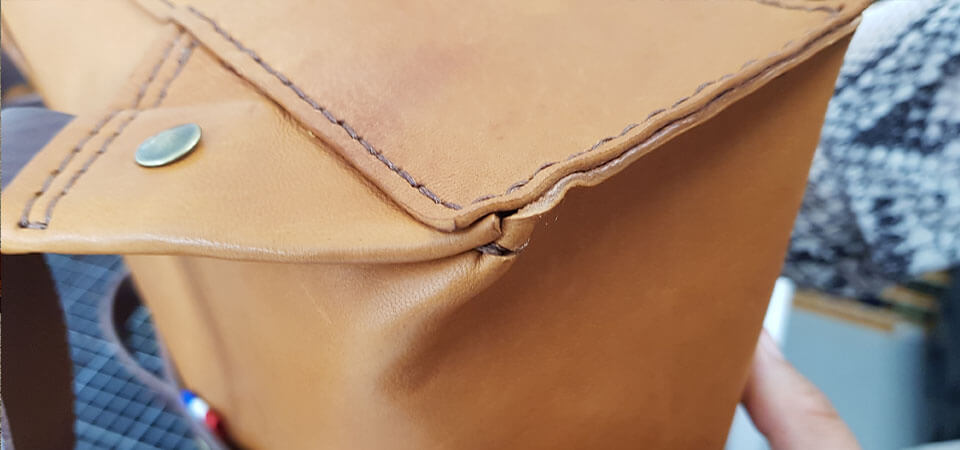
13. Finish working the flap
Take the 33 cm strip. Glue one end of the strip to the center of the top of the flap (see small blue circles on the pattern). 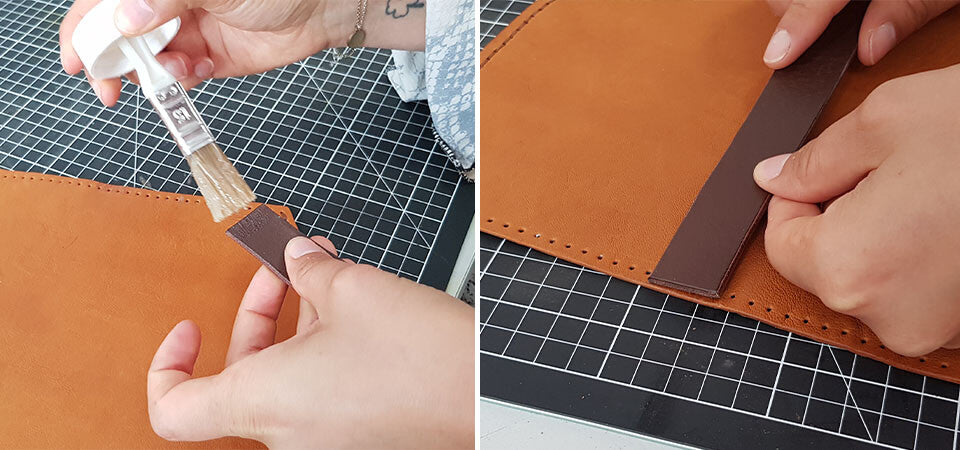
Mark and pierce the sewing holes using an awl. Then sew the flap to the top of the bag (piece #9). 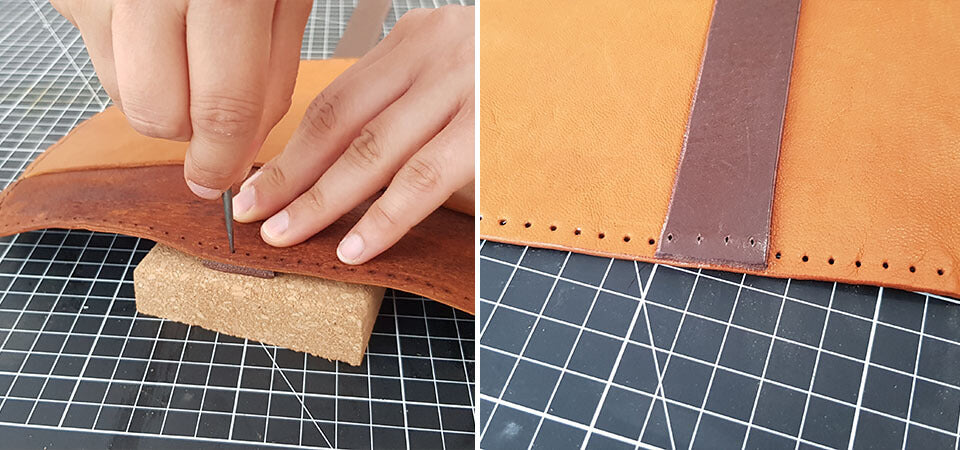
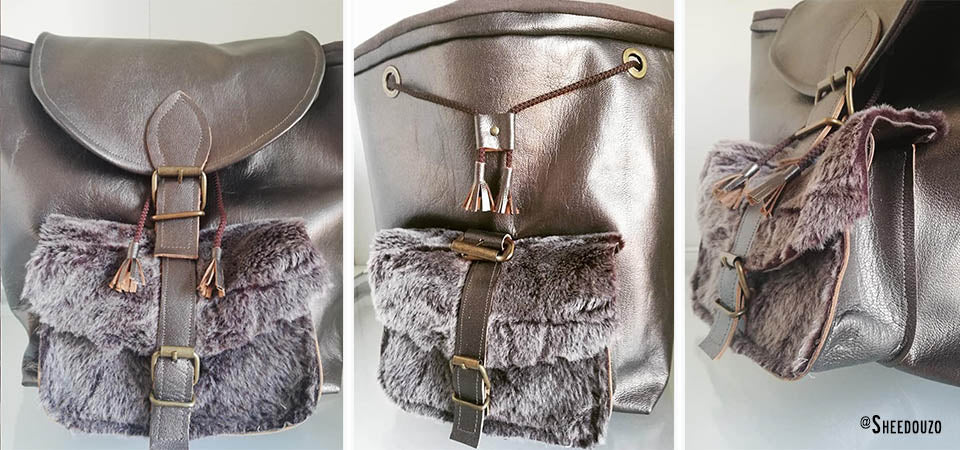
14. Work on closing the bag
Fold the other end of the 33 cm strap back on itself (about 5 cm) and place the carabiner.
Make the hole for the rivet and rivet the strap to the flap. 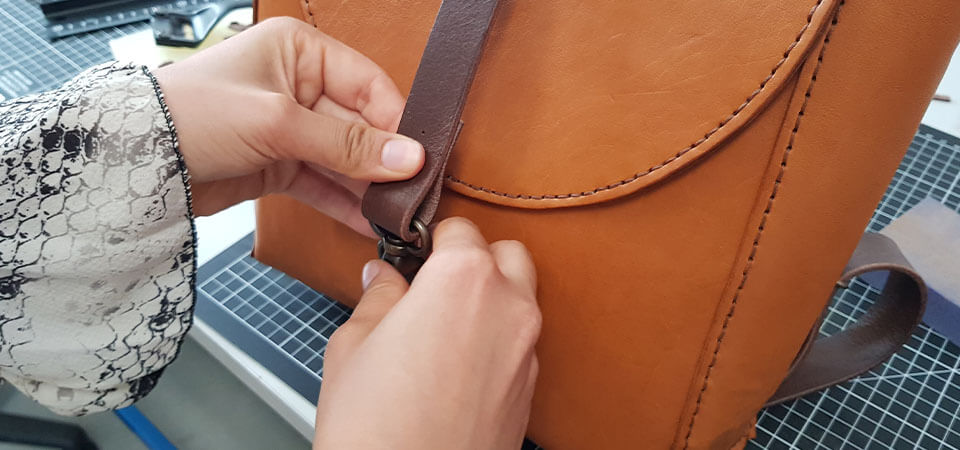
On the back of the bag:
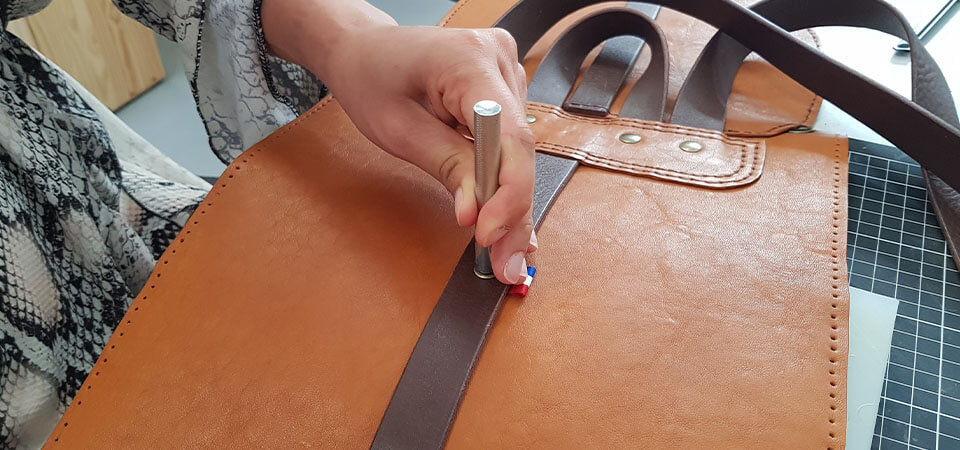
Option: Glue the tricolor ribbon to the location of the first rivet. Then place the rivets to hold the strap on the bag. 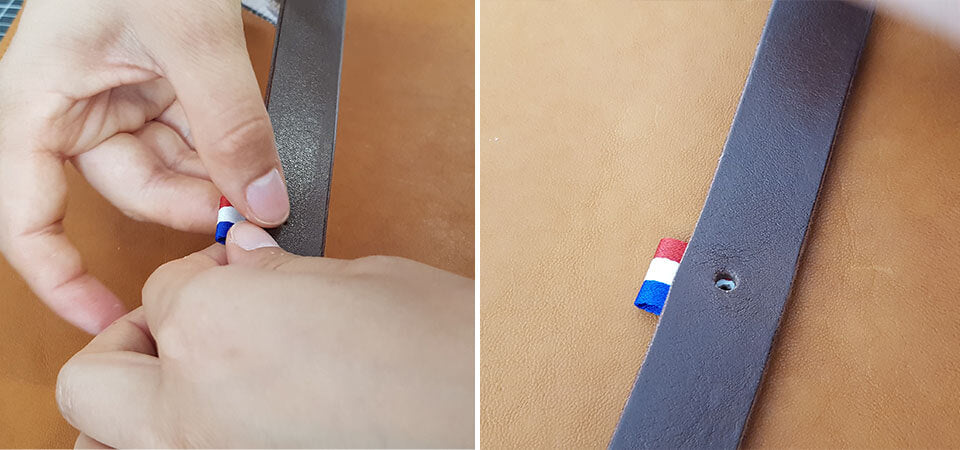
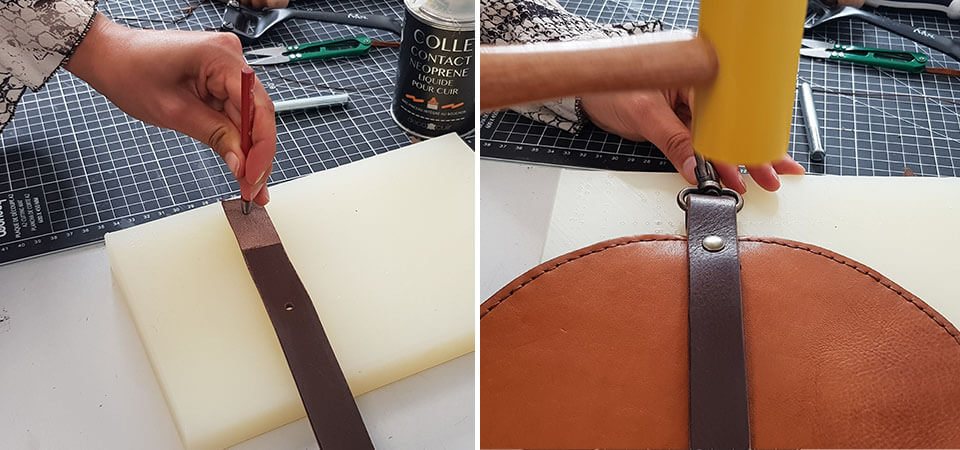
Finally, insert the half-round ring onto the end of the 43 cm strap and fold it back on itself (about 2 cm).
Glue and rivet on the back of the bag. 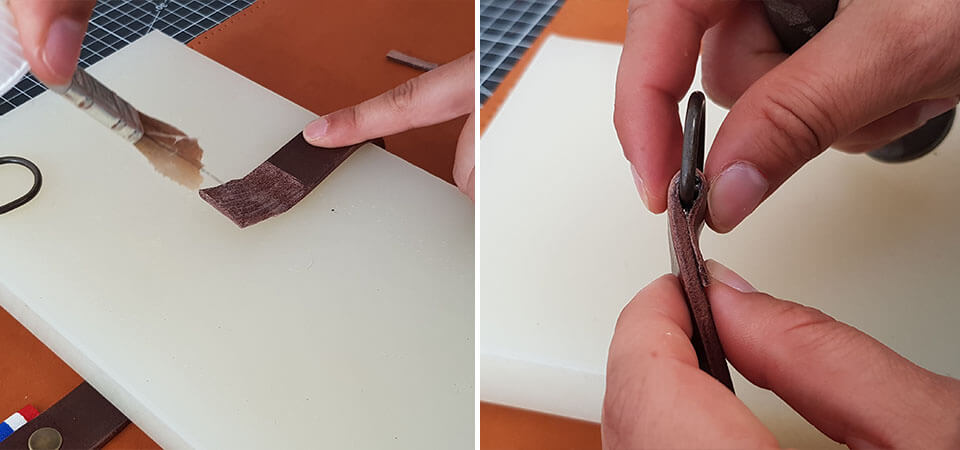
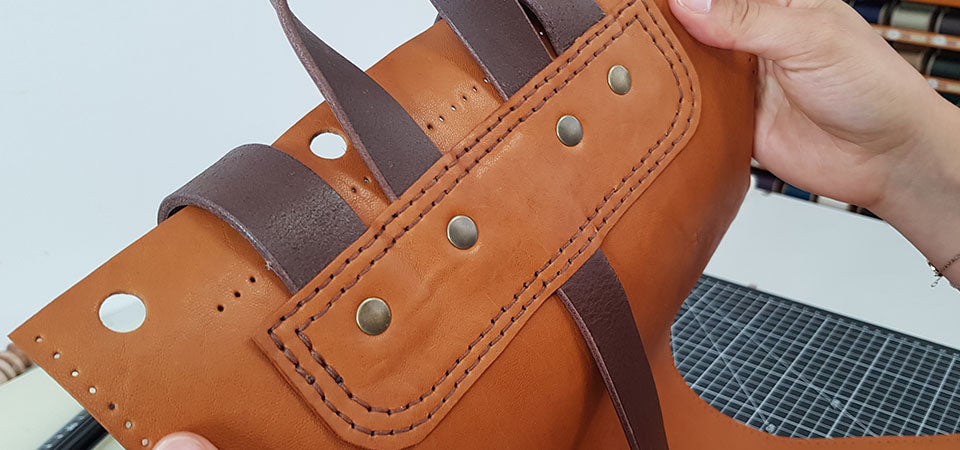
15. Assembling the backpack handles
Sew squares #2 and #3 onto the backpack in the locations indicated on the pattern (blue circles on piece #9). Be careful to position the squares in the correct direction: straps facing inwards. 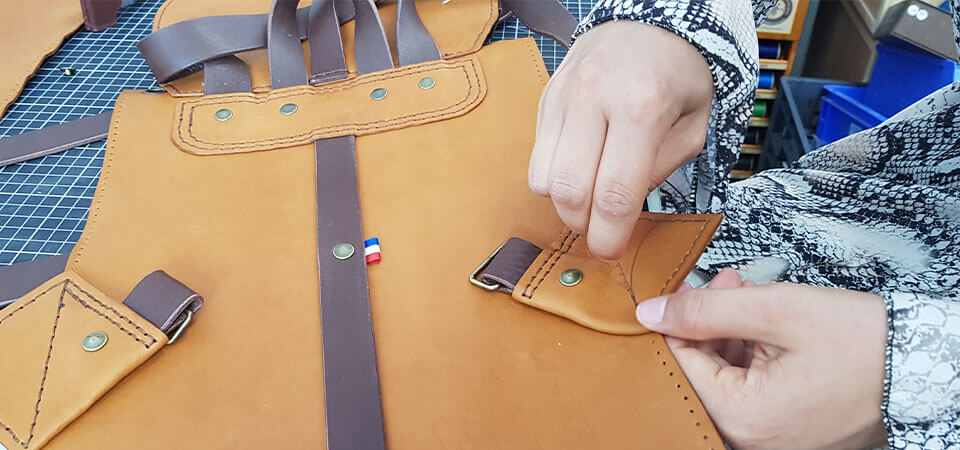
To have an adjustable strap: pass the sliding buckle through one of the 100 cm straps then pass the strap through the rectangular loop. Pass the end of the strap back through the sliding buckle. Then, rivet the two thicknesses of the strap together (be careful to rivet the correct thicknesses).
Do the same with the second 100 cm strip. 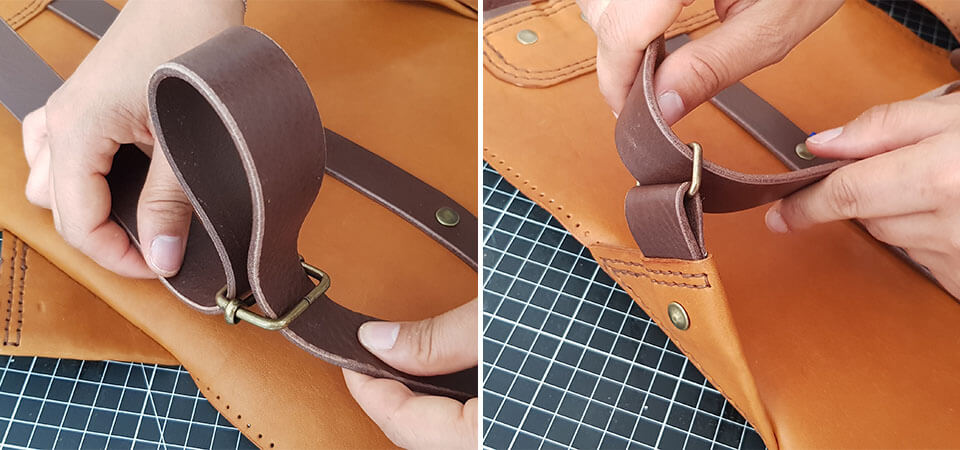
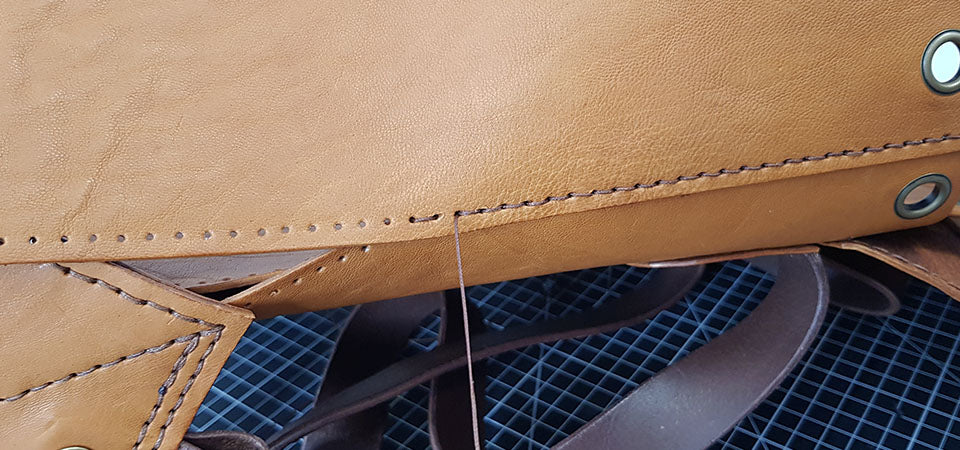
16. Sew the bag
Sew right sides together. The wrong sides of pieces 7 and 8 should be sewn to the right side of piece 9.
Please note, for the bottom of the bag, we sewed inside out to give the bag more support and a more rectangular shape at the bottom (see photo 3).
Pass each needle through each hole and tighten the stitch. 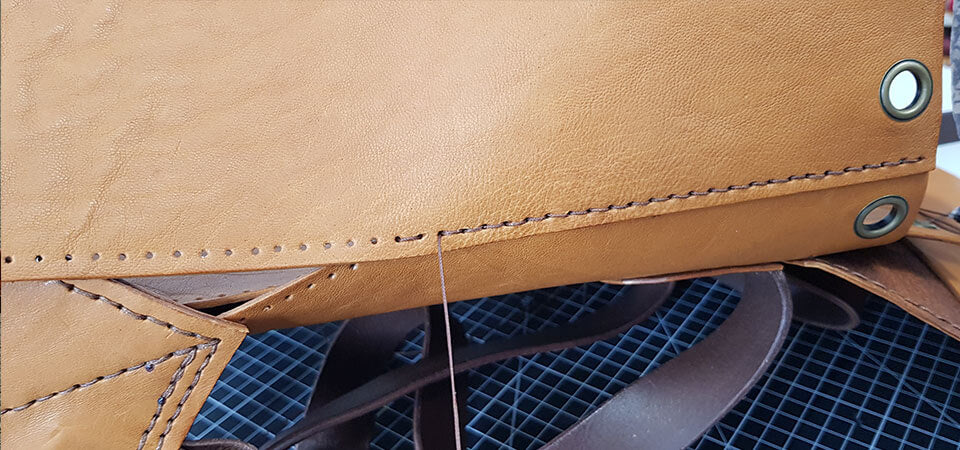
17. Pass the lace to close the bag
Sew piece #4 of the backpack to form a lace stopper. 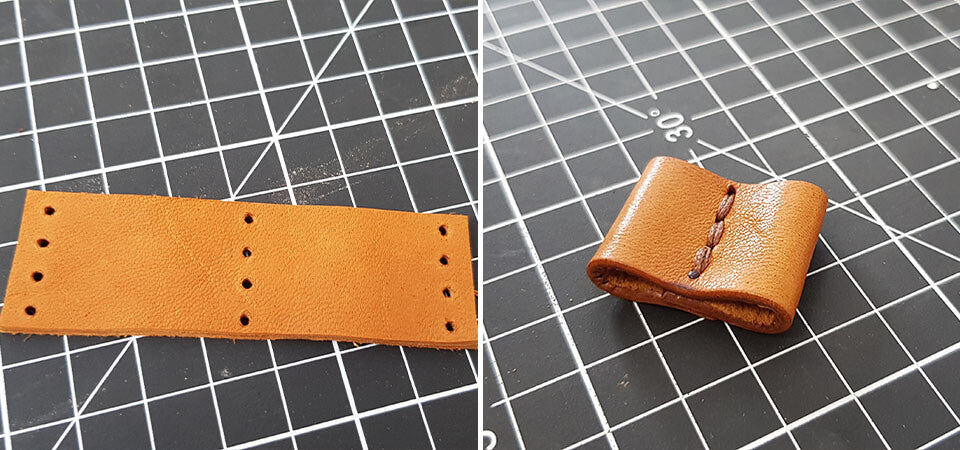
Then thread the lace through the eyelets and the lace stopper. Finally, tie knots at each end of the lace.
The purse effect gives a more feminine style to the bag, we recommend not adding eyelets if you want a more masculine style. 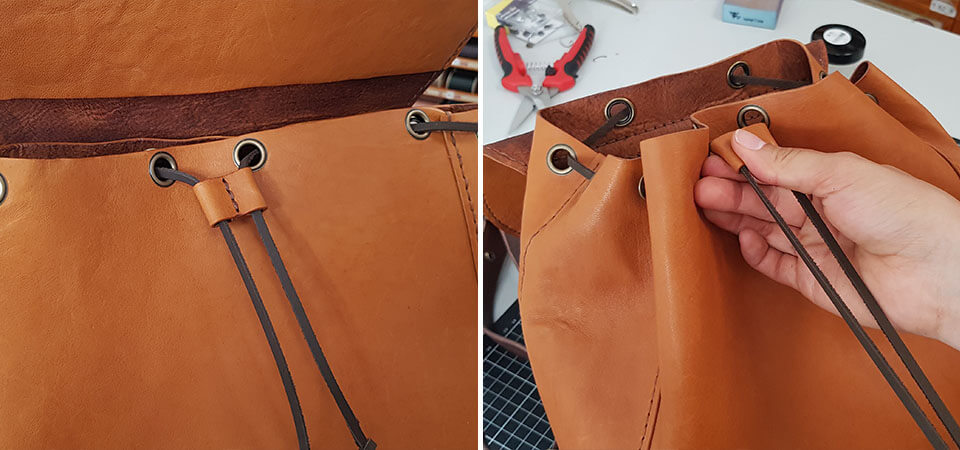
18. Waterproof the backpack
Waterproof the leather backpack with a water-based spray. 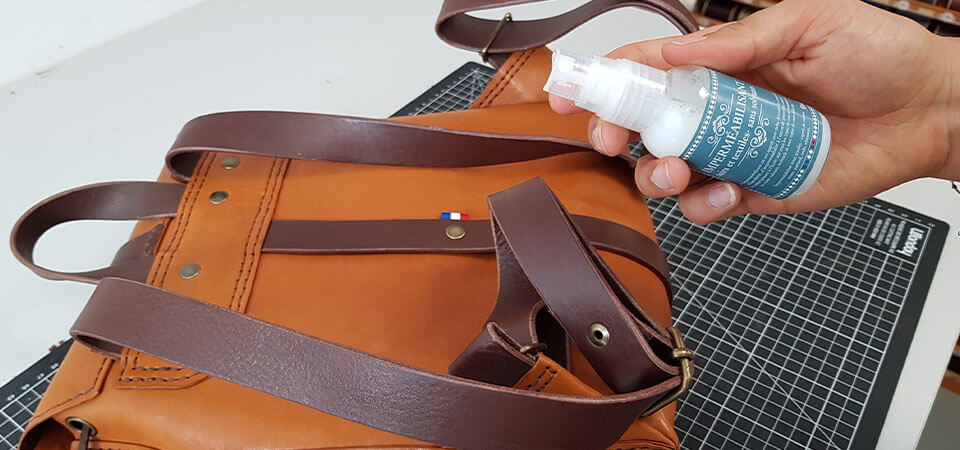
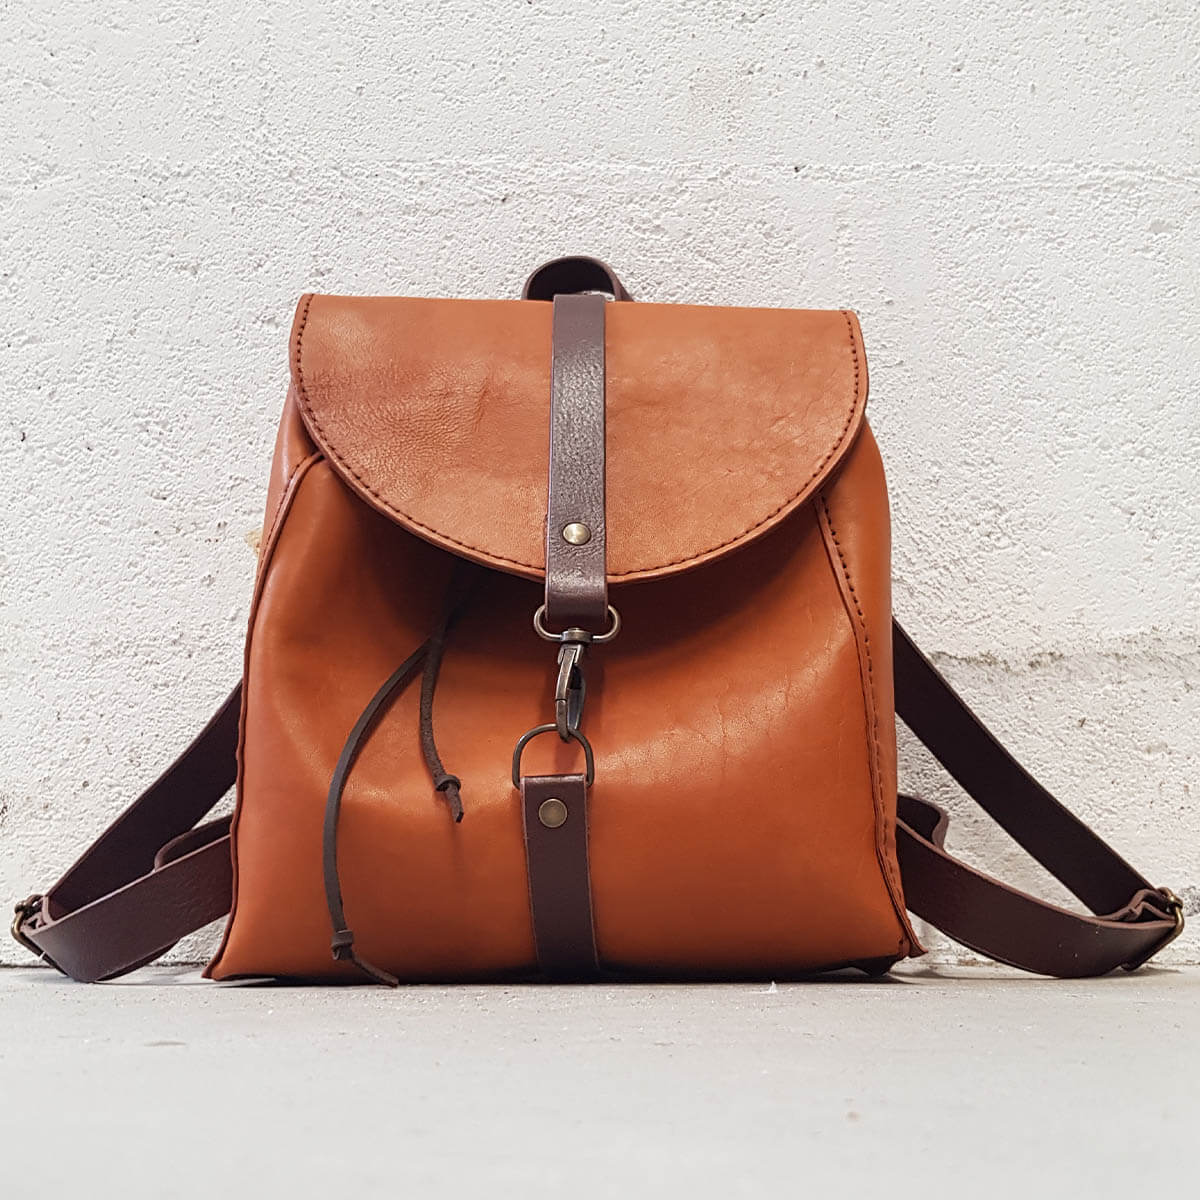
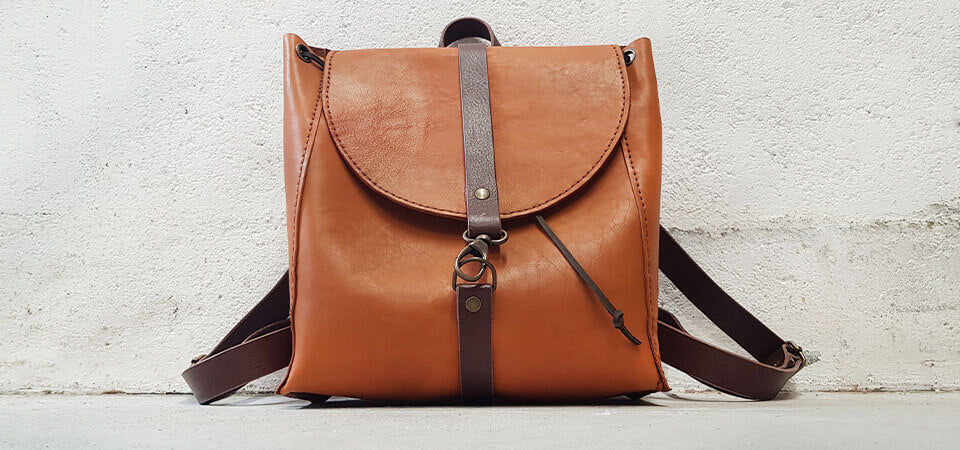
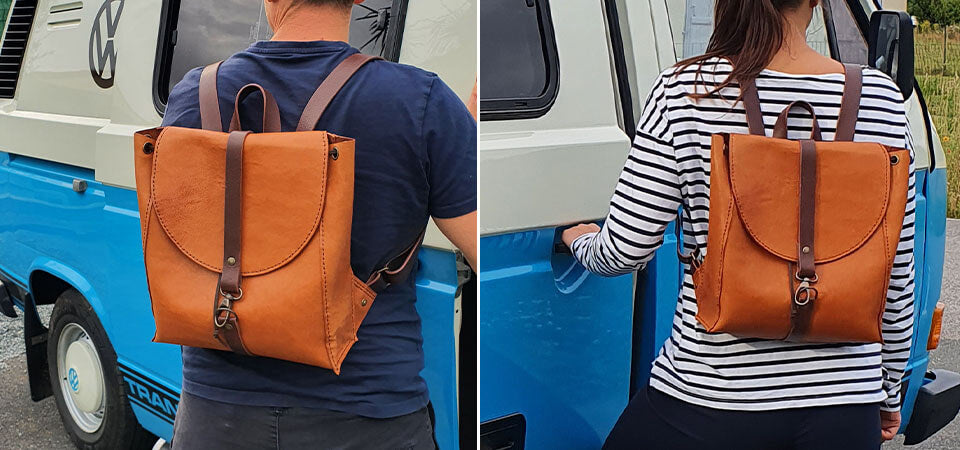
Your leather backpack for home and women is finished! 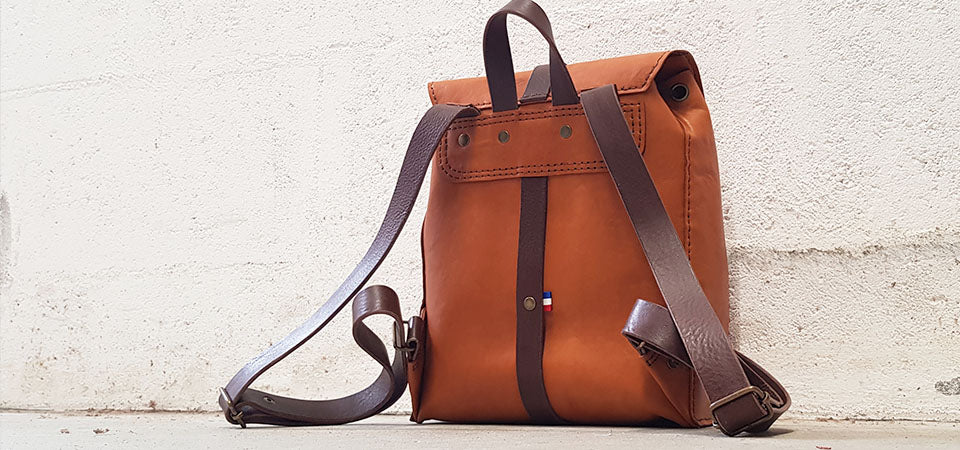
OTHER BACKPACK MODEL
@Marion Créations offers you another version of the backpack.


4 comments
Deco Cuir
Bonjour,
Il faudrait sélectionner votre premier modèle en fonction du matériel que vous avez en votre possession : avez-vous une machine à coudre pour la couture du sac cabas ?
Je dirais que le niveau des tutoriels est équivalent. En ce qui concerne le tutoriel du sac à dos il n’y a malheureusement pas de vidéos. Bonne fin de journée, l’équipe Deco Cuir
George
Bonjour,
Existe-t-il une vidéo tuto pour ce sac, comme pour les autres ?
Merci,
George
Bonjour,
Quel est le meilleur modèle pour débuter, celui-ci ou le sac cabas ?
Merci :)
marcel theodore
C’est très bon, merci