


NECESSARY MATERIALS
To make the plant pot cover, you need:
- 2 pieces of PREMIUM natural vegetable-tanned leather - 20 x 30 cm - 2.5 mm thick
- 1 card of Meisi M50 thread - 0.55 mm
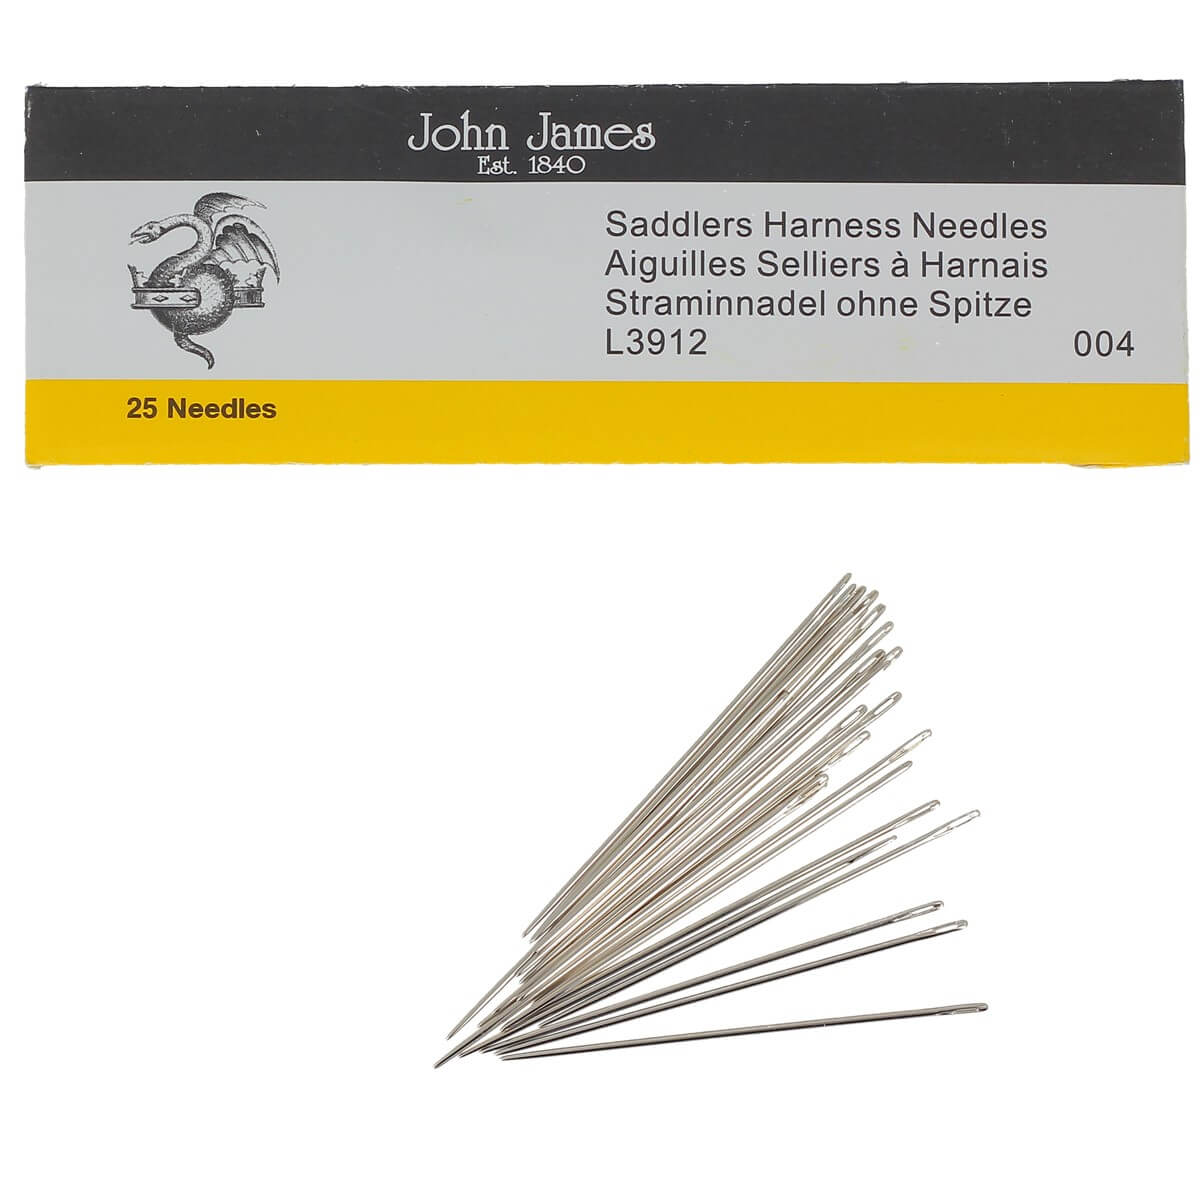
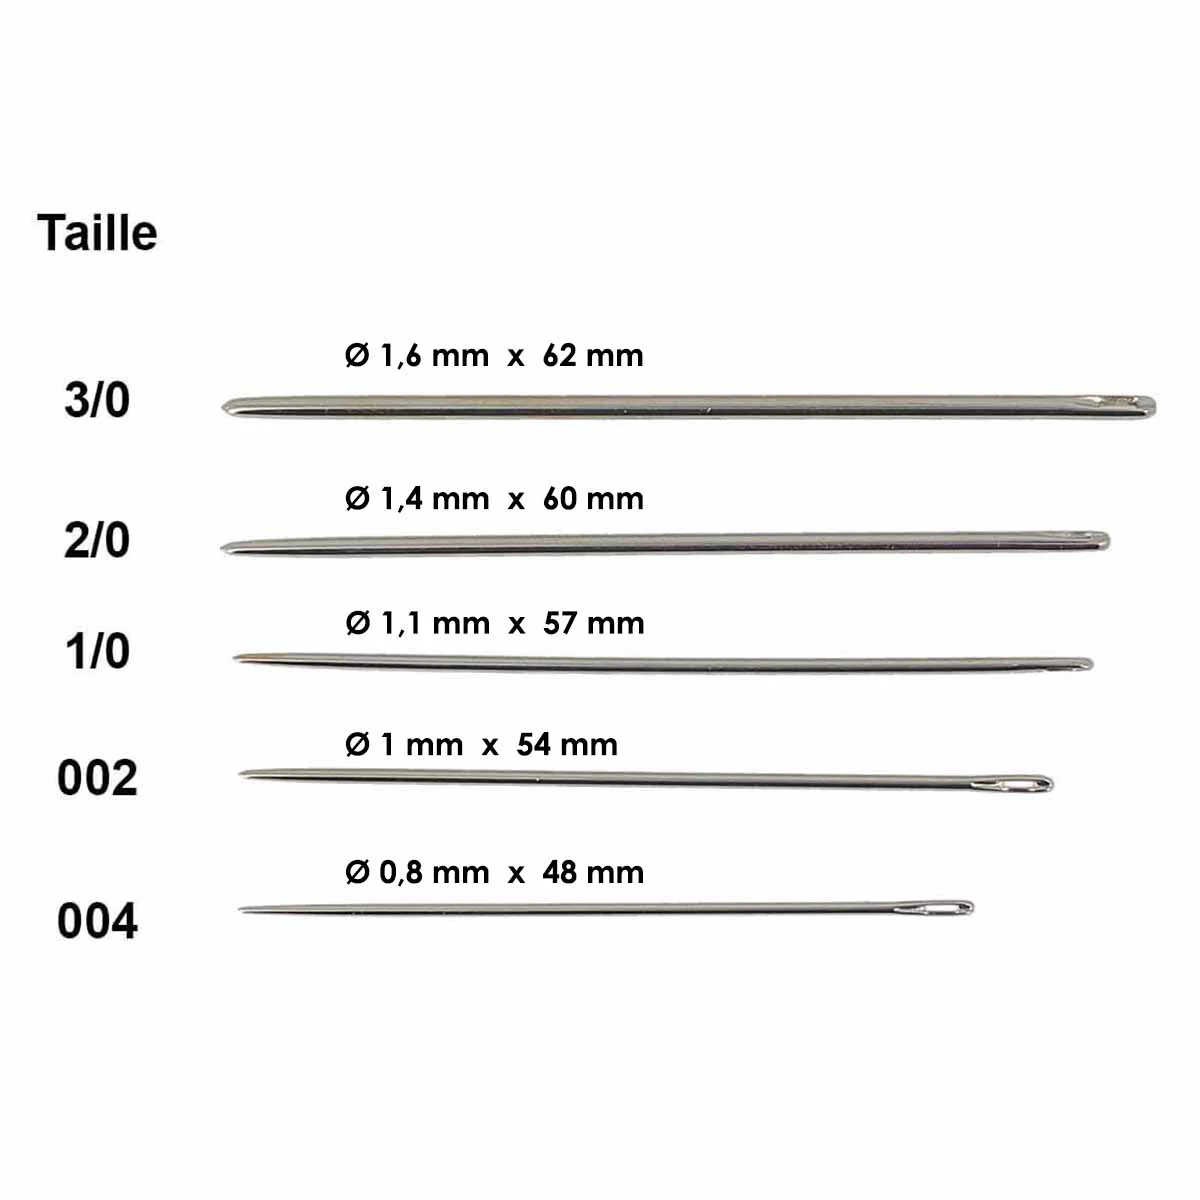
- 2 saddler's needles with rounded tips
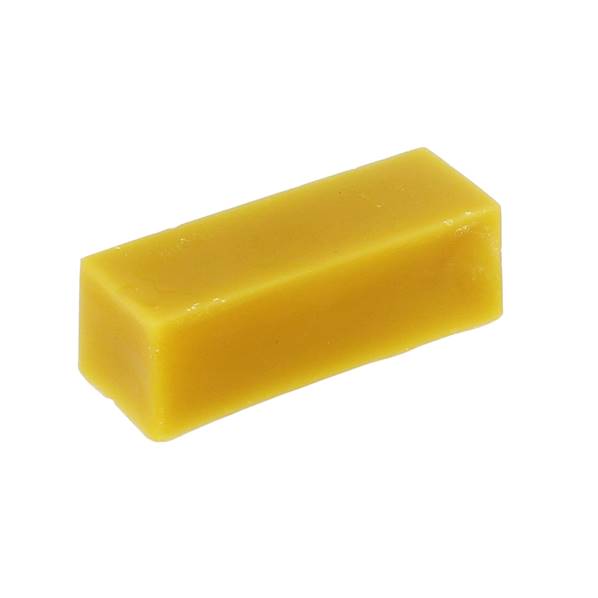
- 1 block of beeswax
And the following tools:
A: a pen for tracing
B: a pricking iron to mark stitching points and an awl to pierce the leather. I haven't yet invested in a proper diamond awl for piercing leather; it's more of a punch. In any case, it does the job required for this project correctly.
C: one or more cutting tools (scalpel or utility knife). Important: use new blades.
D: an edge skiver / a bone folder. These two tools are used for edge finishing.
E: sewing needles / brown thread. The needles have rounded or curved tips. The thread, for its part, is synthetic, sold as "special leather." It is very strong.
F: paper, pencil, ruler, printer. Used for the pattern making step.

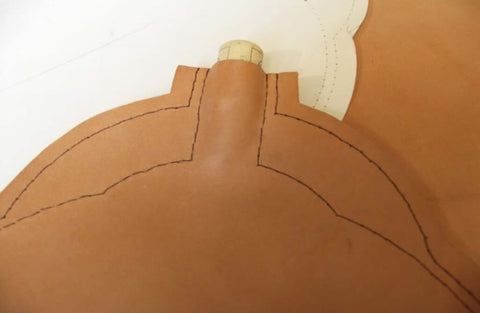
1. MAKING THE PATTERN
This is the basic step. As mentioned in the introduction, I kept it simple and stuck to a round shape.
To draw the circle, if you have a drawing compass, it's not particularly difficult. In my case, I used a salad bowl for tracing!
Then trace the neck. After a few adjustments, you get a pattern like this.
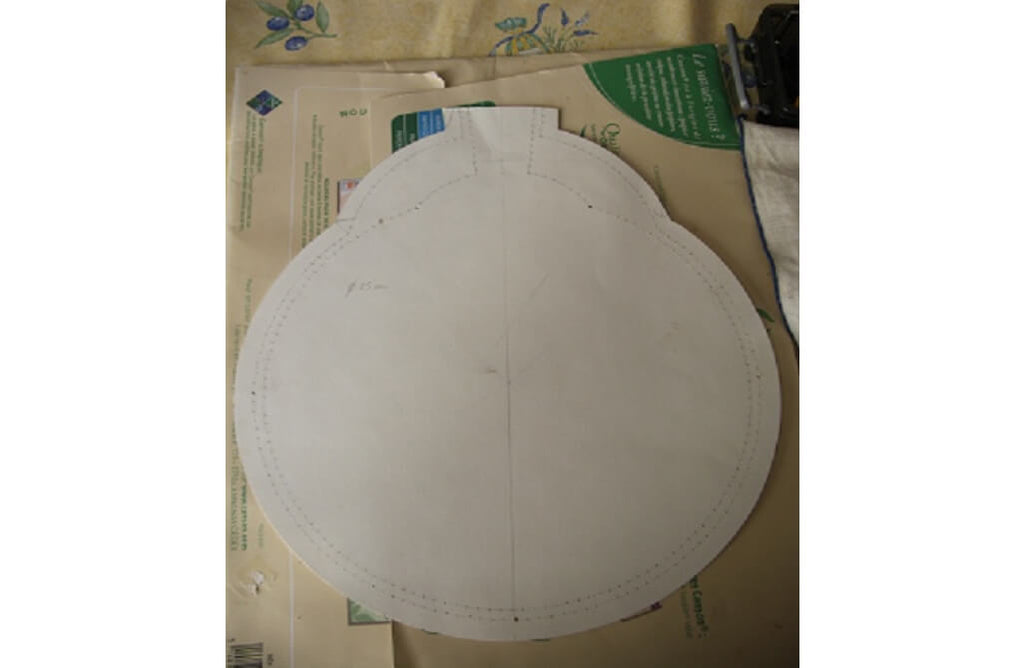
Here, the diameter is 25 cm, which is quite a substantial size. I would recommend starting with a smaller template, say 10 centimeters, for beginners.
I also pre-marked the stitching points on this pattern. If you have a marking wheel, this isn't necessary... though it can be very useful for sewing beginners.
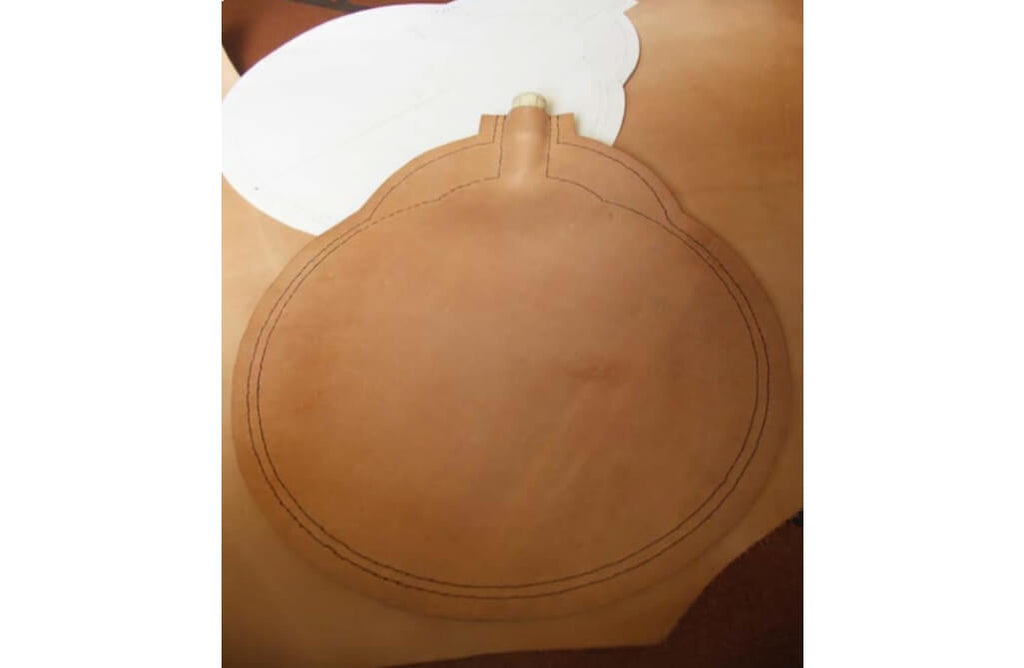
2. TRACE AND CUT THE LEATHER
Position the pattern on the leather, suede side up, and trace the outline using your silver pen/pencil. This gives you a first side.
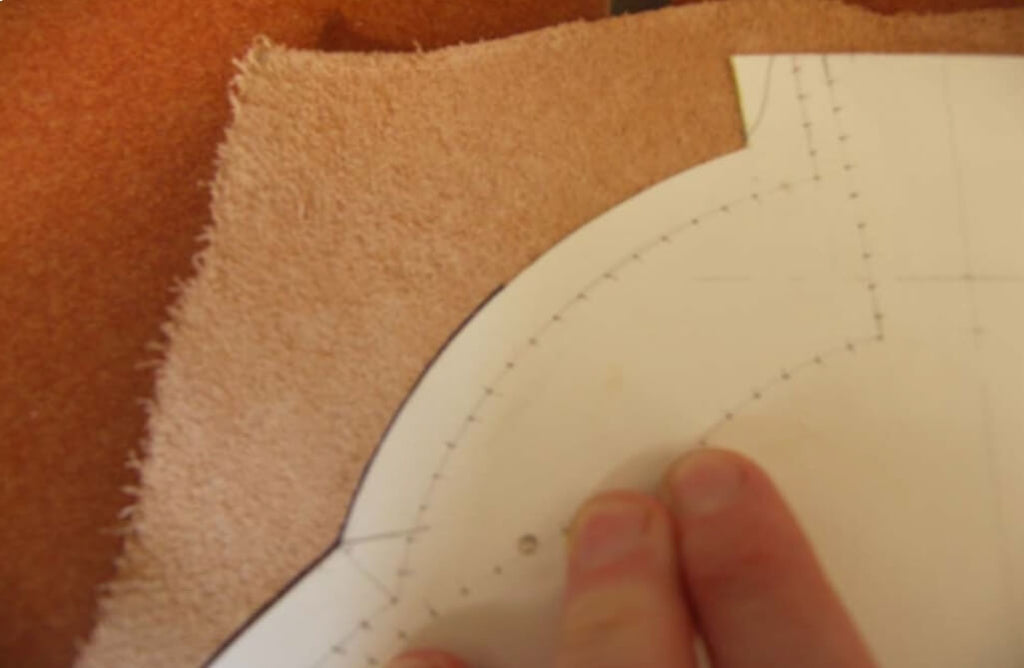
If you have marked the stitching points, flip your pattern before tracing the second side: this way, when piercing, the marks for the future seams will align perfectly! You will get two circular faces that you can cut with your utility knife.
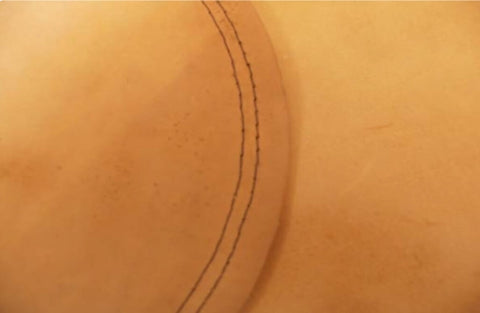
3. SEWING THE LEATHER PIECES
- Pierce your leather with your awl (or a sharp needle). First, slightly moisten the leather and let it dry until it returns to its original color: your piercing will be cleaner.
- Sew with a saddle stitch. The main difficulty in this step is positioning the two pieces of leather. I recommend using a sewing clamp, or if you don't have one, small C-clamps.
I made a double stitch: this strengthens the flask.
I chose not to glue the pieces before sewing with neoprene glue, as it's an item intended to hold liquid, and I preferred to avoid contact with any kind of solvents.
 |
 |
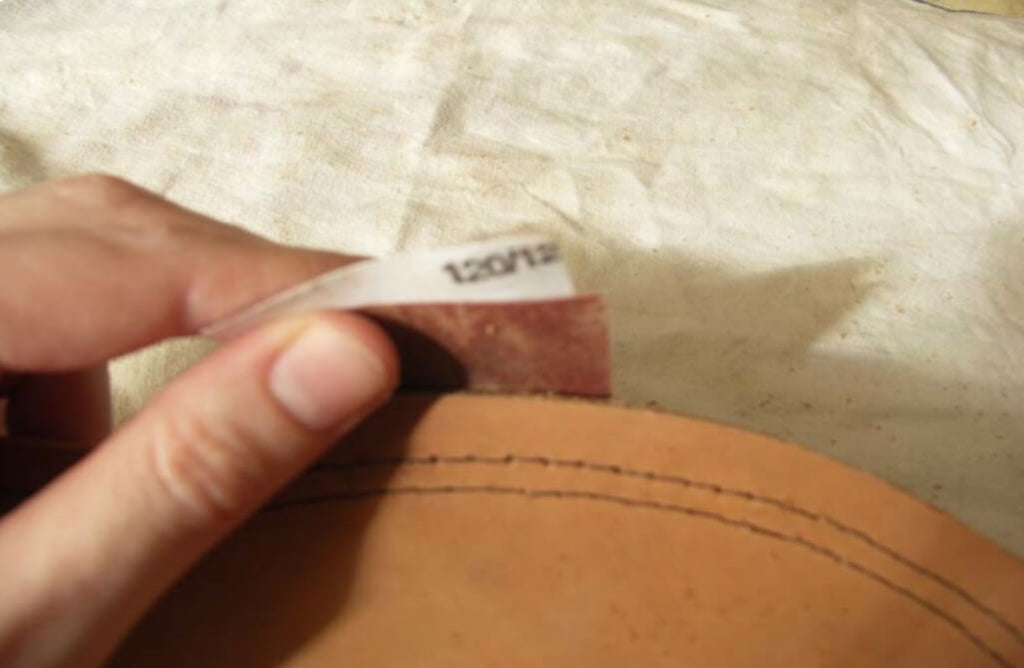
To finish the leather flask, bevel the outer edges and lightly sand the edges with sandpaper (120 grit) after moistening them.
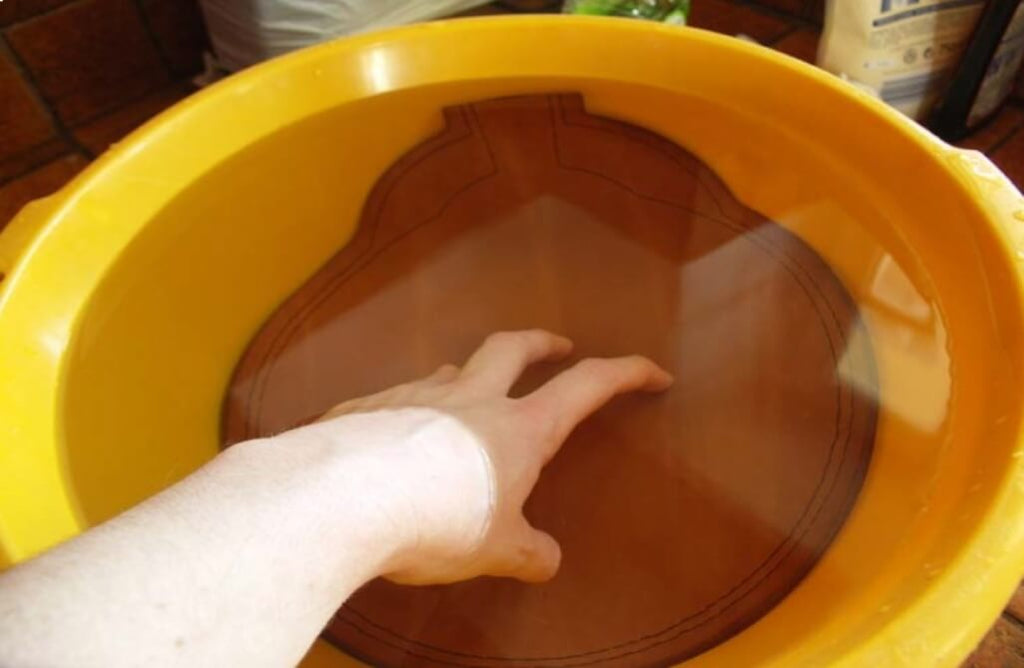
4. SHAPING THE LEATHER
The goal of this step is to give volume to what is still only a two-dimensional shape.
First, fully saturate the leather with water. The easiest way is to fully immerse the flask in a basin of water. Be careful with the water temperature! It should be warm but not boiling, otherwise you will "cook" your leather...
To avoid an accident, it's very simple: dip your hand in... If it's too hot for you, assume it's too hot for your leather too!
From the moment you immerse the flask, small bubbles will form on the surface. This is perfectly normal, the leather absorbs water through all its pores. The disappearance of these tiny bubbles after a few tens of minutes will indicate that your leather is saturated with water.
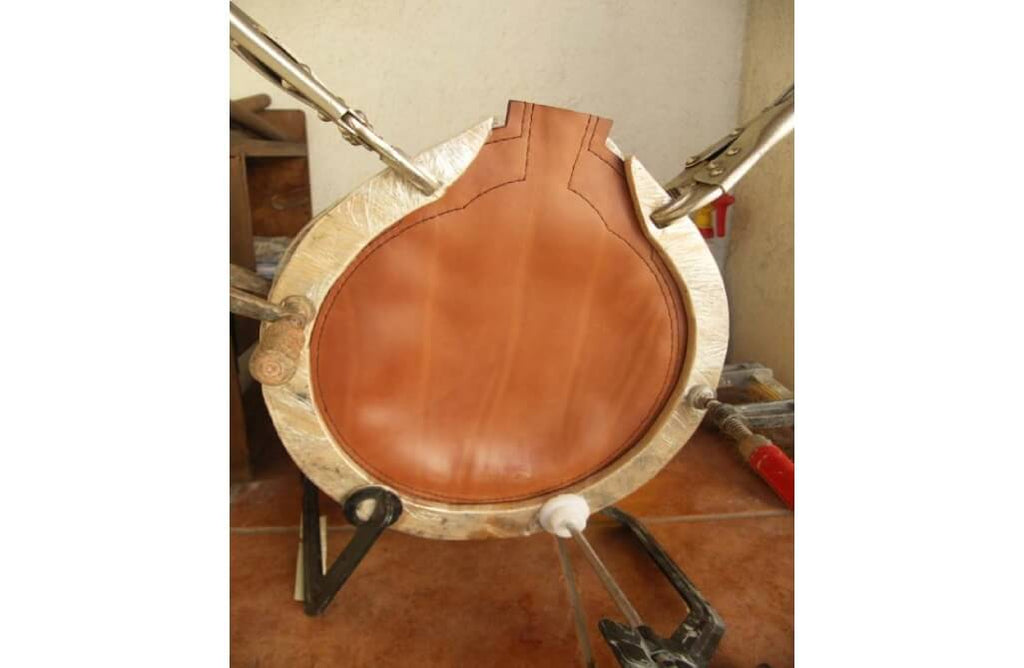
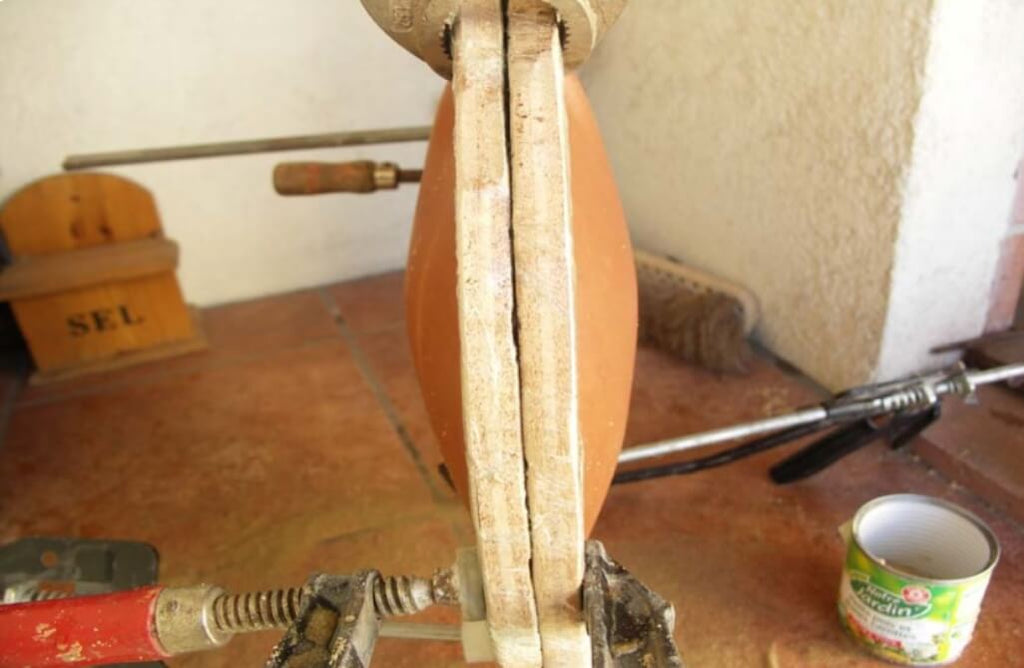
Now for shaping, you'll need a rigid jig to hold your flask in place, clamping it only on the sides. It's advisable to create wooden outlines that will hold the flask using C-clamps.
Here's the model used for this particular flask. You will, of course, adapt its size to the size of your own flask.

Install the clamps on the leather flask.
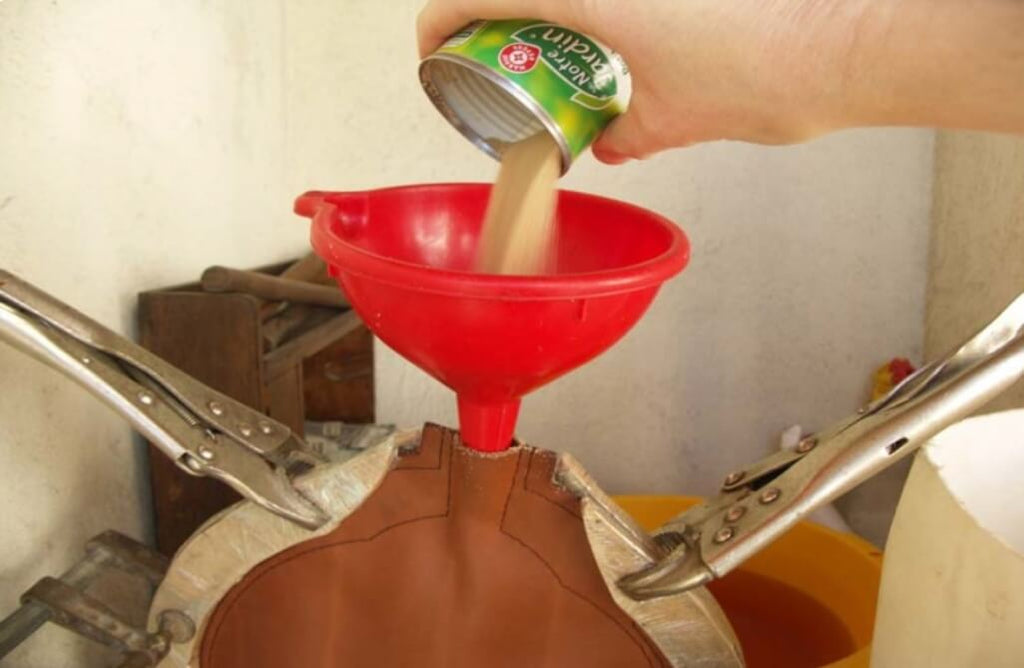
5. FILLING THE FLASK
Fill the flask: you can use sand, for example, or any similar material (corn kernels, wheat, clean cat litter, etc...)
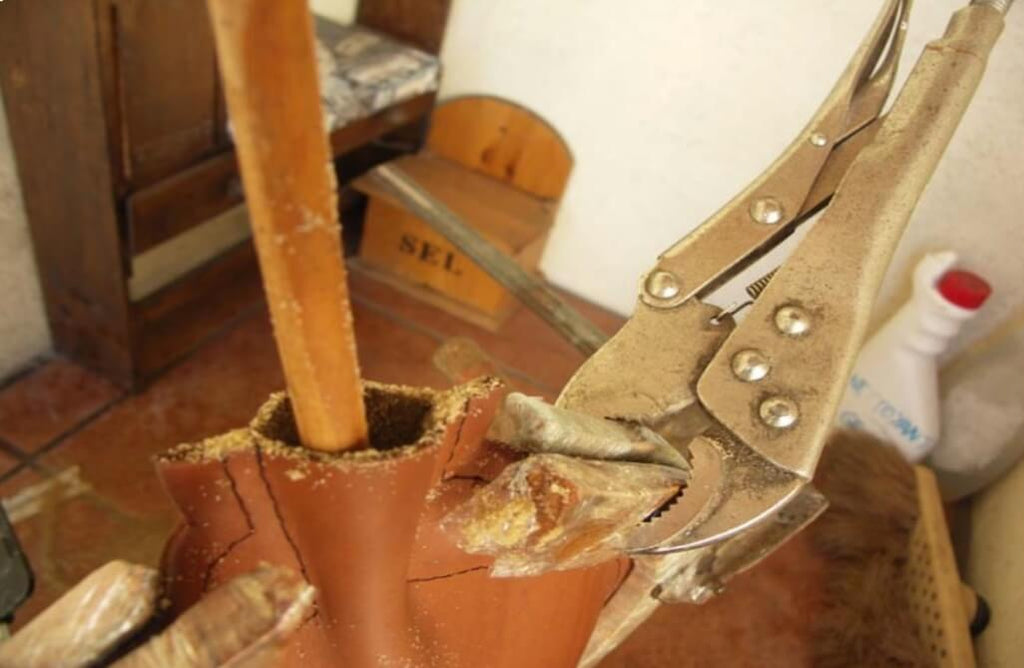
6. COMPACTING THE SAND
Regularly compact the sand with a stick to gradually shape the flask.
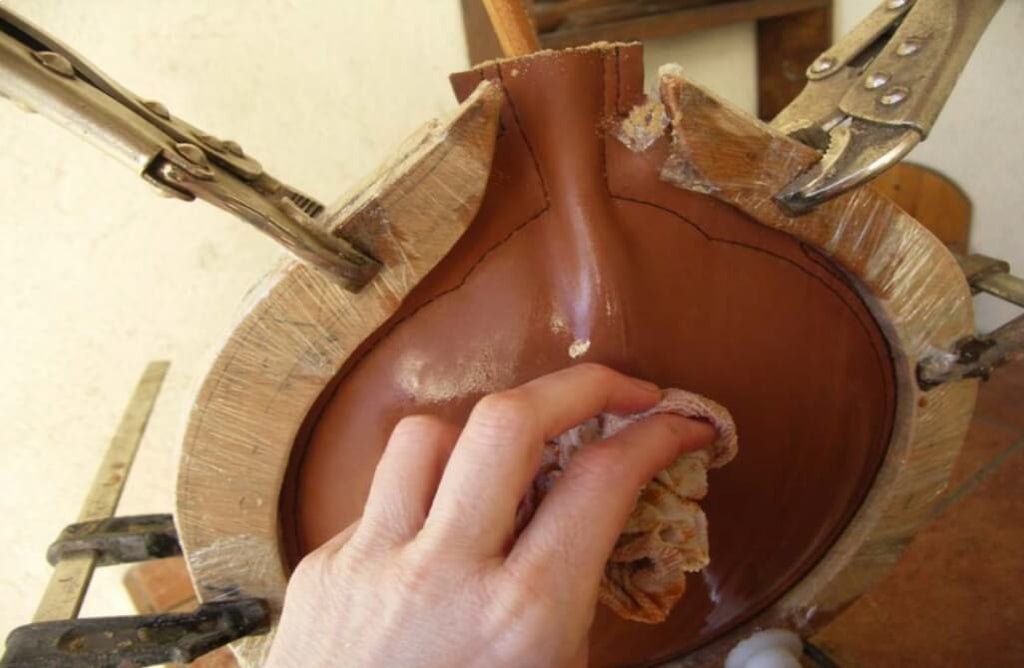
7. WETTING THE LEATHER
Remember to regularly moisten the leather with a water-saturated cloth during this step. It needs to remain pliable and supple.
8. SHAPING THE FLASK
Gradually fill the flask, making sure to compact the sand well on the sides. The flask will gradually take its final shape. Regularly check the profile to ensure the filling is well-balanced.
Let it dry for about 24 to 48 hours. Visually, the leather will change color and lighten. To the touch, it will stiffen and feel cardboard-like.
Once thoroughly dry, empty the sand by turning it upside down.
Personally, I use an air compressor to blow out any grains that might be stuck in the seams.
The shaping step is complete; you can now move on to waxing.
9. BEESWAX SOAKING
- Before starting, ensure the work surface is well protected to avoid getting wax everywhere.
- Protect your hands with thick enough gloves or mitts to avoid burns.
- Wear an apron or old clothes that you don't mind getting damaged.
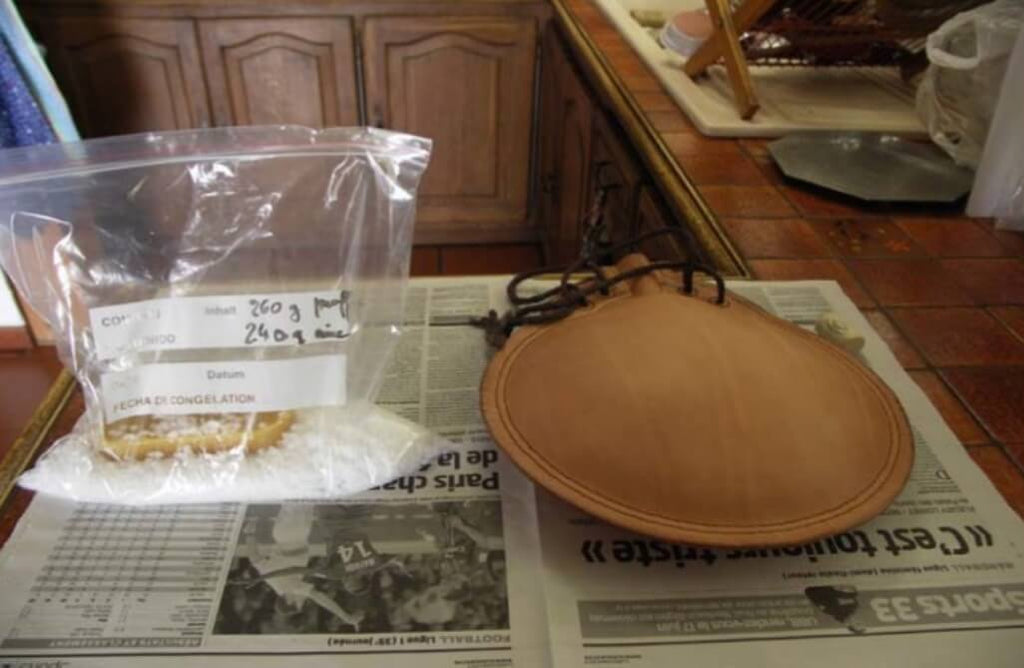
Prepare the amount of beeswax you will need.
For a volume of 1 liter, count approximately 250 g of beeswax. In my specific case, not having enough wax, I supplemented with paraffin pellets. These are easily found in supermarket aisles, used for homemade jam making.
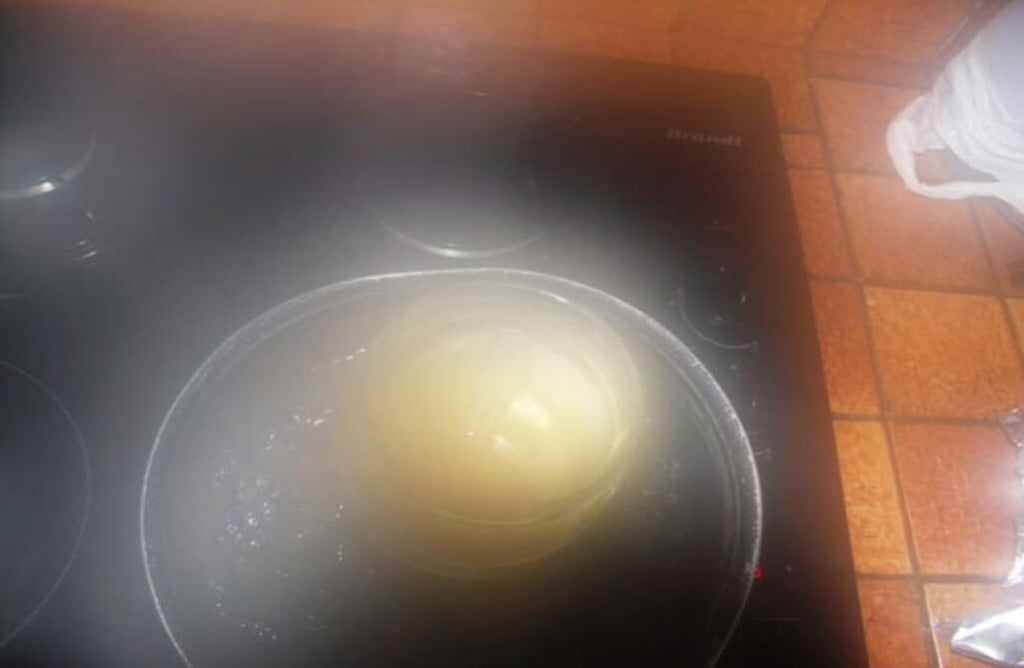
10. MELTING THE BEESWAX
Melt your wax or wax/paraffin mixture in a double boiler. Be careful not to burn yourself!
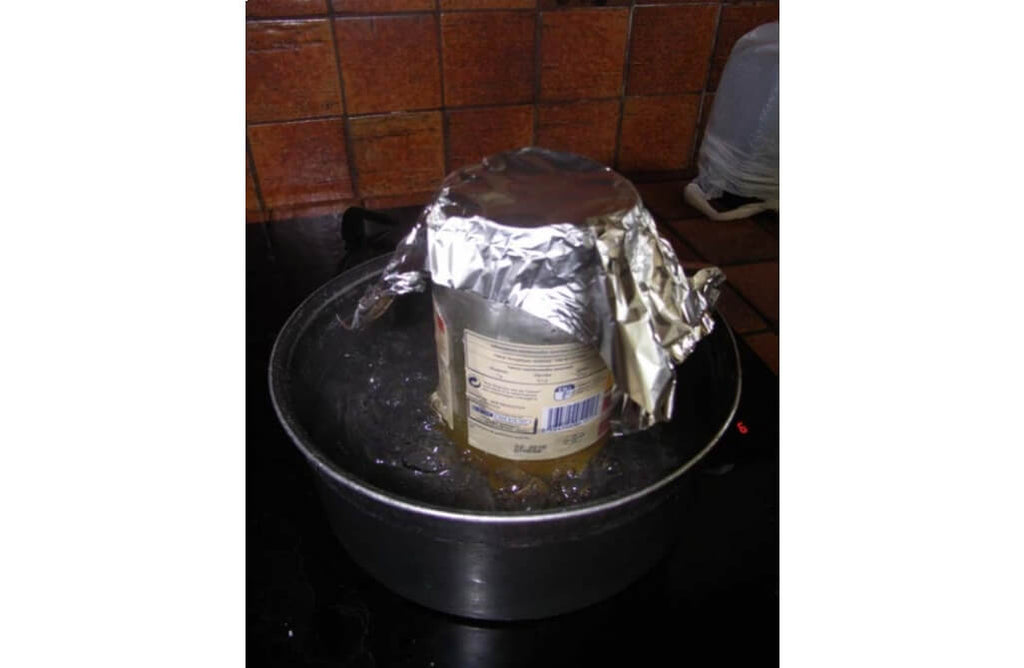
Watch the boiling carefully. After about ten minutes, your wax will begin to melt; stir with a wooden spoon to homogenize the mixture.
11. POURING THE WAX INTO THE FLASK
Position yourself over a basin (not plastic) and pour the wax into the flask.
Using back-and-forth motions, coat the inside of the flask and pour any excess back into the basin.
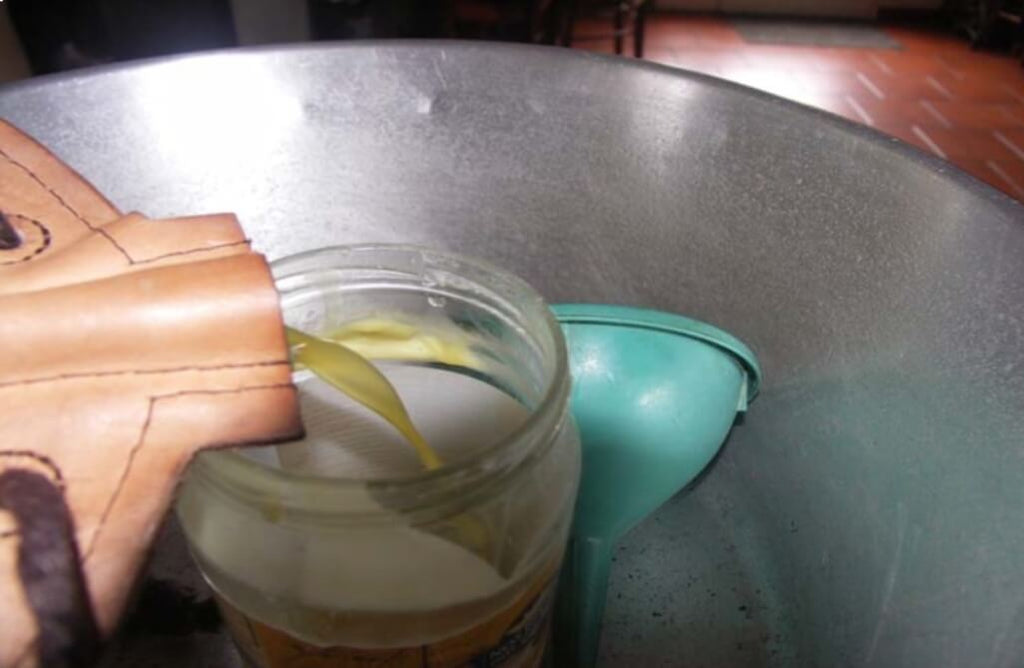
Work quickly, as the wax will harden as it cools and may form a thick layer.
I recommend the following method:
- Fill
- Plug and turn the flask upside down once or twice
- Empty immediately
- Repeat the previous steps (2 or 3 times maximum).
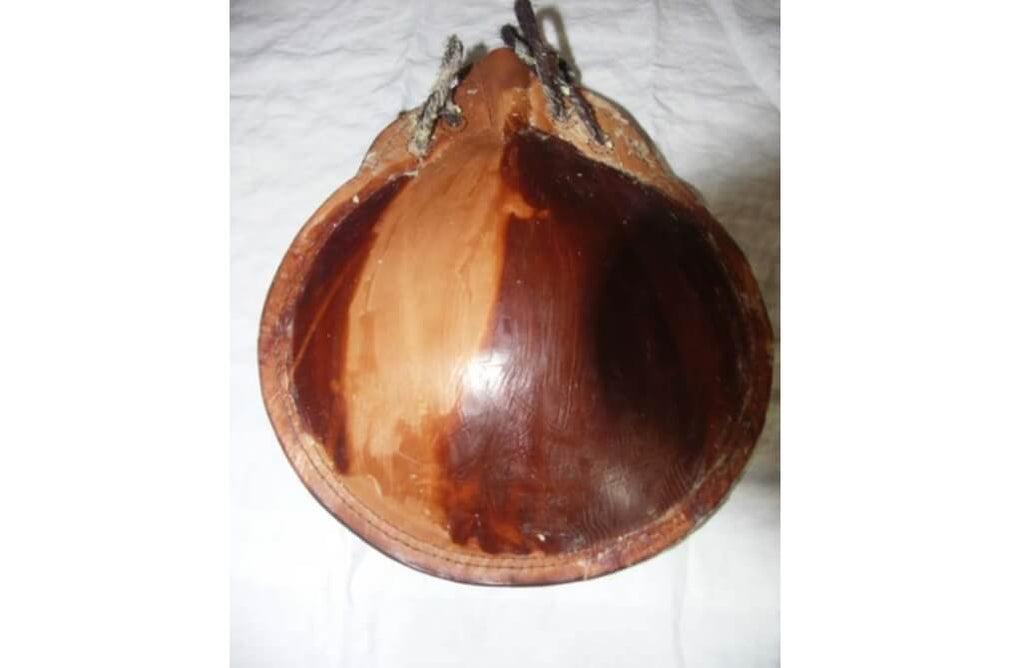
The leather will gradually darken, indicating that the wax has penetrated well. Here's a photo after applying just one coat: you can see that the flask is only partially imbibed, with the clear area devoid of wax.
As you can see, I've already punched holes for the hanging strap. It's useful to do this at this stage, so you can handle the flask more easily.
12. FINISHING THE FLASK
This step is optional but provides a beautiful finish for your flask.
- Apply a thin layer of beeswax to the outside of the flask. This will enhance its waterproofness, especially at the seams.
- Armed with a lint-free cloth, rub until the stickiness of the wax is gone and a beautiful shine is achieved.

2 comments
DECO CUIR
Bonjour M.Ko,
Nous n’avons jamais fait ce tutoriel avec du repoussage, donc je ne pourrais pas vous répondre avec certitude. Cependant, je pense que c’est tout à fait possible. Peut-être avec un cuir de 3 mm, pour que la gourde soit plus solide, effectivement.
N’hésitez pas à nous partager votre création, nous serions ravis de voir le résultat !
Très bonne journée,
L’équipe Deco Cuir
M.ko
Bonjour,
Peut-on repousser le cuir avant, ou cela va t il fragiliser Gourde, ou le traitement à laquelle elle est soumise va t elle abîmer le repoussage? Si oui, quelle épaisseur de cuir? Faut il prendre plus épais que du 2,5? (Vu que le repoussage va l’affiner)
Merci pour le tutoriel, j’ai hâte de m’y mettre!