

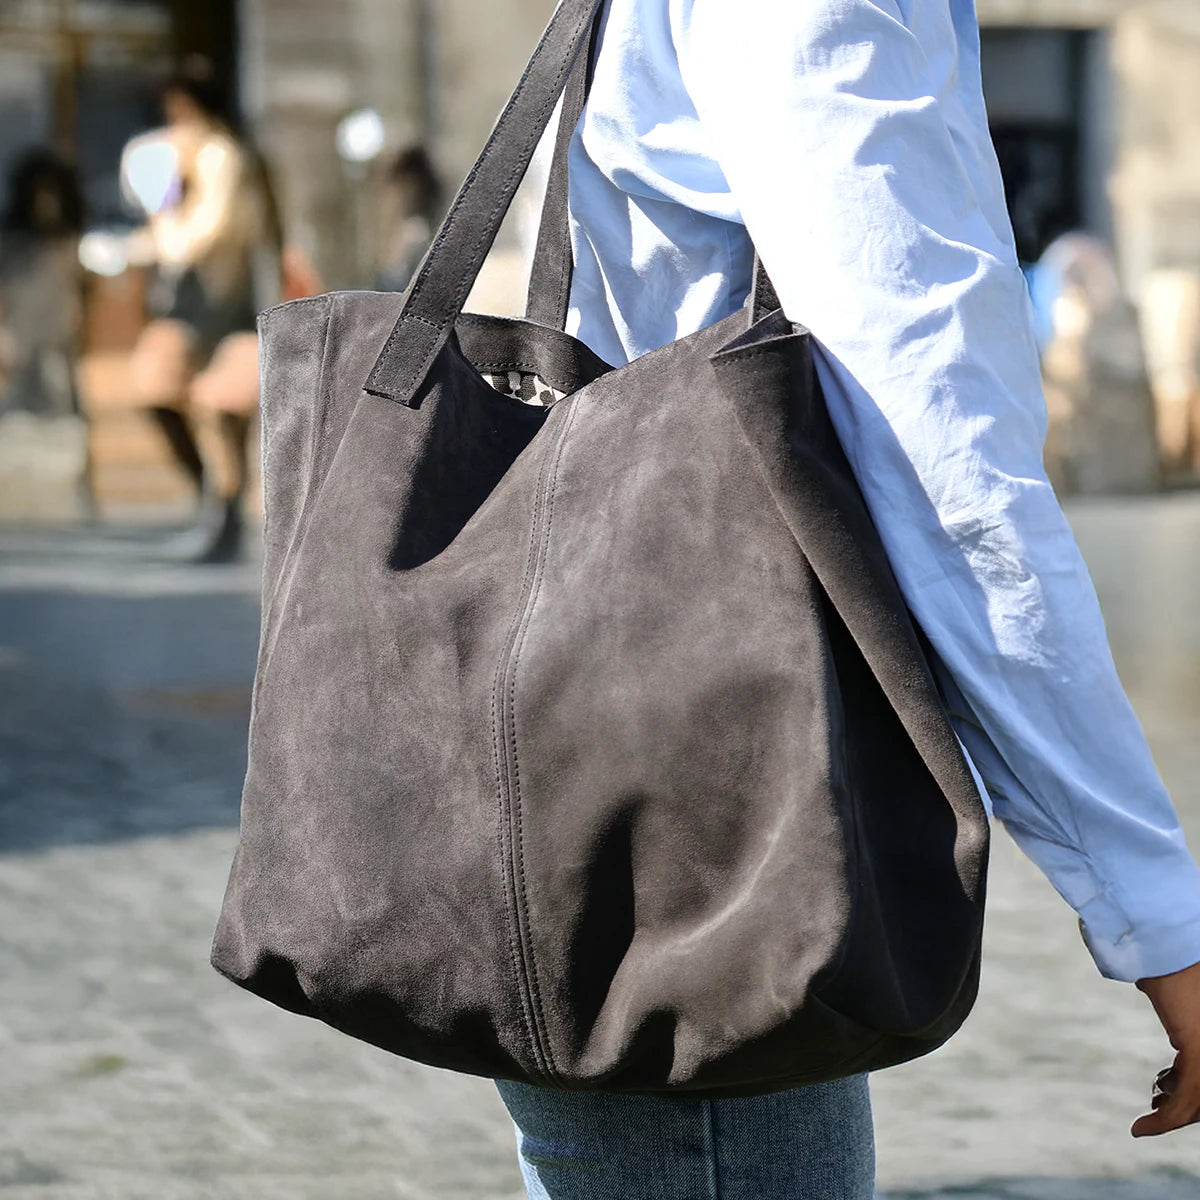


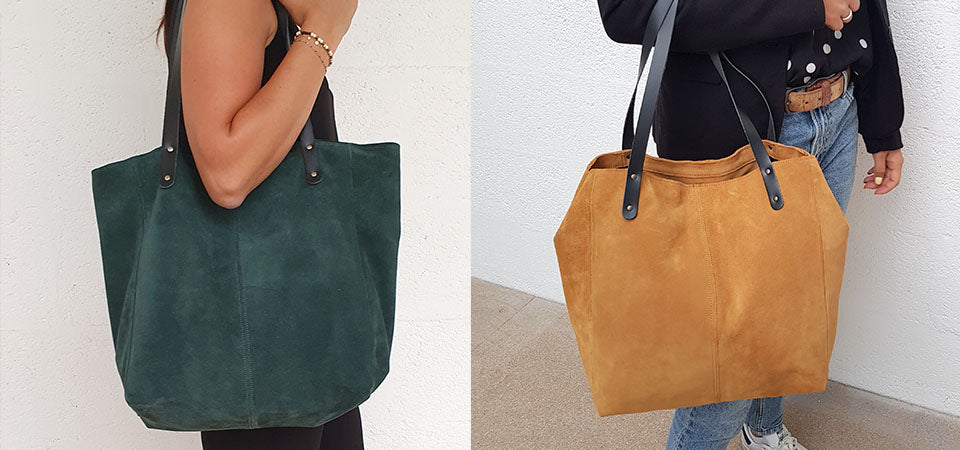
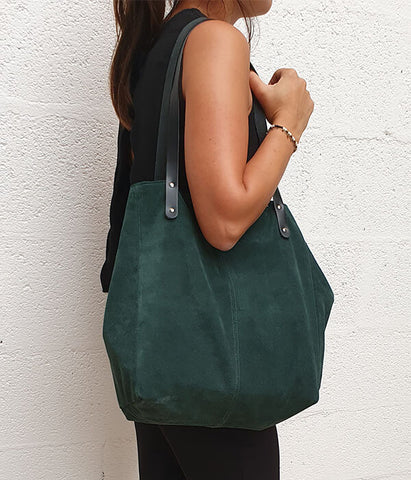
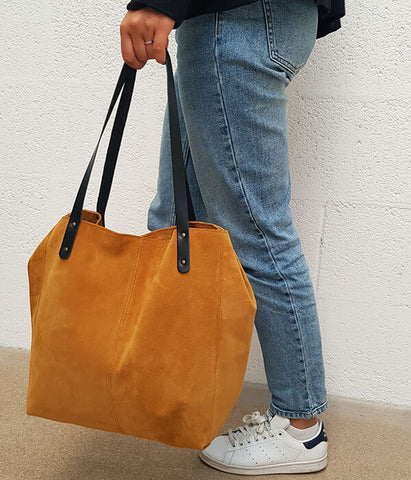
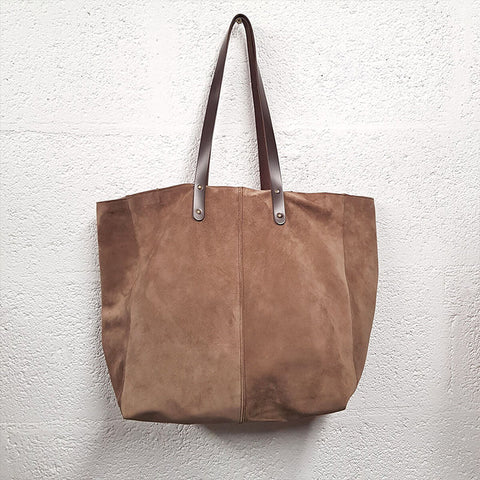
MATERIALS NEEDED
To complete this tutorial, you will need:
- 1 or 2 goatskin leather hides or suede calfskin hides, soft, 1.2 to 1.4 mm thick. We recommend a surface area of 1.30 m2 or 2 hides of 0.65 m2.
- Lining fabric (140 or 120 cm wide x 90 cm).
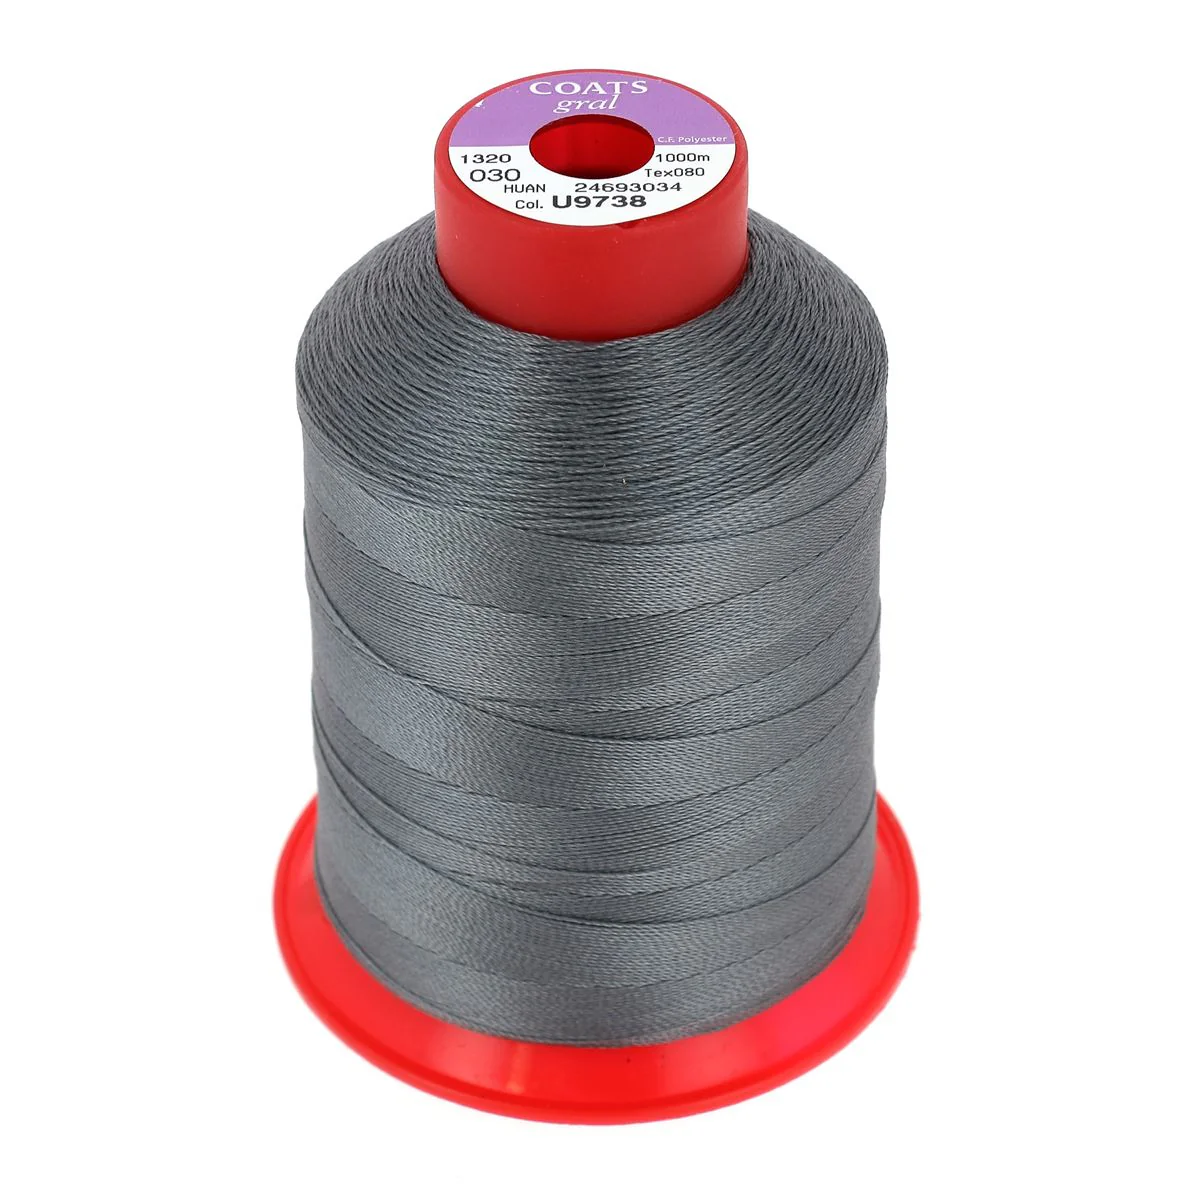
- 1 spool of n°30 polyester thread - 1000 meters
-
1 metal zipper - Length 15 cm
- 1 magnetic snap fastener - 14 mm diameter
And the following equipment:
- 1 stainless steel ruler
- 1 utility knife
- 1 roll of double-sided adhesive tape - 4 mm width
- Tear-resistant tape, 15 mm width
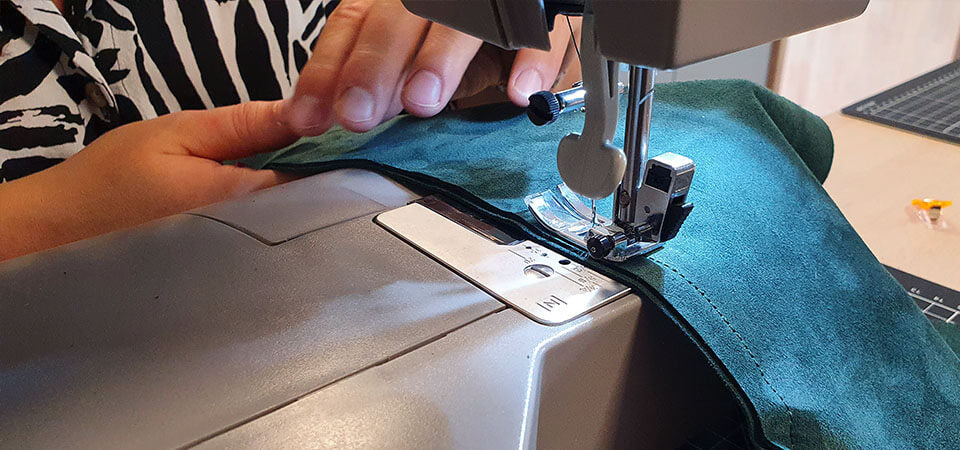
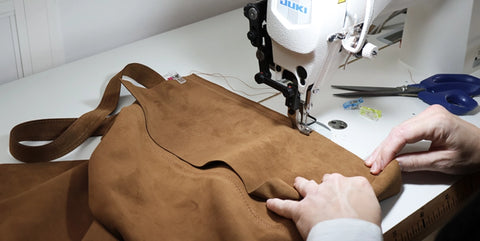
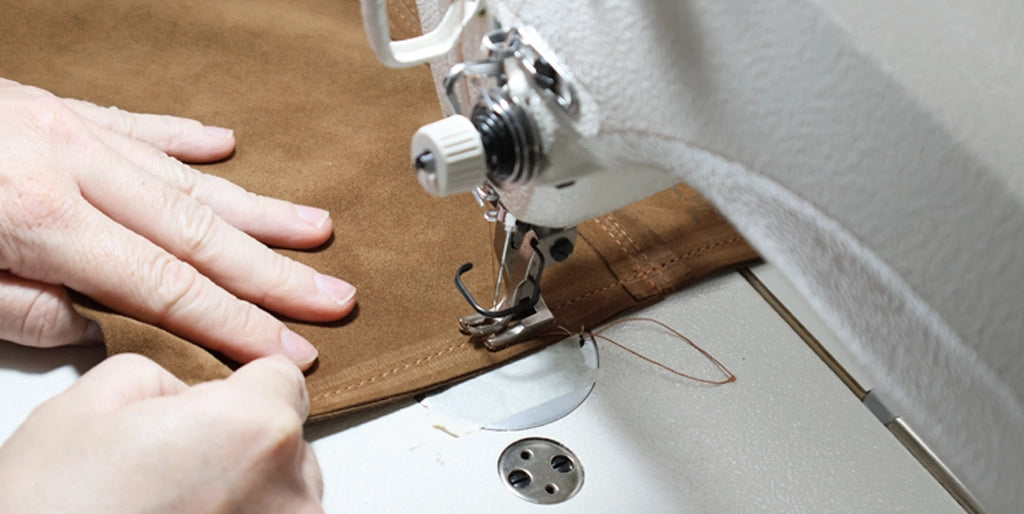
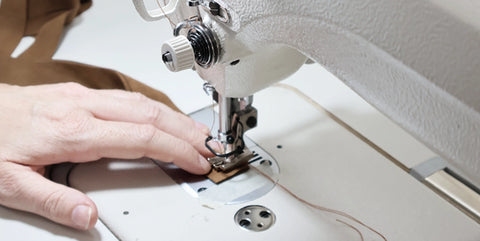
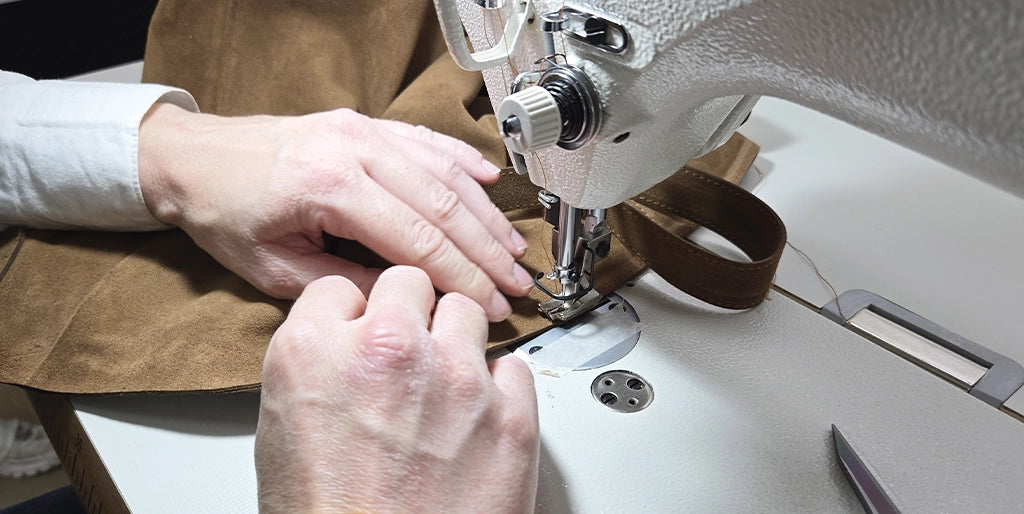
SEWING LEATHER WITH A MACHINE
Discover, in the guide below, the essential points to know before embarking on machine sewing leather (with a household machine).
Tutorial Video
In this video, we chose to replace the leather straps with a pair of rivet-on handles for the bag. You can choose the option you prefer (version 1 or 2)!


Video Version No. 2
Tip
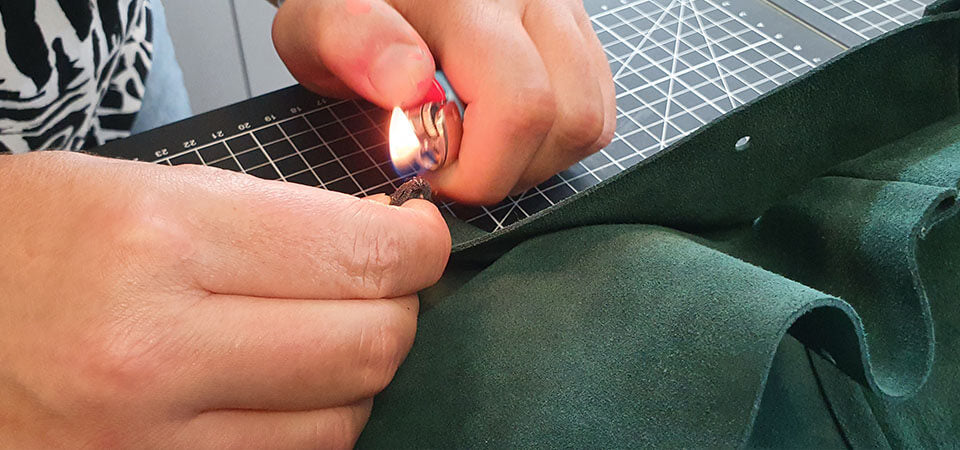
To finish sewing, trim the polyester thread flush and burn it.
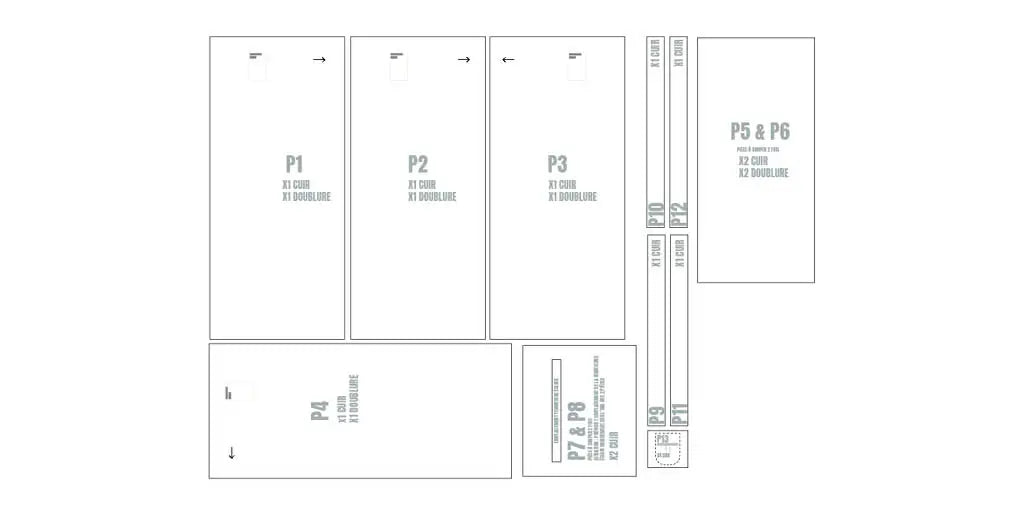
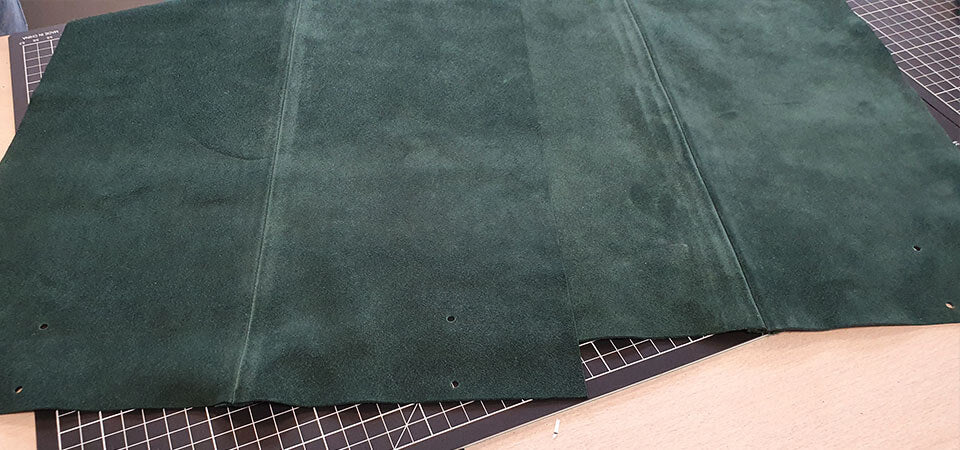
1. CUT THE PAPER PATTERN
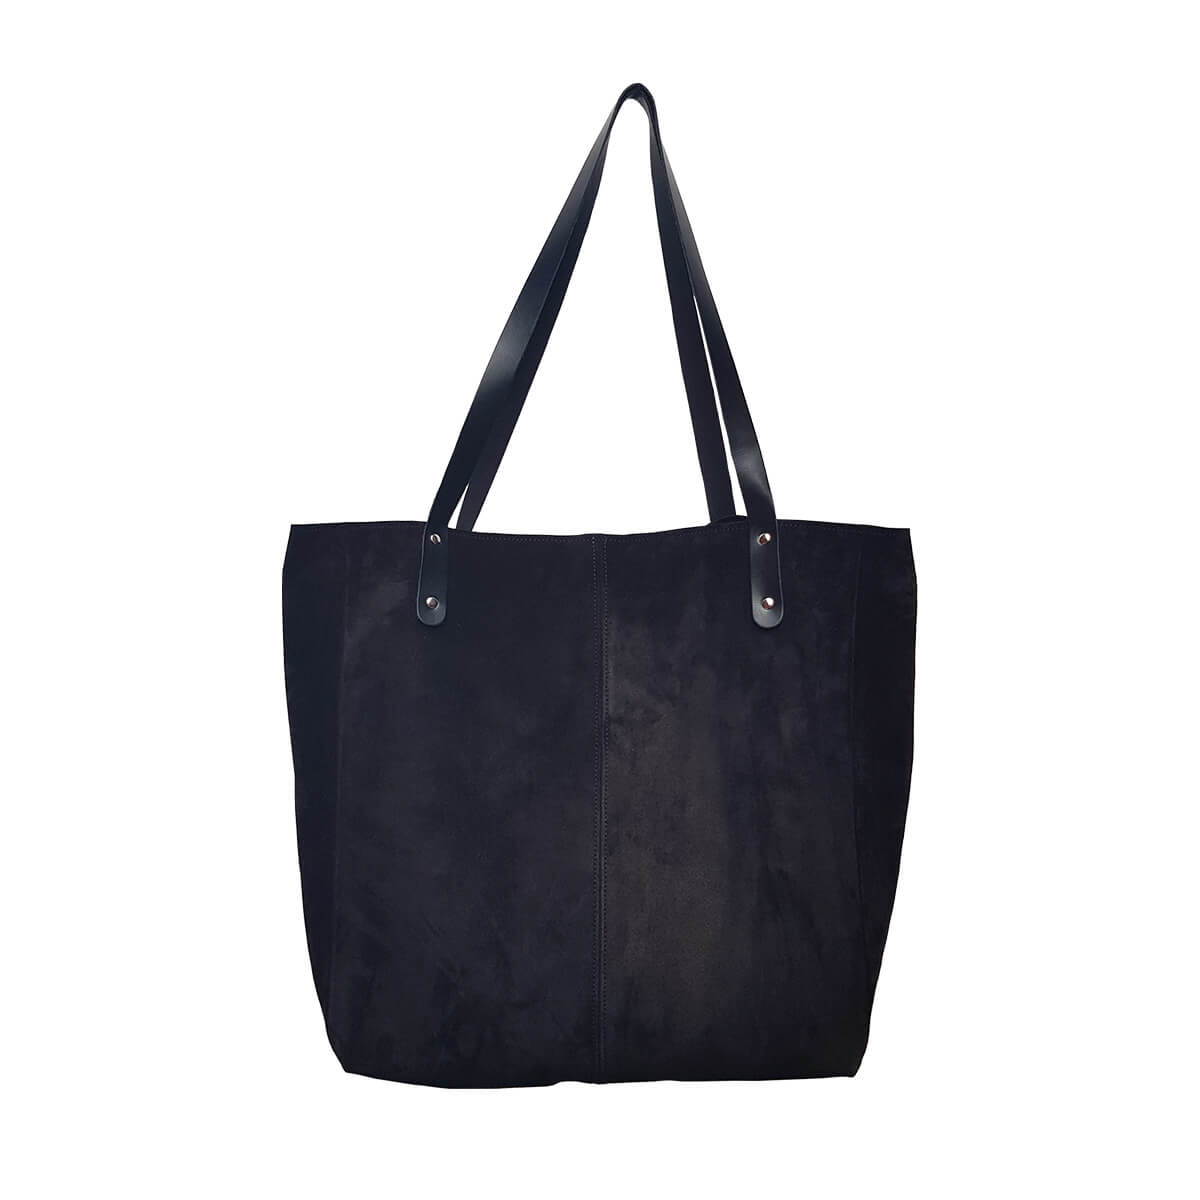
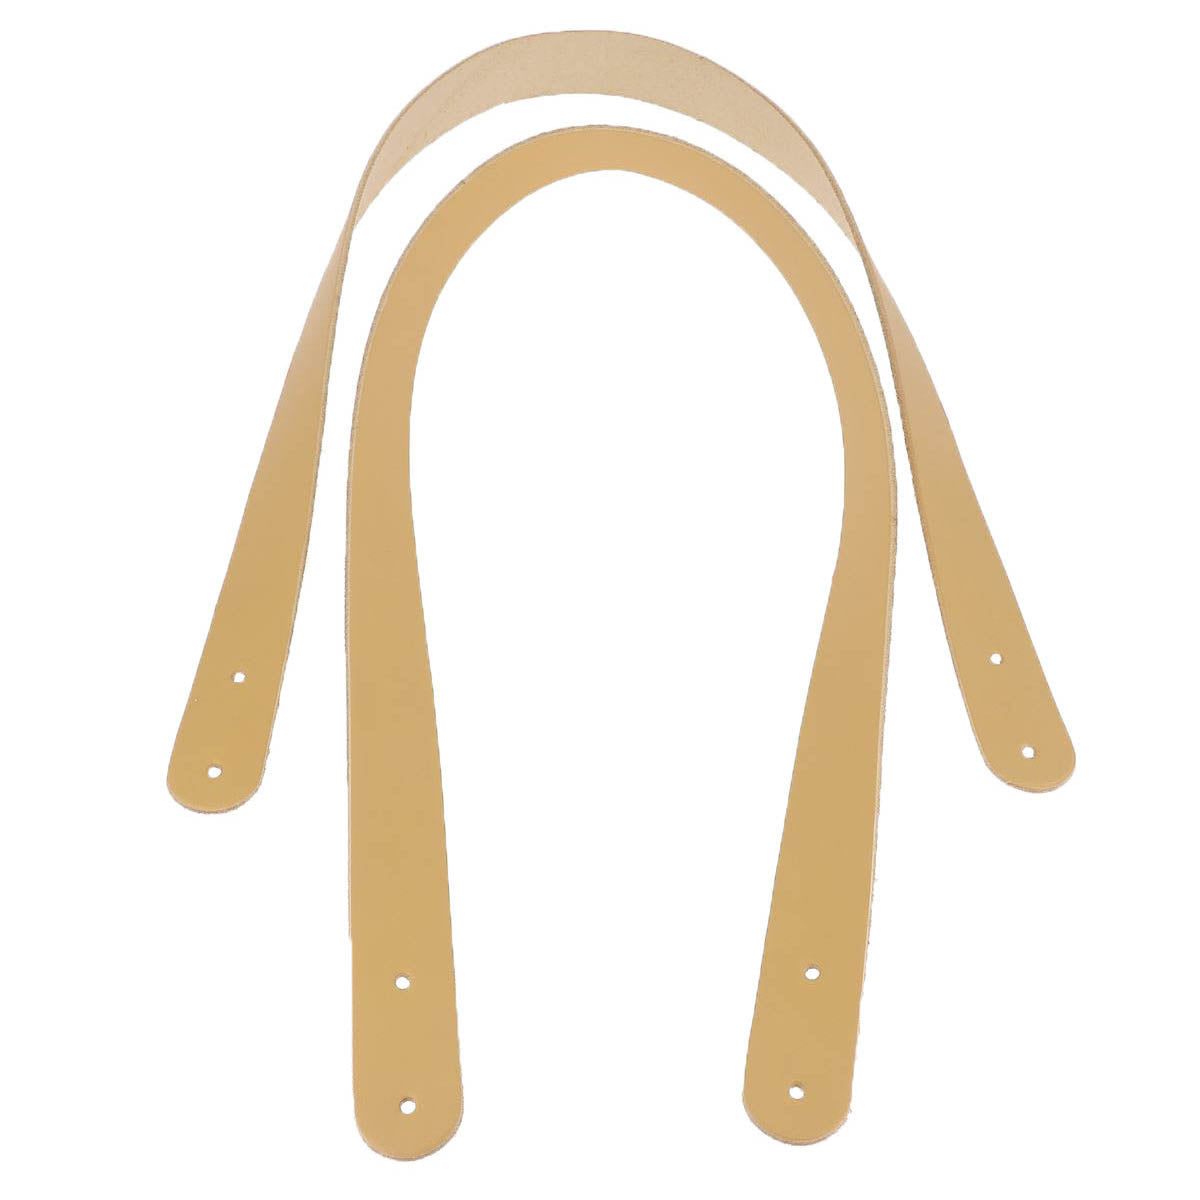
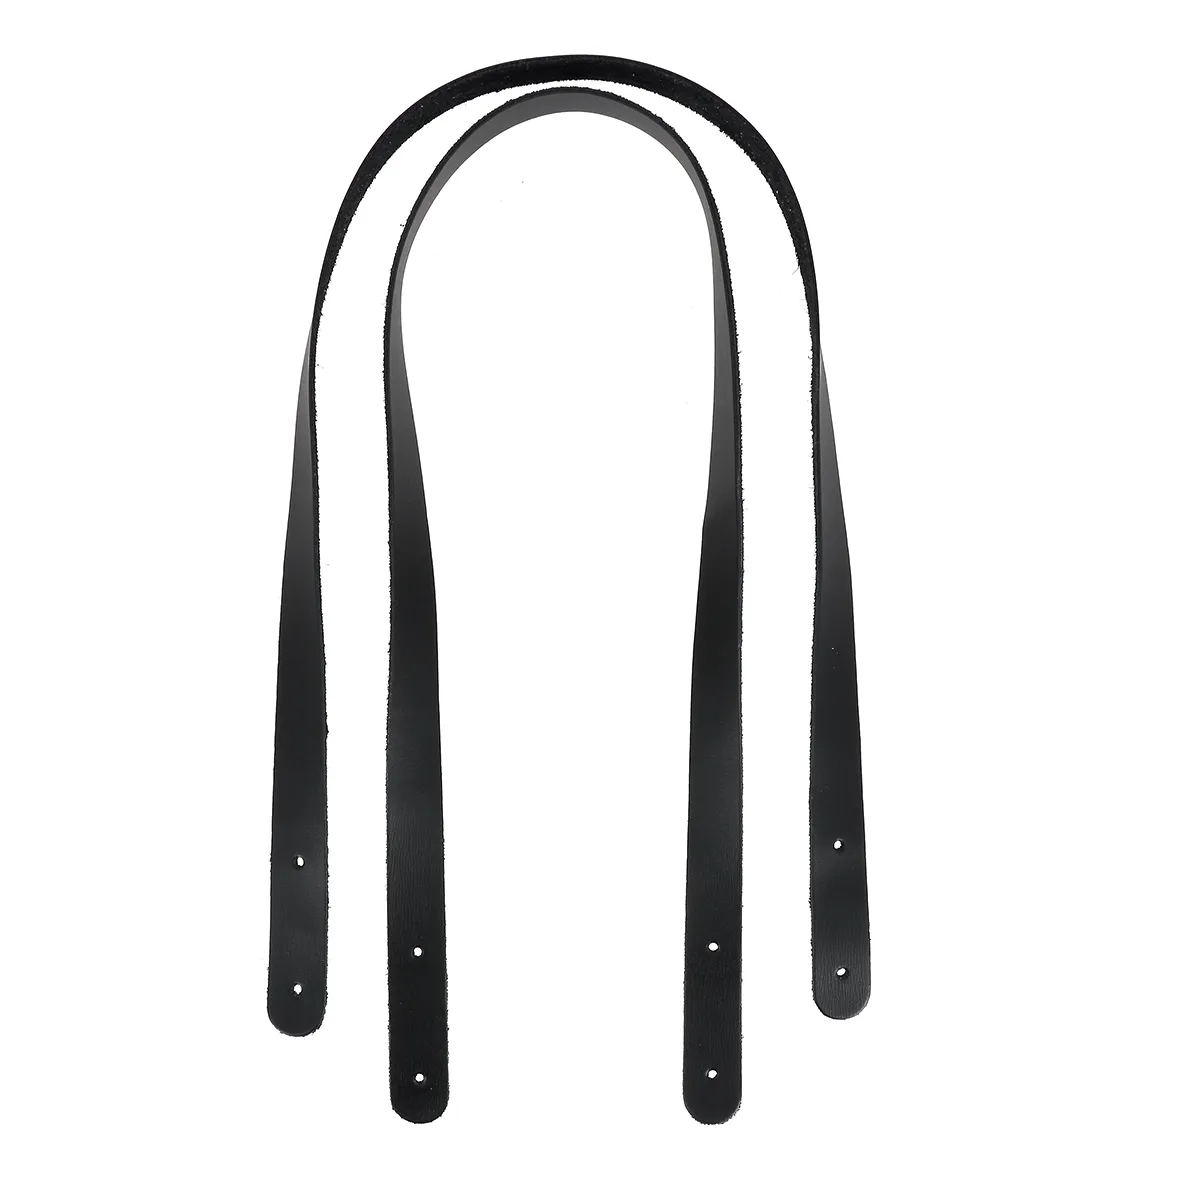
Cut out the 14 pieces of the paper pattern and position them on the leather hide(s). For the bag handles (P14): cut a rectangle of 71.5 x 14 cm from the leather. Do not cut P14 if you opt for version 1 with rivet-on handles.
Seam allowances are included in the dimensions given below.
Presentation of the pieces:
- P1 / P2 / P3 / P4: 19 x 43 cm
- P5 / P6: 16.5 x 34.5 cm
- P7 / P8: 16 x 18.5 cm
- P9 / P10 / P11 / P12 : 2.5 x 27 cm. Depending on the size of your hide, you can cut 2 strips of 54 cm (instead of 4 small strips).
- P13 : 3.5 x 4.5 cm
- P14 (not visible on the pattern - version 2 of the tote bag): to make the bag straps from leather, cut a rectangle of 71.5 x 14 cm.
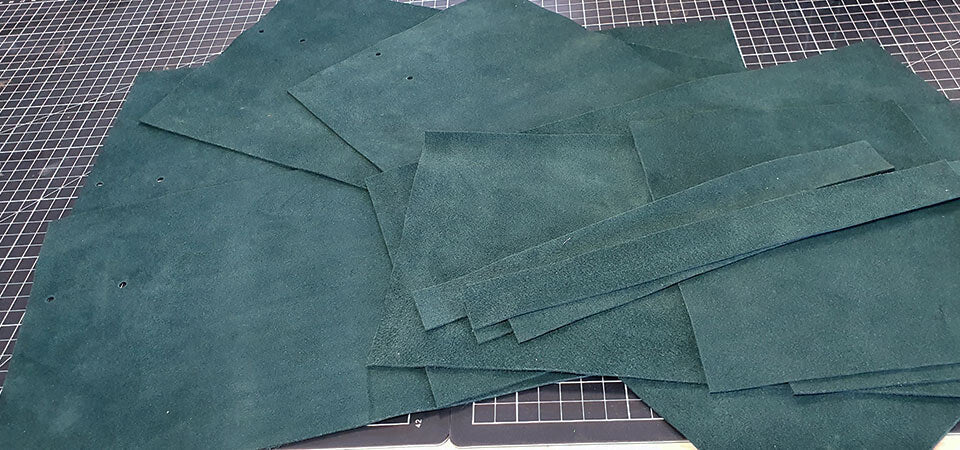
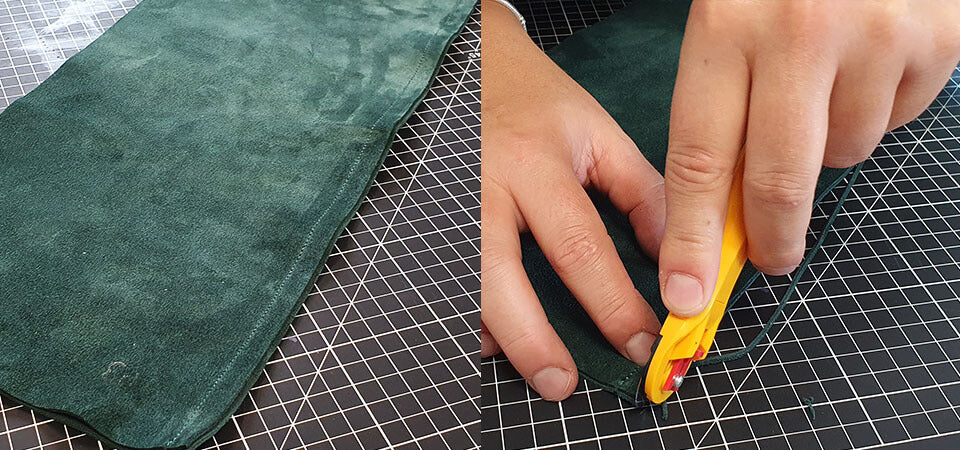
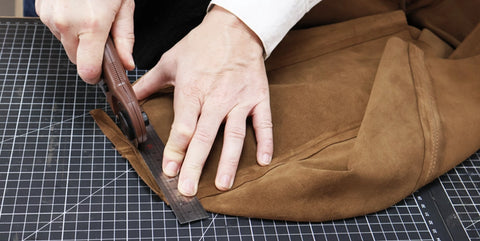
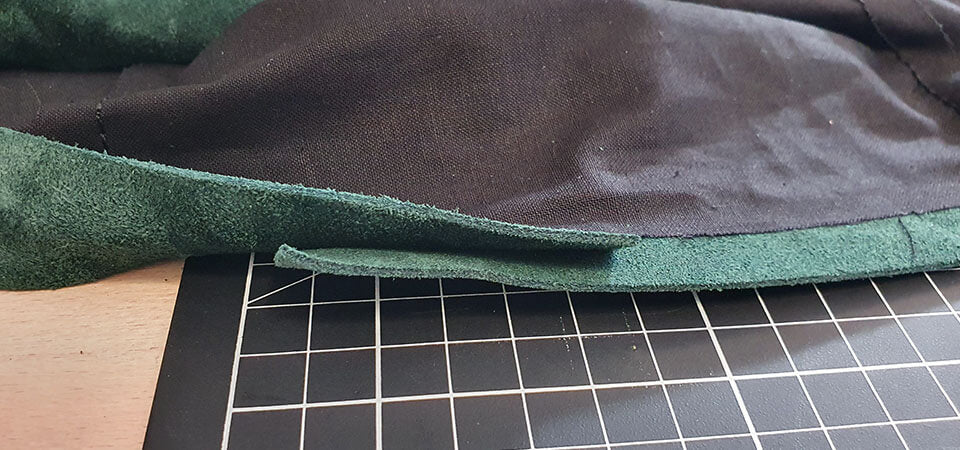
2. PUNCH AND CUT THE LEATHER
Hold the pieces with masking tape (to facilitate cutting) or trace the pieces with a silver pencil. Using a utility knife and a ruler: cut out all the pattern pieces.
The visible holes (3 mm diameter) on the different pieces are for version 1 of the tote bag (handles with rivets). If you opt for leather straps (version 2), there is no need to punch the material.
3. CUT THE LINING
Cut pieces P1 to P6 from the lining.

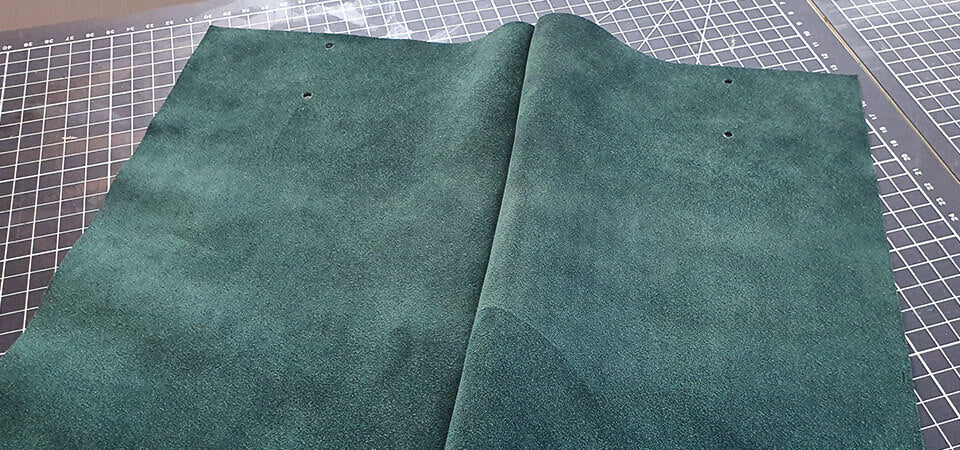
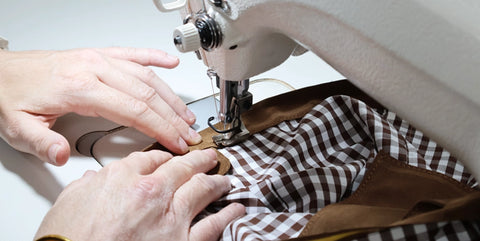
4. ASSEMBLE THE MAIN PIECES
Using sewing clips, position piece P1 on P3 right sides together. Then sew 1 cm from the edge, only on the side indicated by the arrows on the pattern. Start sewing from the top to avoid any misalignment. Do the same for pieces P2 and P4.
The visible holes (3 mm diameter) on the different pieces are for version 1 of the tote bag (handles with rivets). If you opt for leather straps (version 2), there is no need to punch the material.
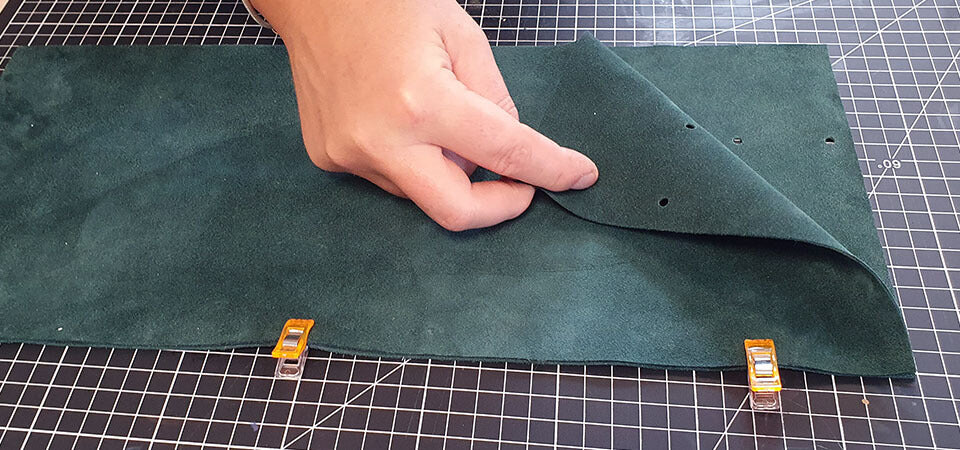
Trim if necessary after sewing for a perfect finish.
The visible holes (3 mm diameter) on the different pieces are for version 1 of the tote bag (handles with rivets). If you opt for leather straps (version 2), there is no need to punch the material.
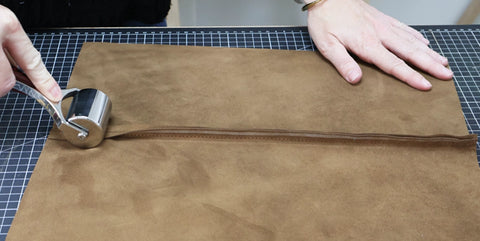
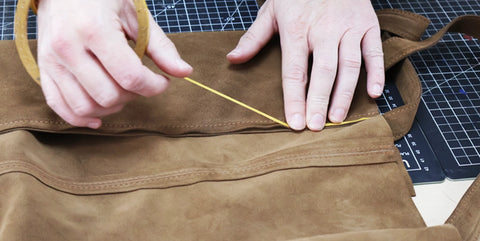
5. OPEN THE SEAMS
On the wrong side of the leather, open the seams with adhesive tape and a steel roller.
 |
 |
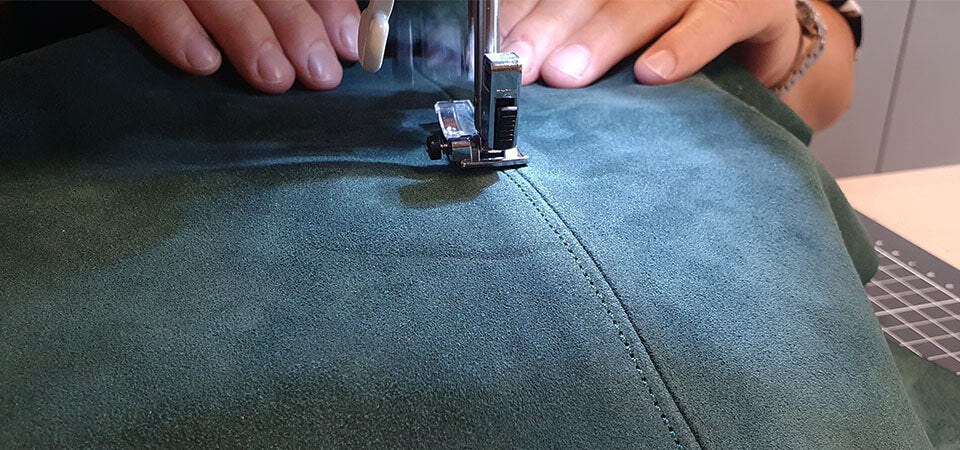
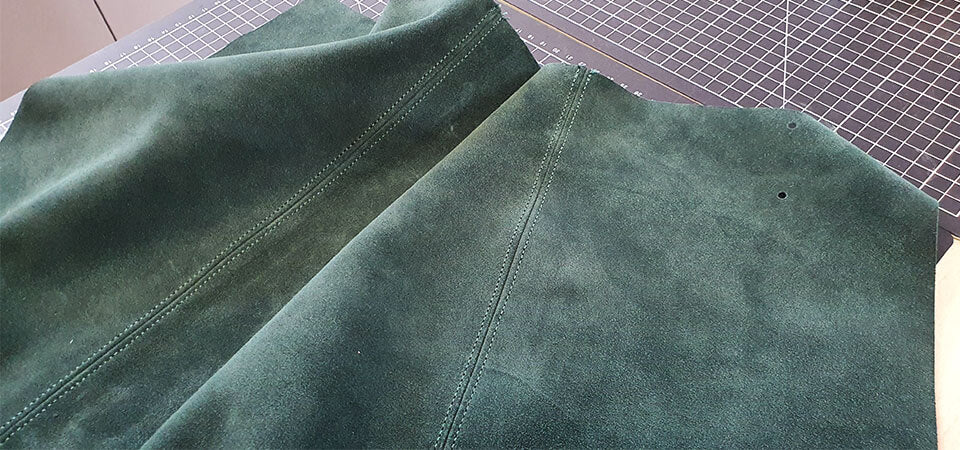
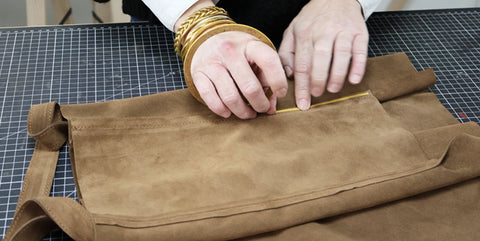
6. TOPSTITCHING
Topstitch on each side of the seam, 3 mm from the edge, on pieces P1/P3 and P2/P4.
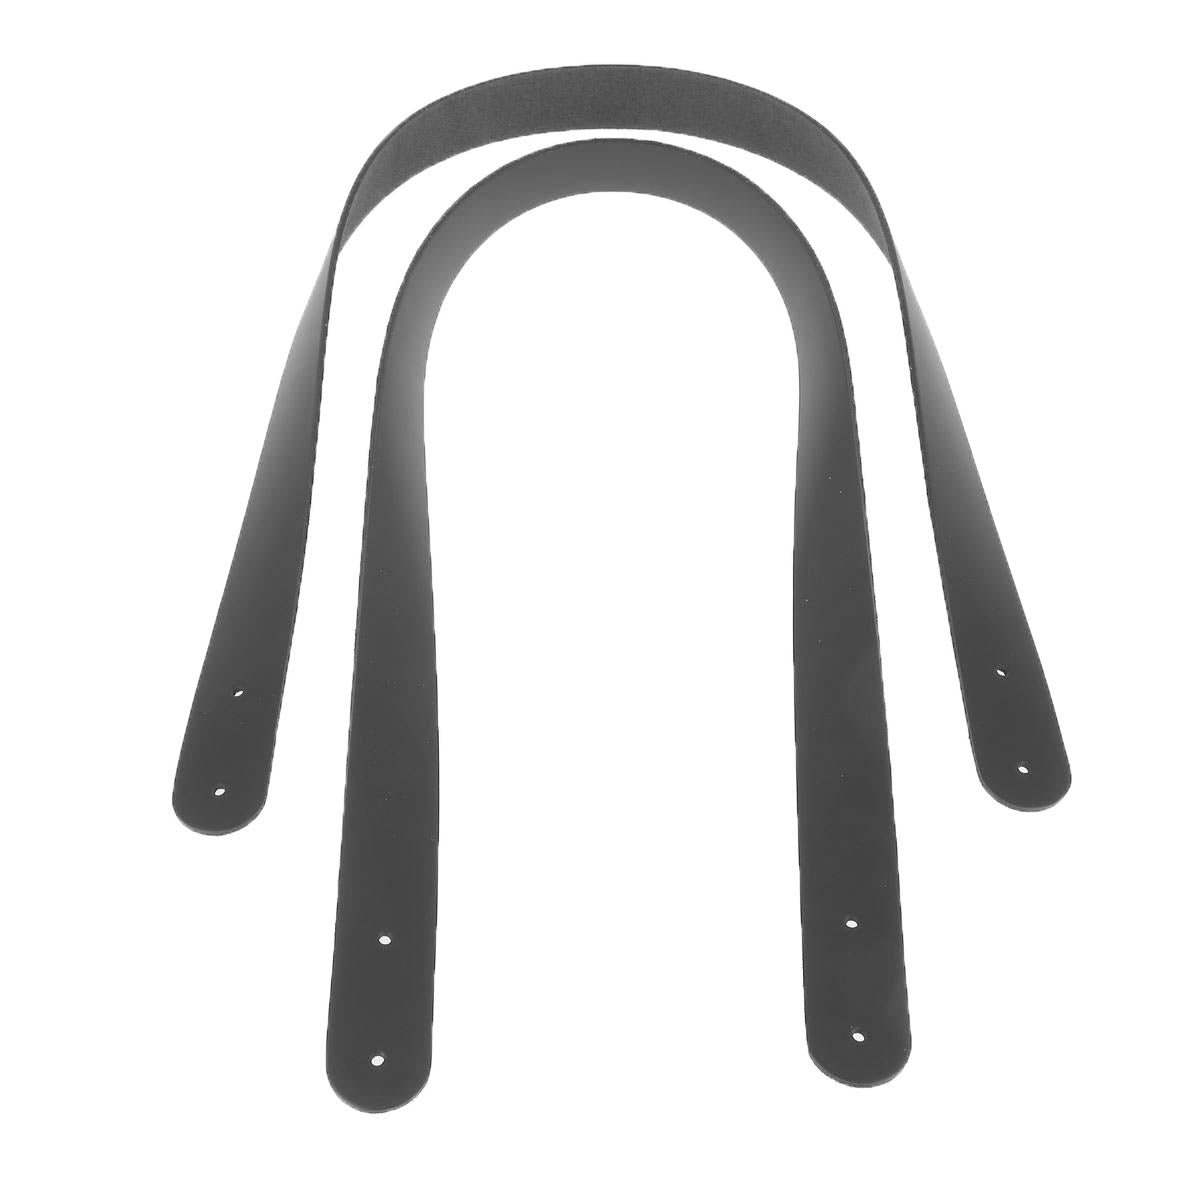
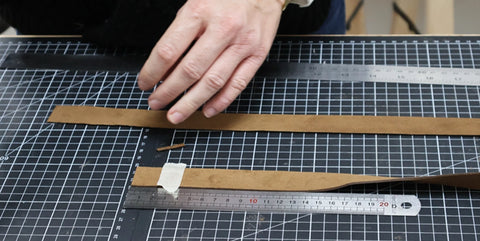
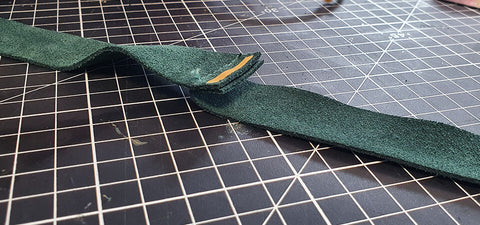
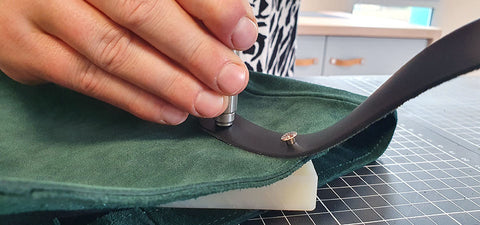
7. Prepare the straps (Version 2)
Watch the video to learn more about version 2 and how to sew the bag straps ⬇️
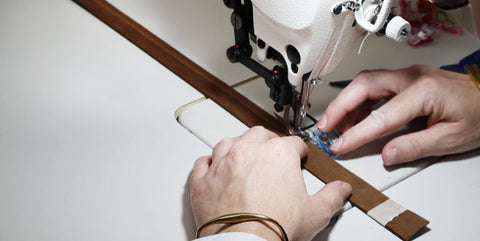
Take piece P14 measuring 71.5 × 14 cm and cut it in half to obtain two straps 7 cm wide. On one of the straps, place two strips of tear-resistant tape to prevent the leather from stretching.
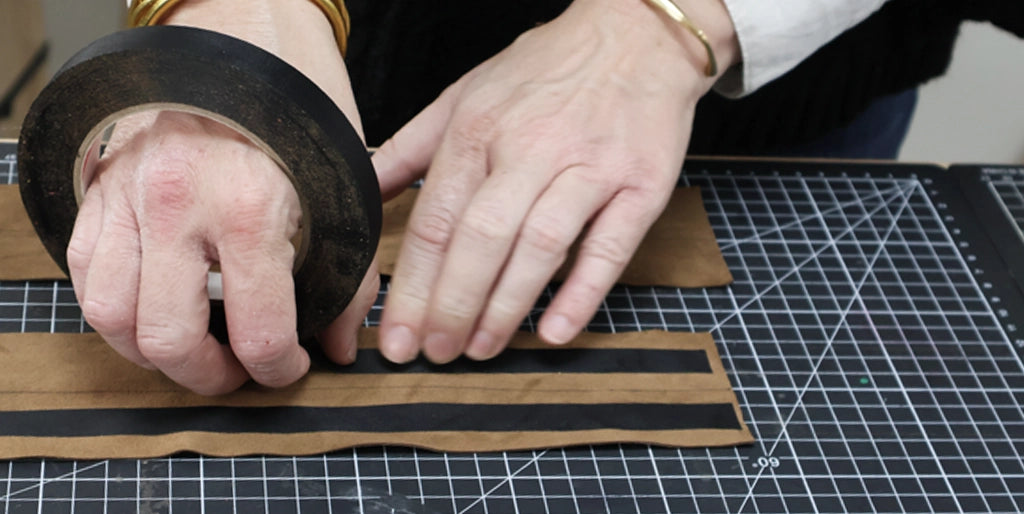
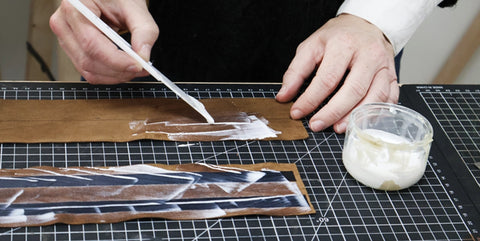
Apply contact adhesive for leather to the wrong side of both straps, then bond them together. Flatten the bond with a steel roller.
 |
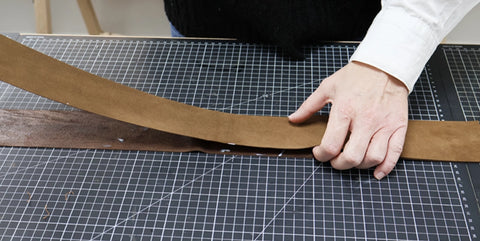 |
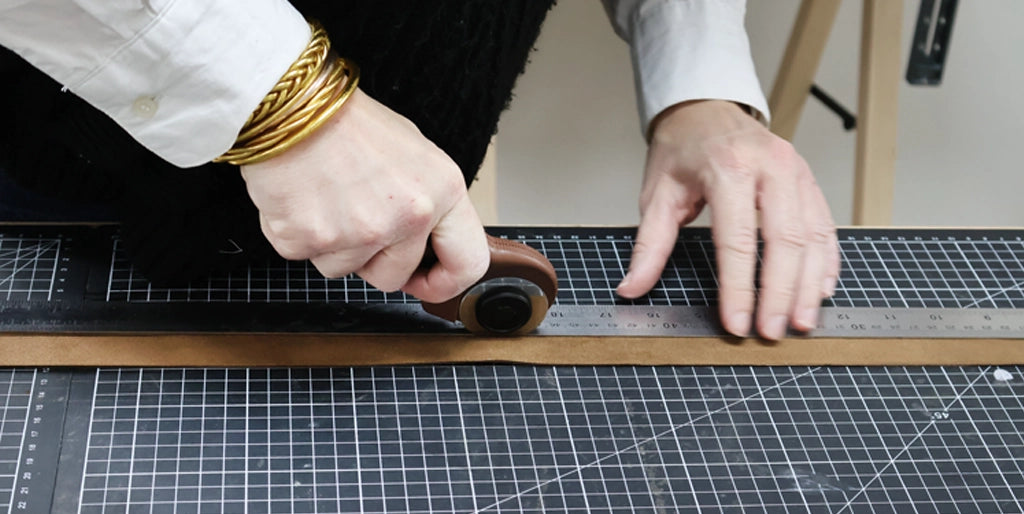
From this doubled rectangle, cut two straps measuring 70 x 2.5 cm.
Mark 4 cm from each end of the straps. Topstitch both straps 3 mm from the edge, stopping at the 4 cm marks.
 |
 |
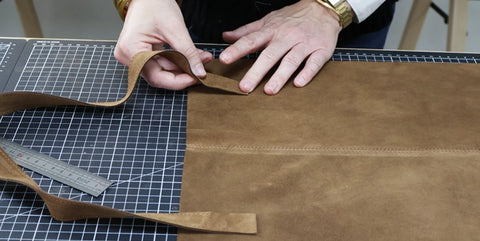
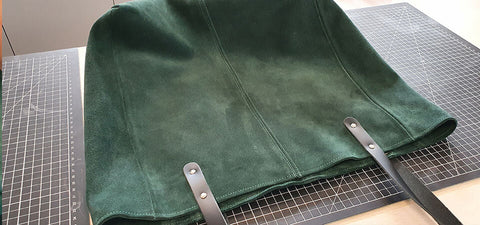
Position the straps using glue or double-sided tape at the locations indicated on the pattern on pieces P1 to P4. Sew the remaining 4 cm of the straps to the body of the bag (form a rectangle).
 |
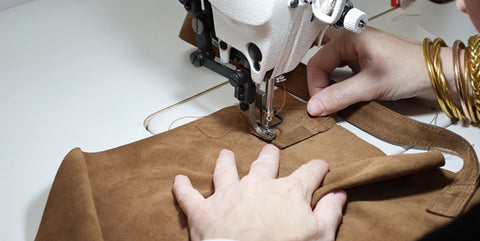 |
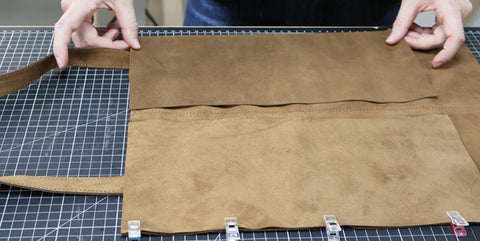
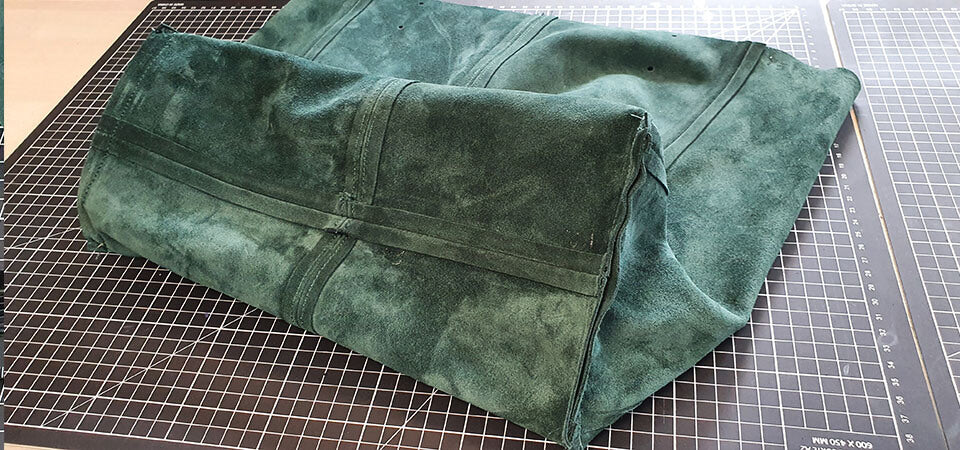
8. SEW THE SIDES
Using sewing clips, position piece P5 at the top of one of the long edges of piece P1/P3. Sew the side right sides together (at 1 cm). Always start sewing from the top to avoid any misalignment. Do the same for piece P6 on the other side.
 |
 |
Then, open the seams with double-sided tape.
 |
 |
9. SEW THE SIDES - FINISH ASSEMBLY
Position piece P2/P4 on the long edges of pieces P5 and P6. Sew the sides right sides together (always start sewing from the top). Then, open the seams with double-sided tape.
 |
 |
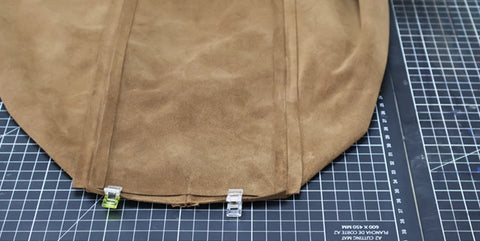
10. SEW THE BOTTOM OF THE BAG
Sew the bottom of the bag right sides together and at 1 cm. Then, open the seams.
Ensure that the seams overlap.
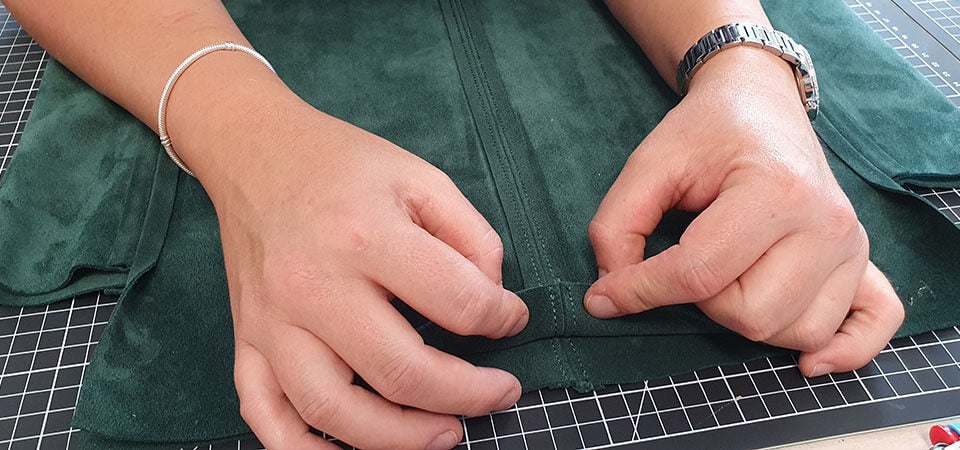
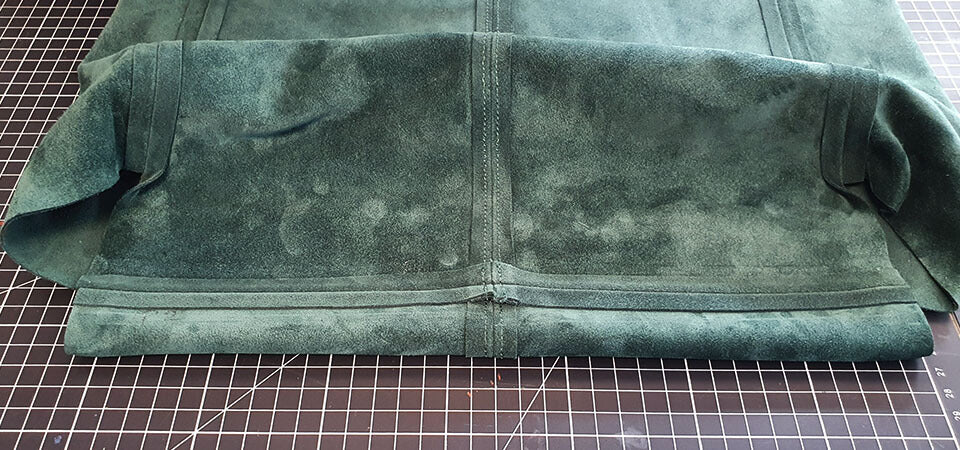
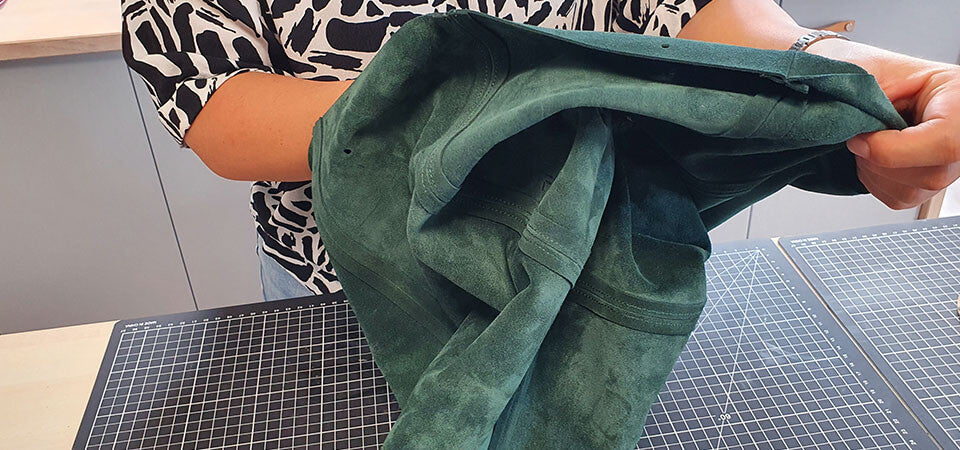
11. SEW THE CORNERS
Bring the corners of the bag together and sew right sides together. Do not open the seams as in the previous steps. Trim if necessary to even out the corners.
 |
 |
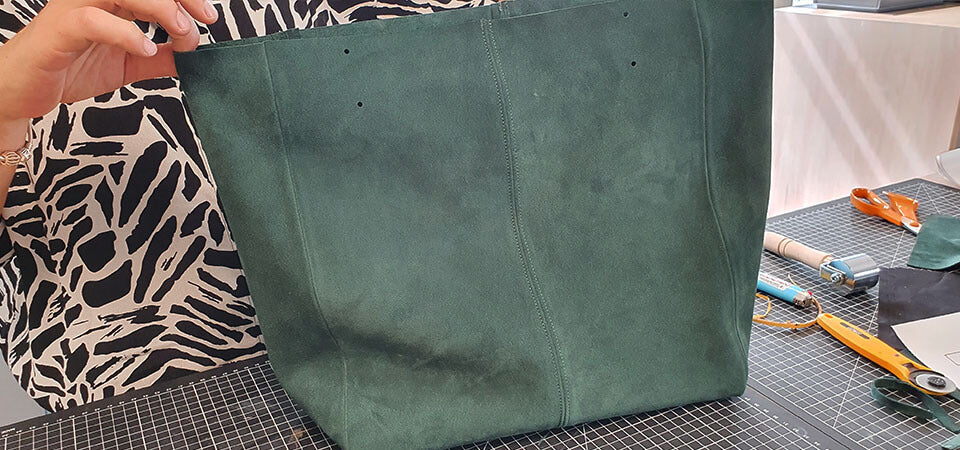
Turn the bag right side out.
OPTIONAL
BEFORE SEWING THE LINING
To give your tote bag a more "square" shape: place magnetic snaps or strong press studs on each side of your bag, approximately 5 cm from the top and 4 cm from the side.
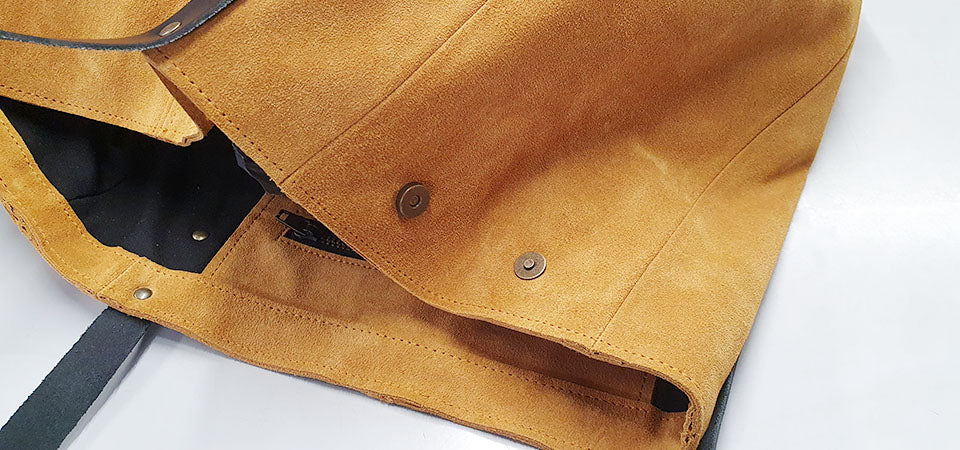

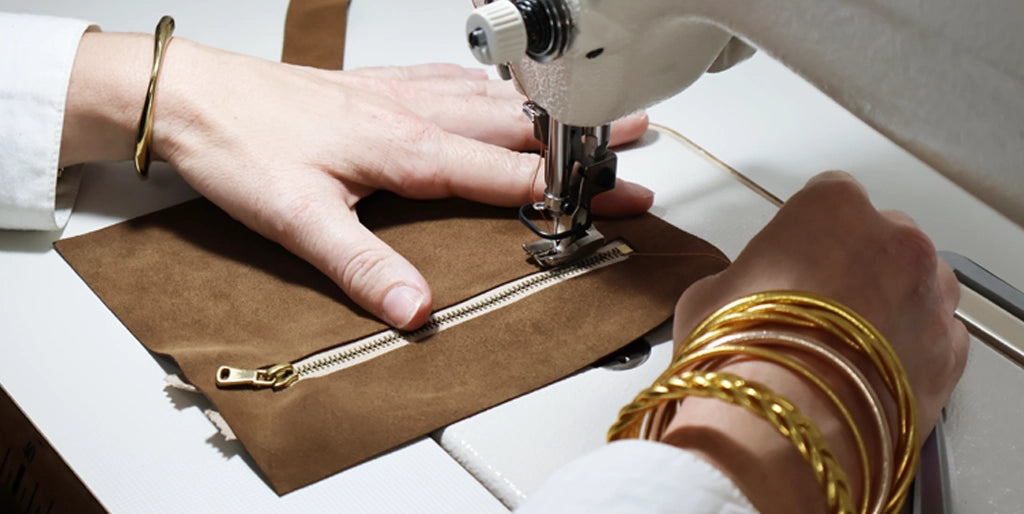
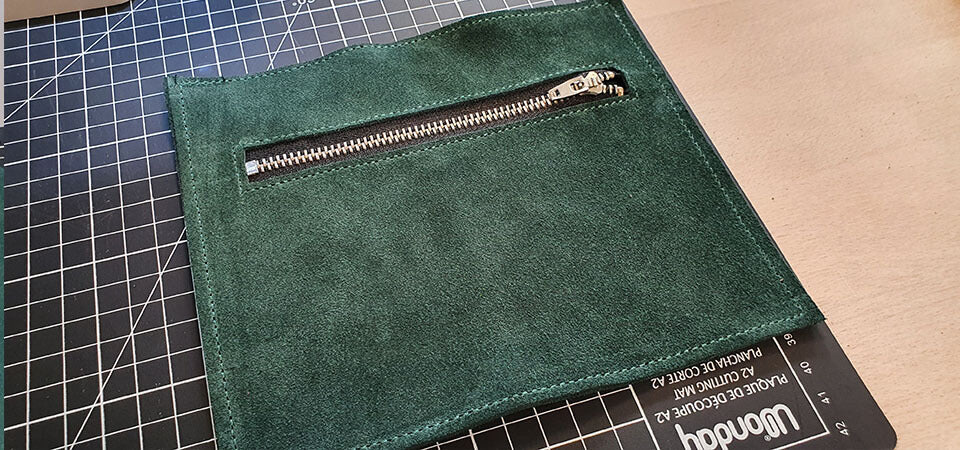
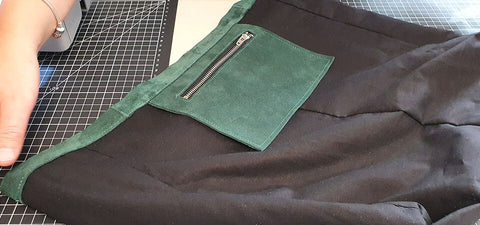
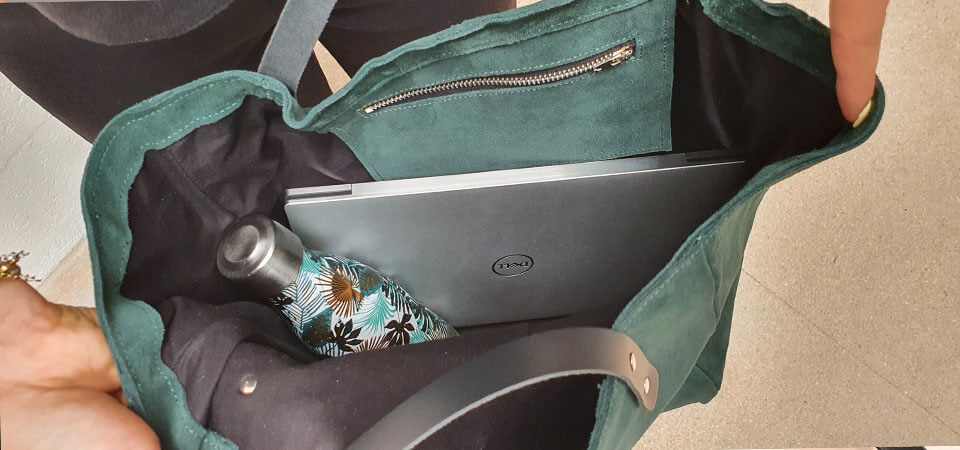
12. SEW THE ZIPPER
Position the zipper with double-sided tape at the location indicated on the pattern (P7). Sew the zipper with a zipper foot.
Place P8 on P7, wrong sides together. Topstitch all sides of the pocket.
OPTION: It is also possible to sew an invisible/slit pocket directly into the lining.
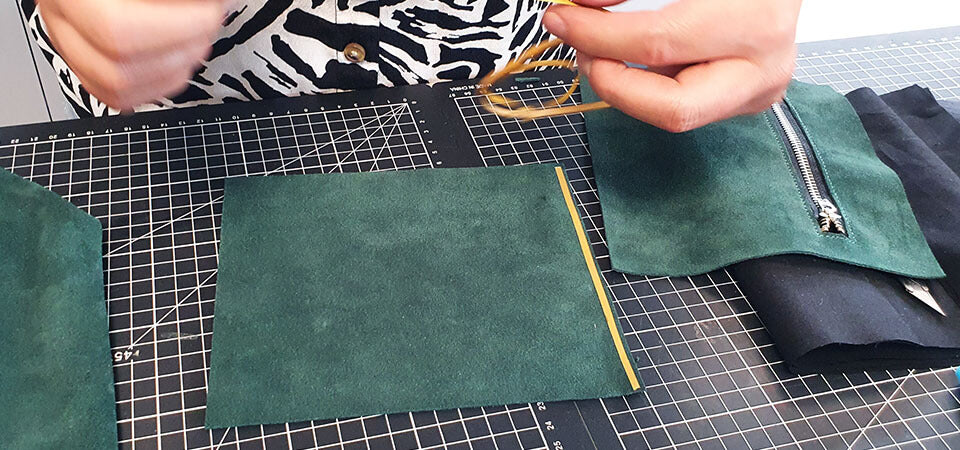
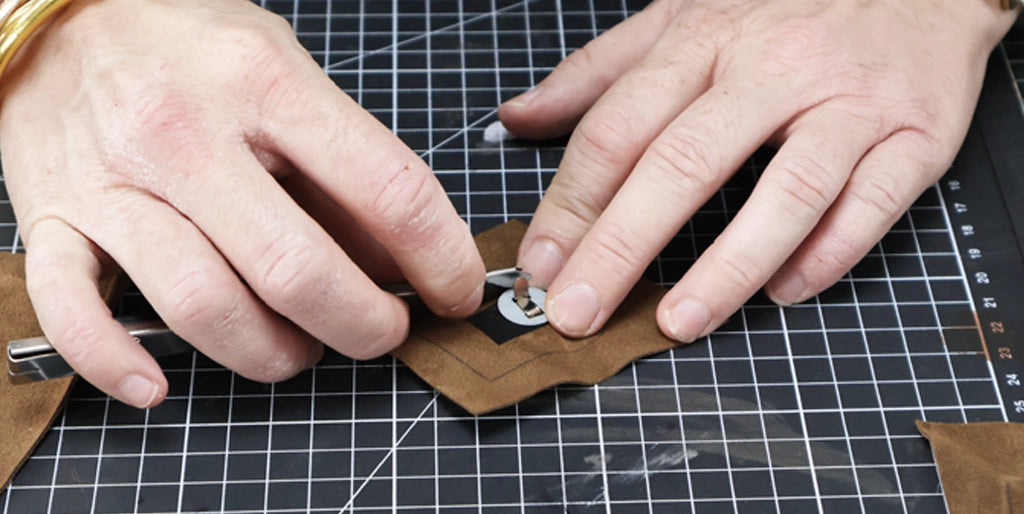
13. ATTACH THE MAGNETIC SNAPS FOR CLOSING THE BAG
Trace the dotted lines on the right side of two P13 pieces. Place tear-resistant material on the wrong side and attach a magnetic snap in the center of the P13 tabs. Adhere the tabs (with the other two P13 pieces) then trim. Stitch 3 mm from the edge except on the upper width (it will be sewn in the next step).
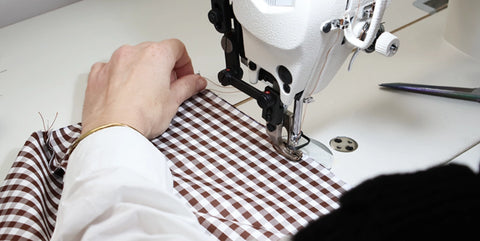
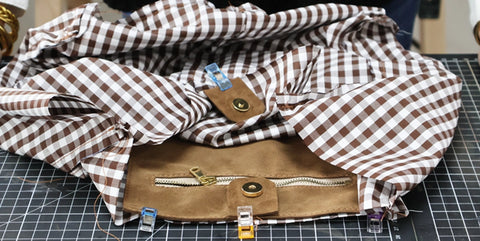
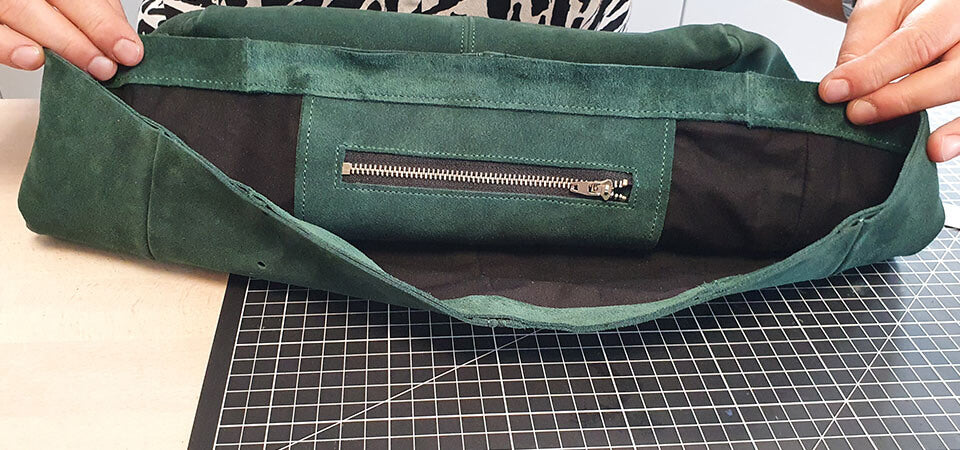
14. Sew the lining
Assemble the different pieces of the lining, in the same way as the leather pieces, without topstitching and without opening the seams (this is not necessary, unless your lining is very thick). Before completing the assembly, sew the pocket and the P13 tabs to the top of the lining and on the right side. Make sure they are well centered.
 |
 |
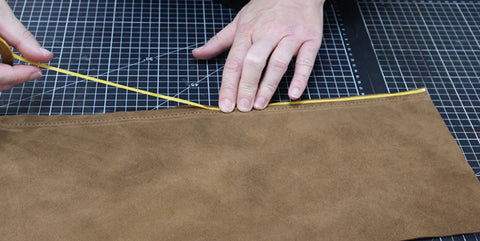
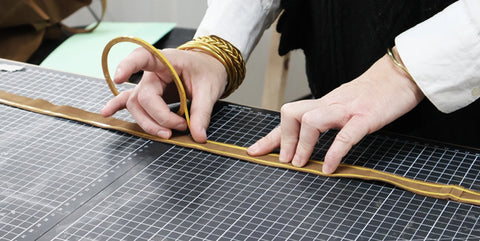
15. ASSEMBLE THE FACING
Assemble the 4 strips (P9/P10/P11/P12) widthwise, right sides together, to form a circle. Do not fully sew the clean finish strip to allow for length adjustment in the next step. Finally, open the seams.
 |
 |
16. POSITION THE STRIP
Apply adhesive tape 1 cm from the edge of the clean finish strip. Then, gradually position the lining onto the adhesive tape. Trim any excess strip and assemble.
 |
 |
Sew the clean finish strip to the lining at 0.5 mm.
 |
 |
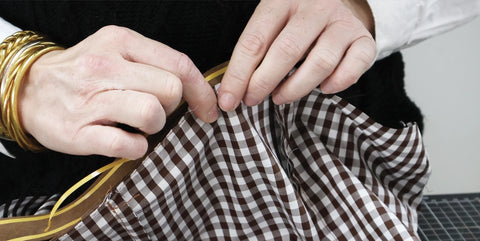
17. GLUE THE STRIP TO THE TOP OF THE BAG
Position the lining in the tote bag and glue the strip with adhesive tape.
Topstitch the top of the bag.

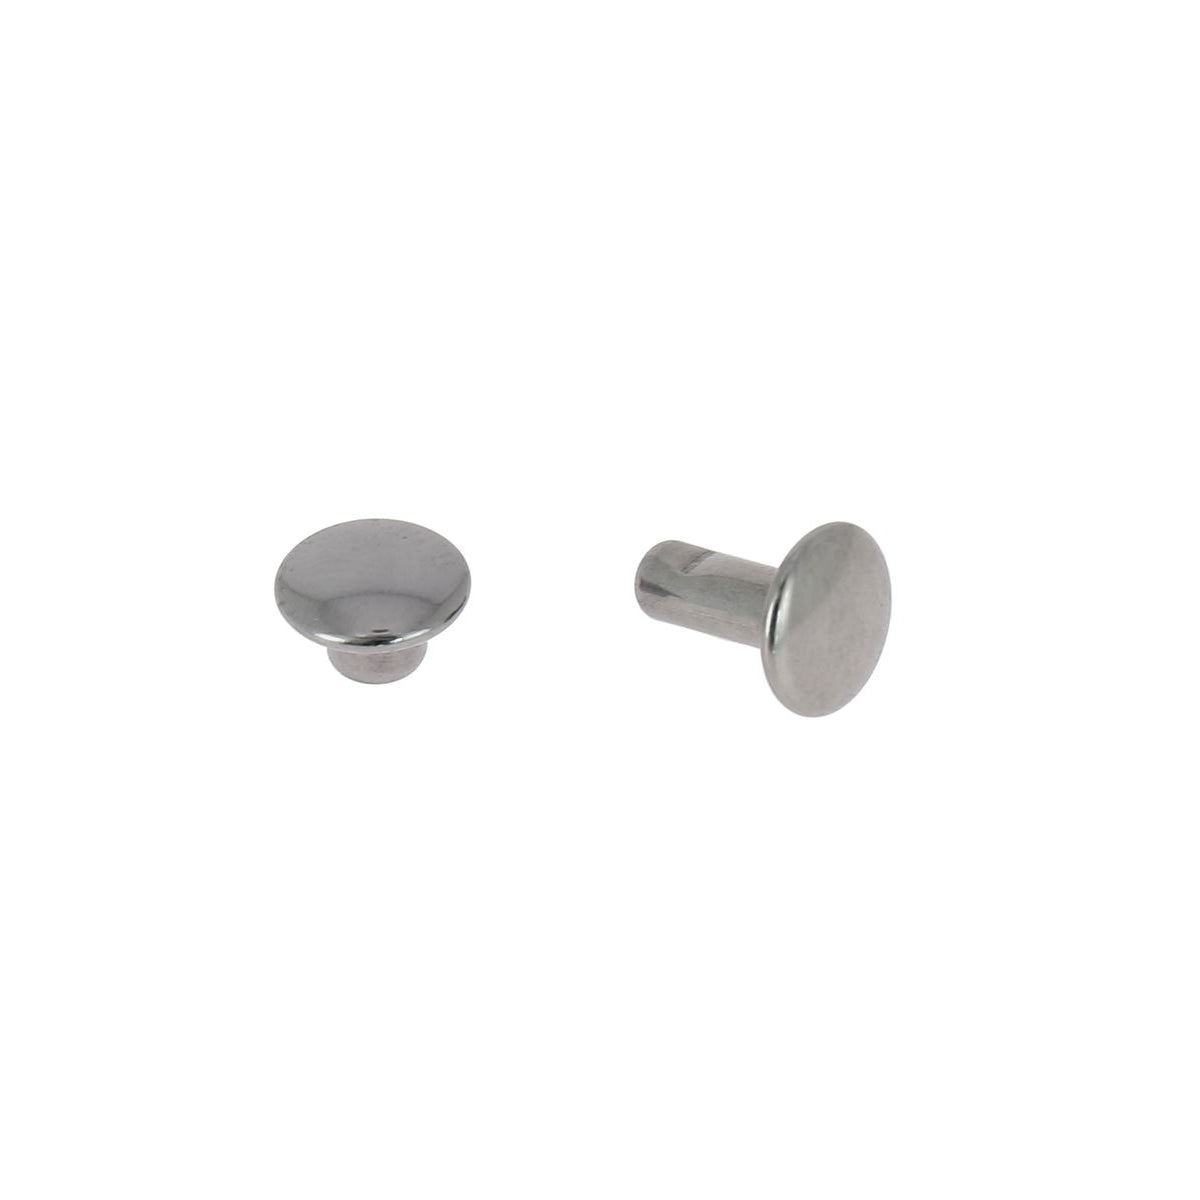
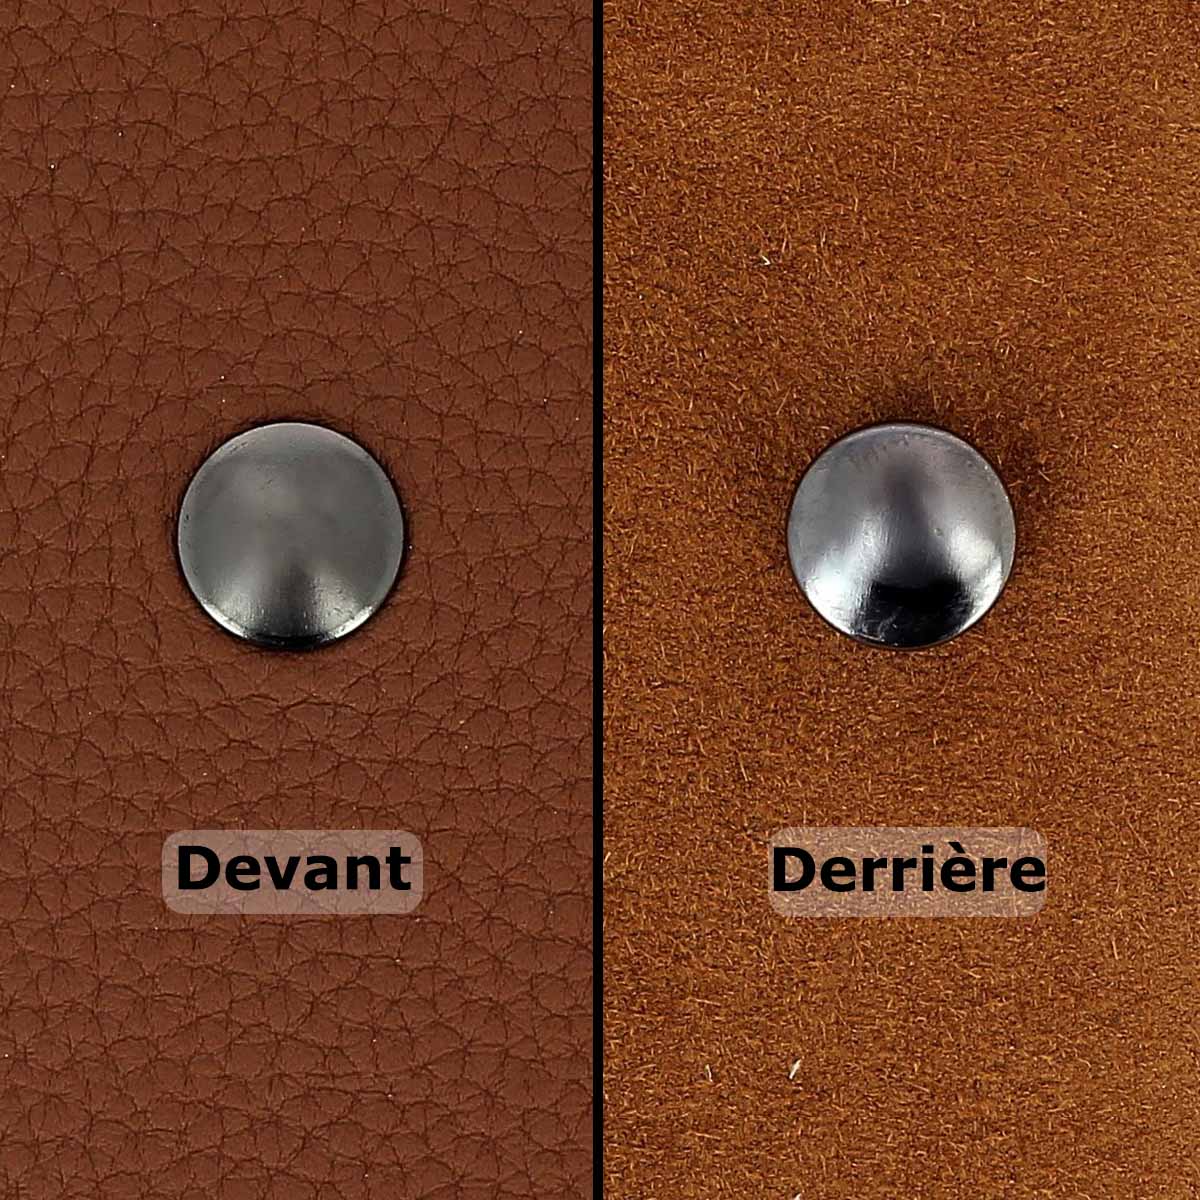
18. RIVET THE HANDLES (VERSION 1)
Rivet the handles with your chosen setting tool and T3 double cap rivets (for version 1 only).
 |
 |
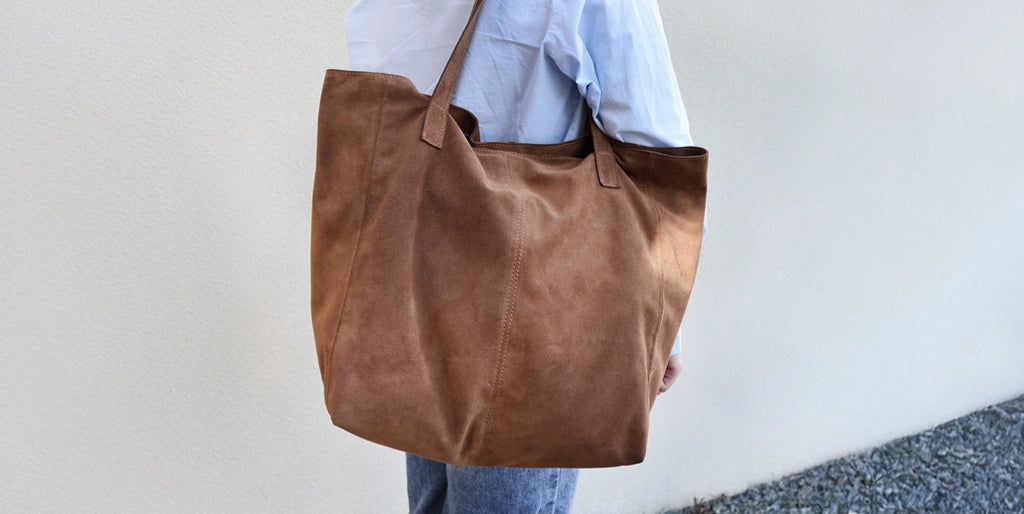
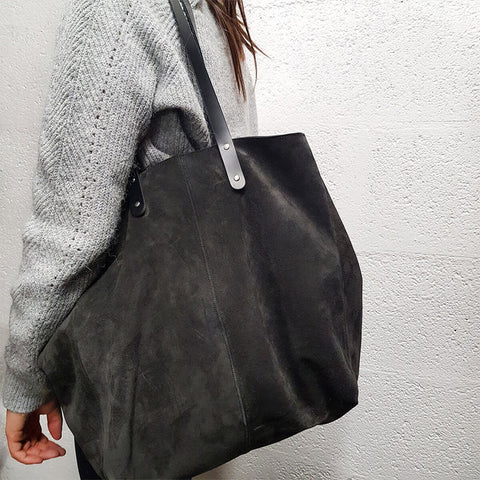
YOUR TOTE BAG IS FINISHED!
Tips: remember to waterproof your bag with a water-based spray.
 |
 |
DISCOVER OUR COMPLETE KITS
 |
 |


2 comments
Deco Cuir
Bonjour,
C’est une évolution qui a été faite récemment sur notre sac cabas (c’est pour cela que vous ne le voyez pas dans la vidéo originale). Je vous invite à regarder cette vidéo 😊 : https://youtu.be/YYCRl1cjMKk?si=MXlsqHPMscfrF5Hb&t=64
Cela est normalement indiqué à l’étape 12 sur le patron. Il faut mettre le top magnétique au centre des pièces P13. C’est aussi l’étape 13 sur notre article de blog.
Bonne journée,
L’équipe Deco Cuir
navarro
Bonjour, je viens d’acheter votre kit Cabas et dans les explications, je n’arrive pas à comprendre où va l’aimant il est dans le montage mais il n’apparaît pas dans vos photos finale et même dans la vidéo que j’ai regardé, il n’apparaît pas du tout. Merci