
HOW TO HAND STITCH LEATHER?
VIDEO: SADDLE STITCH TECHNIQUE
1- Glue the leather pieces to be assembled with water-based leather glue – aquagum or neoprene depending on your creation (in a thin line, about 4 mm). Apply glue to each piece: contact adhesive. Do not stick immediately, let it dry for 5/10 minutes.

2- After assembling the pieces, draw the stitch line with a creaser, groover, or wing divider between 3 and 5 mm from the edge. The stitching should not be too close to the leather edge.

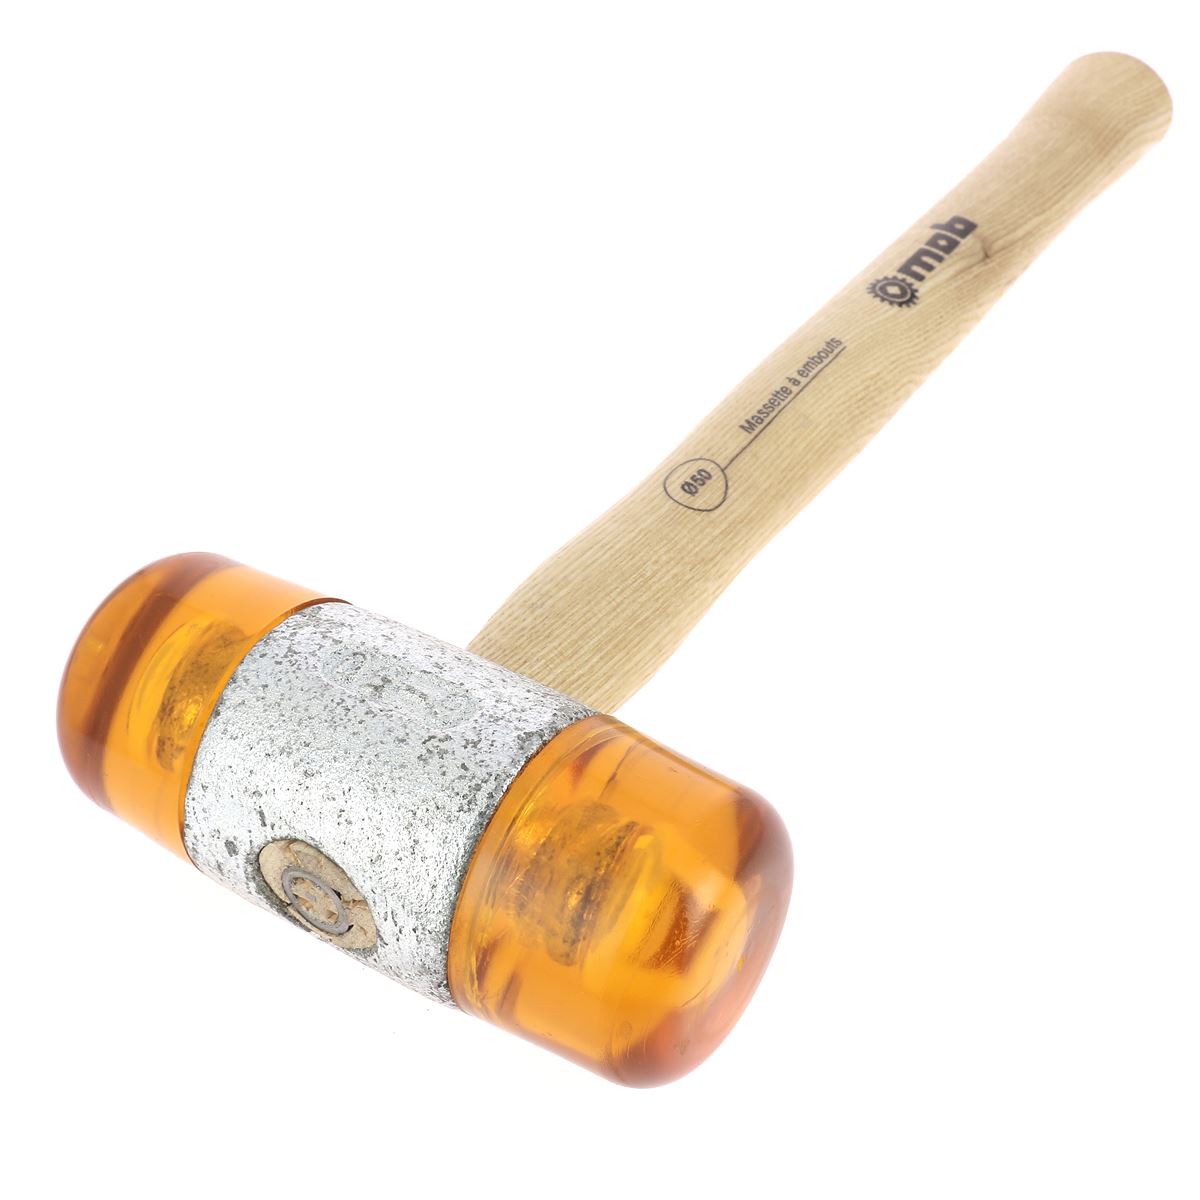
3- With a mallet and a pricking iron: mark the stitch points. The goal is not to pierce the leather completely but only through part of its thickness.
We chose to mark the points next to the drawn line to maintain a decorative filet (only possible on vegetable-tanned leather). For beginners, you can mark the points directly on the line.
We recommend using a plastic or polymer hammer so as not to damage your tools.

4- Cut a linen thread: generally equivalent to 4 or 5 times the length of the stitch line. If you have to do a long seam, take an arm's length = arms outstretched so as not to have to handle meters of thread. An arm's length corresponds to the "maximum amplitude" of your movements (depending on your build).
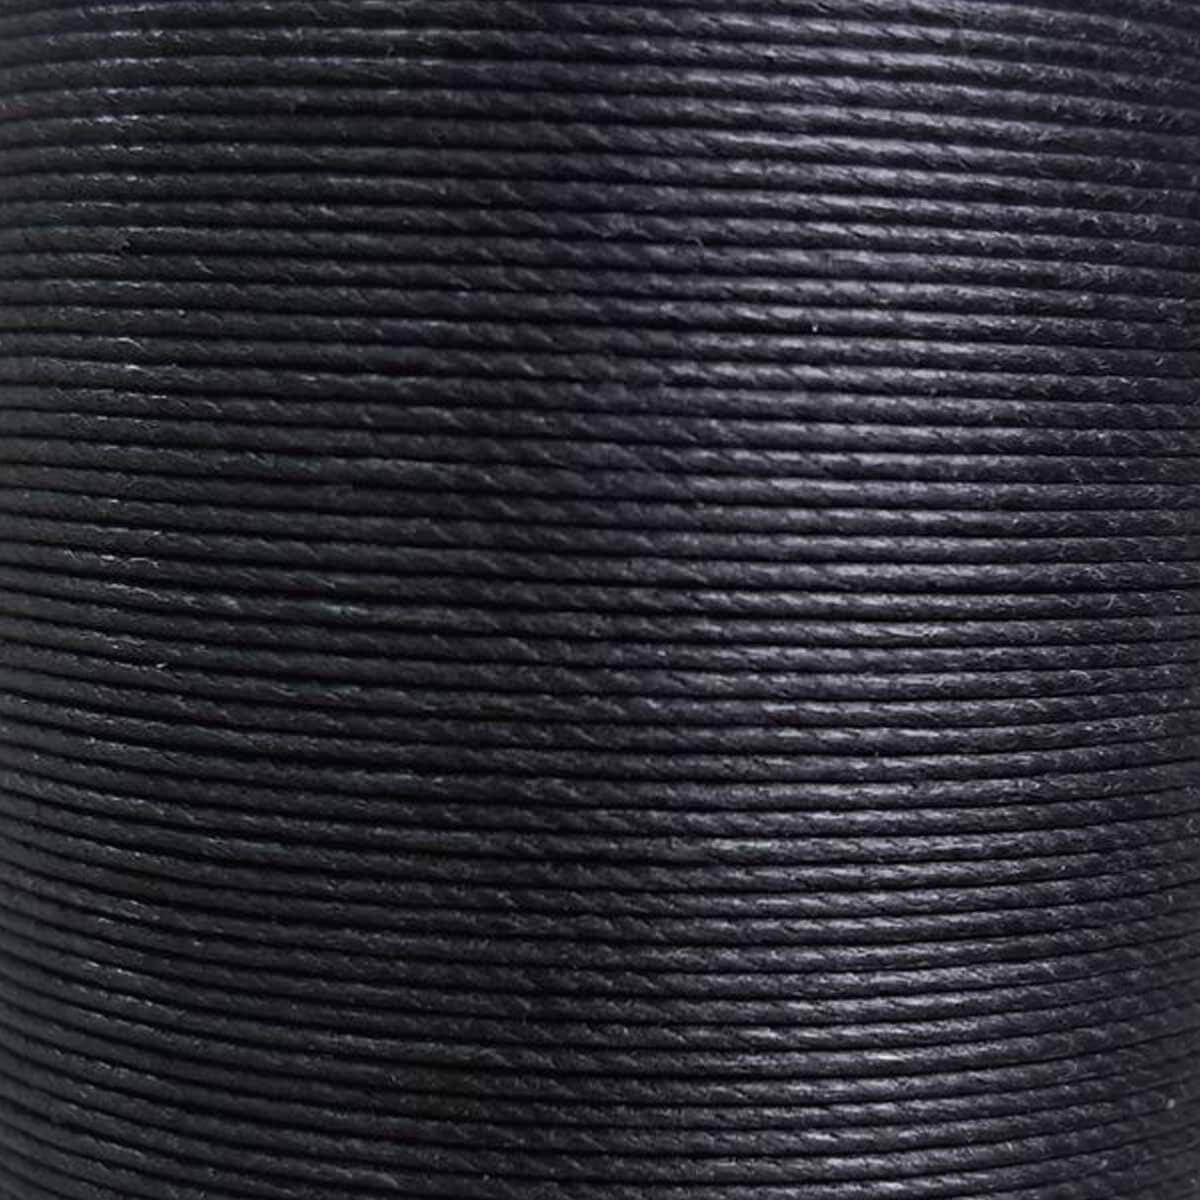
Wax the thread with beeswax: pass it 3 times and wipe it. It is important to wax the thread before sewing to bond the thread fibers, protect it, and prevent it from knotting.
Thread a needle at each end of the thread:
- Pierce the thread at needle height, then pierce it twice.
- Flatten the end of the thread and pass it through the needle's eye.
- Pull the thread to tie the knot (see photo).
- Do the same to thread the other end of the thread onto the second needle.
Don't have enough thread to finish your stitching? We invite you to watch our video (starting at minute 14) where we explain how to make a splice. Purists will tell you it's forbidden, but it can sometimes be useful!
 |
 |

5- Clamp the leather in the jaws of the stitching pony / sewing clamp and let the stitch line extend about 4 mm above the jaws.

6- Pierce the leather with the awl (diamond awl): raise your elbow to the height of the stitch line and form a right angle (90°) to the piece. Be careful to respect the piercing angle with the diamond awl, otherwise you risk not having a beautiful stitch.
 |
 |
7- Start saddle stitching. Always sew towards yourself.
For aesthetic reasons, in our video, we start our stitching at the 4th point to make 3 double stitches and thus have symmetry with our ending stitch (the 3 backstitches) => only do this if the seams do not meet.
You can also simply start your stitching from the first point by evening out the threads or by making a saddle stitch (when you are at the edge of a piece - e.g., cardholder).
- Left hand: pass the needle, using the awl's iron (photo n°1).
- Right hand: form a cross and pull the needle (photo n°2).
- Pull the threads towards you to avoid tangles* and pass the needle (right hand) in front of the thread you just passed (photo n°3).
- Take the thread from the left side and pass it over the needle outwards: make a comma shape (photo n°4).
Our advice for beautiful stitching: practice! The movements must become automatic.
*Tangle: when one thread enters the other thread (forms a kind of knot): a mixture of threads.
 |
 |
 |
 |
8- Pull on each needle to tighten the stitch: left hand upwards and right hand towards yourself - diagonally at about 45° to the leather. The stitch must be tight (use your thumbs) and have the same tightening force for each stitch.
 |
 |
9- Make 3 backstitches with a round awl to enlarge the holes: do not make a comma / pass the thread over the needle. Cut the thread flush and apply a dot of glue on each side.

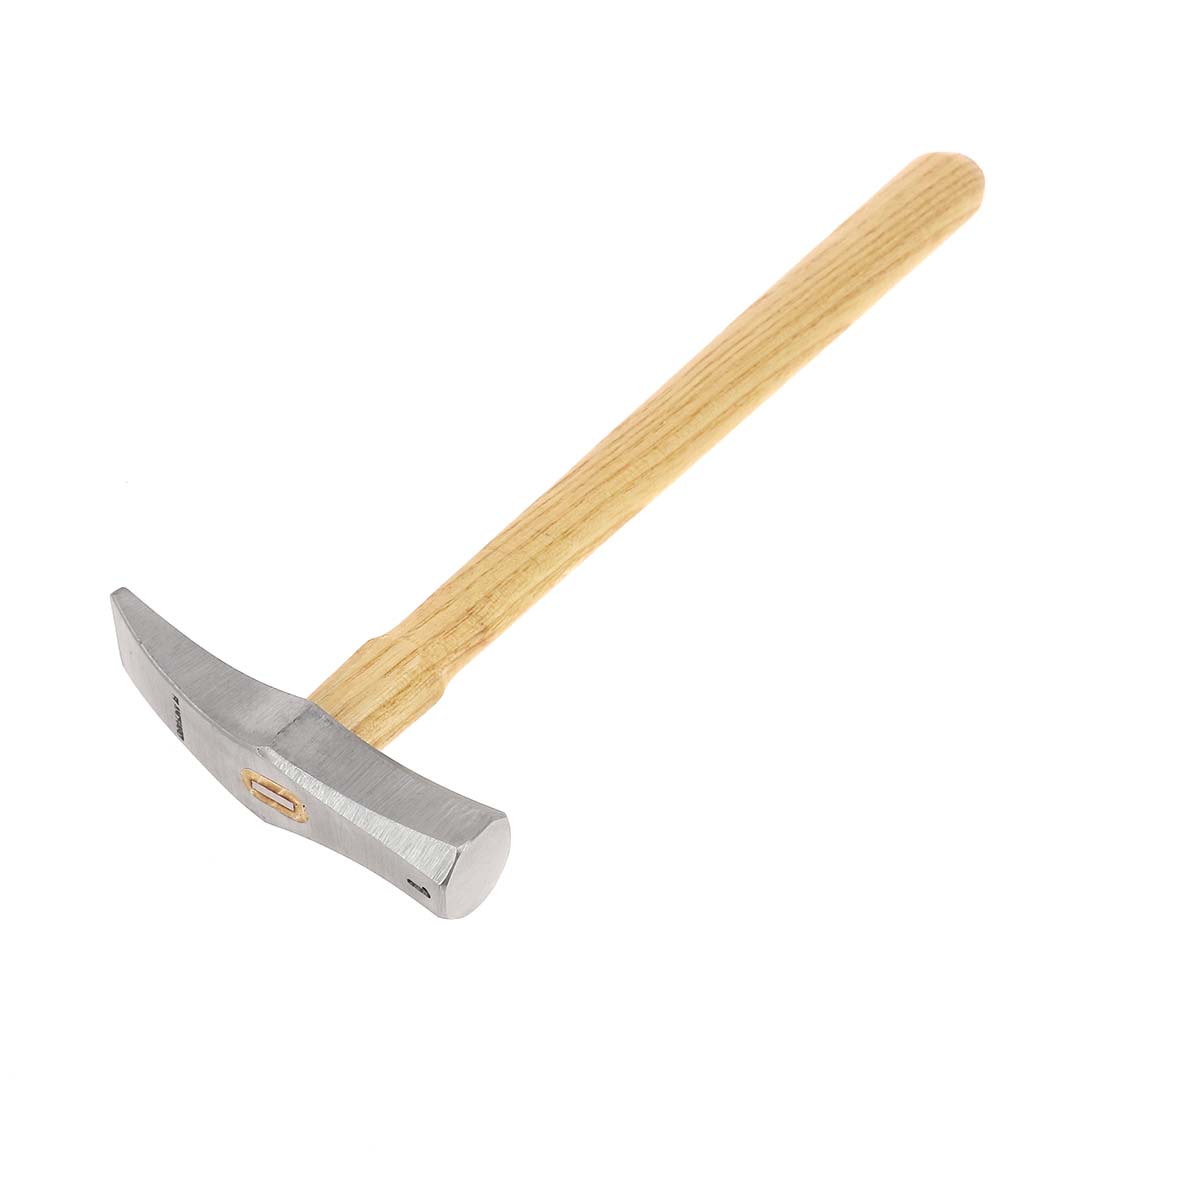
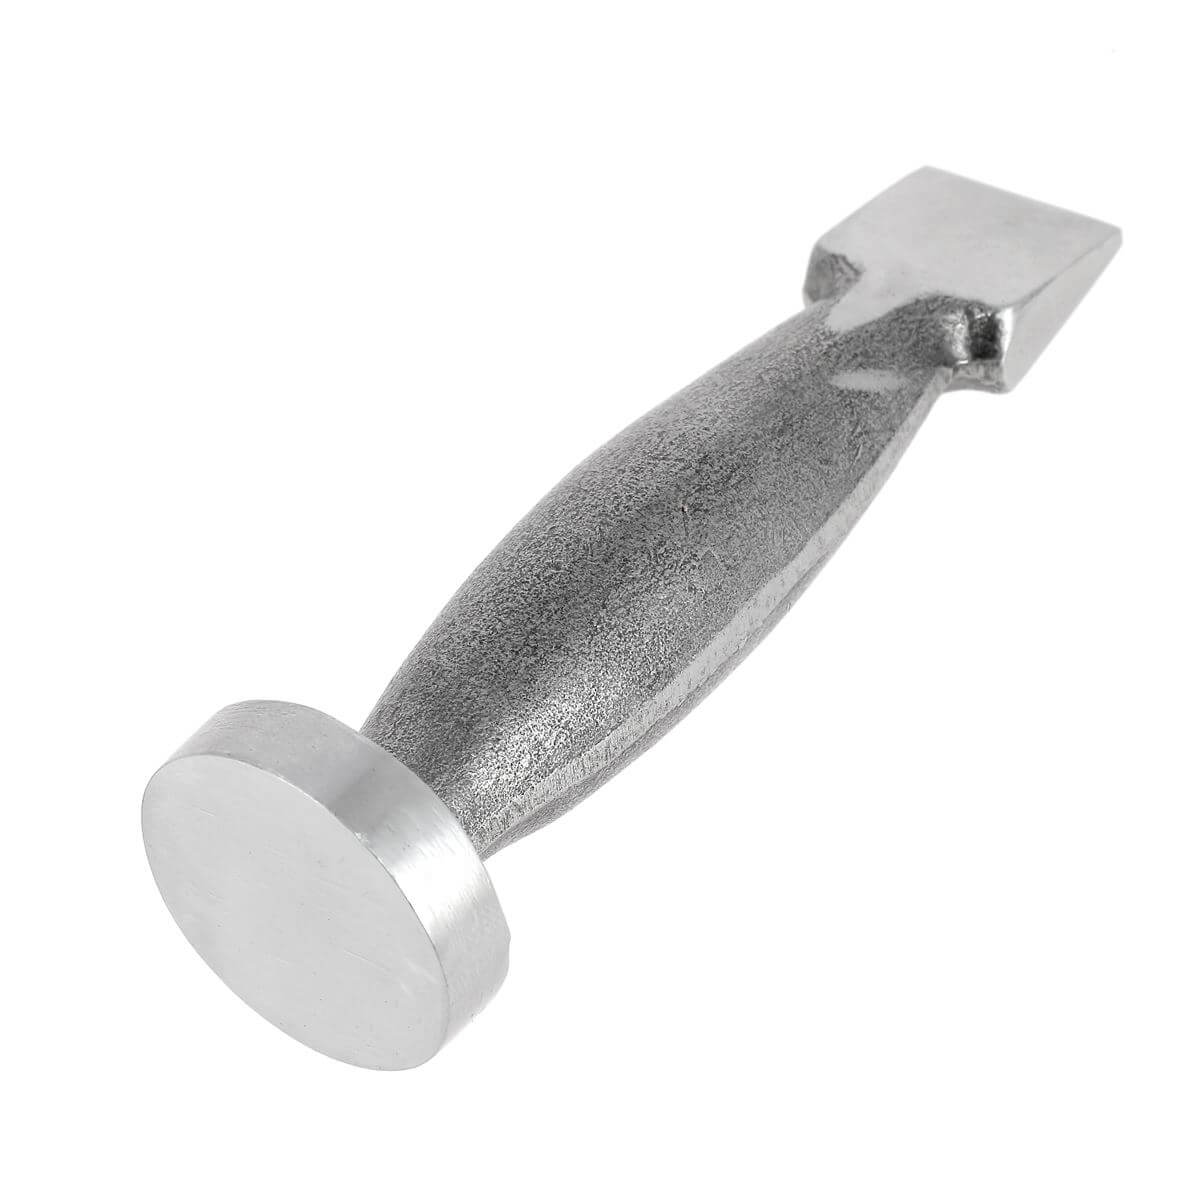
10- Hammer the seam with a riveting hammer or a joining hammer: pay attention to the striking angle and do not hit too hard so as not to damage/mark the leather.

All that's left is to work the edges with an edge beveler, then an edge finish or finishing gum (tokonole / tragacanth gum).
WHAT THREAD AND NEEDLE TO CHOOSE FOR LEATHER SEWING?

The most commonly used thread diameter for hand sewing leather is:
For leather goods (handbags, satchels…)
- 632 – Fil Au Chinois
- M50 – Meisi
- Ø 0.55 mm
For small leather goods (cardholders, wallets…)
- 832 Fil Au Chinois
- M40 – Meisi
- Ø 0.45 mm
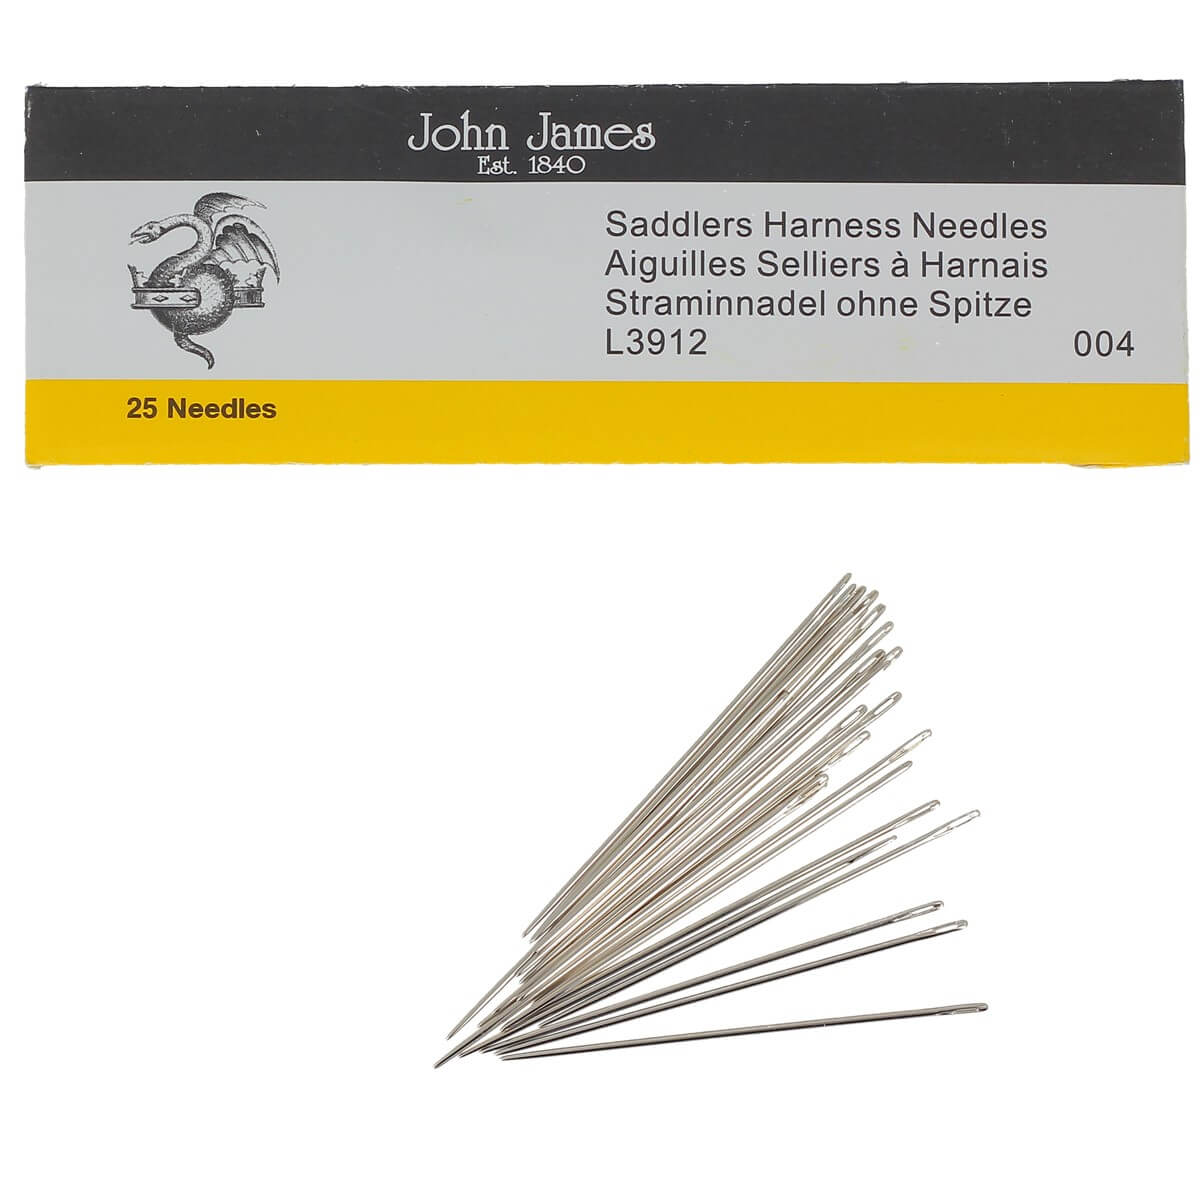
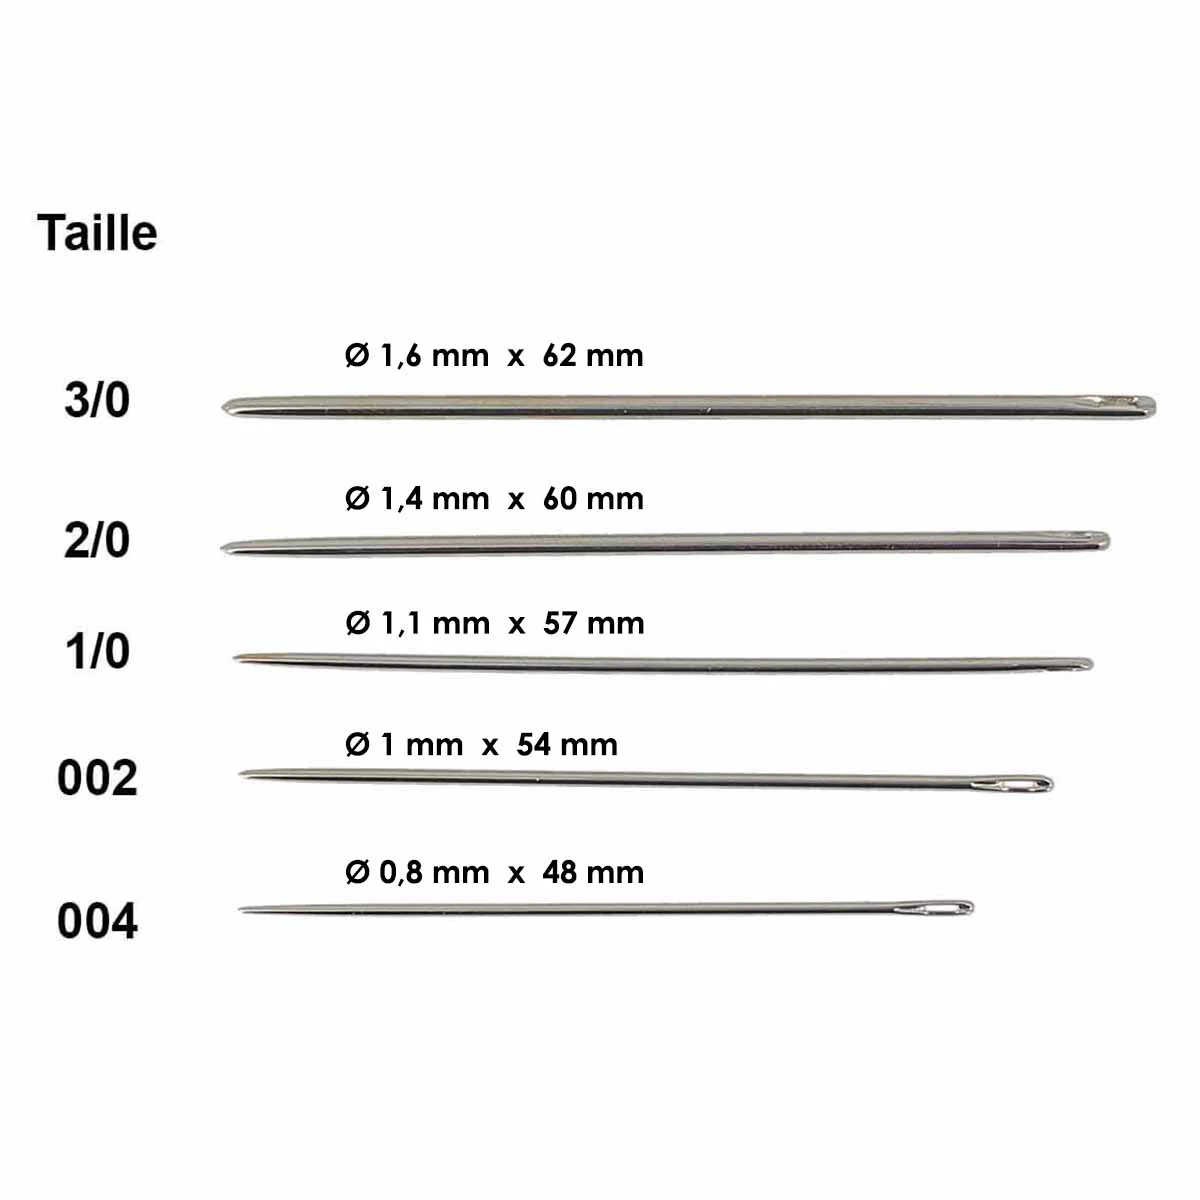
The needle, with a round tip, reference (L3912) from Deco Cuir is size 002 - Ø1 mm. You can use this needle for all your "standard" leather goods creations. For small leather goods, prefer size 004 - Ø0.8 mm.
To learn more about choosing the right needle and thread for leather sewing, we invite you to consult our guide:
ARE YOU LEFT-HANDED?
We invite you to acquire the Atelier Haptique book "Saddle Stitch Techniques - Leather Goods" which details the specific steps of saddle stitching when you are left-handed.

TOOLS NECESSARY FOR SADDLE STITCHING
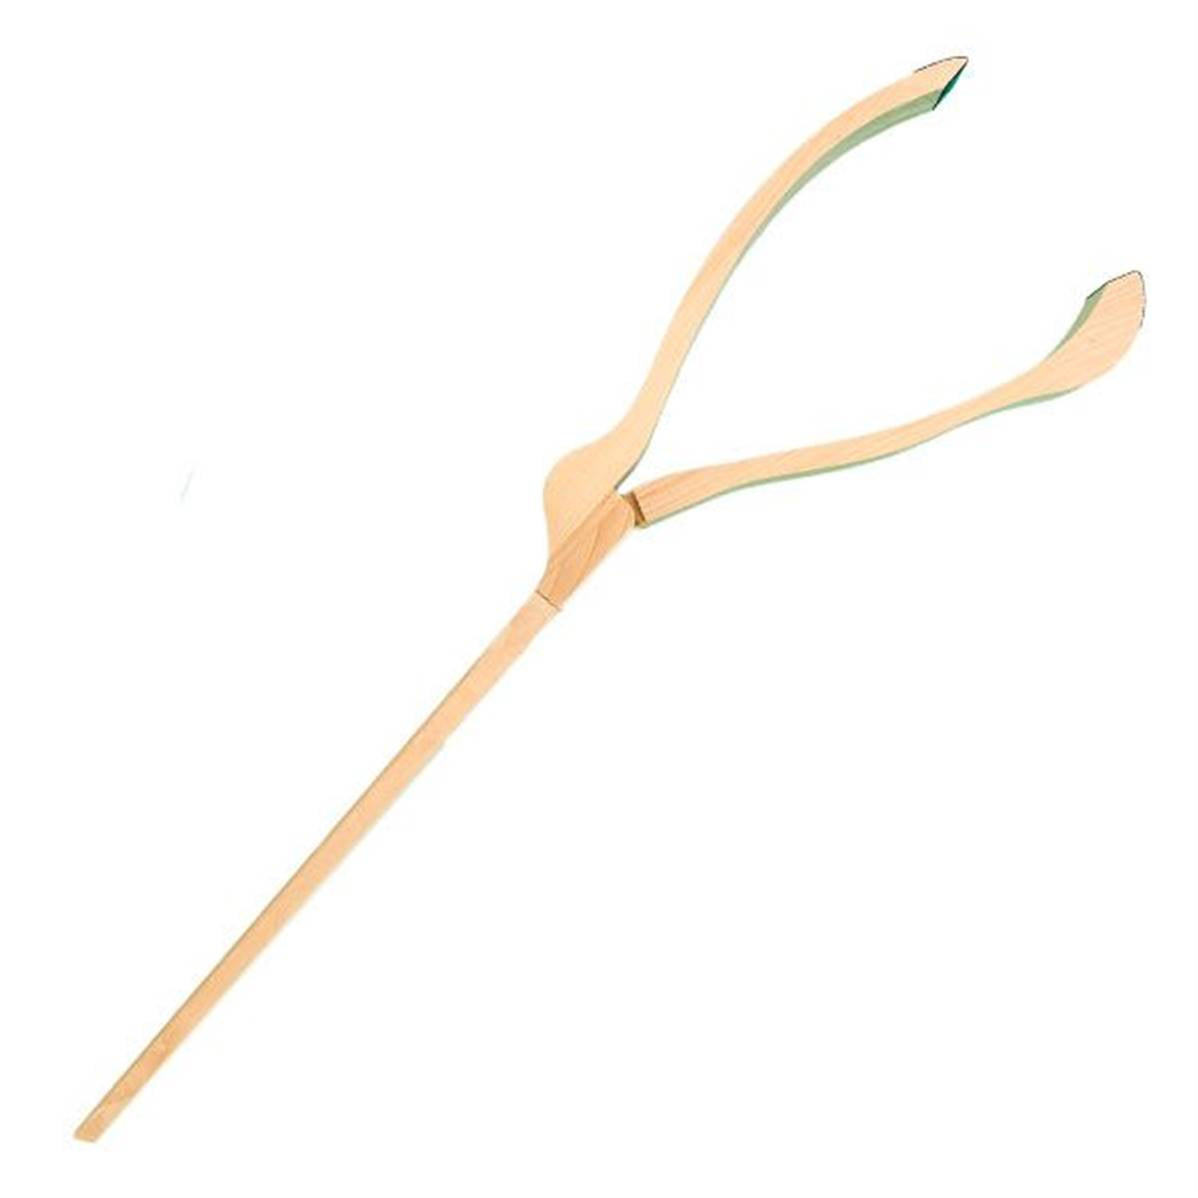
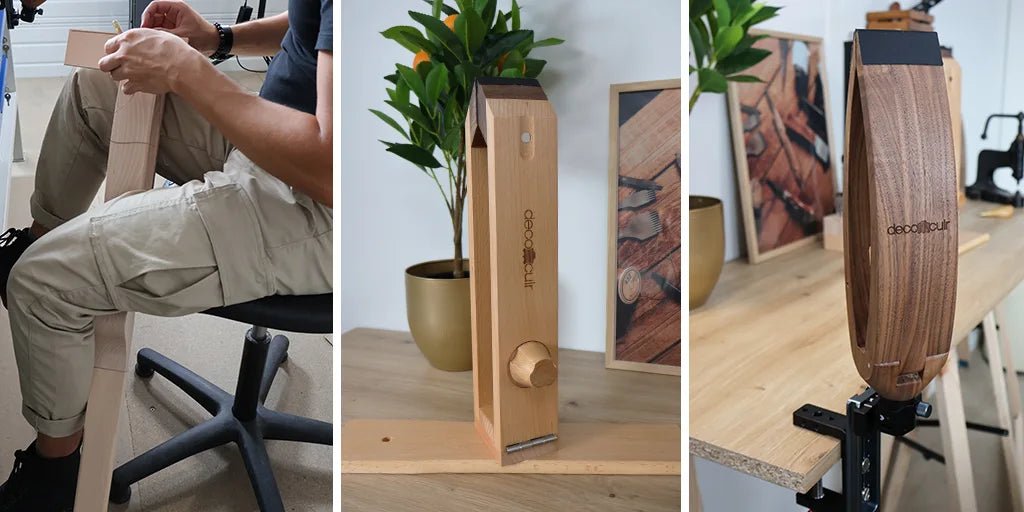
STITCHING PONY
A stitching pony is essential for hand sewing leather because it acts as a third hand to hold the leather piece. The pony is positioned between your legs. We advise you to protect the jaws of your pony with self-adhesive leather to prevent the diamond awl from damaging it. We also recommend placing a small 10 cm block under your feet for better pony stability.

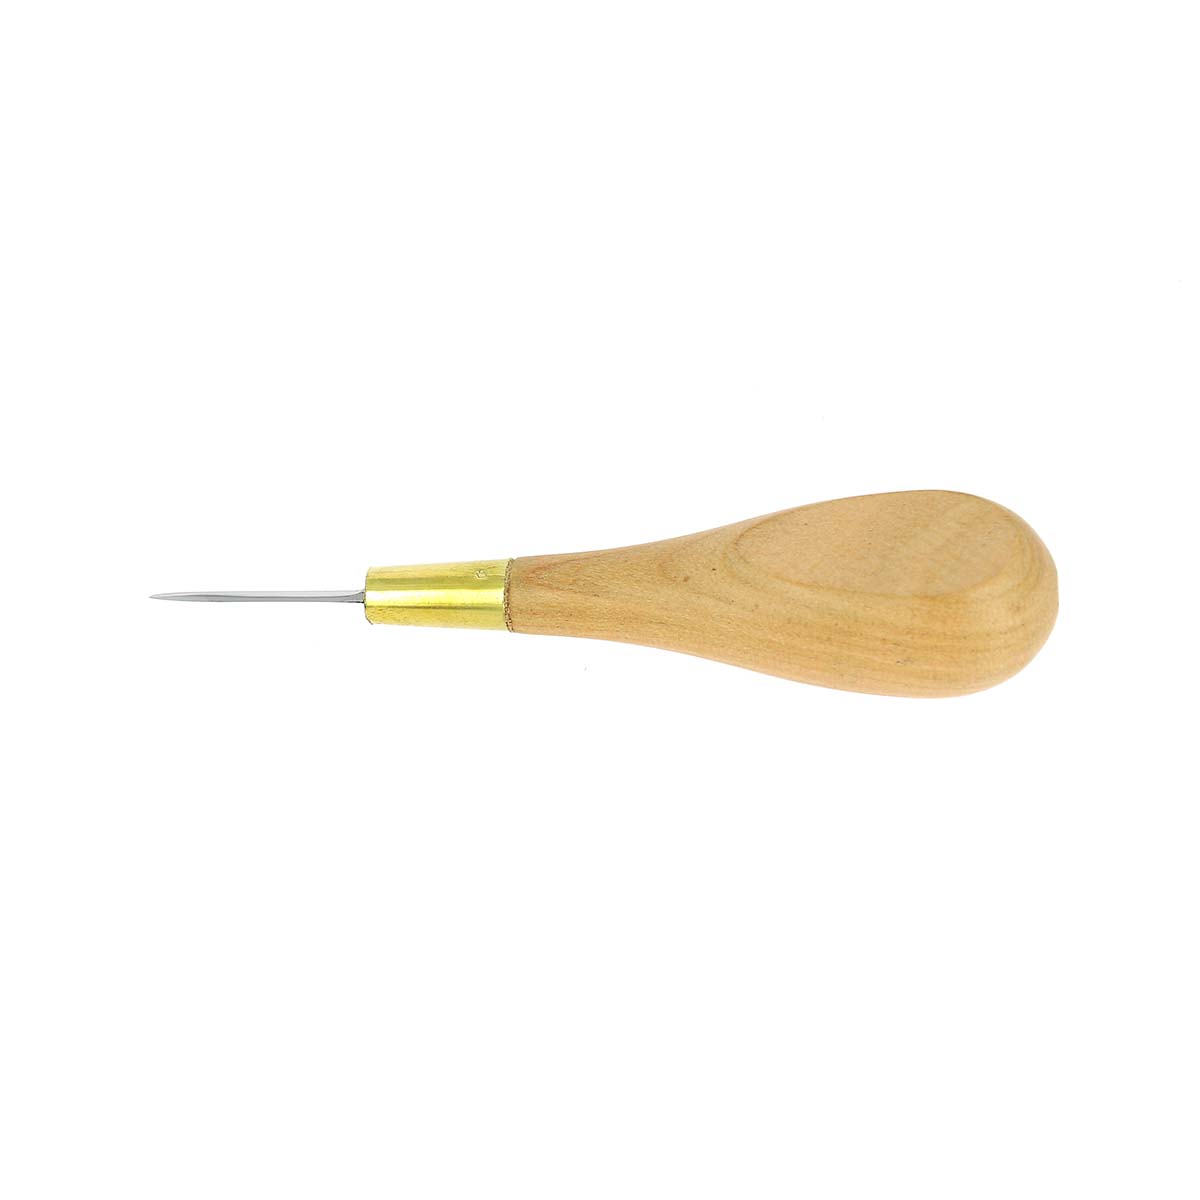
AWLS
A round awl allows you to enlarge holes without breaking/damaging the thread, helping needles pass, especially when starting and finishing stitching.
A diamond awl, also called a pricking awl, is used to pierce leather before saddle stitching (hand sewing leather). It is one of the most personal tools for a craftsperson, as the handle can be adapted to their hand.
Tip: remember to sharpen your awl well to avoid forcing it and damaging your leather.

HOW TO SHARPEN A DIAMOND AWL?
To achieve quality work, you need quality tools. Therefore, remember to regularly sharpen and strop your tools!
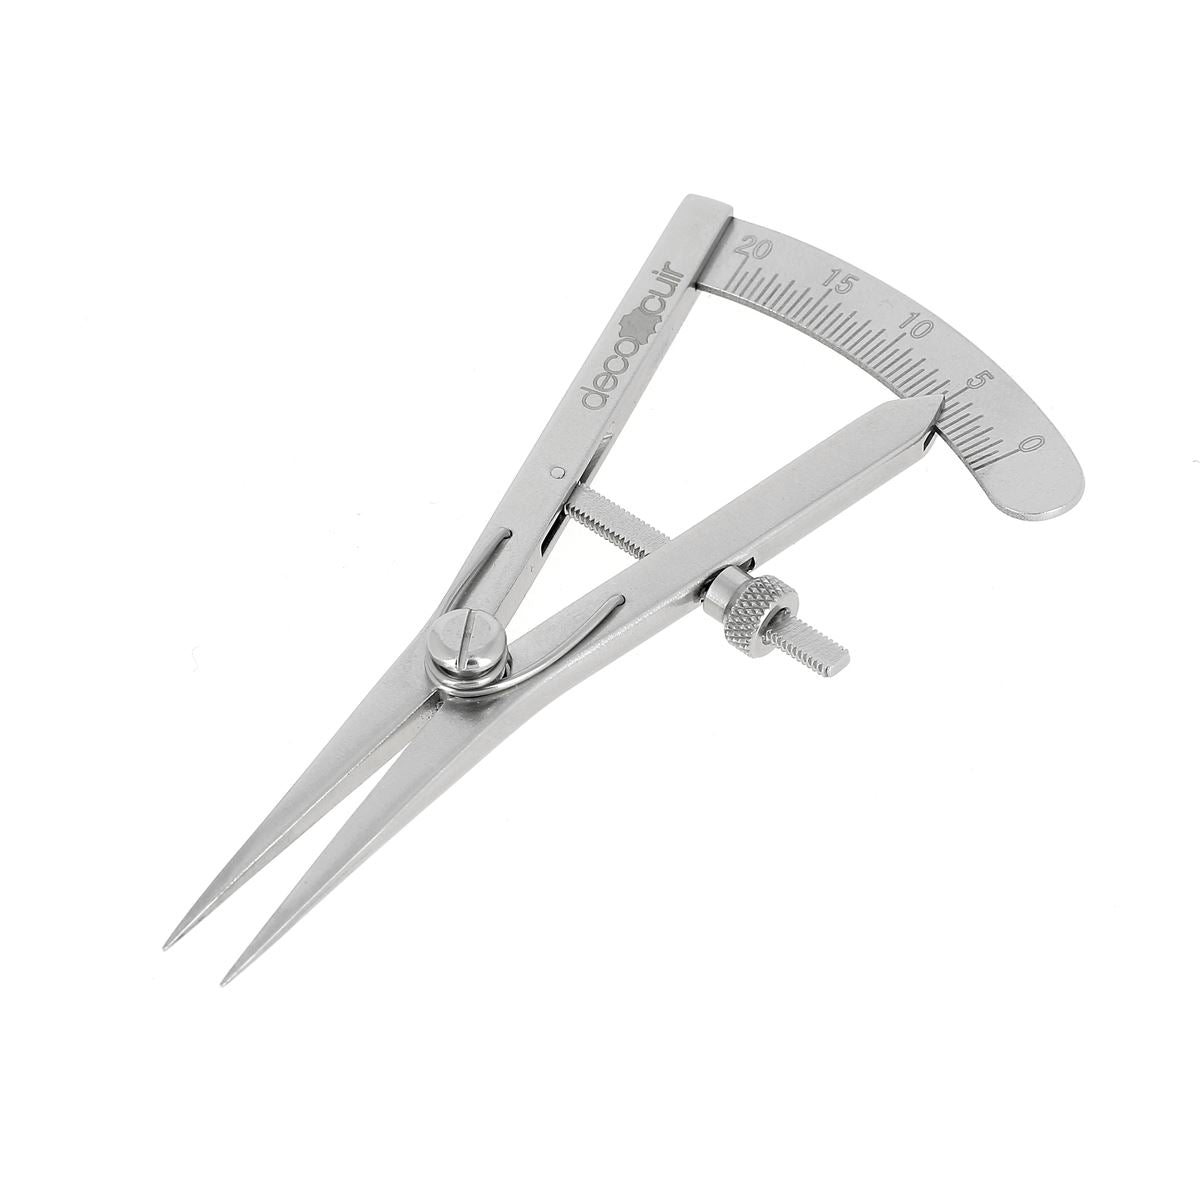
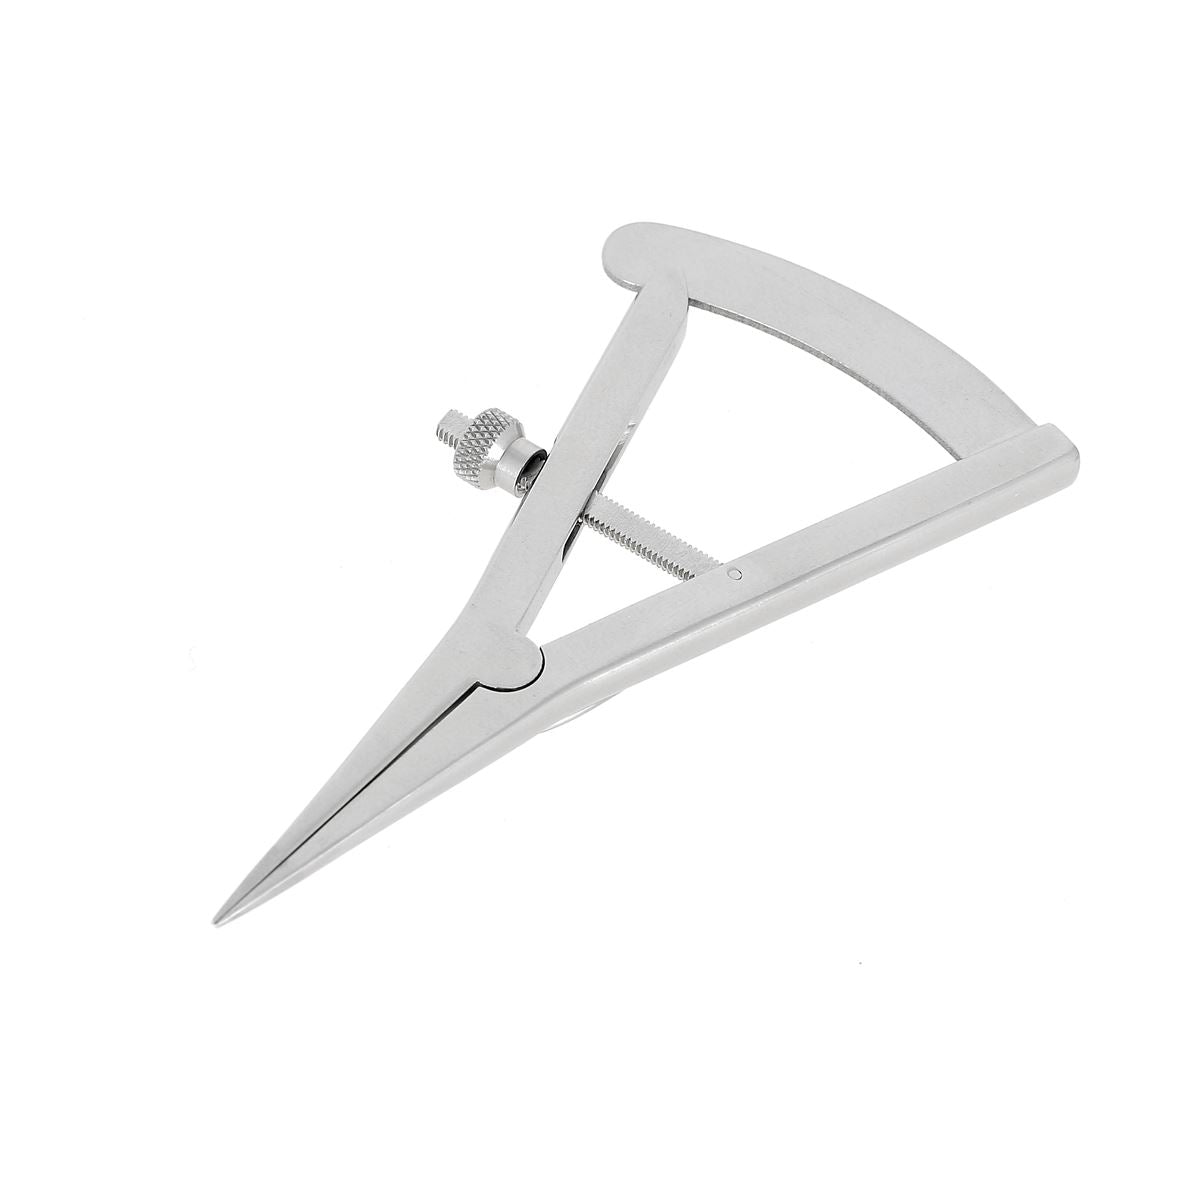
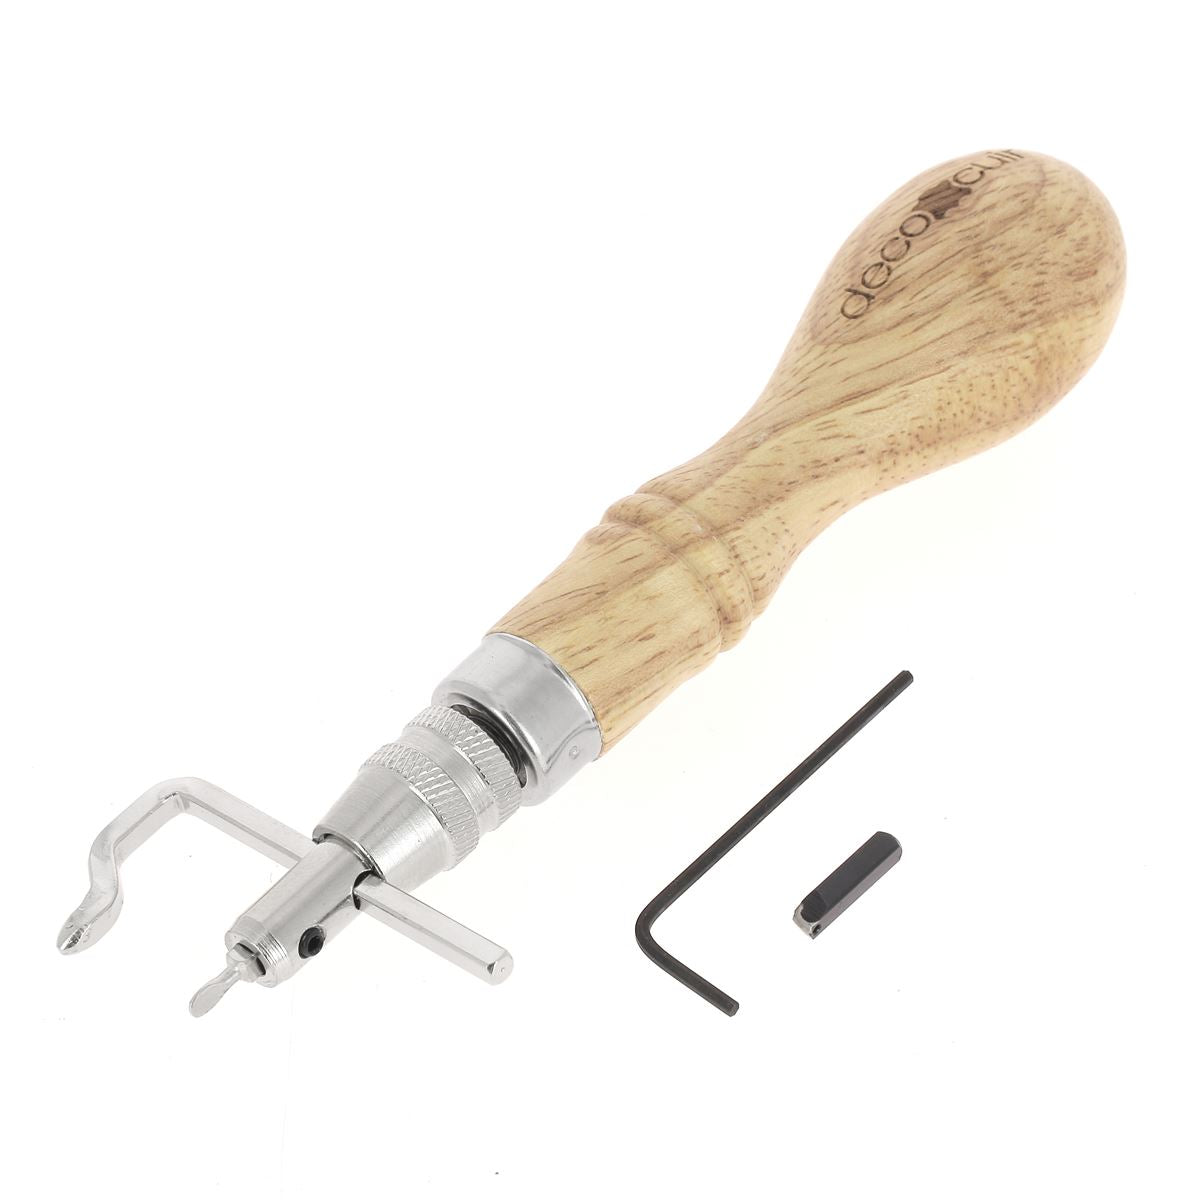
DRAW THE STITCH LINE
A groover, creaser, and wing divider are 3 tools that allow you to draw the stitch line: choose the tool that suits you!
A compass is useful for reaching the middle of a piece, and a creaser can also create a groove to embed the thread and protect the stitching.

MARK THE STITCH POINTS
A pricking iron or a stitching wheel allows you to have evenly spaced stitch points.

DIFFERENT STITCHING PONIES AND CLAMPS
Discover our comparative table of different stitching ponies and clamps for hand sewing leather.
| Tool | Advantages | Disadvantages |
| Traditional stitching pony (between legs) |
- Industry standard, solid and durable |
- Fixed position, leg/back fatigue - Bulky - Depending on the model, may be less practical for very thick or very rigid assemblies |
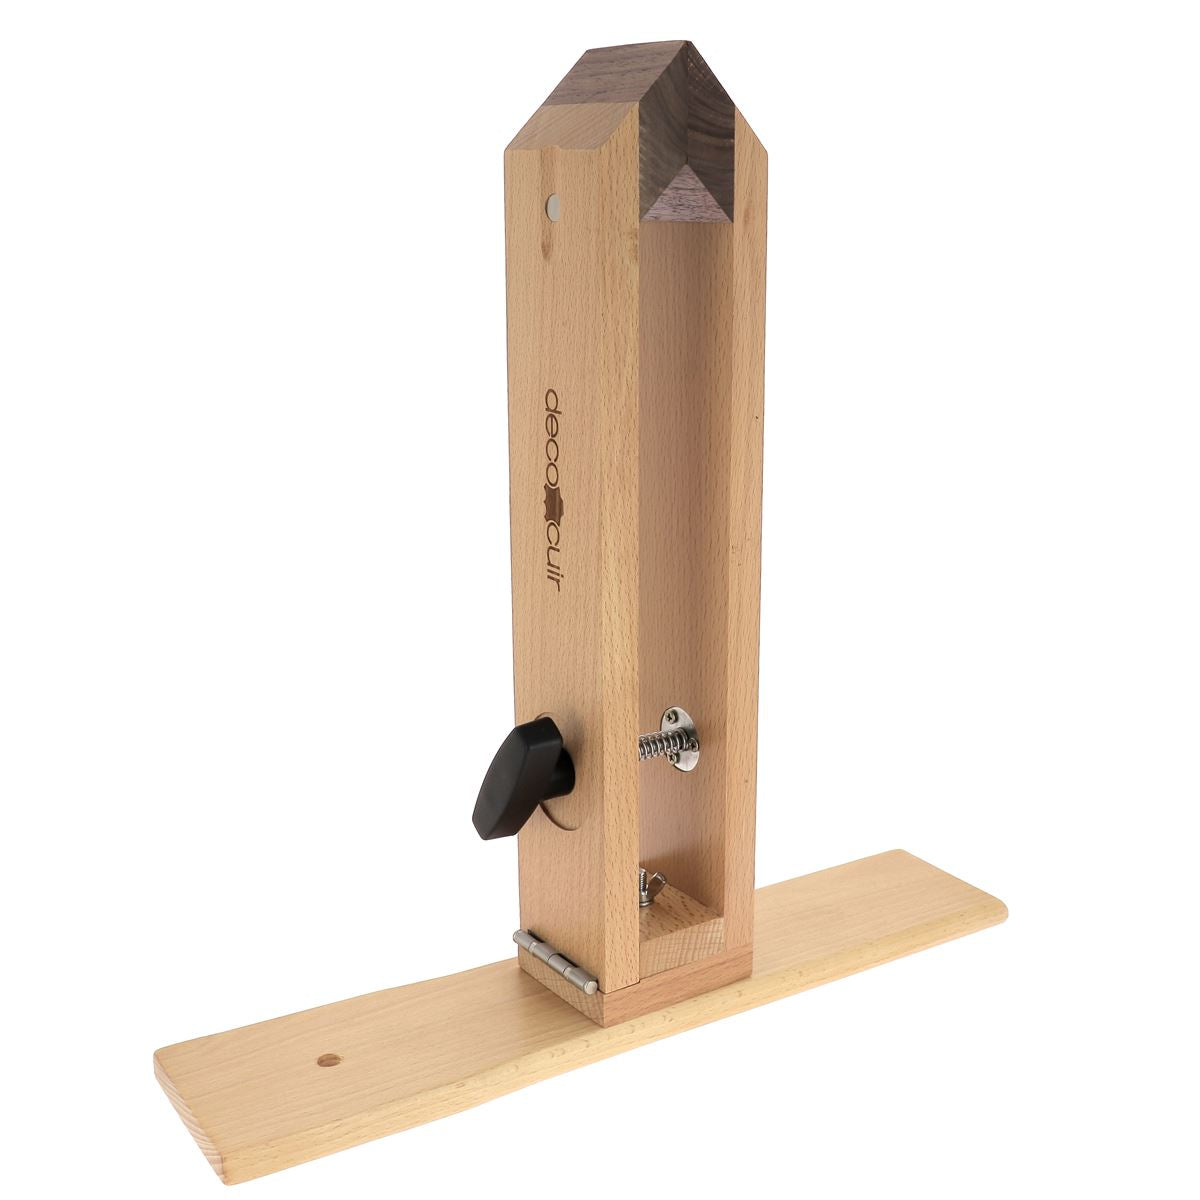
| Stitching vise (vertical clamp, placed or straddled) | - Higher position, relieves back strain - Suitable for larger pieces - Relatively light and portable |
- Less common - Variable stability if not properly braced - Clamping sometimes limited |
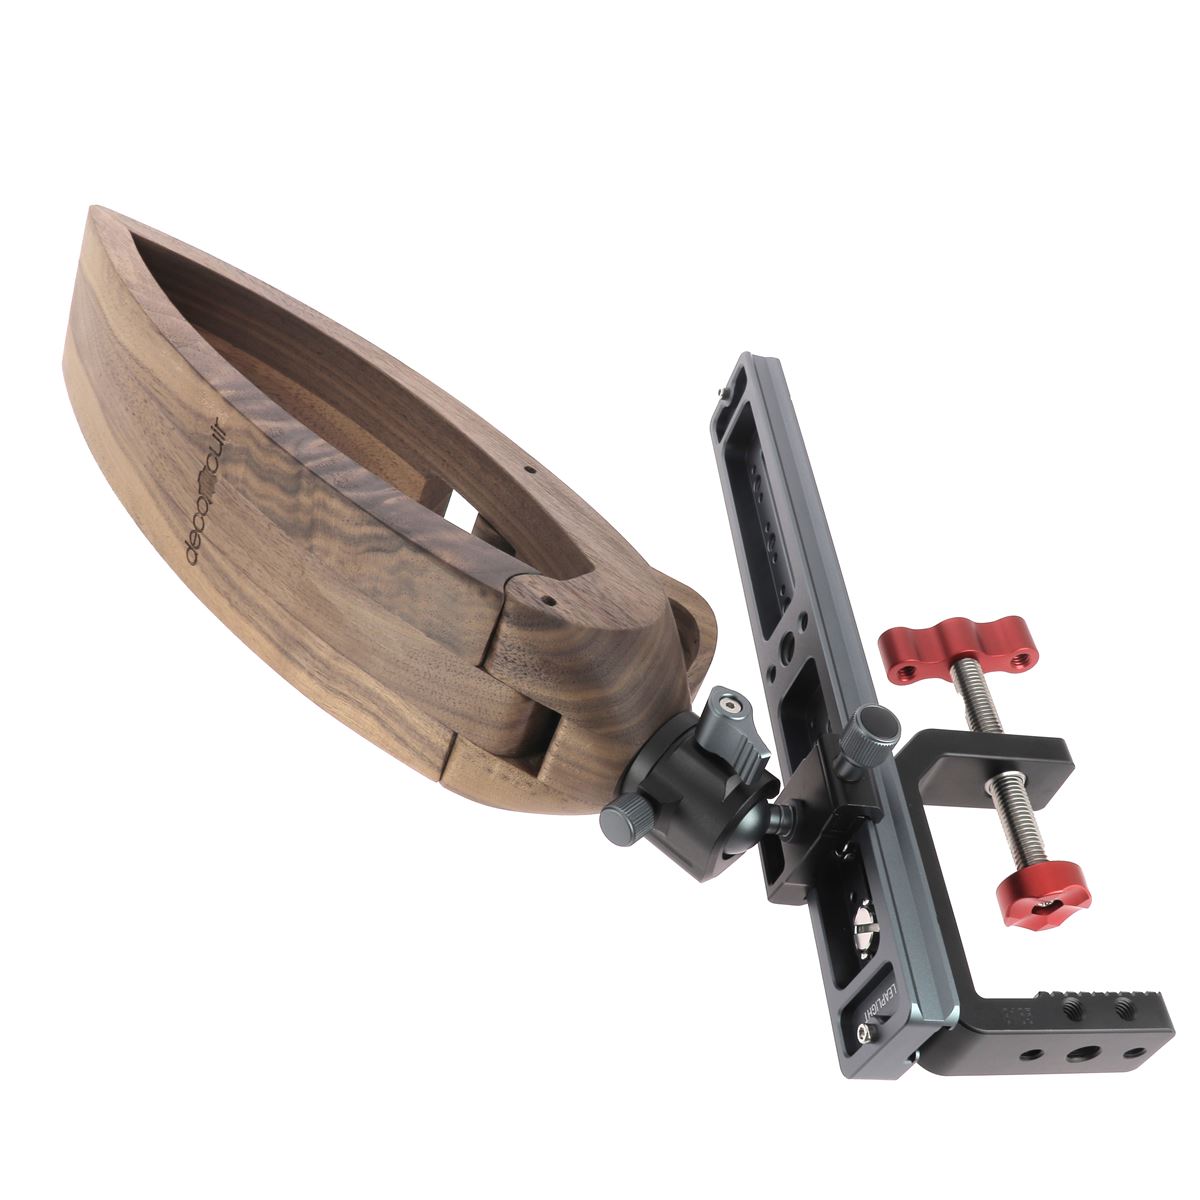
| Workbench-mounted vise | - Excellent stability - Adjustable height (ergonomic) - Very comfortable for long sessions |
- Requires a sturdy workbench - Less mobile, fixed |


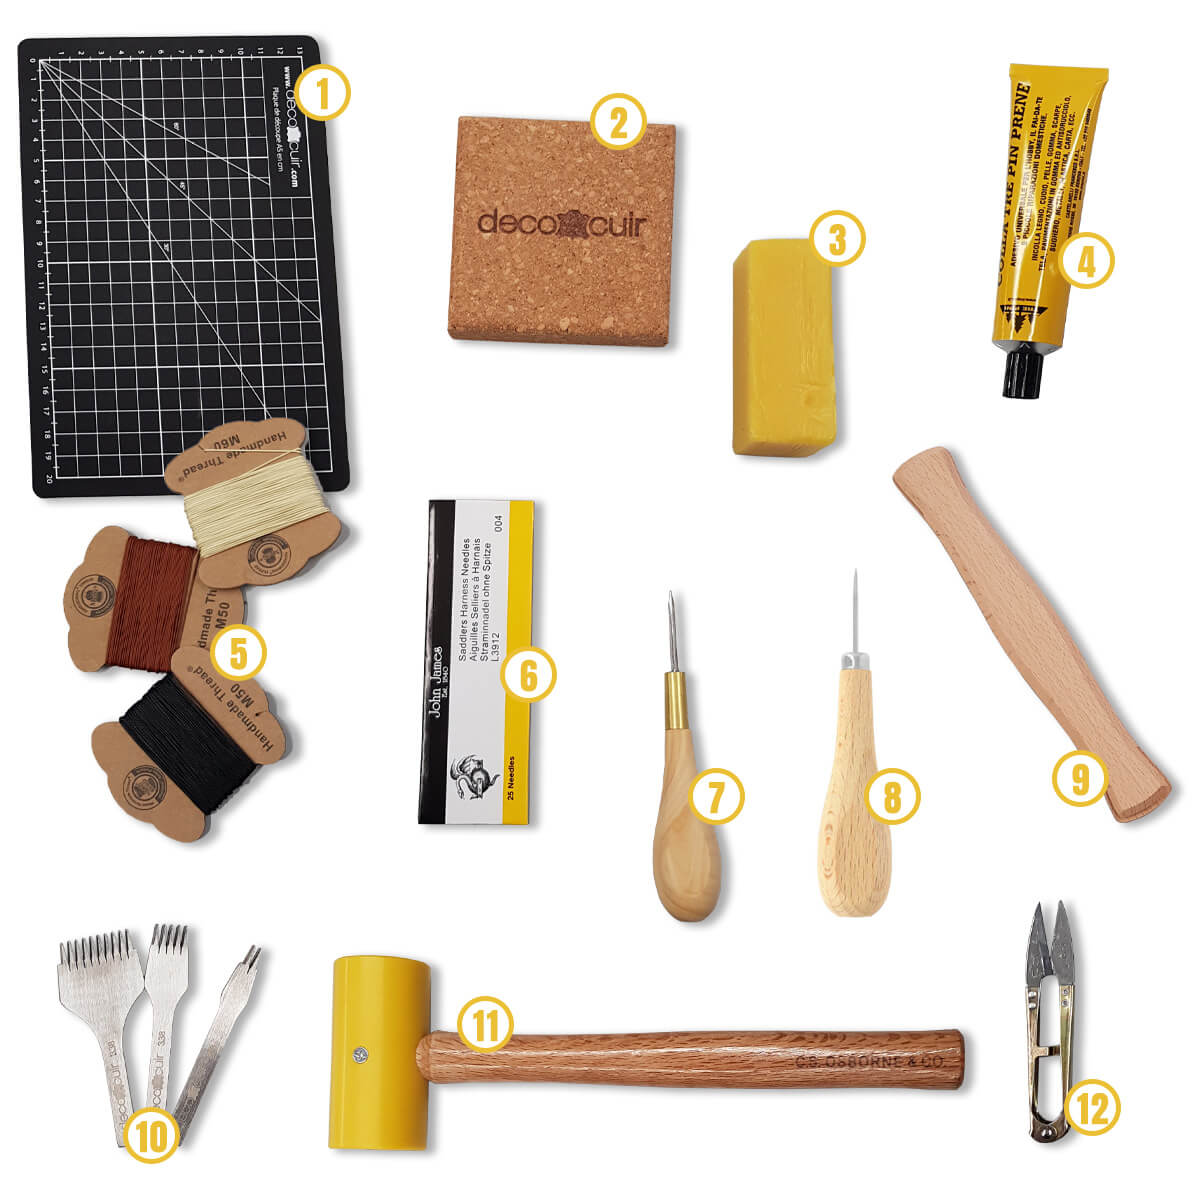
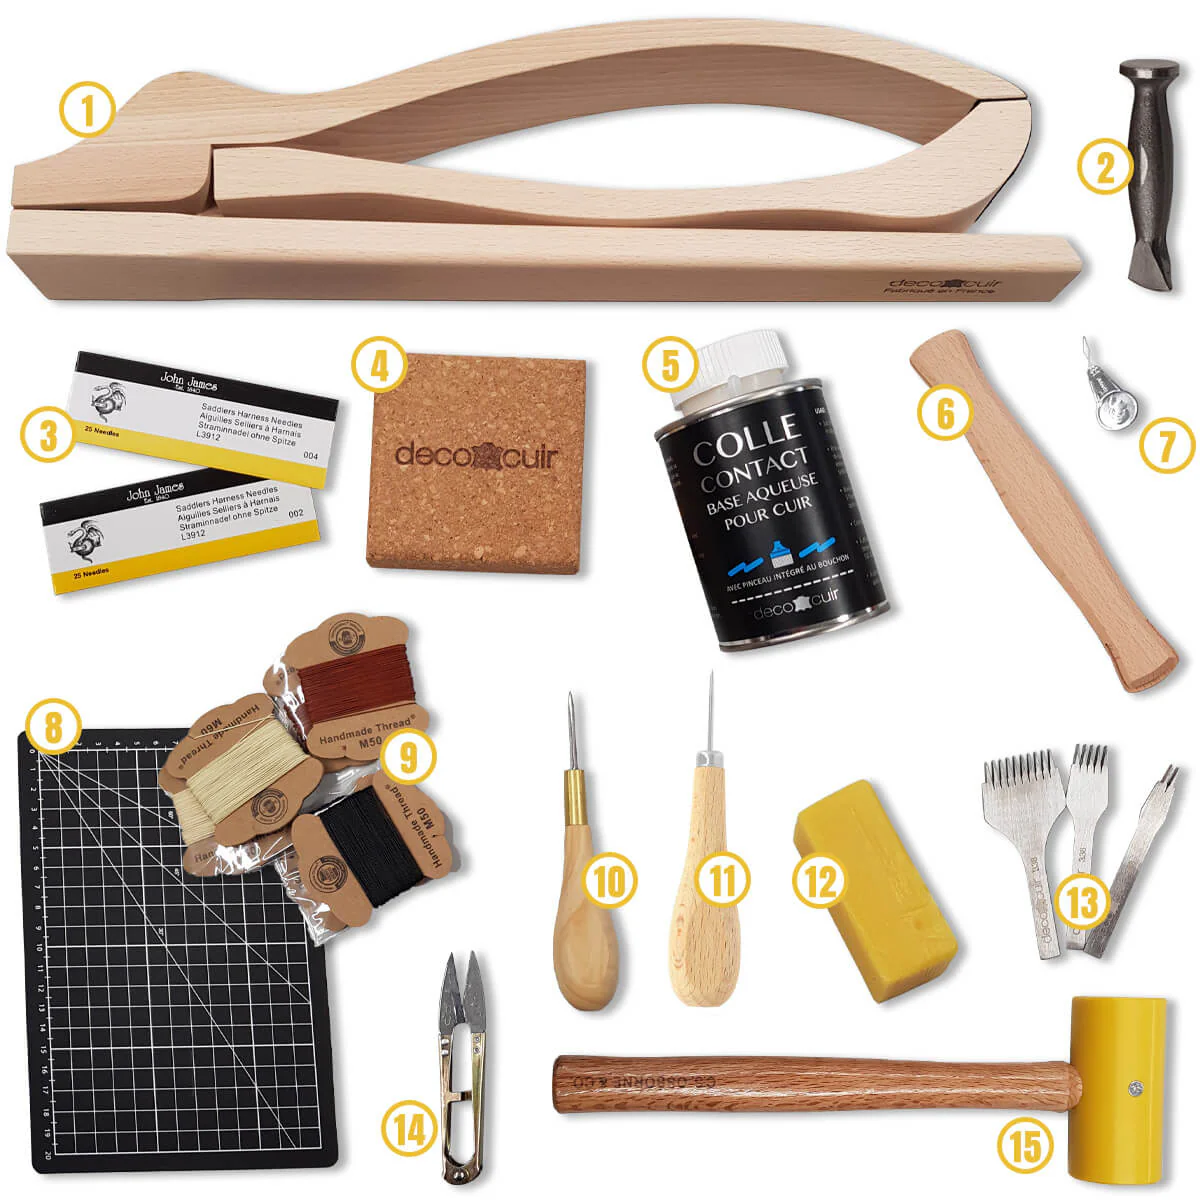
Below is a small summary of our favorite tools:


We have relied on our experience to offer you a starter kit with essential tools for hand sewing leather (3 ranges: Essential, Essential +, and Premium).
HOW TO SEW CURVES?
The technique is the same for curved stitching! We invite you to mark your points with a stitching wheel, which will be the easiest tool to use (or a 2-prong pricking iron). The piercing angle with your diamond awl must follow the inclination of the points.

HOW TO SEW CORNERS AND WHAT IS DOUBLE PRICKING?
Learn corner sewing by making a Choupette©. In this guide, we will cover various technical points, including double pricking and skipped stitches!
WHAT LEATHER TO CHOOSE FOR SADDLE STITCHING?
The ideal is to select thick leather (at least 1.2 mm thick) that is not too soft. We invite you to check our guide on different leather finishes.
WHAT LEATHER TO CHOOSE FOR MY CREATION?
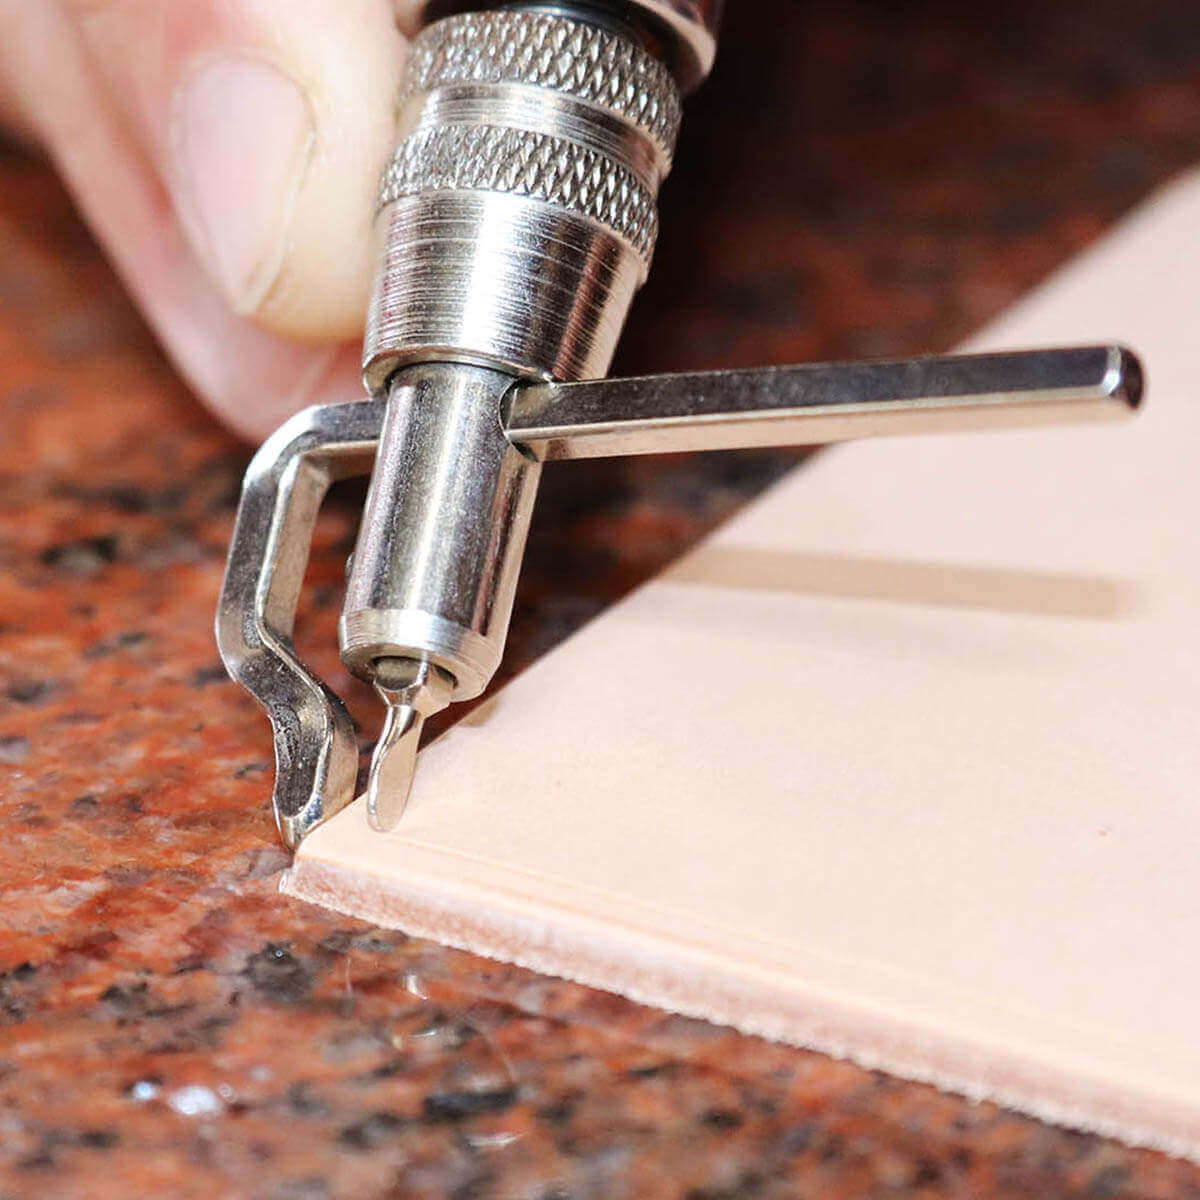
HOW TO USE A PRICKING IRON?
The pricking iron will allow you to have regular stitching. Several factors must be taken into account for beautiful stitching:
- Always keep the pricking iron perpendicular to the leather and stable;
- Always go back 3 points;
- Always prick with the filet to your right;
- Always start by working the corners with a 2-prong pricking iron: the rule is that the point located in the corner must always be directed towards the center of the piece. It is also possible to mark the corner with a round awl.
- Never use a mallet with a 2-prong pricking iron as you risk piercing the leather and damaging it.
There is no specific way to hold the pricking iron: the point is the same on both sides.
We recommend using a plastic or polymer hammer so as not to damage your tools.
 
 |
|
Different types of stitching chisels:
You can find 2 types of stitching chisels in our shop:
1- Pricking iron (straight line, also called "comb") are used to mark the leather with the correct inclination to facilitate the "insertion" of the awl.
2- Diamond-point stitching chisels (rhombus) are used to pierce the leather like pincers with an awl. Be careful to hold it perpendicular, otherwise your stitching will be crooked on the back. If your leather is thick, we do not recommend piercing it completely, but only a large part of its thickness (pre-piercing): otherwise your stitch will not be neat (risk of having a larger stitch on one side of the leather).
For aesthetic reasons, we prefer the pricking iron.


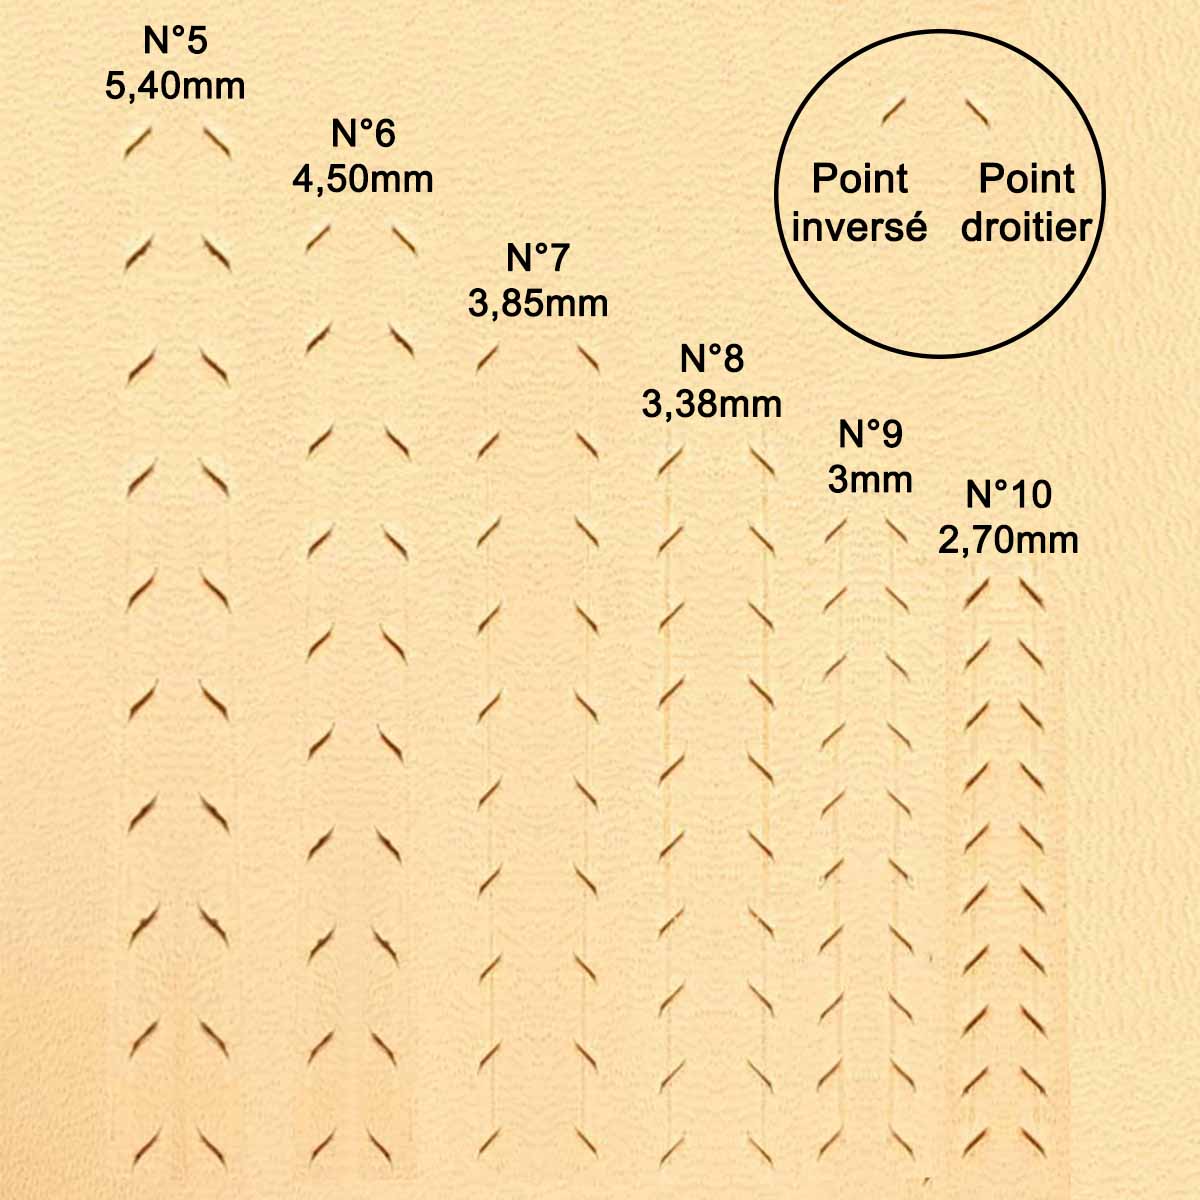
What is the difference between a standard stitch and a reverse stitch?
The "reverse" stitch of the chisels is symmetrical to the "standard" stitch. This stitch is generally used for double-stitching or for joining pieces on a creation that has been sewn with a professional sewing machine.
Chisels with a "reverse" stitch are generally called "left-handed chisels": this is a misnomer, there are no chisels for left-handed or right-handed people. As a reminder: there is no direction for holding the chisel, the stitch is the same on both sides.

Which spacing (stitching chisel) to choose?
The spacing is the distance between two stitches: it should be chosen according to the item you wish to create: an aesthetic choice. The "standard" for leather goods creations is a spacing of 3.38 mm - N°8 (3 stitches per centimeter). To know which spacing to choose for your creation, we invite you to consult our guide:

How to adjust the spacing of the last stitches?
When you only have a few stitches left to mark with your stitching chisel, there may be a slight misalignment. You must therefore adjust the spacing of the last stitches by eye or with the help of our Plexiglas template to avoid these misalignments (stitches too large or too small).
WITH A TEMPLATE
BY EYE
WHAT ARE THE DIFFERENCES BETWEEN HAND SEWING AND MACHINE SEWING LEATHER?
Unlike machine sewing, the saddle stitch technique allows each of the two threads to pass over and under the layers of leather. The stitching is therefore stronger: if one of the threads breaks, the stitching does not unravel and can be repaired.
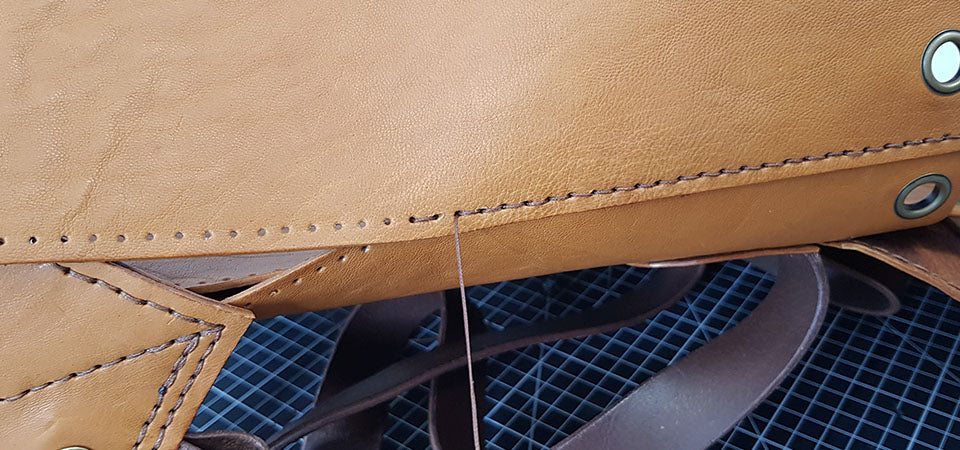
 Saddle stitching leather produces a beautiful slanted stitch on both sides (front and back).

Other hand sewing techniques
Simplified sewing
Simplified sewing consists of piercing the stitches with a round punch. This straight-stitch technique is mainly for beginners.
English stitch sewing
Discover the English stitch sewing technique: a simple method accessible to everyone. English stitch sewing is done with a thread and a needle. In upholstery, the English stitch is called "Backstitch" and in embroidery "Stem stitch".

WHERE TO TRAIN IN SADDLE STITCH SEWING?
Come and learn saddle stitch sewing during a one-day training course in our premises located in Campbon, between Nantes and Saint-Nazaire (44 - Loire Atlantique).


7 comments
Deco Cuir
Bonjour,
Vous pouvez utiliser la colle 1816B https://www.decocuir.com/products/colle-contact-base-aqueuse-intercom-ecostick-1816b pour vos points d’arrêts.
Bonne journée,
L’équipe Deco Cuir
Gomez de Segura
Bonjour,
Pouvez vous m indiquer quelle colle blanche pour du fil ciré
Merci d avance
Garreau serge
Bonjour ,pourriez me dire pour la teinte par ou commencer. Le cuir ou la tranche .Merci de votre reponse
Briatte André
Travaillez devant un petit ventilateur de table et vous verrez que vos mains resteront sèches
Pat jivago
Merci pour le partage tutos clairs Bravo
Anonymous
Bonjour Cécile,
Nous vous conseillons de mettre du talc sur vos mains et d’utiliser une paumelle en cuir. La paumelle va protéger vos mains et vous permettre de pousser plus facilement les aiguilles à travers le cuir, sans vous faire mal aux doigts.
https://www.decocuir.com/products/paumelle-en-cuir-pour-couture-main-droite-vergez-blanchard
https://www.decocuir.com/collections/fils-couture-mercerie-cuir-decouvit-ciseau
Bonne journée, L’équipe Deco Cuir
cecile
Bonjour, j’aimerais un petit conseil sur un problème pas glamour quand je fais de la couture point sellier. Lorsqu’il fait chaud j’ai les mains super moites et c’est super difficile de coudre comme ça, ça me lacère les doigts en plus de perdre un temps précieux. Est ce que certains d’entre vous auraient une solution, y aurai-t’il des gants fait pour la couture qui permettrait d’attraper l’aiguille facilement ?
Je vous remercie de vos réponses.