


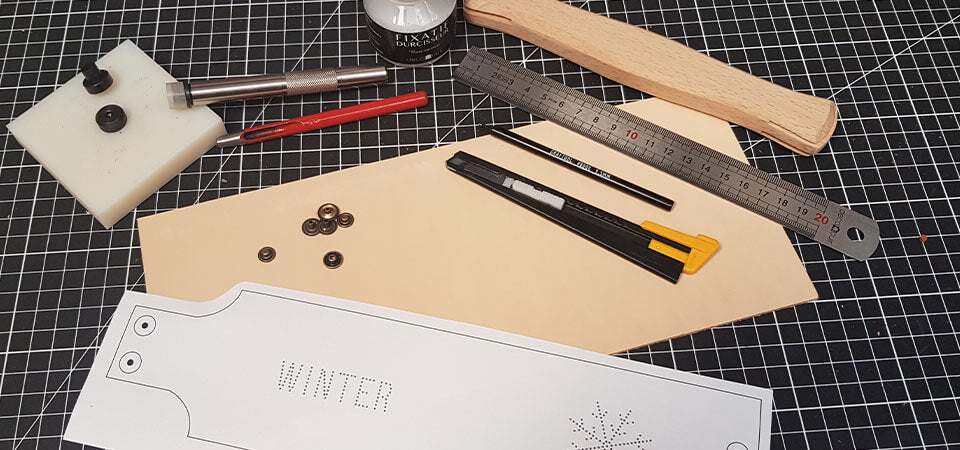
THE NECESSARY EQUIPMENT
To make this tutorial (2 leather mug protectors), you will need:
- 1 piece of CLASSIC natural vegetable tanned collar leather - Thickness 1.6mm - 20 x 30 cm
- 2 MINI snaps in AGED BRASS - diameter 10.5 mm and its installation set
- 1 pot of hardener for leather finishing - Deco Leather
- 1 ROUND punching cutter - Craftool - 0.5 mm in diameter
And the following material:
- 1 knockout punches - Ø 3 mm
- 1 mallet
- 1 cutter
- 1 formoir or 1 Stitch Groover
1. PRINT THE PATTERN
Download the pattern and print it in real size. Cut out the paper pattern, leaving about 1 cm of margin around the piece. Then tape, using masking tape (to avoid damaging the leather), the pattern on the piece of leather. 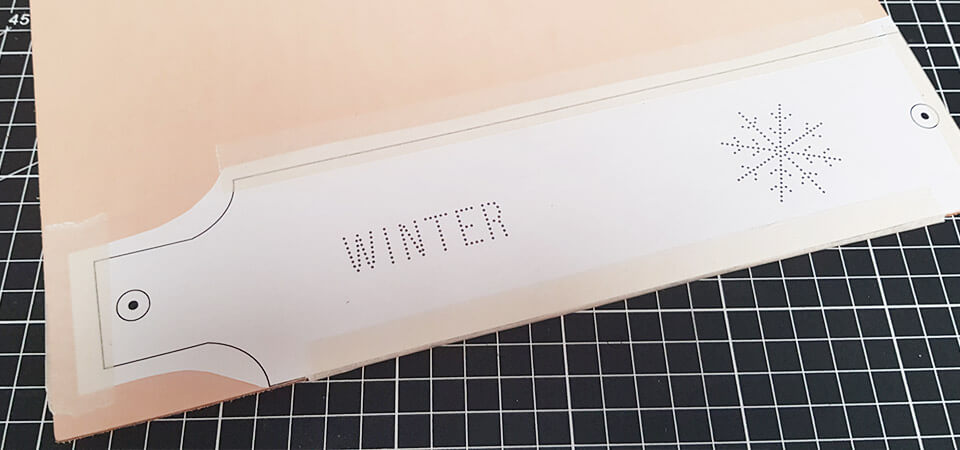
2. MAKE THE PATTERNS AND CUT THE PATTERN
Using a mallet, gently hit the 0.5 mm diameter round cookie cutter to make the holes indicated on the pattern. The cookie cutter should not pierce the leather but just push it in. 
Drill the holes for the press studs using a 3 mm diameter round punch. 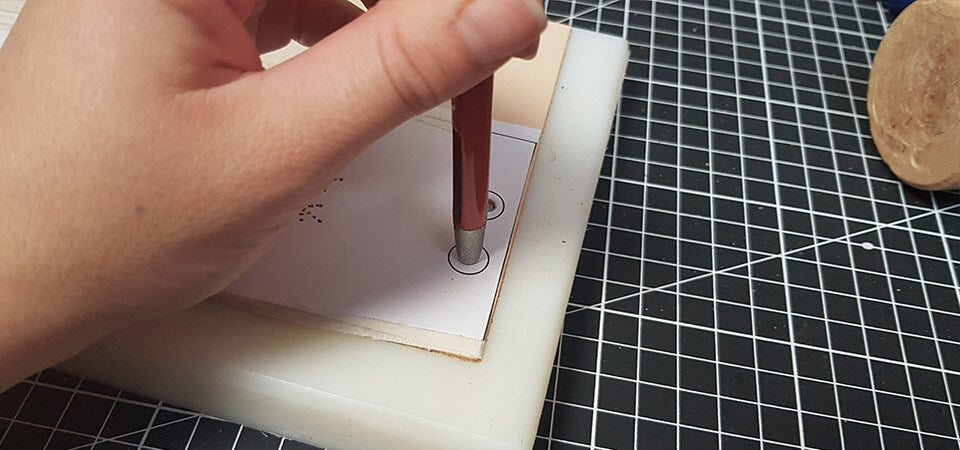
Cut out the piece of leather, following the lines, with a cutter. 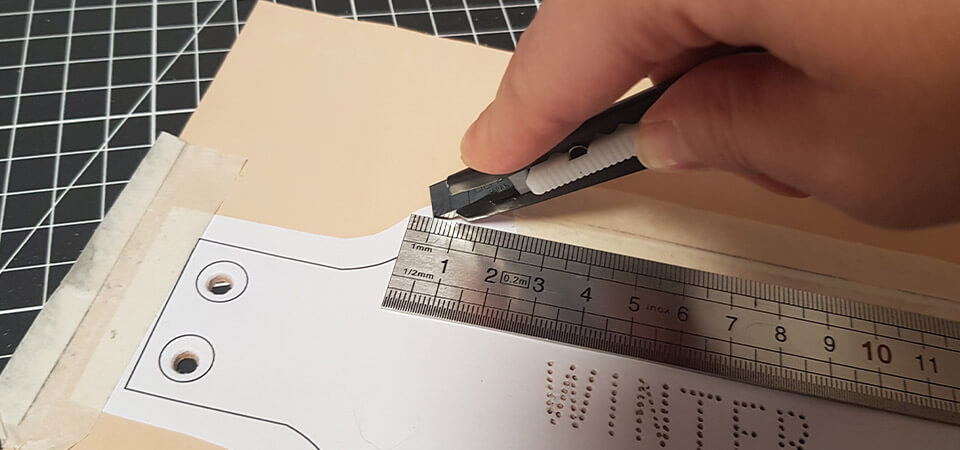
3. DRAW A DECORATIVE NET
Option: draw a decorative net, all around the piece, using a wooden former, a dry-point compass or a tree frog. 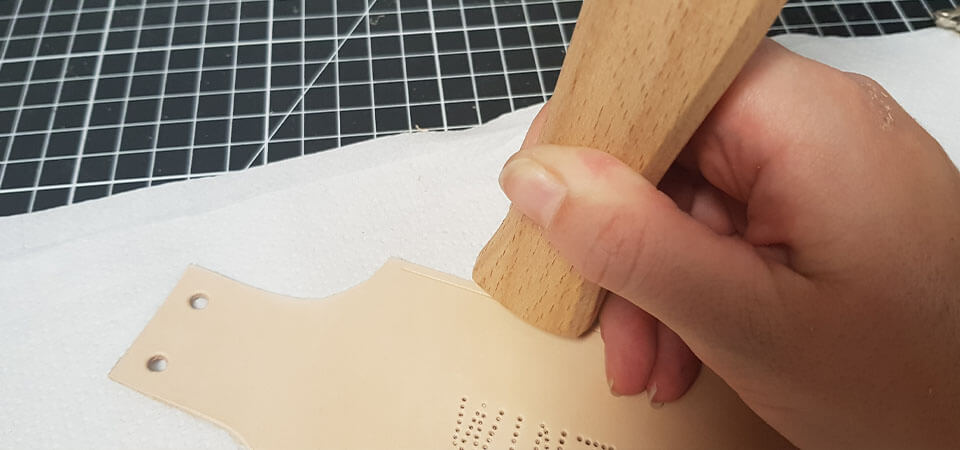
4. APPLY HAIRSPRAY
With a brush, apply a coat of fixative/hardener on the front and back (grain and split side) of the piece of leather. The hairspray will waterproof your mug protector.
 |
 |
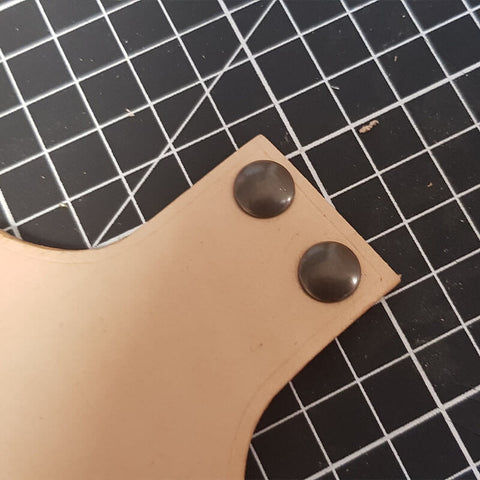
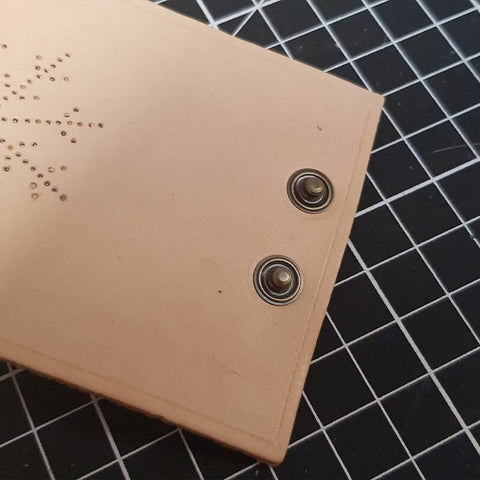
5. INSERT THE SNAP BUTTONS
Using a fitting set, fit the head of the mini press studs (diameter 10.5 mm) . 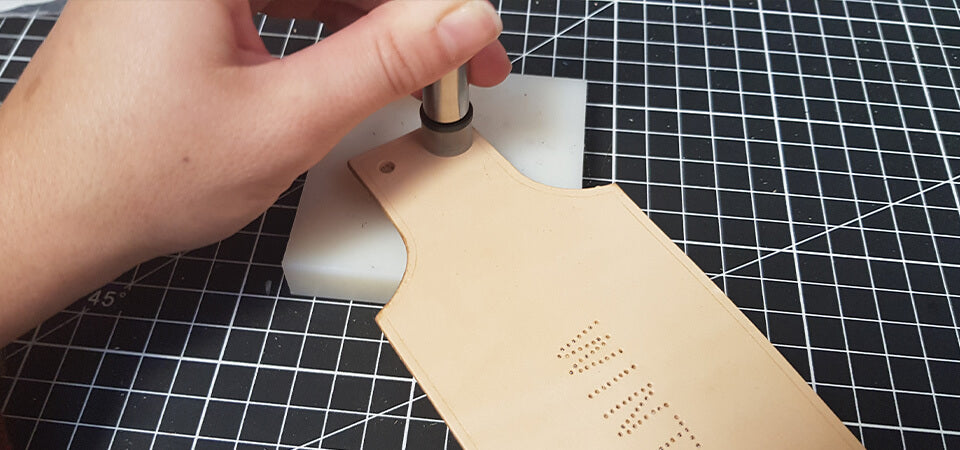
Also place the foot of the two press studs.
If the mug is not a standard size (8 cm in diameter), stagger the press stud feet according to the size of the mug.
 |
 |
OPTION: WORK THE SLICES
Work the slices with gum tragacanth or tokonole before applying the fixative. Apply and let the product penetrate the edge, then rub briskly with a cloth or a slicker. The slice will brown and shine.
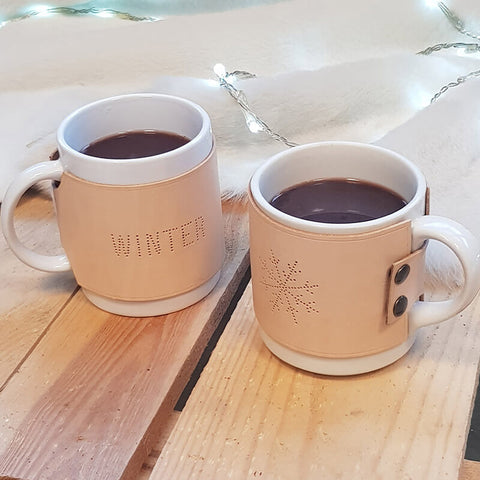
YOU HAVE FINISHED YOUR LEATHER MUG COVER!
 |
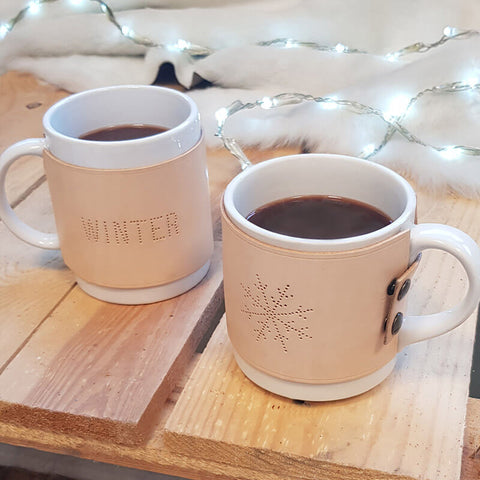 |
FEEL FREE TO PIN THE PICTURE ON PINTEREST TO SHARE!


2 comments
Deco Cuir
Bonjour,
Nous ne vendons pas ce modèle en kit 😊
https://www.decocuir.com/blogs/blog-tutoriel-patron-cuir/diy-protege-mug-en-cuir
Voici les articles utilisés :
1 morceau de cuir de collet tannage végétal naturel CLASSIC – Ép 1,6mm – 20 × 30 cm : https://www.decocuir.com/products/cuir-collet-tannage-vegetal-naturel-classic-05-20×30cm
2 MINI boutons pression en LAITON VIEILLI – diamètre 10,5 mm et son jeu de pose : https://www.decocuir.com/products/lot-mini-boutons-pression-laiton-verni-10mm-maroquinerie-cuir-creation
Bonne fin de journée et bonnes fêtes de fin d’année !
Bien cordialement,
L’équipe Deco Cuir
Marie-Noëlle GIL
Vendez-vous un kit de ce modèle s’il-vous plaît : bande de cuir, pressions ? merci