


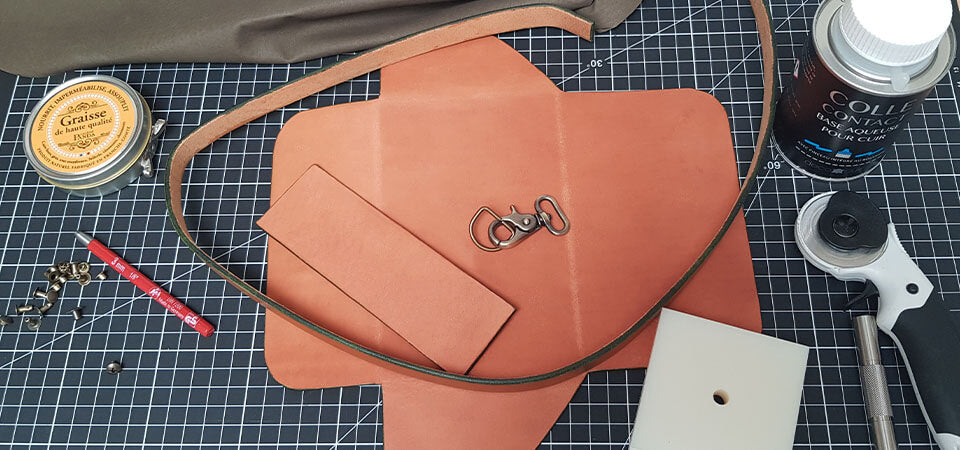
REQUIRED MATERIALS
To complete this tutorial, you will need:
- 1 piece of natural vegetable-tanned bridle leather CLASSIC - 30x40 cm - Thickness 1.9 mm
- Pigskin lining leather - Khaki
- 1 bridle leather strap - LONDON TAN - Width 19 mm - Length 120 cm
- 1 Deco Cuir water-based dye - GREEN - 60 ml
- 1 round swivel snap hook - Antique Brass - 44x20 mm
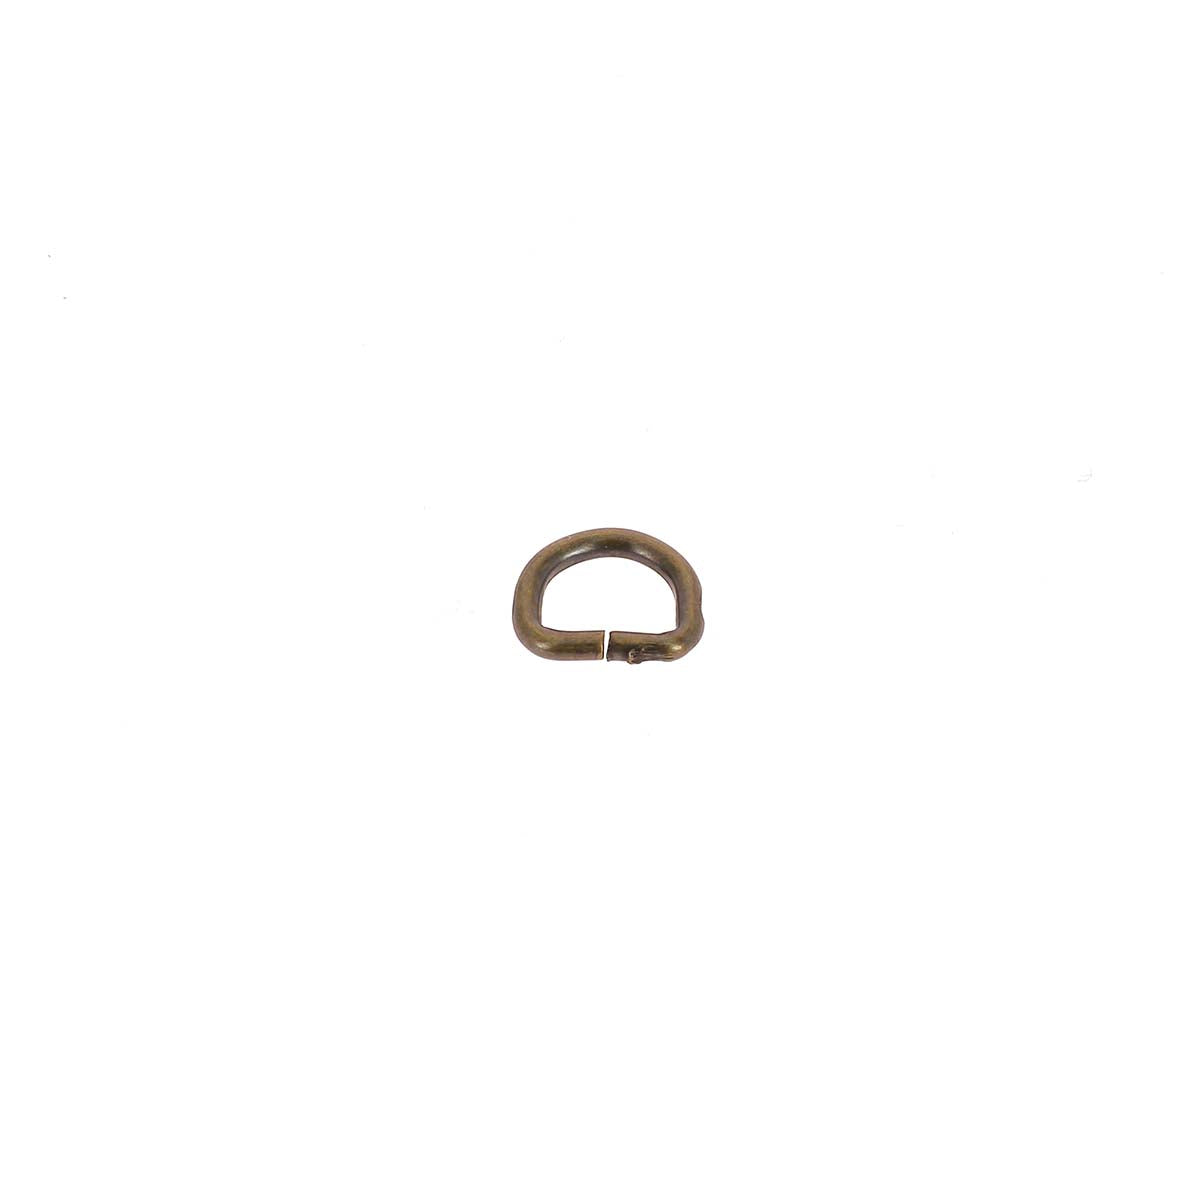
- 1 half-round ring - ANTIQUE BRASS steel - 20x16x2.5 mm
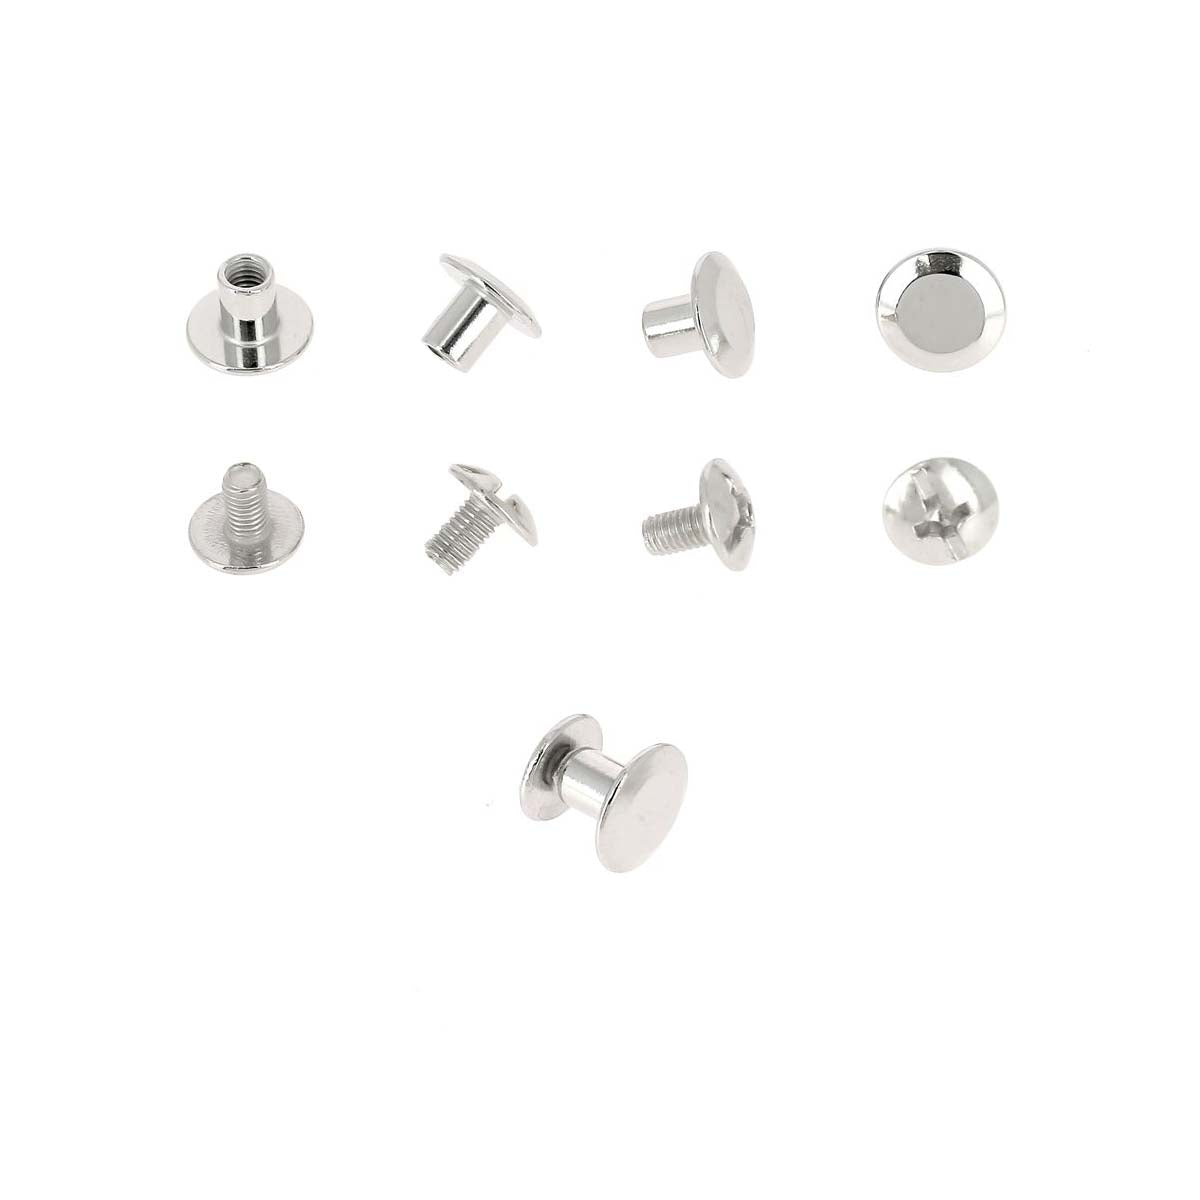
- 9 medium brass rivets (T3) antique brass finish
- 2 CHICAGO screws in antique brass - 9 mm diameter
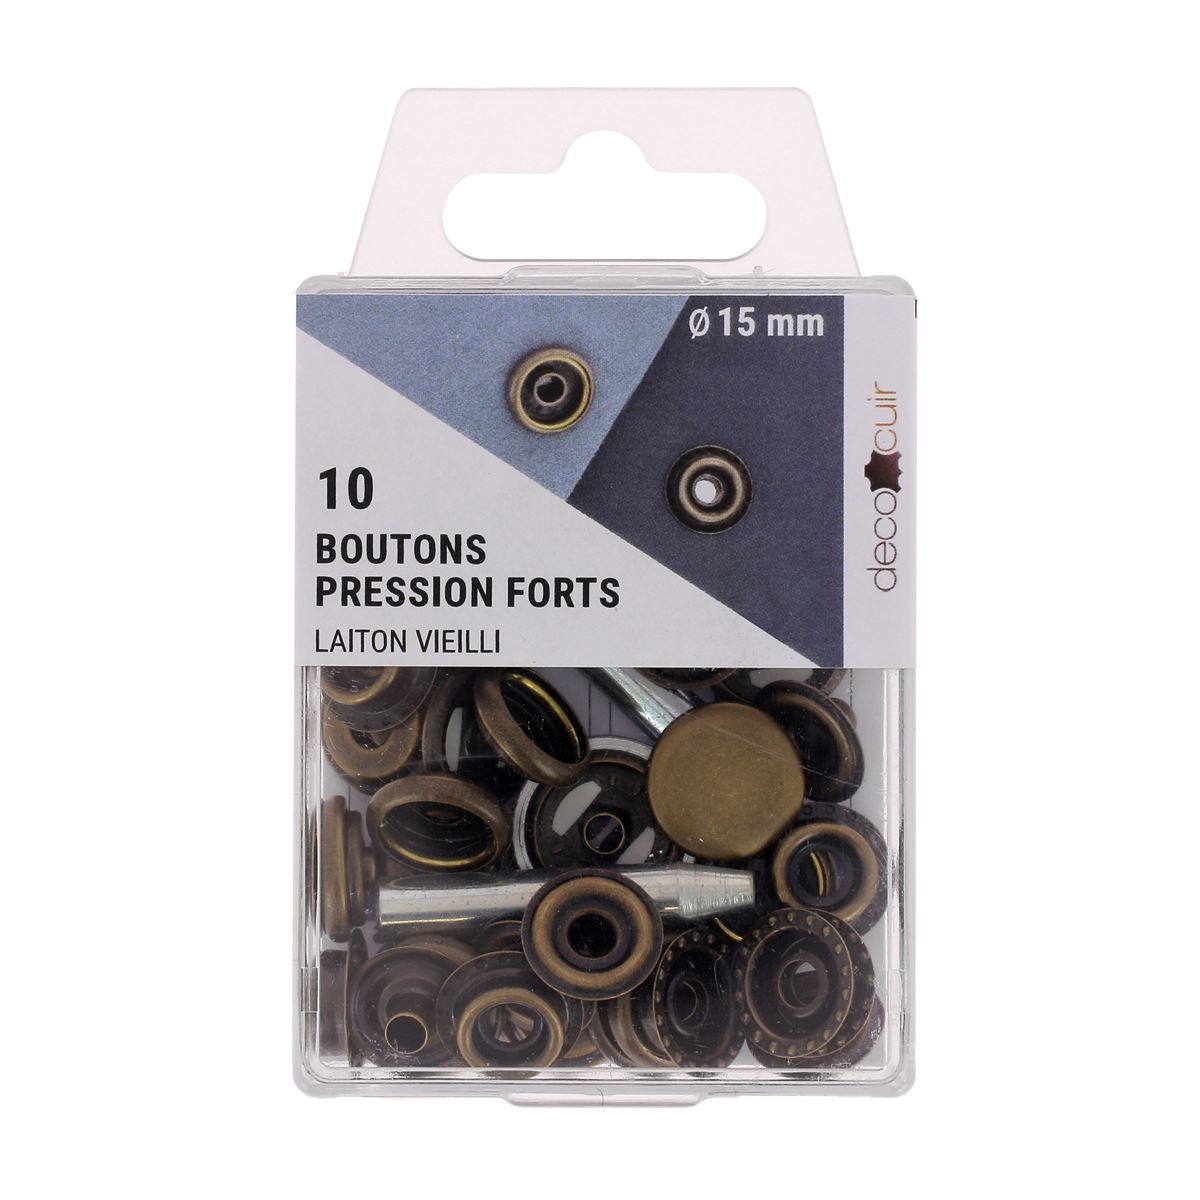
- 2 HEAVY-DUTY snap fasteners and setting tools - 15 mm - ANTIQUE BRASS
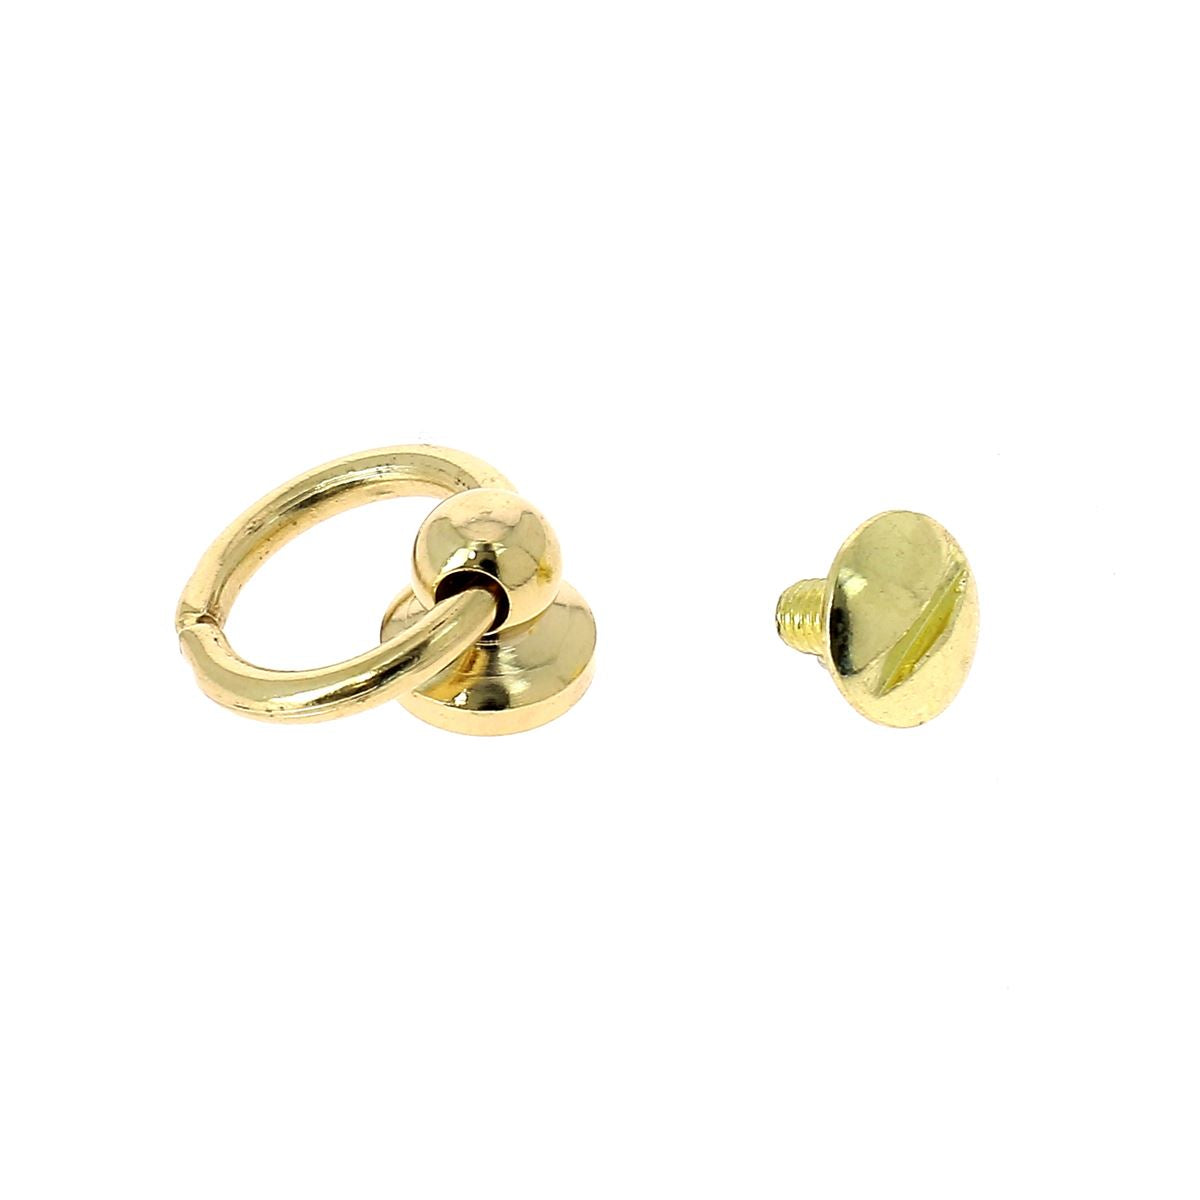
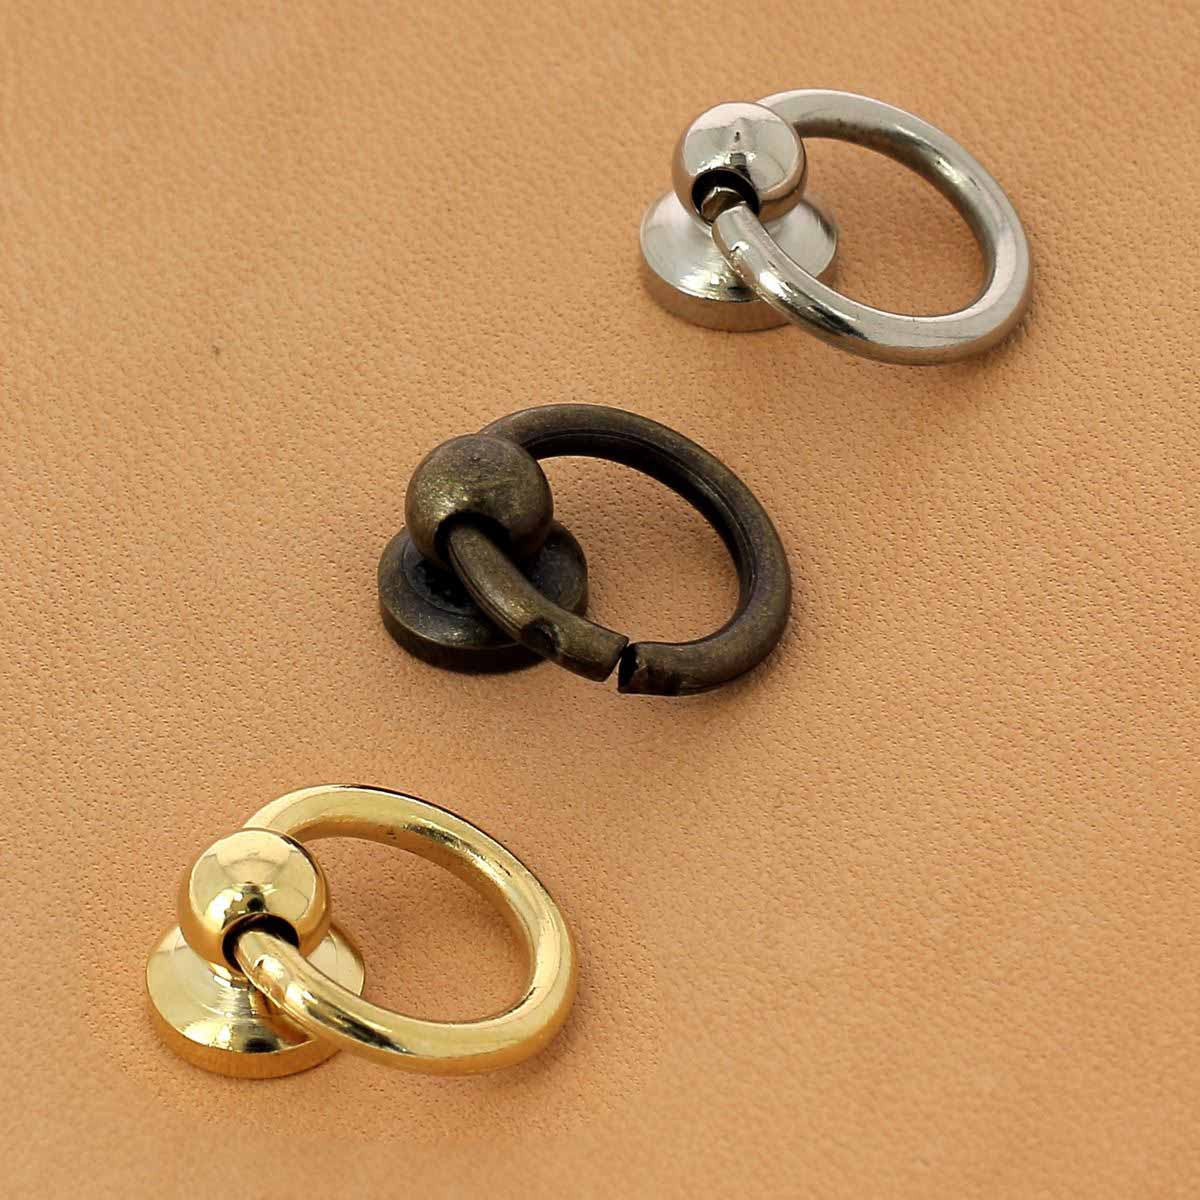
- 1 collar button with ring for strap attachment - ANTIQUE BRASS - 10 mm
- 1 pot of Tokonole - Leather finishing gum - 120 g - Neutral
- 1 pot of 250ml WATER-BASED CONTACT CEMENT with brush integrated into the lid
And the following tools:
- Cutter (TA191) and rotary cutter (3042_00)
- 3mm hole punch (EPA_DROIT_03)
- Edging tool - size 2 (TL_8076_02)
- Fine abrasive sponge (EPONGE_FINE)
- A mallet (OSB_90_4)
- A silver pencil (CRAYON_ARG_10)
- Olive oil and a brush
- Wooden slicker or cloth
- Grease for nourishing leather (TR_GRAISSE_100_BL)
- Optional: Alphabet stamps (8137_00)
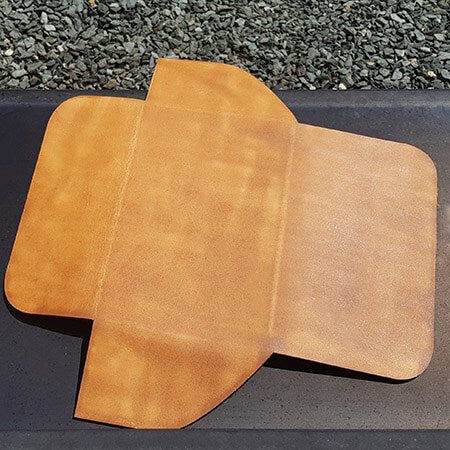
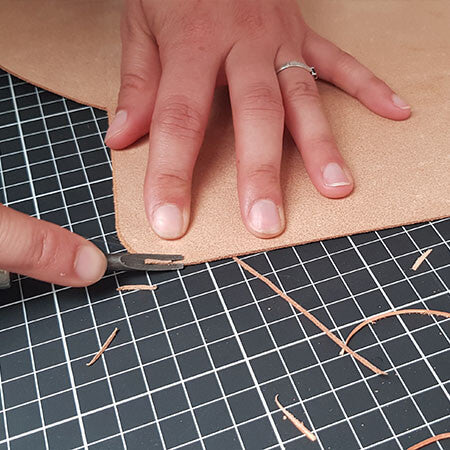
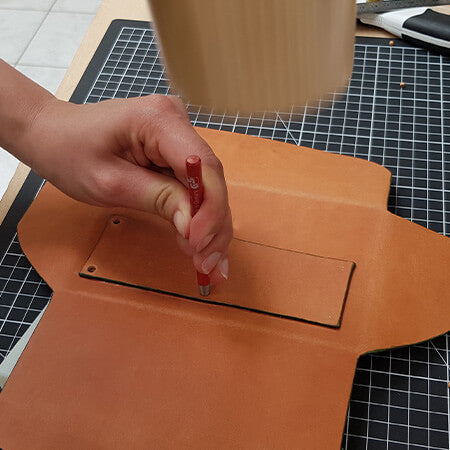
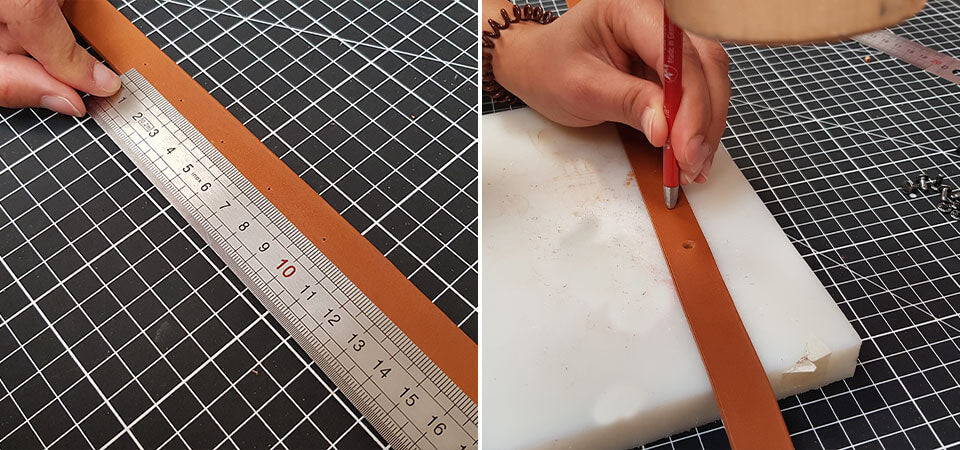
1. CUT THE LEATHER USING THE PATTERN
Download the pattern from our website. Print it at actual size, then cut it out, remembering to make the holes with the 3mm hole punch.
Trace the pattern onto the flesh side (back) of the leather using the silver pencil.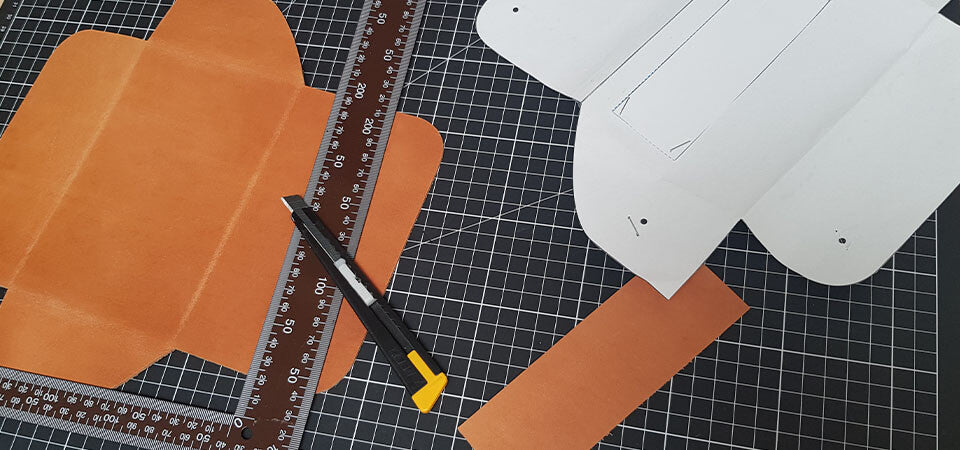
 For this tutorial, we decided to use the Cricut Maker (available on our website).
The Cricut Maker is a cutting machine designed for multiple creative projects (jewelry, pouches, wallets, 3D art, transfers, vinyls…).
VIEW CRICUT >
Already own a Cricut? Download the SVG pattern at the top of the page. Be careful to resize the shape correctly in the Cricut software. It should be 28.5 cm wide and 33.7 cm high.
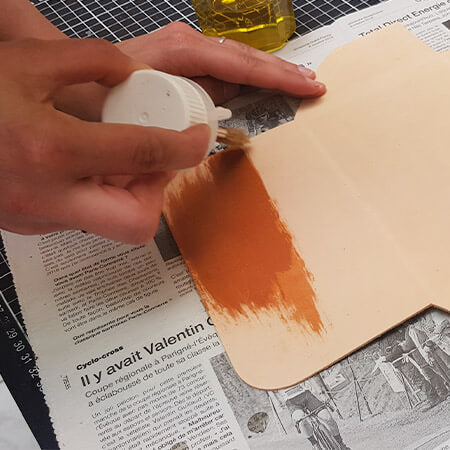
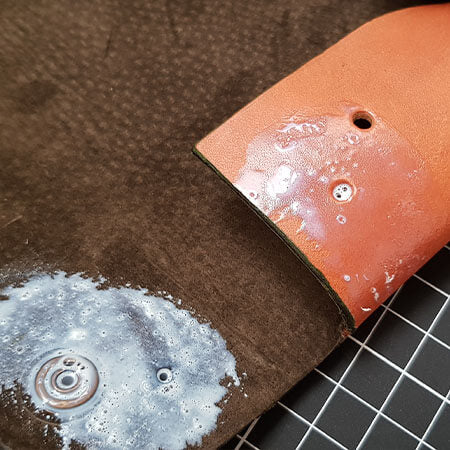
2. DYE THE LEATHER WITH OLIVE OIL
Using a wide brush, dye the leather with olive oil. Apply at least 2 coats to the grain side (front) of the leather, trying to apply the same amount of oil everywhere and always in the same direction.
Allow the oil to soak into the leather for at least one day, preferably in front of a window.
 |
 |
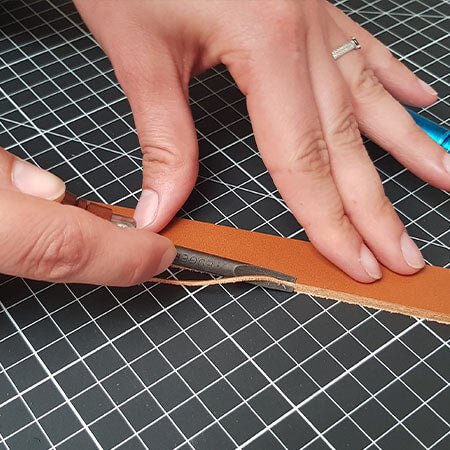
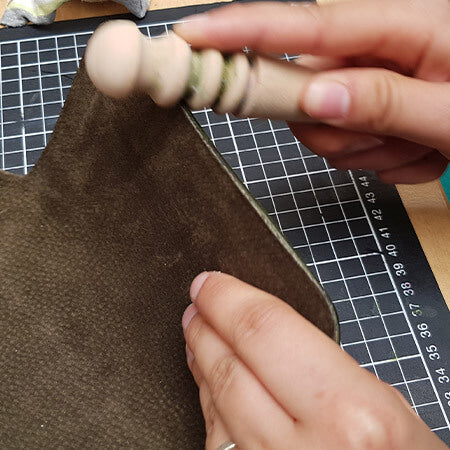
3. BEVEL THE LEATHER AND BELT EDGES
Using an edging tool, bevel the edges of the leather piece and the belt (bridle leather strap).
 |
 |
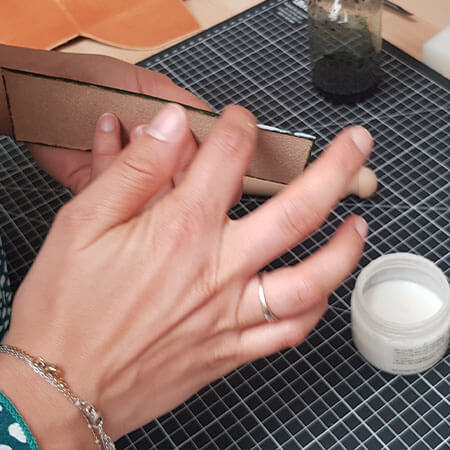
4. SAND THE LEATHER EDGES
With a fine abrasive sponge (400 grit), sand the edges of the leather piece and the belt => always in the same direction.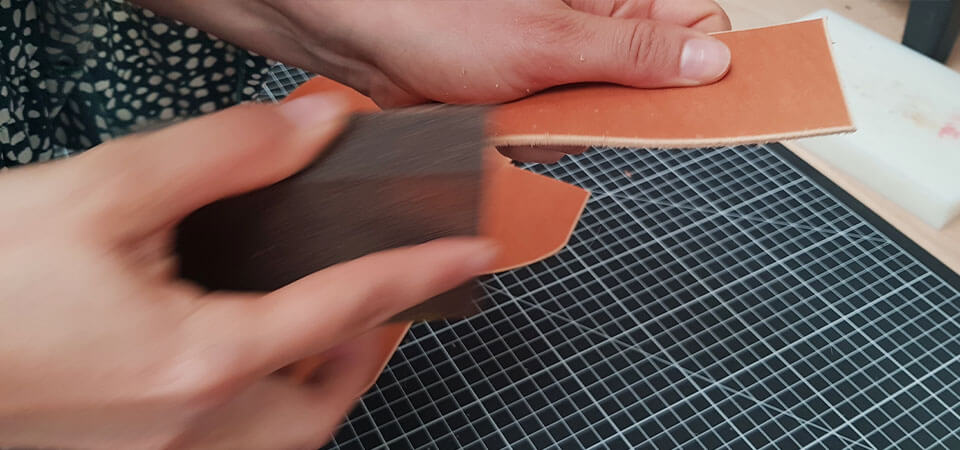
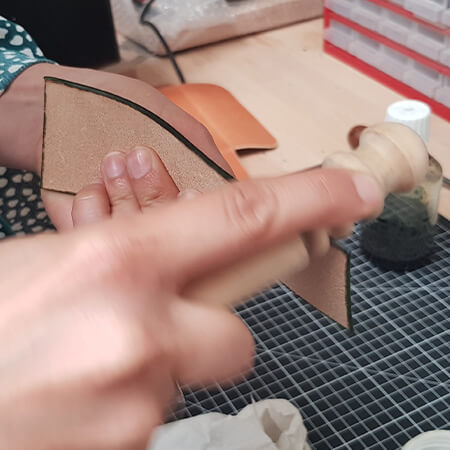
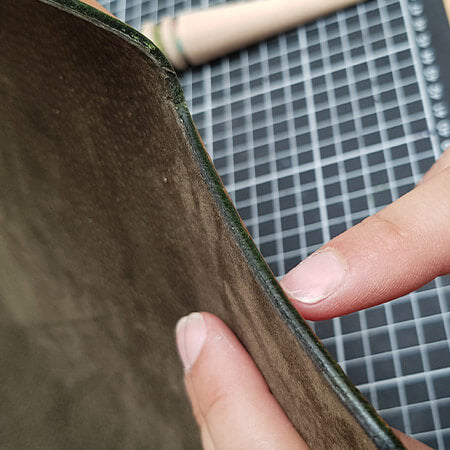
5. WORK THE EDGES
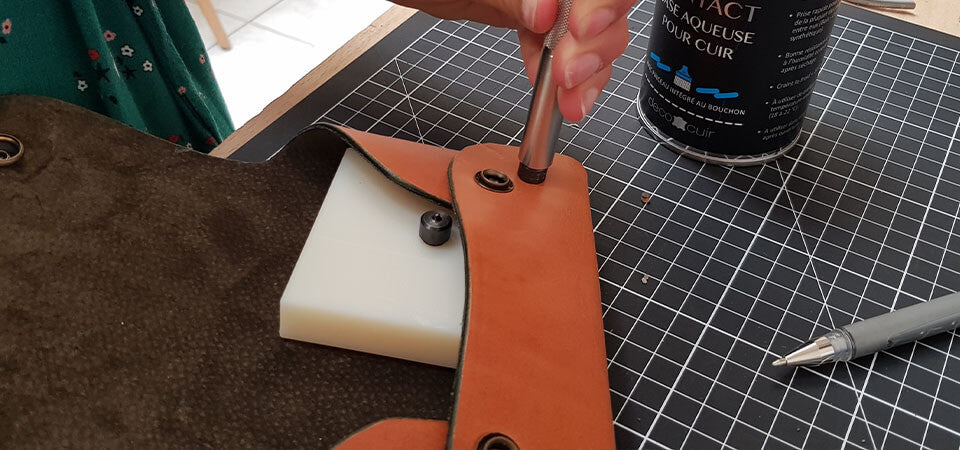
Here, we are working the edges of the leather and the belt with green water-based dye and Tokonole. The dye will color the edge and the Tokonole will make it shiny. With a small sponge or an awl, apply water-based dye to the edges of the leather and the belt.
Next, apply a thin coat of Tokonole to the edges of the leather. Wait a few moments for the product to soak in, then rub the edge vigorously with a cloth or slicker.
 |
 |
6. GLUE THE BELT LOOP TO THE LEATHER
Apply contact cement to the ends (length) of the loop, then glue it onto the piece of leather.
 |
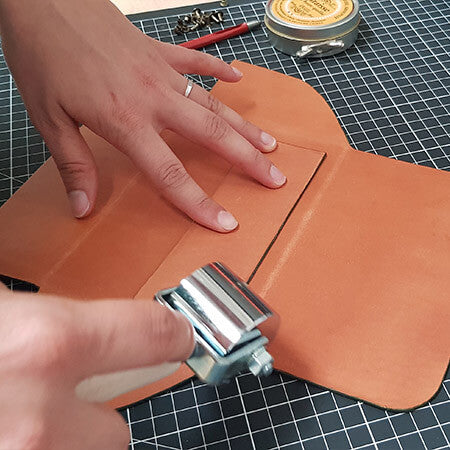 |
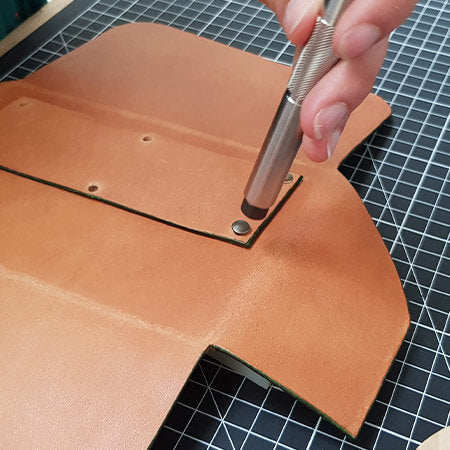
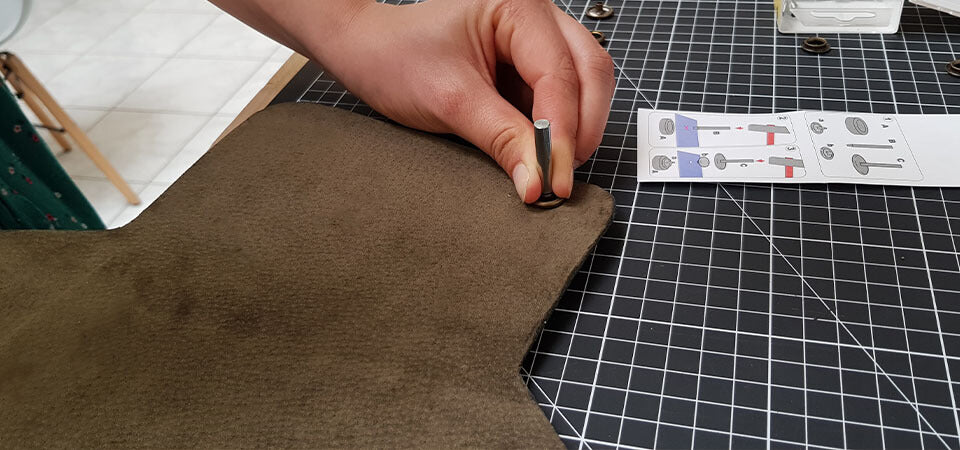
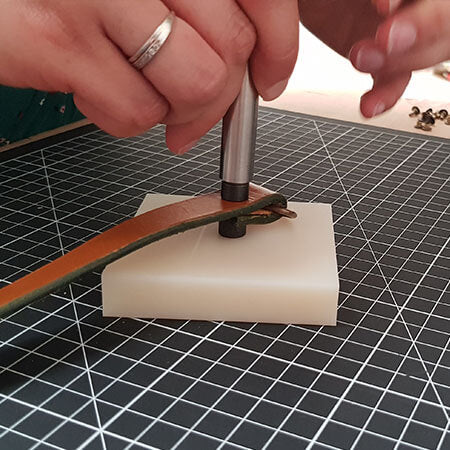
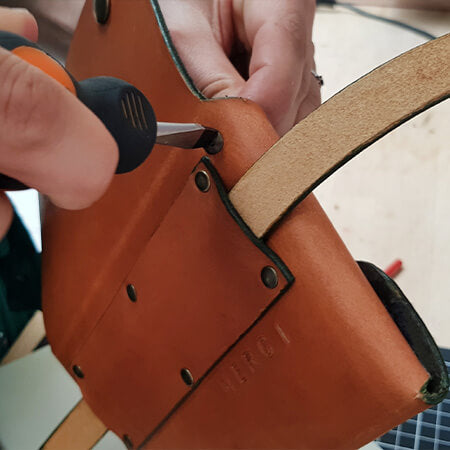
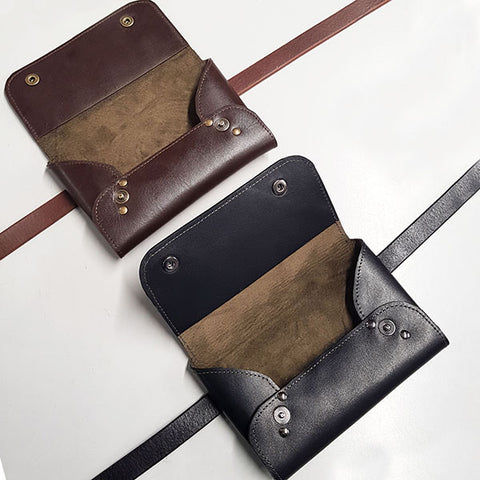
7. ATTACH THE 6 RIVETS
To secure the belt loop, attach 6 T3 rivets. Start by making the 6 holes with the 3mm punch, then hammer the rivets using a setting tool (here a hammer handle).
VIDEO: HOW TO SET RIVETS >
 |
 |
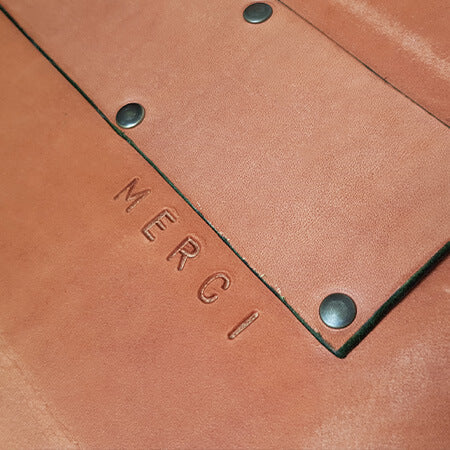
8. OPTIONAL: CUSTOMIZE THE POUCH
Using alphabet stamps, you can write a word on your belt bag.
To learn more:
VIDEO: HOW TO MARK LEATHER? >
 |
 |
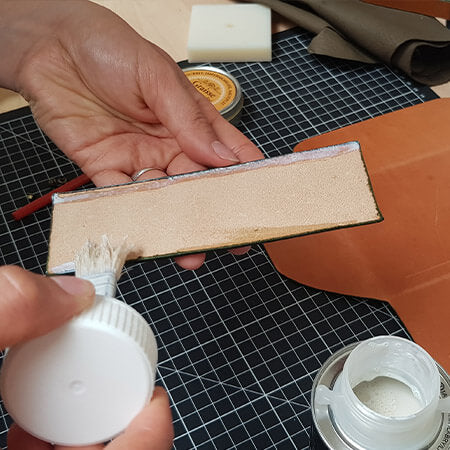
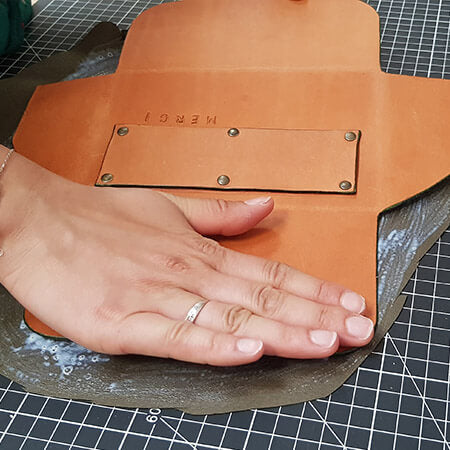
9. GLUE THE LINING TO THE LEATHER
Roughly cut the lining. Then, apply contact cement to the back of the vegetable-tanned leather and the lining.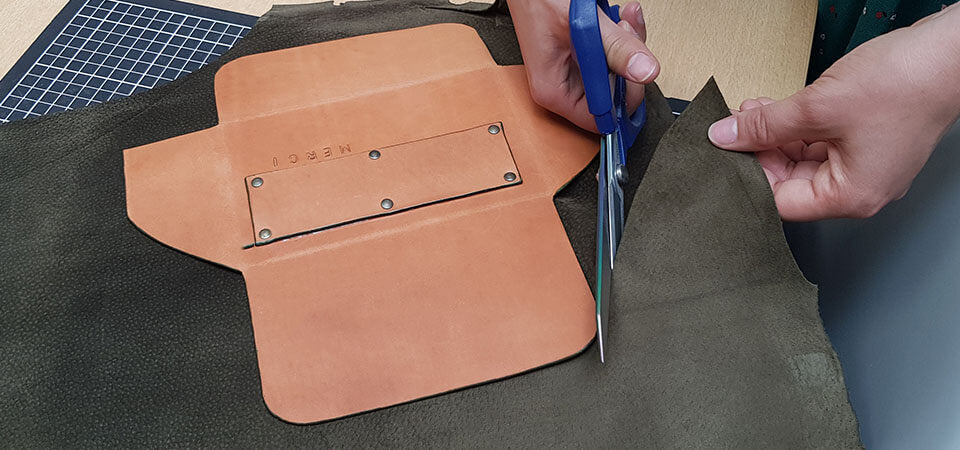
 Wait a few moments for the glue to soak in, then glue the two pieces together.
 |
 |
Using the rotary cutter, cut the lining flush with the leather piece.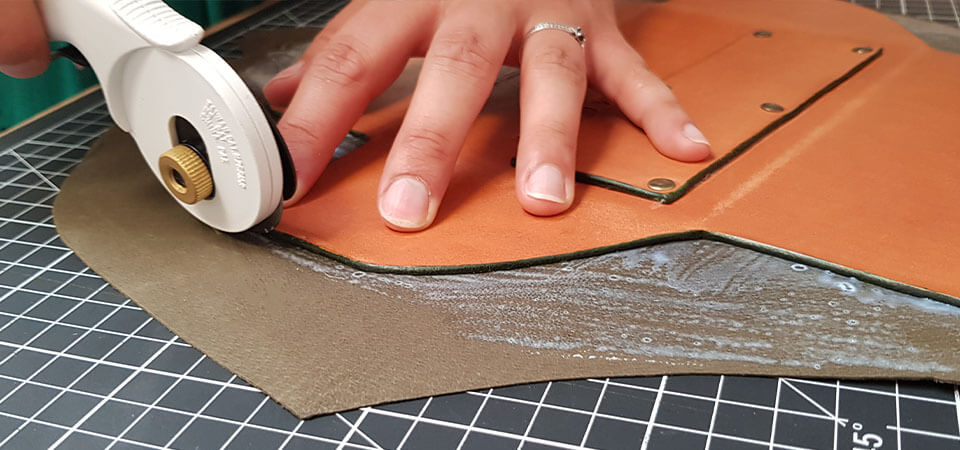
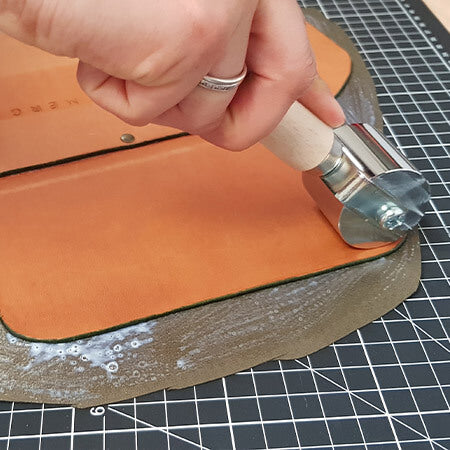
10. RE-WORK THE EDGES
Apply a second coat of Tokonole so that the edges of the leather and the lining become one!
 |
 |
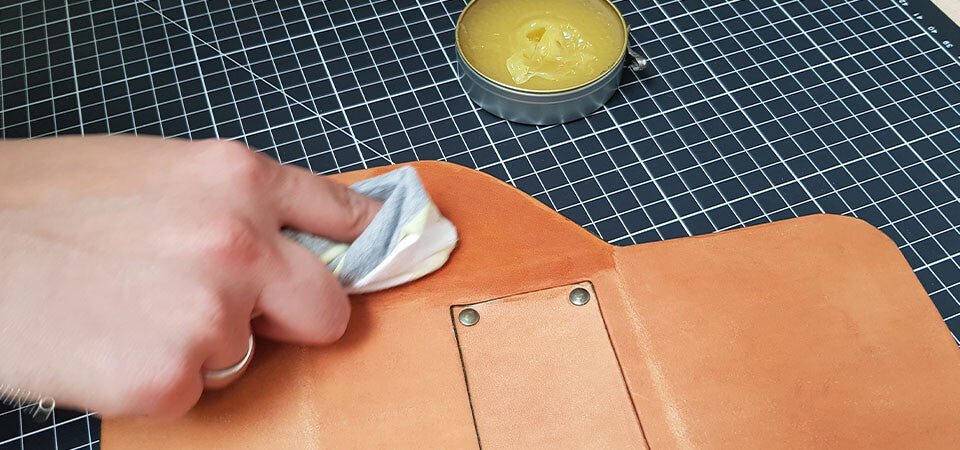
11. NOURISH AND SHINE THE LEATHER
Apply a thin, even layer of grease or oil with a cloth (here, Trimadel's blonde Panda Grease).
VIEW THE SECTION >
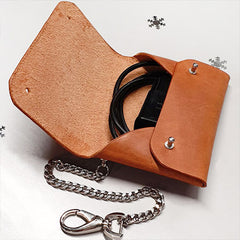
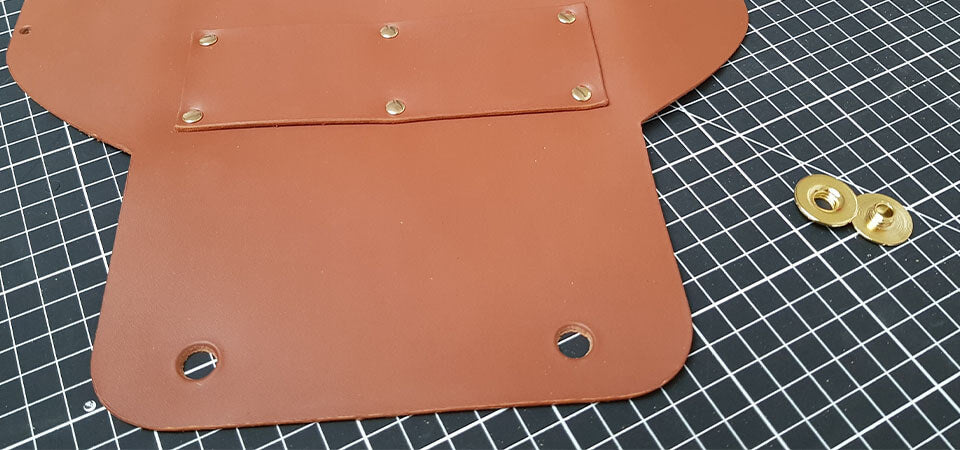
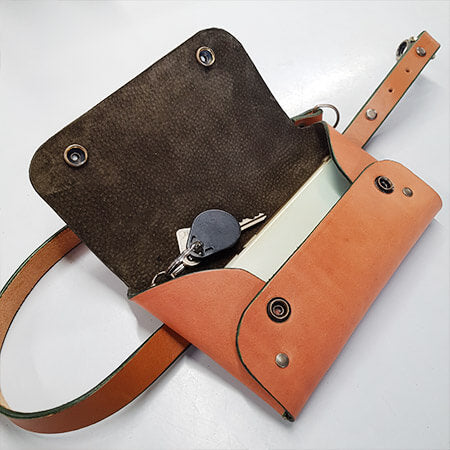
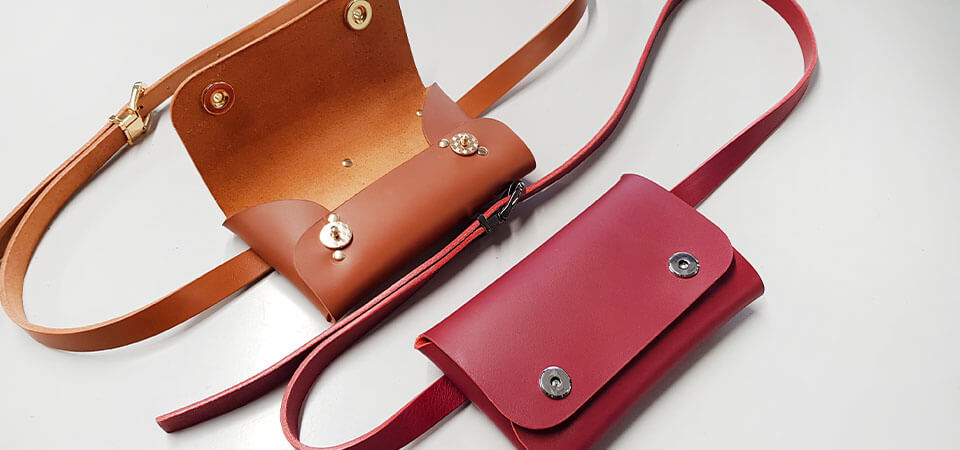
12. ATTACH THE SNAP FASTENERS OR OTHER CLOSURES
Here, we decided to attach heavy-duty snap fasteners to the flap and assemble the pouch with rivets. Please note, here the snap fasteners do not go through both layers of leather. So we only attached the snap fastener posts to the front flap and assembled with T3 rivets.
VIDEO: HOW TO ATTACH A SNAP FASTENER? >
ANOTHER VERSION:
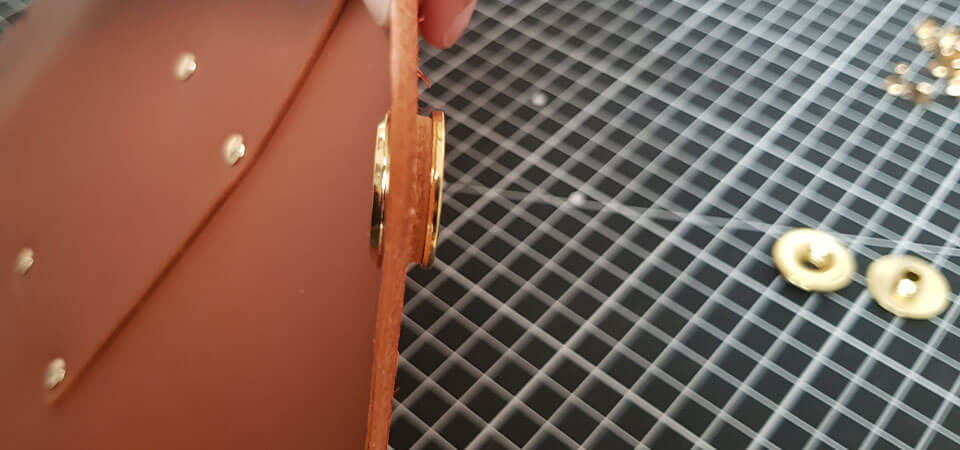
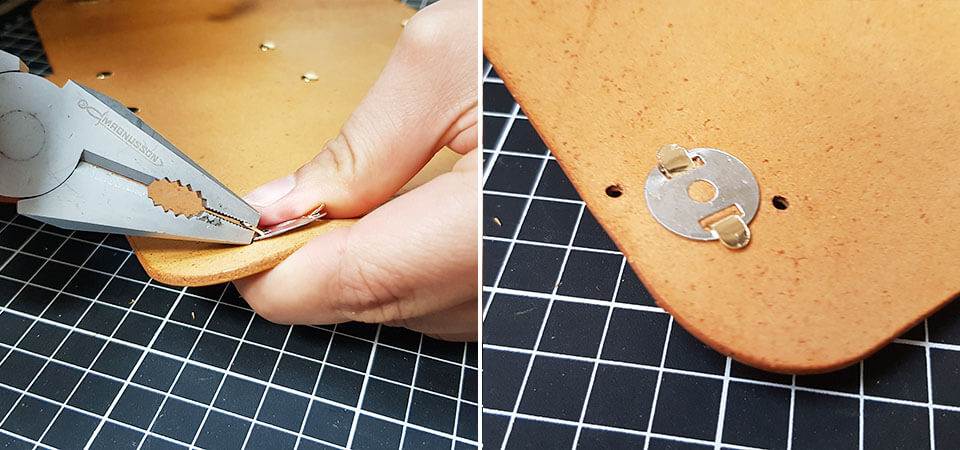
Here we used POLO magnetic tops. These do not require setting tools. Start by making two 10 mm diameter holes for the head and two incisions for the feet. Then screw the fastener heads into the 10 mm holes. For added thickness, place leather discs between the fastener and the flap on the back of the leather.
VIEW MAGNETIC TOPS >
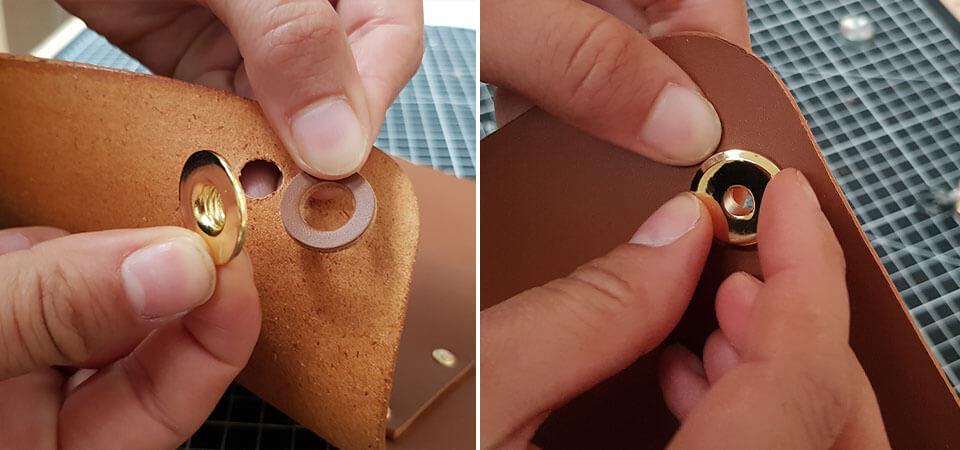
Attach the foot of the magnetic fasteners. Insert the prongs into the incisions then close the prongs using pliers or a ruler.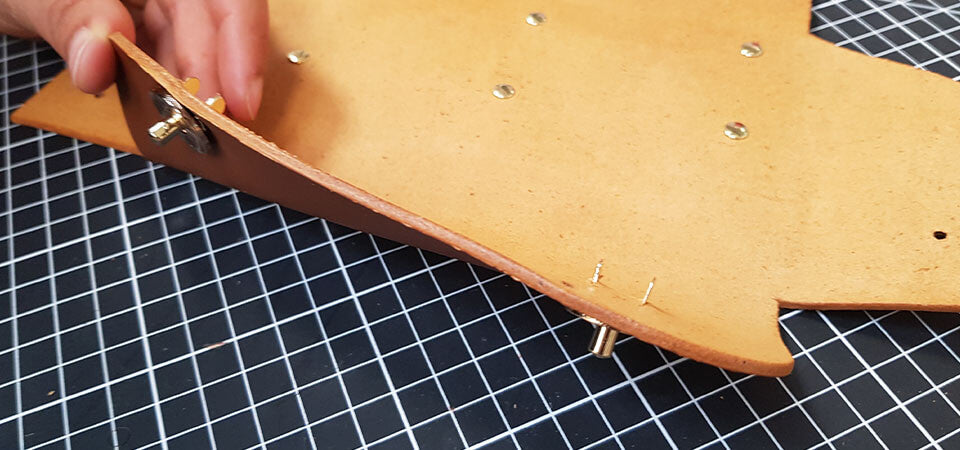
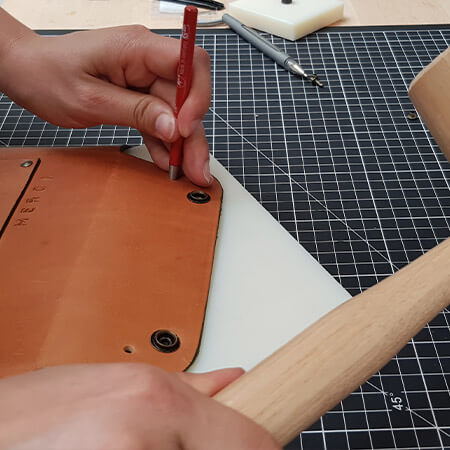
13. ATTACH THE RIVETS
Apply contact cement to reinforce the pouch assembly and attach the T3 rivets.
 |
 |
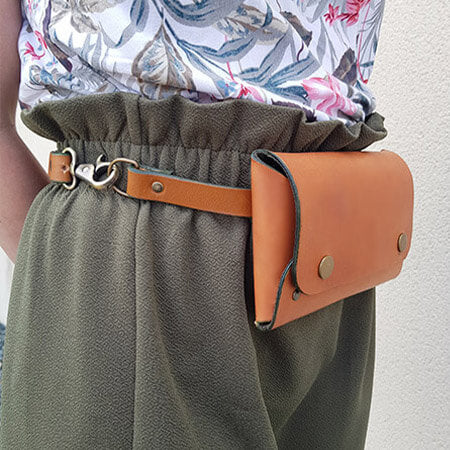
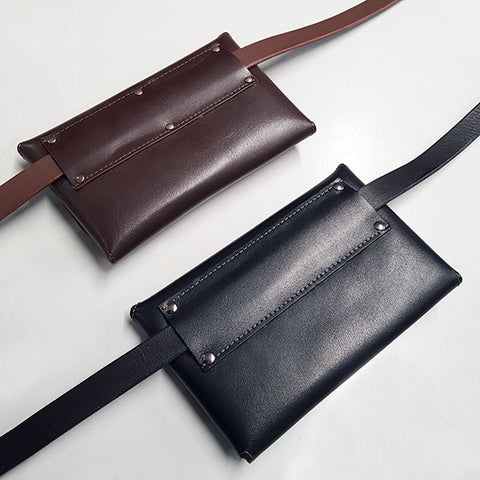
14. WORK ON THE BELT
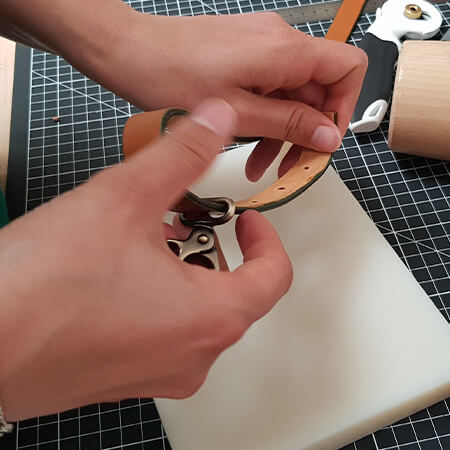
Here, we chose to make a belt that closes with a half-round ring and a snap hook.
Before starting to work on the belt, thread it through the pouch's loop.
Then, place the half-round ring on one end of the belt and close with a rivet.
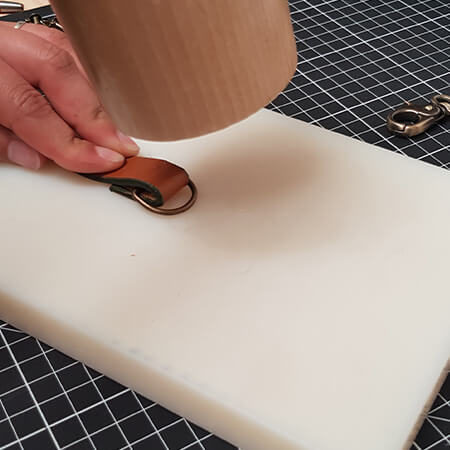 |
 |
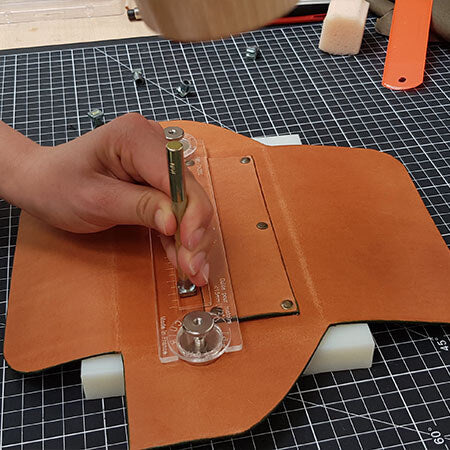
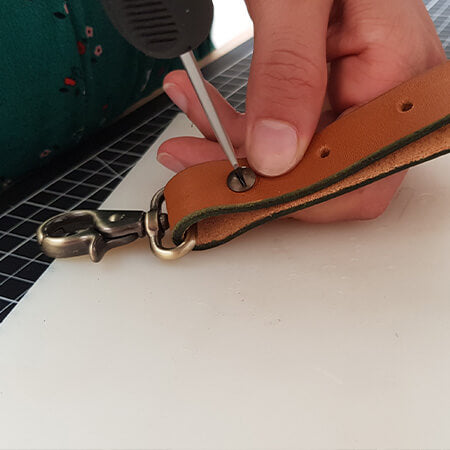
Depending on the desired size and to have an adjustable belt: make several holes spaced 2.5 cm apart. Thread the snap hook, then close with Chicago screws.
 |
 |
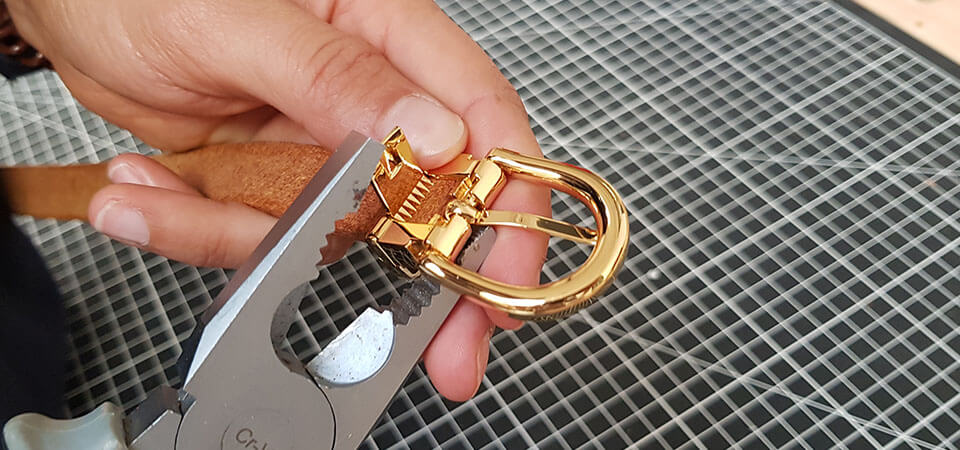
 ANOTHER VERSION:
Make a "standard" and adjustable belt to wear the pouch at the waist or as a crossbody bag.
At one end of the strap, attach a prong buckle using pliers (be careful not to damage the buckle). To wear the pouch as a crossbody bag: make 5 holes of 3 mm spaced 2.5 cm apart (at the other end of the strap and adjust according to your size). The 3rd hole should be the ideal adjustment. To wear the pouch at the waist: also make 5 holes of 3 mm spaced 2.5 cm apart. If you have more than 10 cm left after your last hole, cut off the excess strap.
VIEW THE BELT GUIDE >
 |
 |
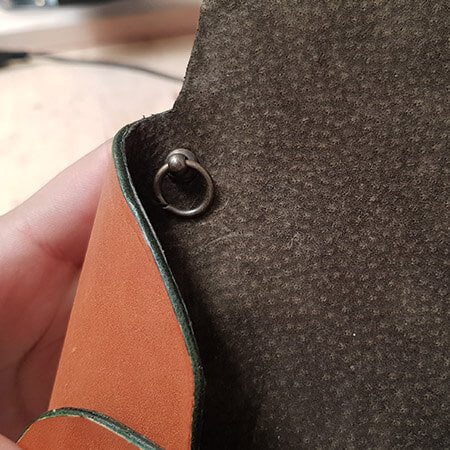
15. THE LITTLE EXTRA!
Add a collar button with a ring to your pouch to attach keys or other precious items (to avoid losing them)!
 |
 |
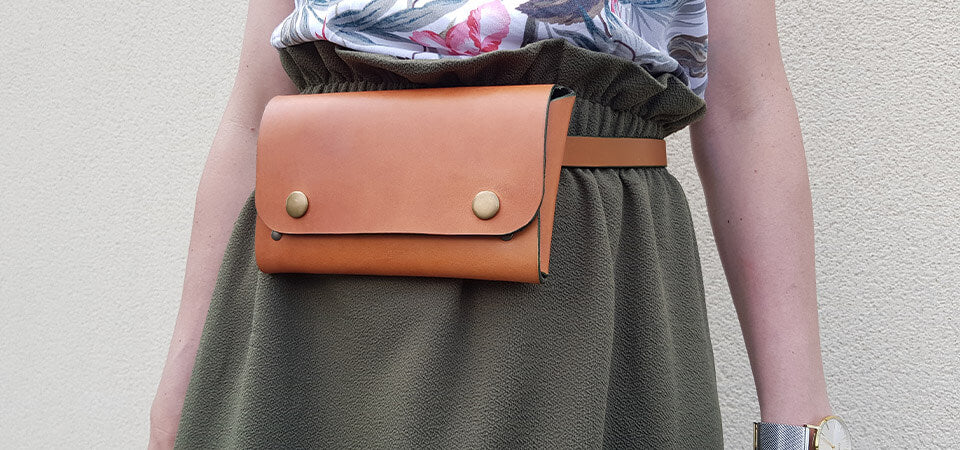
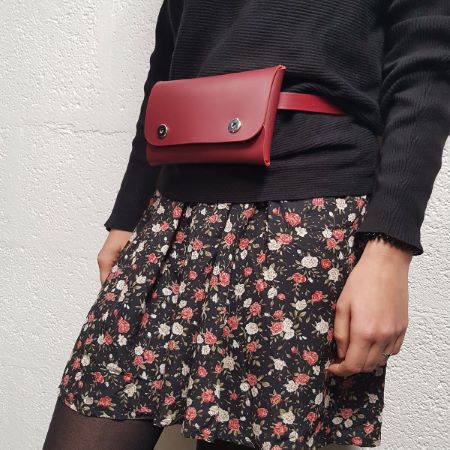
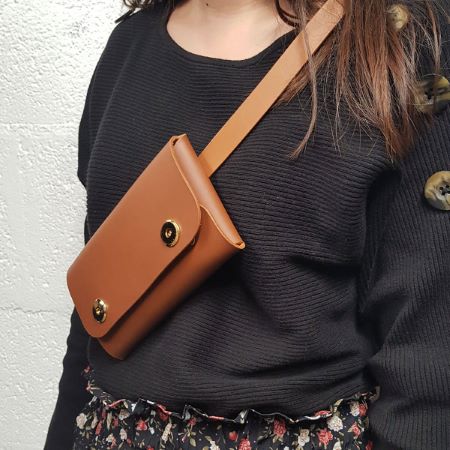
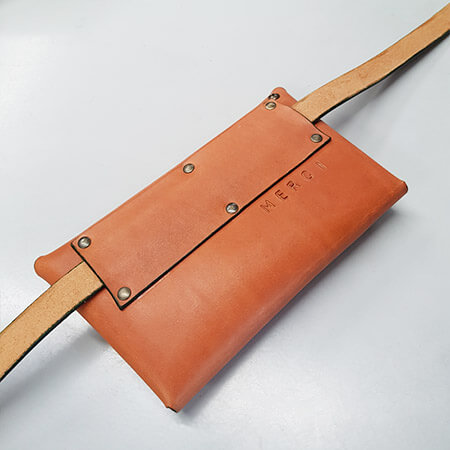
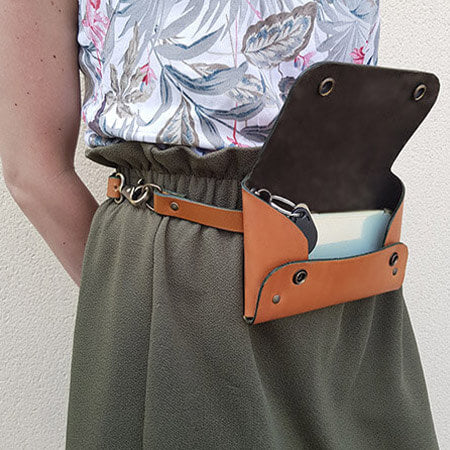
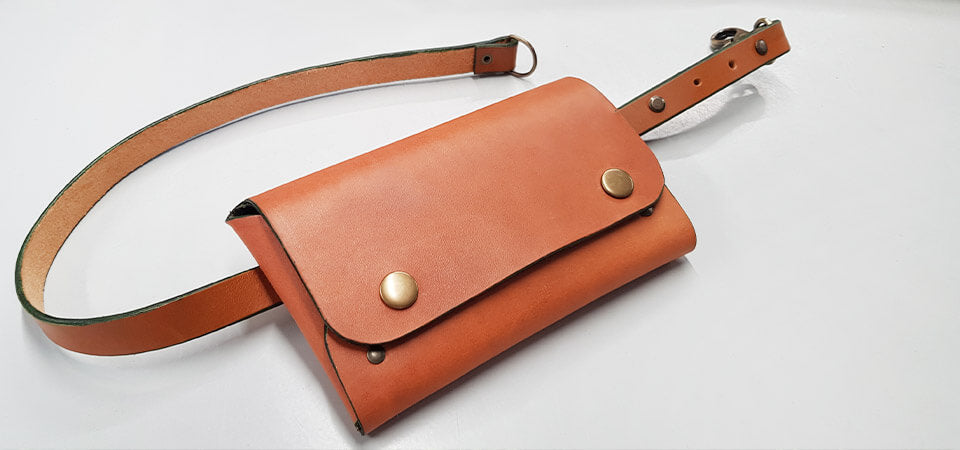
YOUR LEATHER BELT BAG IS COMPLETE...
Ready to accompany you all summer long!
 |
 |
 |
 |
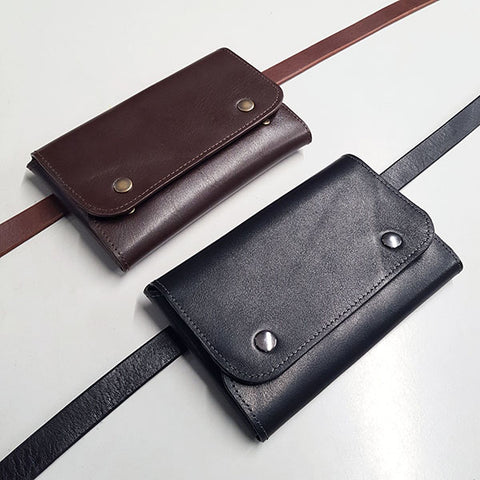
ANOTHER VERSION OF THE FANNY PACK
Discover this other version of the fanny pack made with leathers from our SATINLYS range (the leather was hardened with hardener) and decorative stitching. Closure with 12 mm diameter snap fasteners.
DISCOVER THE SATINLYS RANGE >
*Only 2 colors remain in the Satinlys Range: brown and black.
 |
 |
 |
 |


