


THE NECESSARY MATERIALS
To complete this tutorial, you need:
- Natural vegetable tanned cowhide leather - 20 x 30 cm - Thickness 1.4 mm
- 250 ml pot of water-based contact adhesive with integrated brush in the cap
- Oil Dye - FIEBING'S Professional OIL DYE / PRO DYE - MAHOGANY
- 8m box of MeiSi super fine waxed linen thread M50 - 0.55 mm
- Tokonole - Leather finishing eraser - 120 g - Neutral
- Neatsfoot oil to rehydrate, nourish and soften leather
And the following tools:
- Dual-function tree frog
- Set of 3 precision Deco Cuir n°8 striking claws - Center distance 3.38 mm
- A folding saddler's clamp for sewing leather
- A wooden lisette
1. PRINT AND CUT OUT THE PATTERN
Print and cut out the pattern. You can transfer it to a rigid surface such as cardboard, but if you are careful, this will not be necessary. 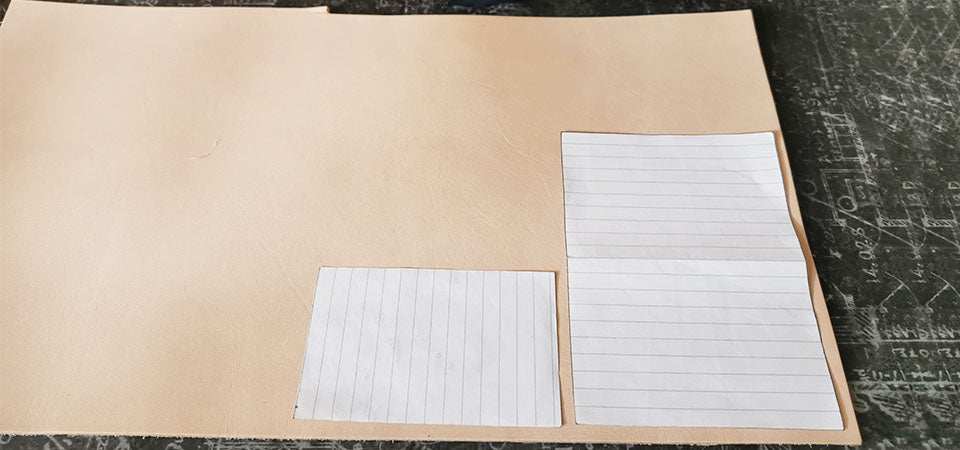
2. TINTING THE LEATHER
Dye the leather before transferring the pattern: this avoids a slight deformation of the leather due to the application of the dye.
You can also maintain your leather at this stage, Aurélien applied neatsfoot oil to nourish and soften the leather. 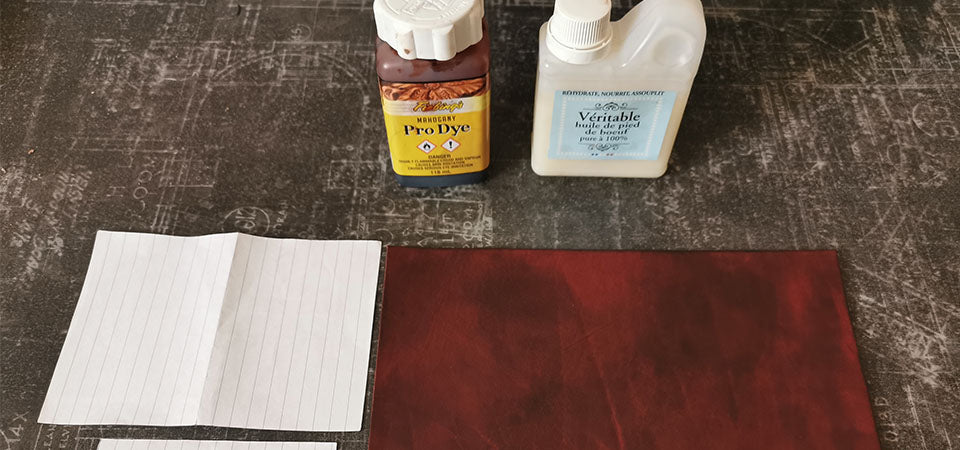
3. MARK THE CUTTING LINE ON THE LEATHER
Using a silver pencil or tracer and the cut-out pattern: mark the cutting lines and holes on the leather.
4. CUT OUT THE TEMPLATES IN THE LEATHER
Cut the leather with a cutter or knife: try to be as even and precise as possible. Aurélien opted for a rounded cut and used drawing guns. 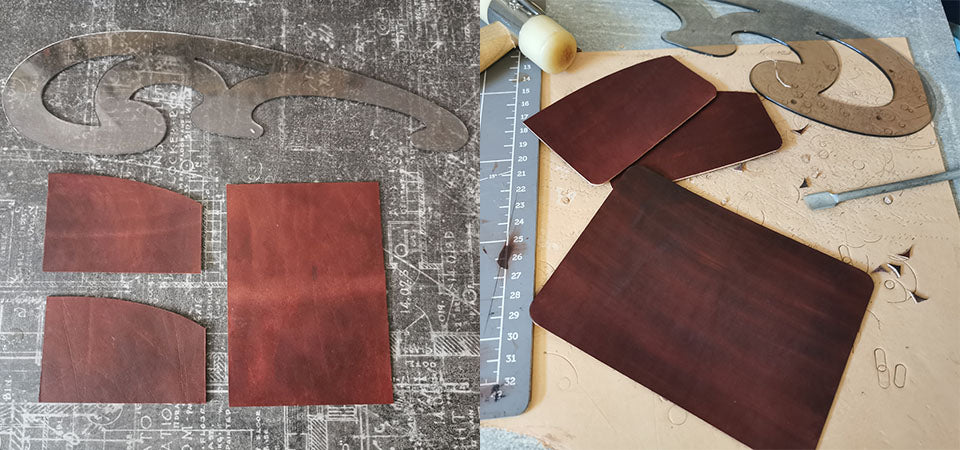
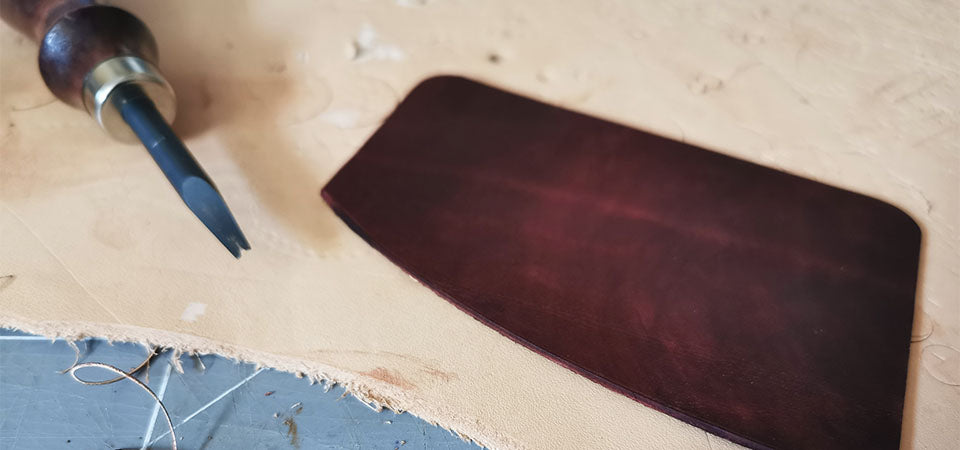
5. WORK THE SLICES
Before gluing, work the edges with a finishing rubber and/or stain as well as with a scuff remover. Particularly the parts that will be difficult to access after gluing.
Here we're working on the "inner" edges of the leather pieces. Aurélien also applied a layer of finishing rubber to the crust side of the leather to give it this look.
GUIDE: USING A FINISHING ERASER >
6. GLUE THE DIFFERENT PARTS
To glue the different pieces of leather together, Aurélien chose a water-based leather glue. Remember to let the glue dry as directed on the container! 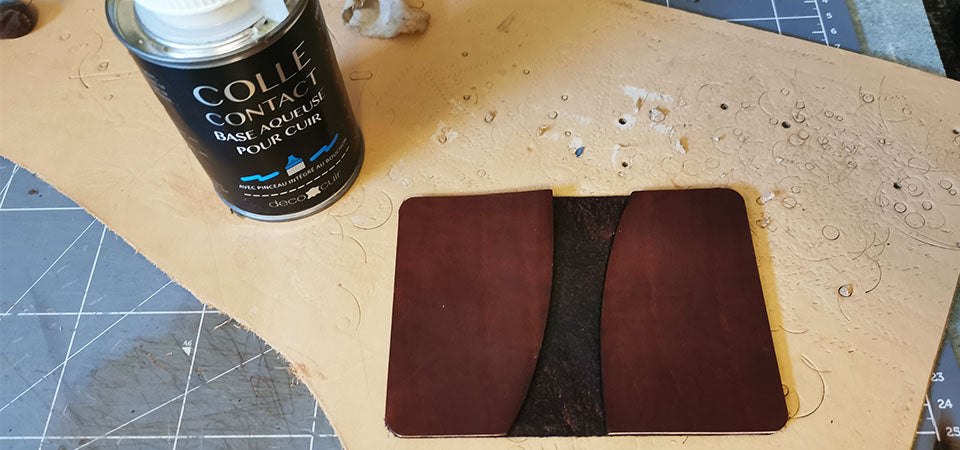
7. PREPARE THE SEAM
Trace the stitching line with a furrier (or compass and former) then mark the leather with a claw. Since the leather is not thick, Aurélien did not pierce the stitching points with an awl. 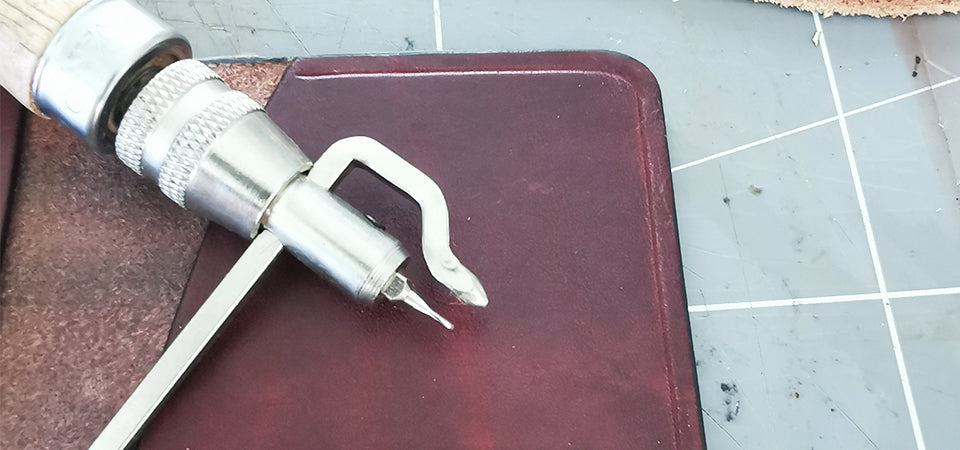
8. SEW AND FINISH THE SLICES
Saddle stitching with waxed linen thread from the card holder. To learn more about saddle stitching, see our guide:
SEWING GUIDE >
After sewing, finish working the slices (see step 5). 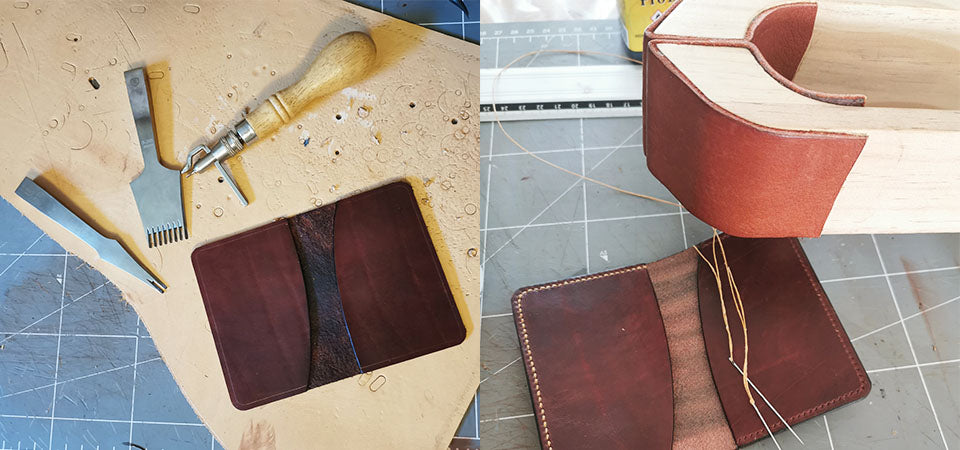
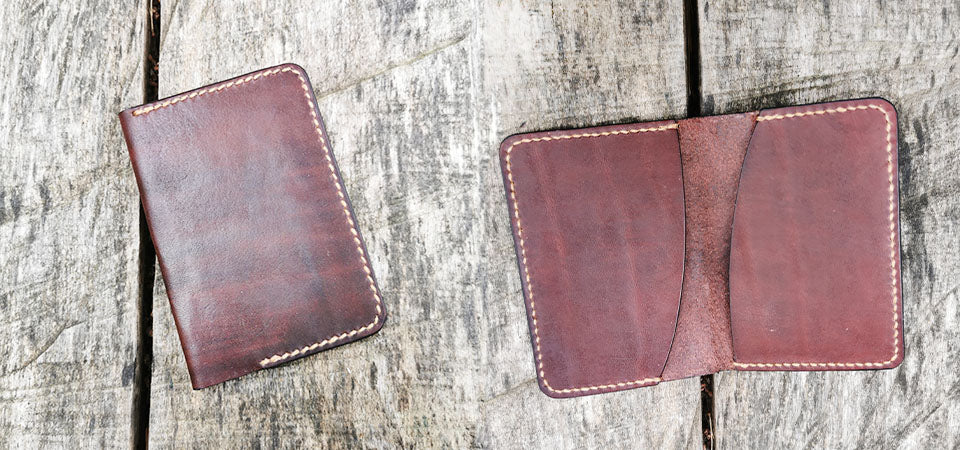
YOUR CREATION IS COMPLETE!