
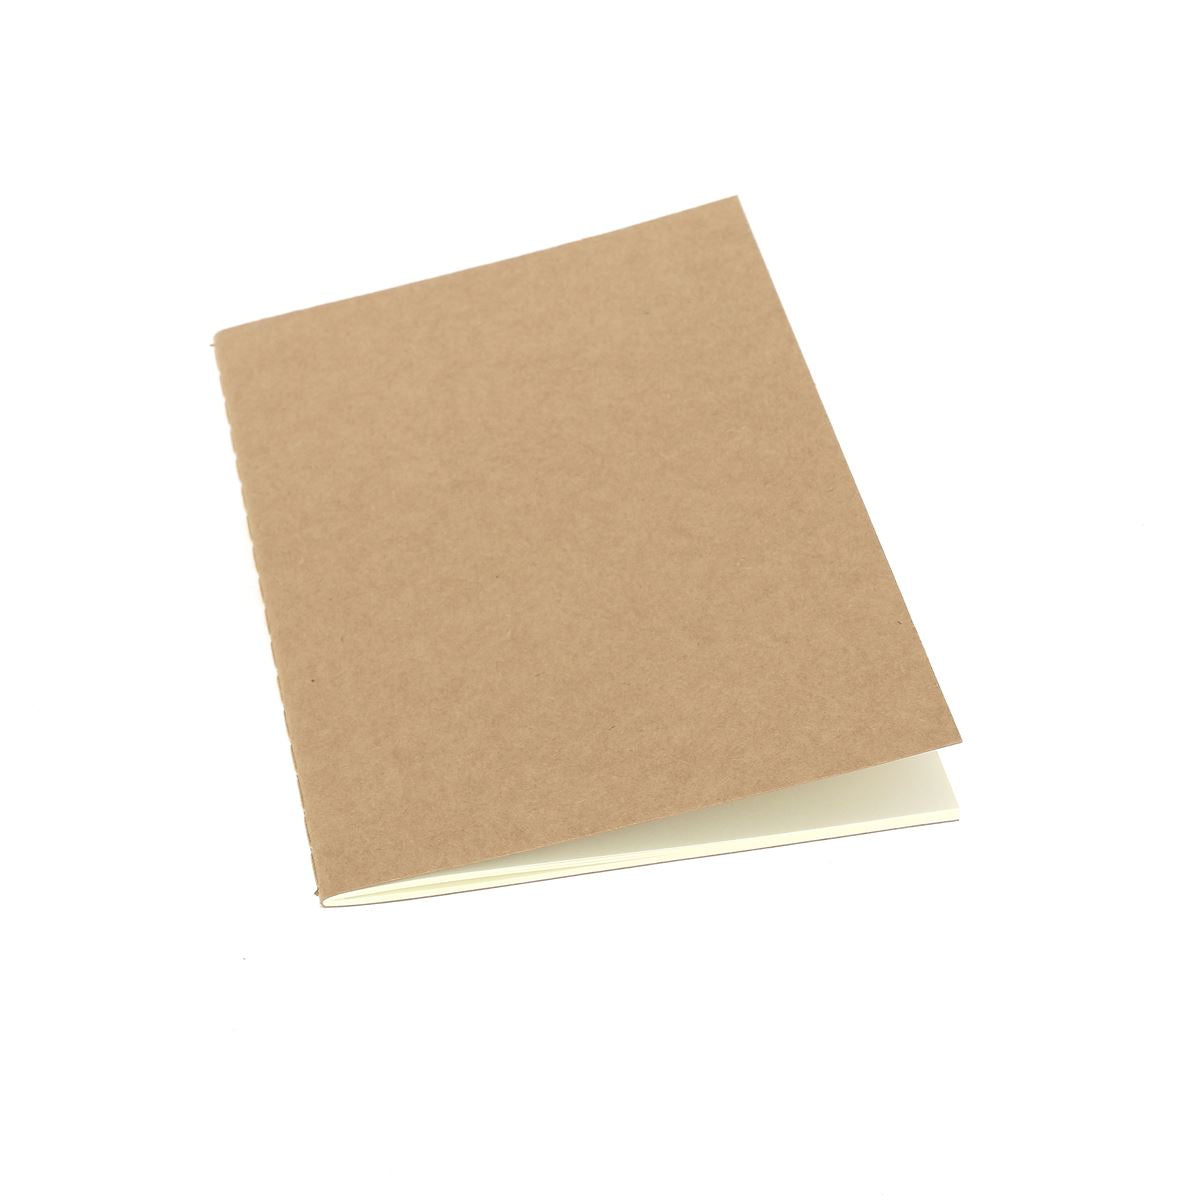
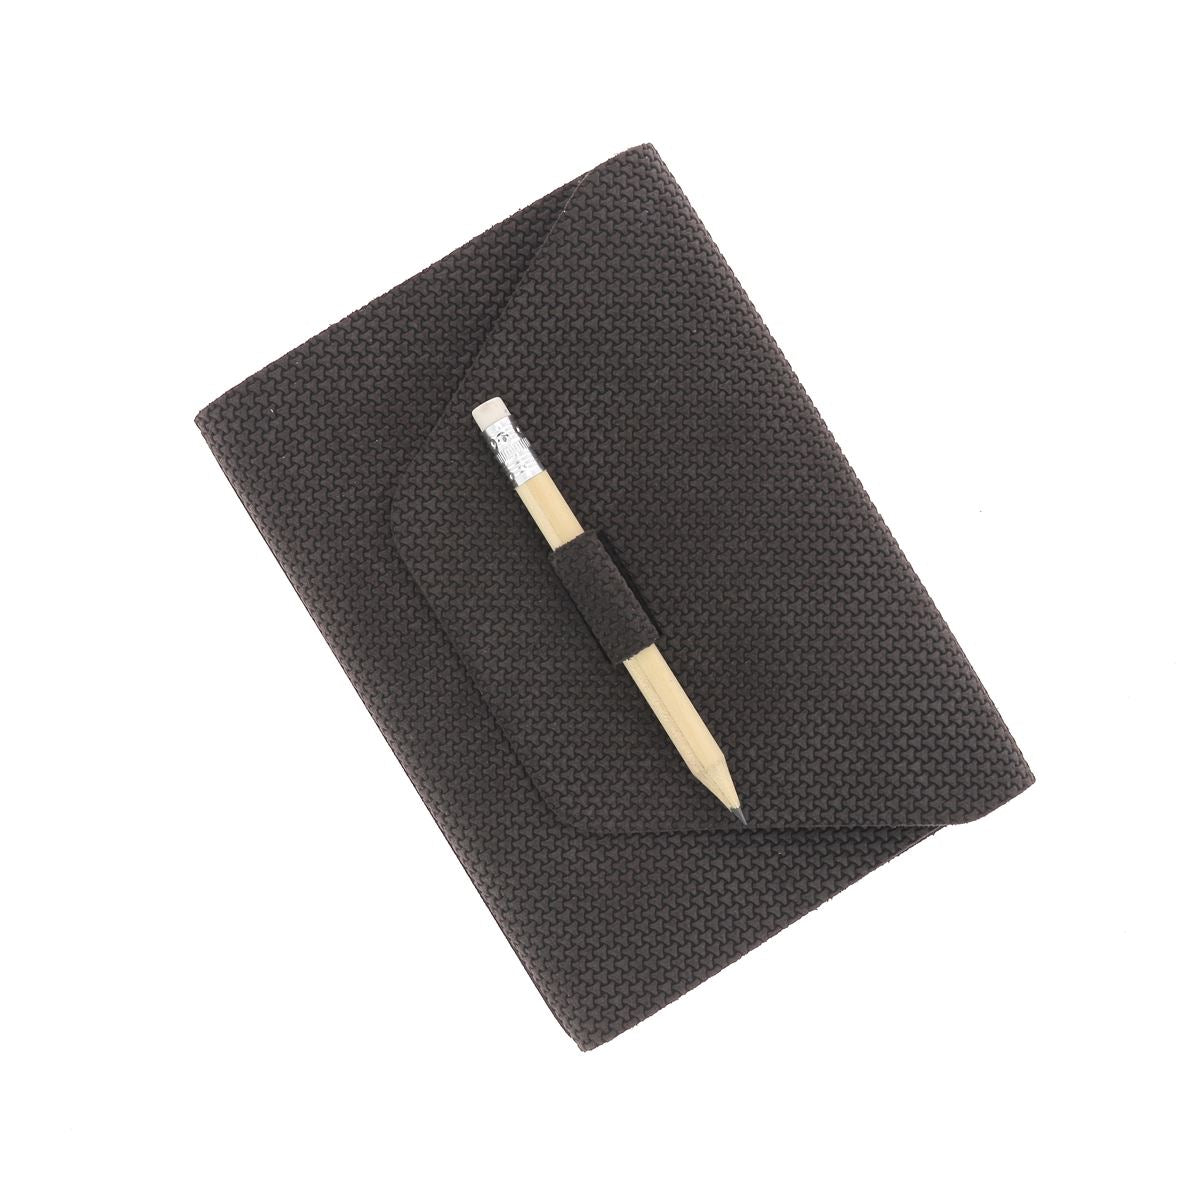
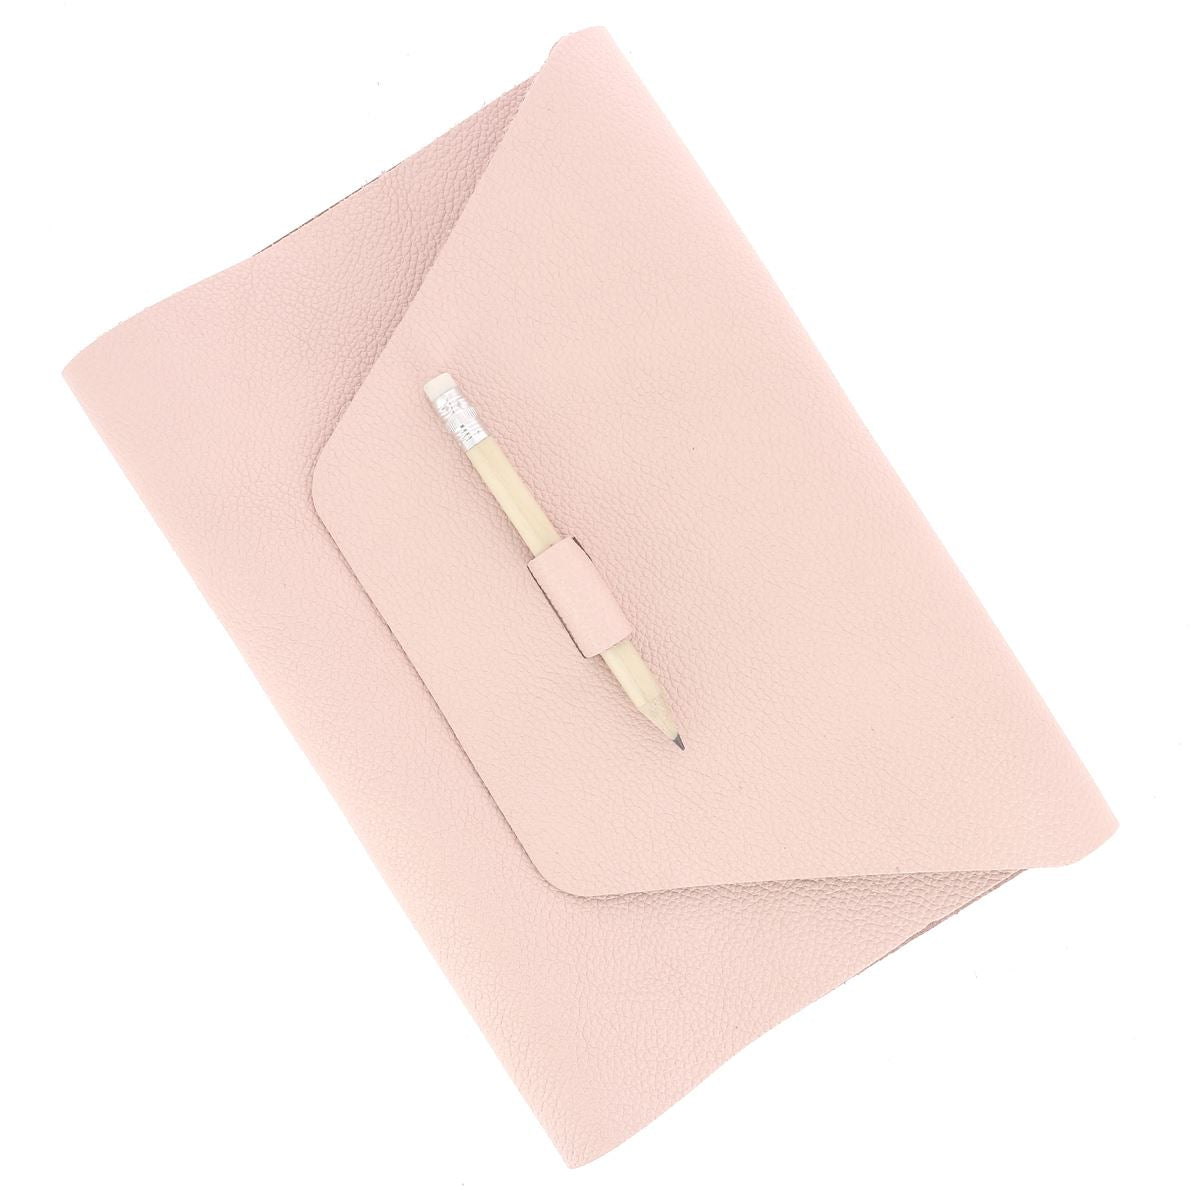
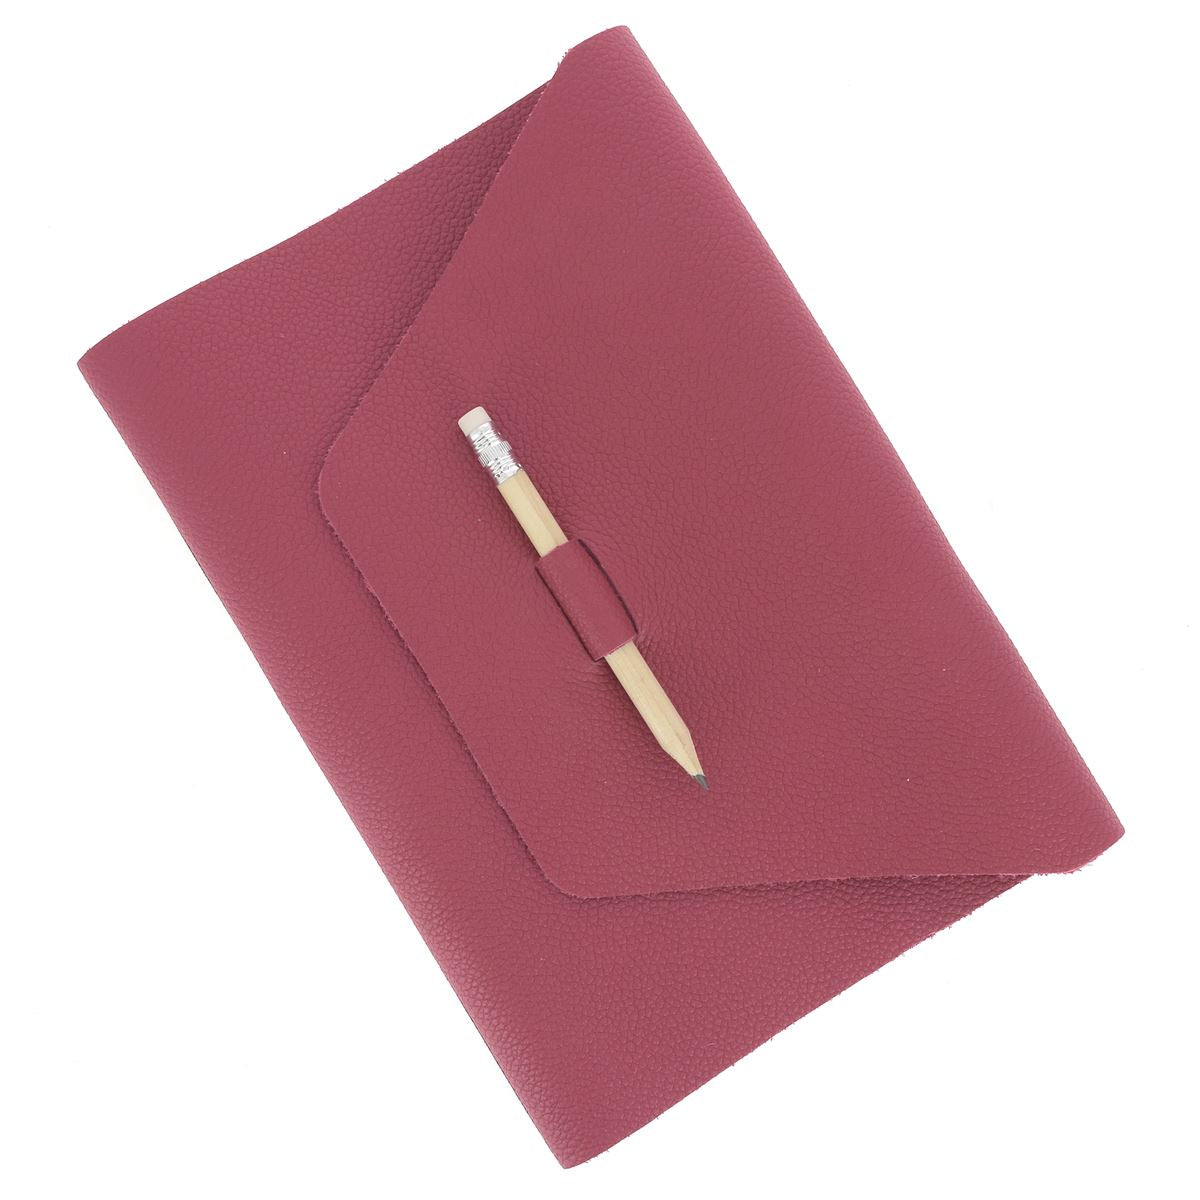
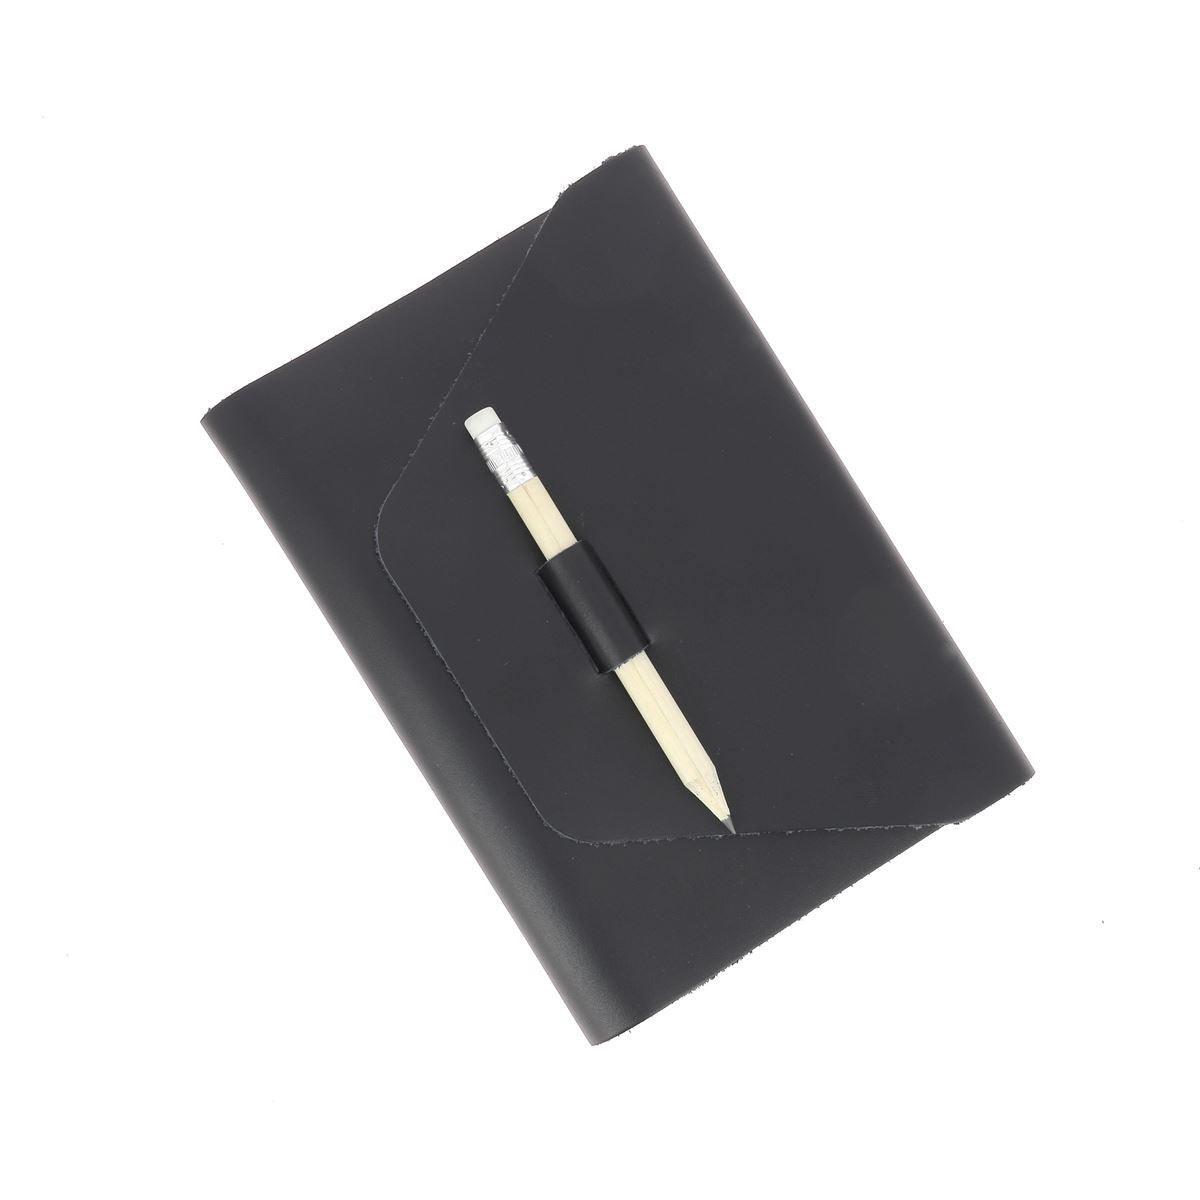
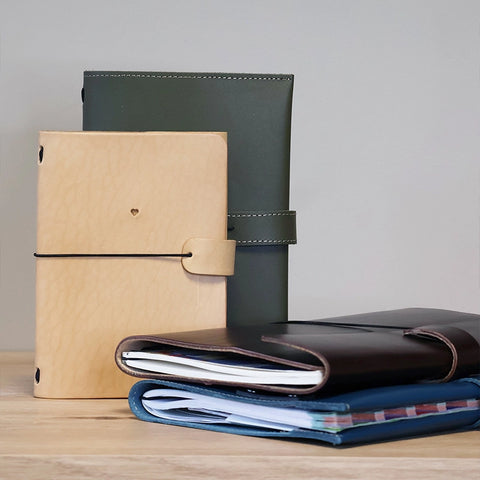
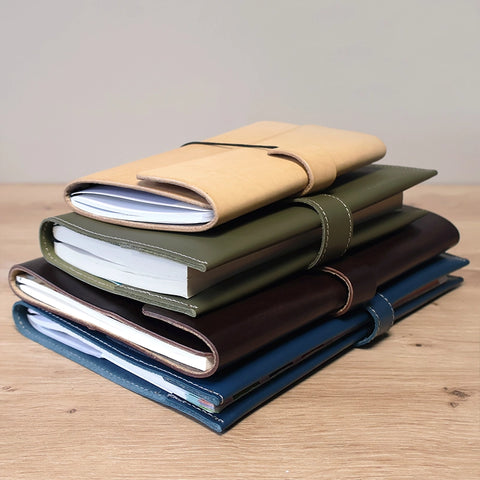
VERSION N°1 - SIMPLE AND ELEGANT SEAMLESS


SUPPLIES IN DETAIL:
To complete this tutorial, you will need:
-
1 piece of fairly firm leather, about 1.4 mm thick
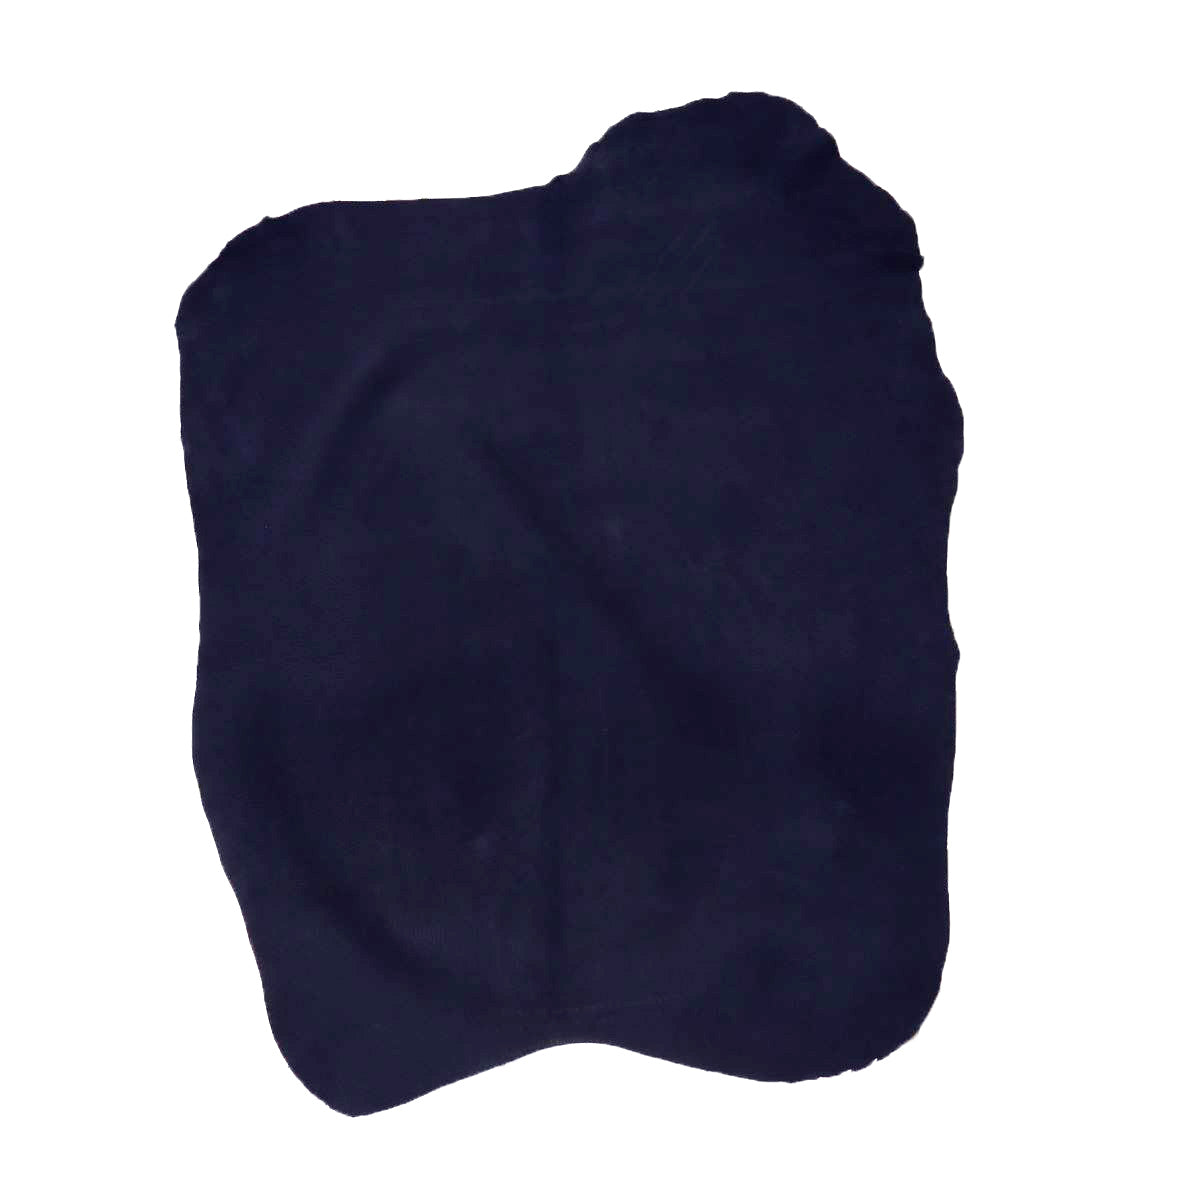
Estimated size: a 20 x 30 cm piece for an A6 notebook, a 30 x 40 cm piece for an A5 notebook. A leather hide for an A4 notebook (approx. 0.40 m2). - 1 piece of VELVET pig suede leather (approx. 0.30 m2).
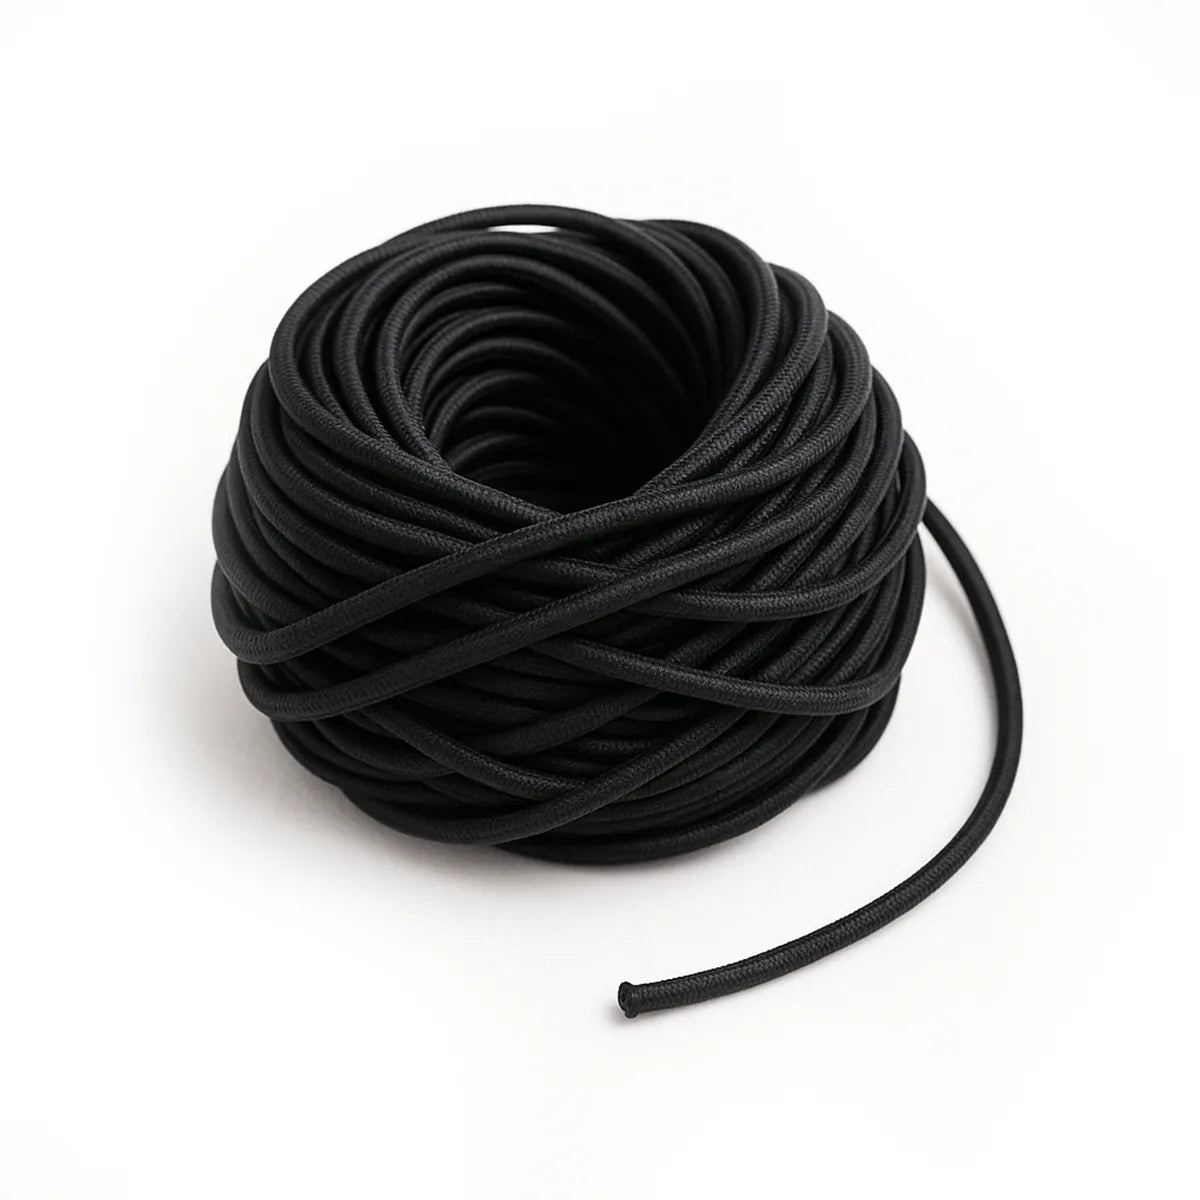
- 1.50m of elastic cord - 1.5 mm diameter
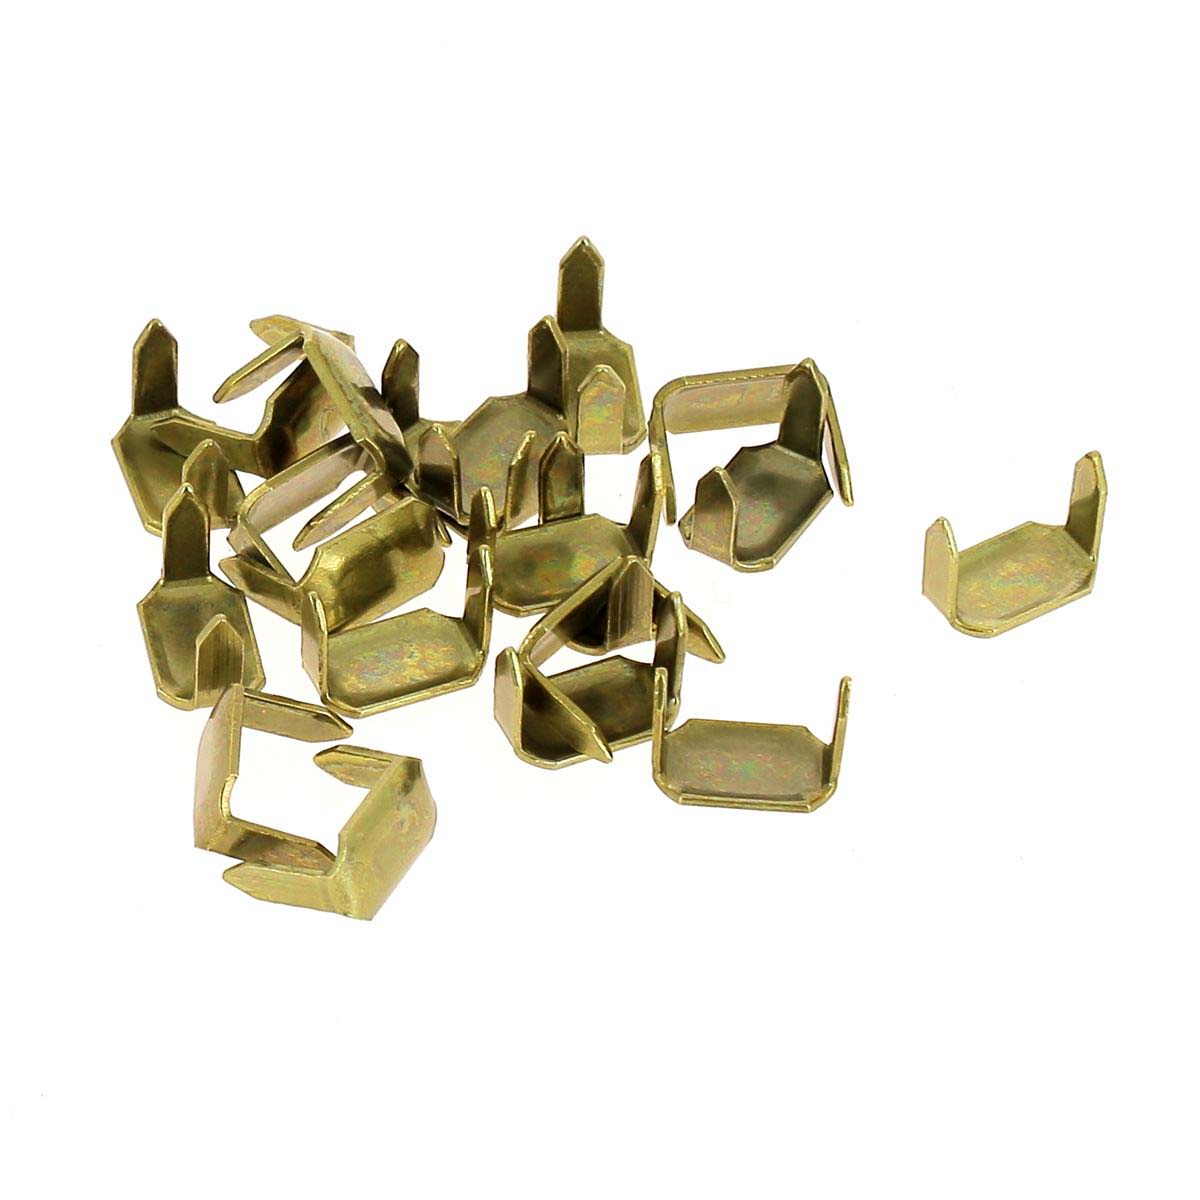
- 1 leather strap staple
-
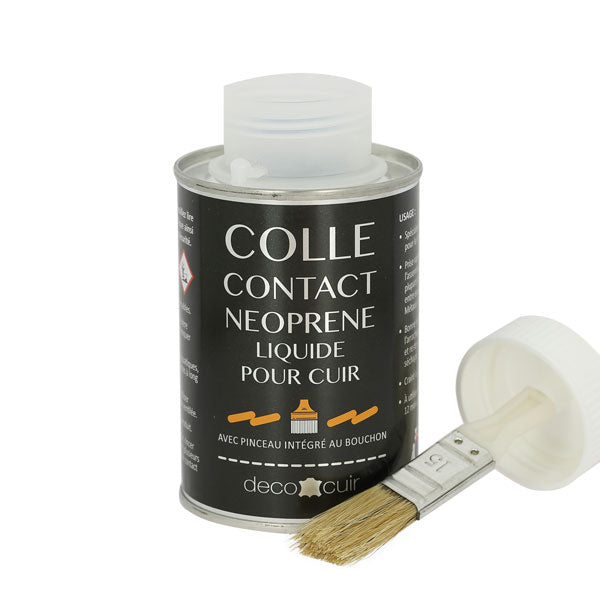
Neoprene glue
OPTIONAL: Tokonole leather finishing gum OR edge finishing paint
And the following tools:
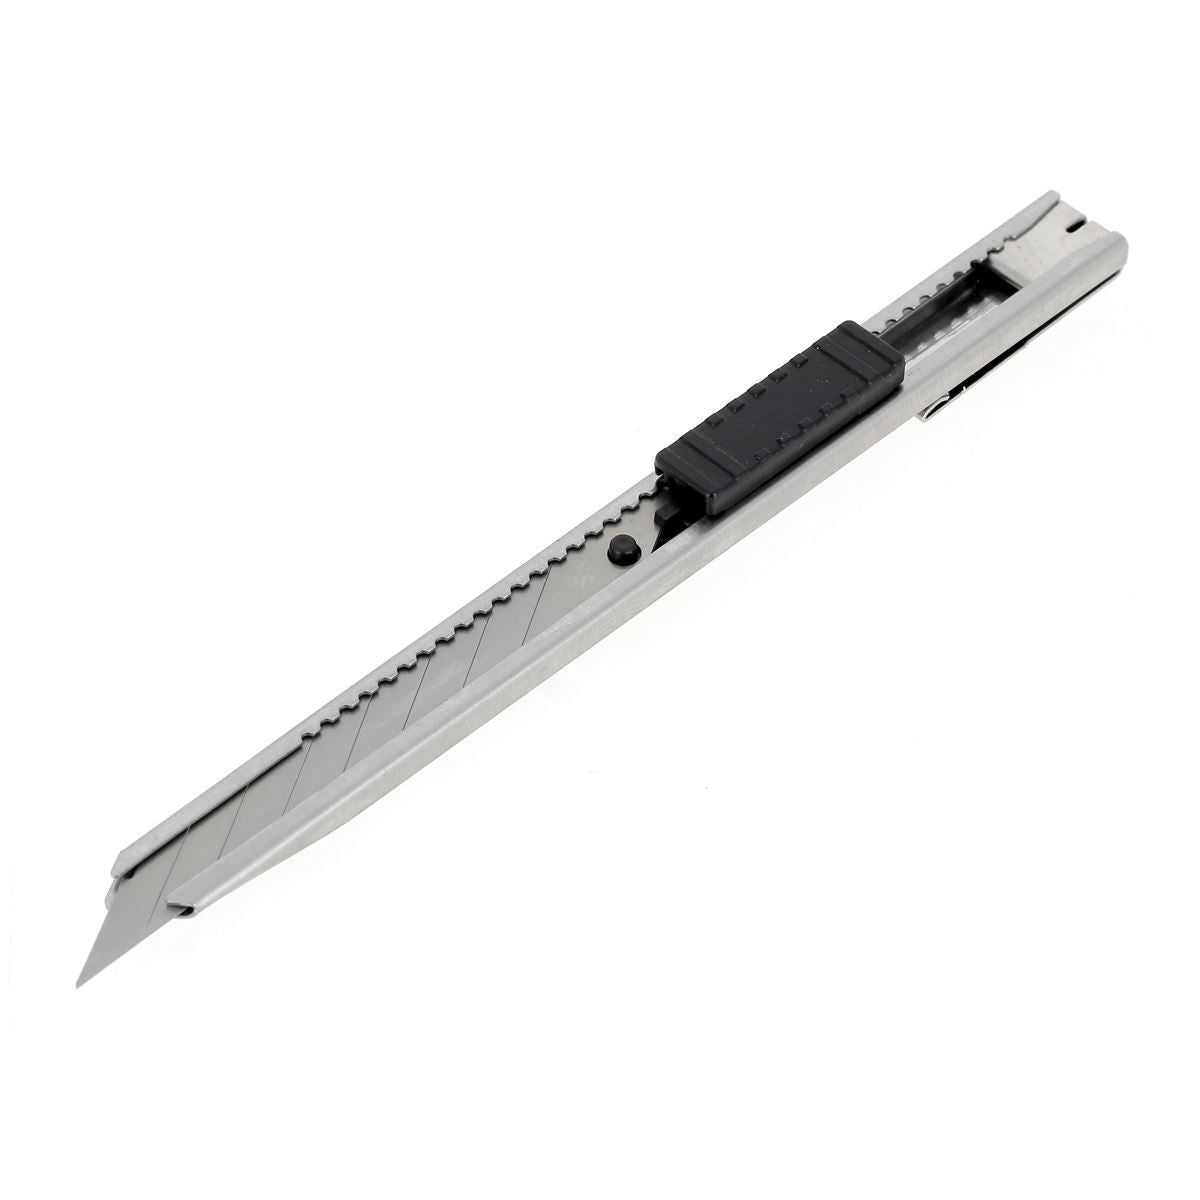
- 1 utility knife
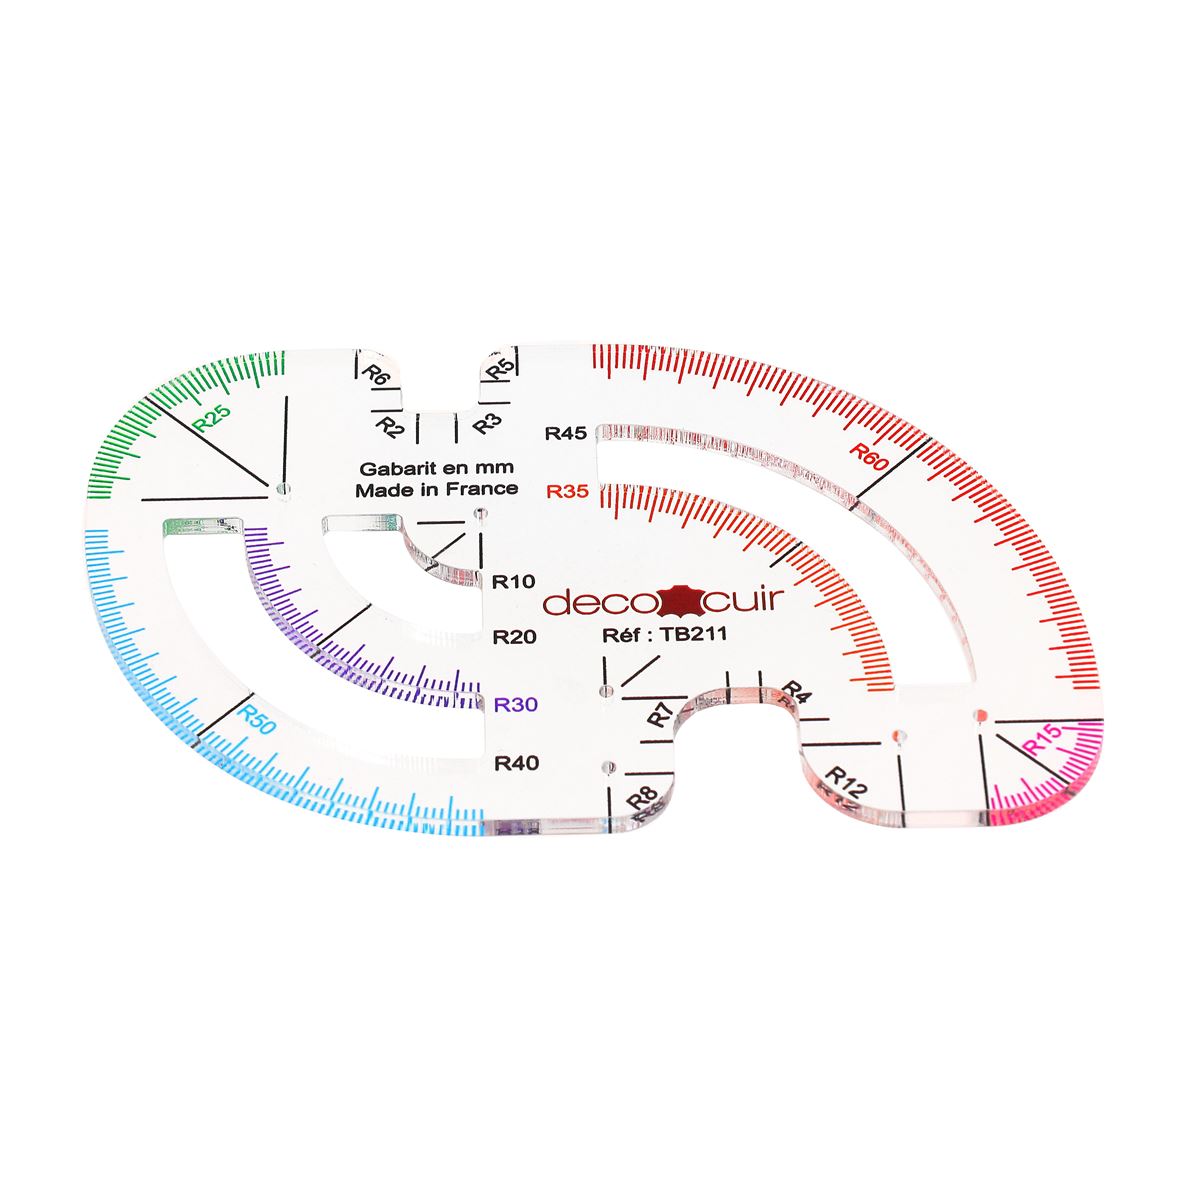
- 1 corner template
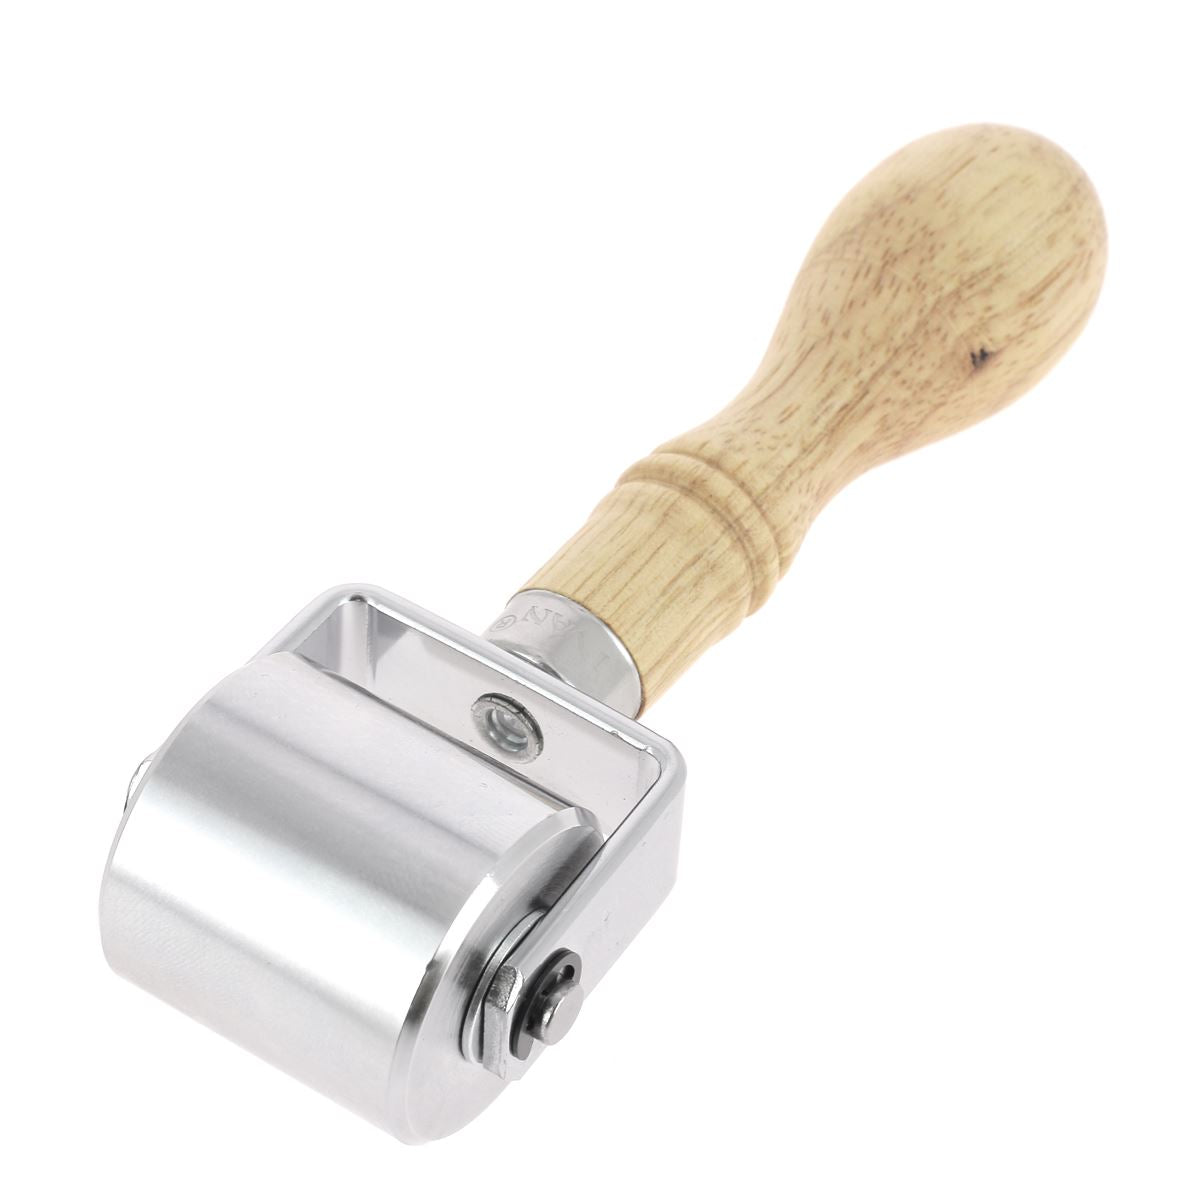
- 1 roller press
- 1 round punch tool Ø 2 mm and Ø 3 mm


Little extras
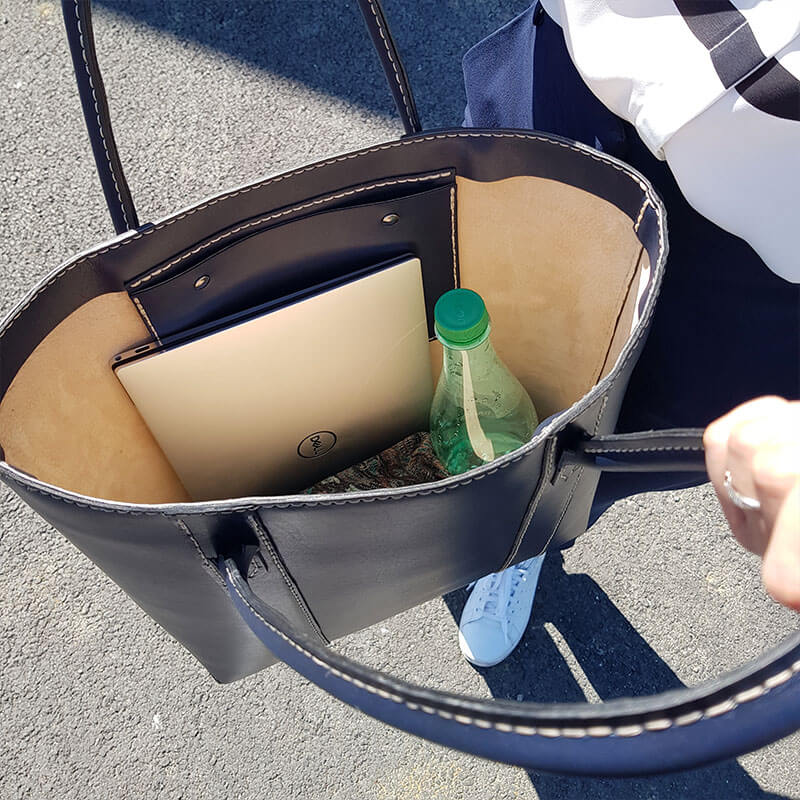
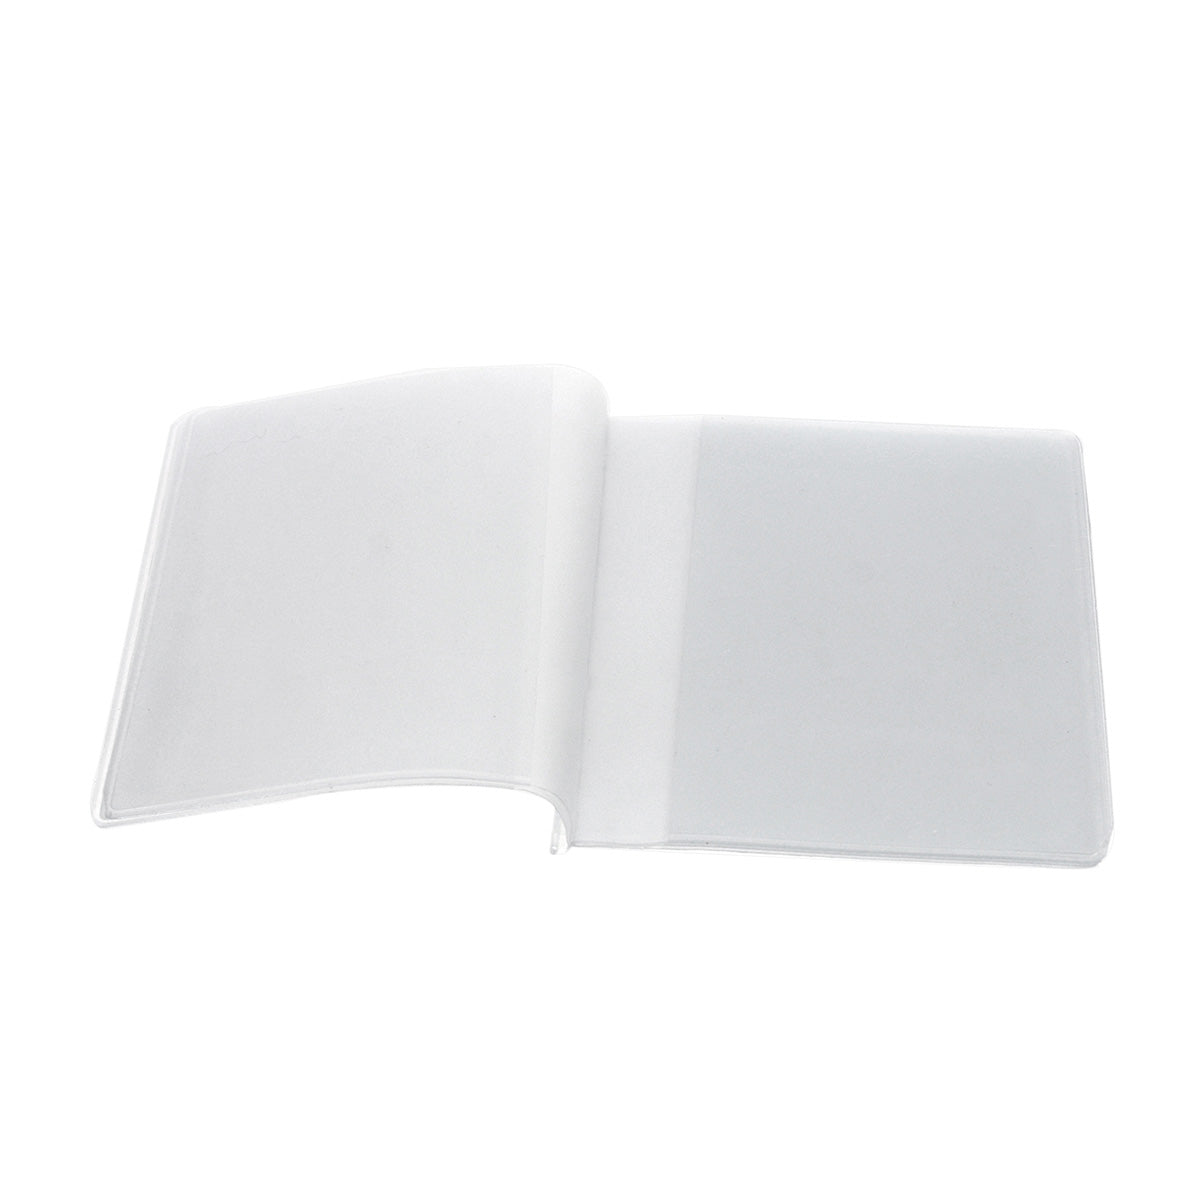
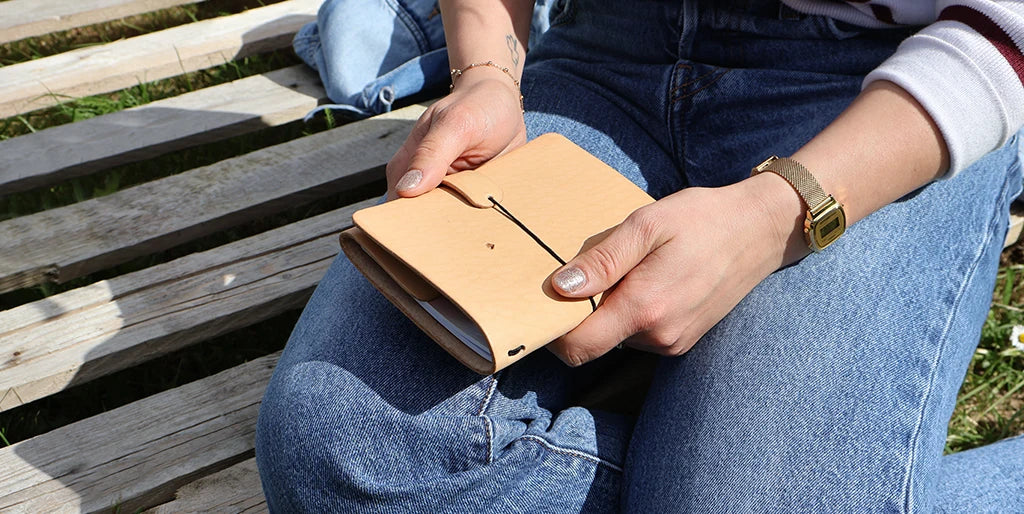
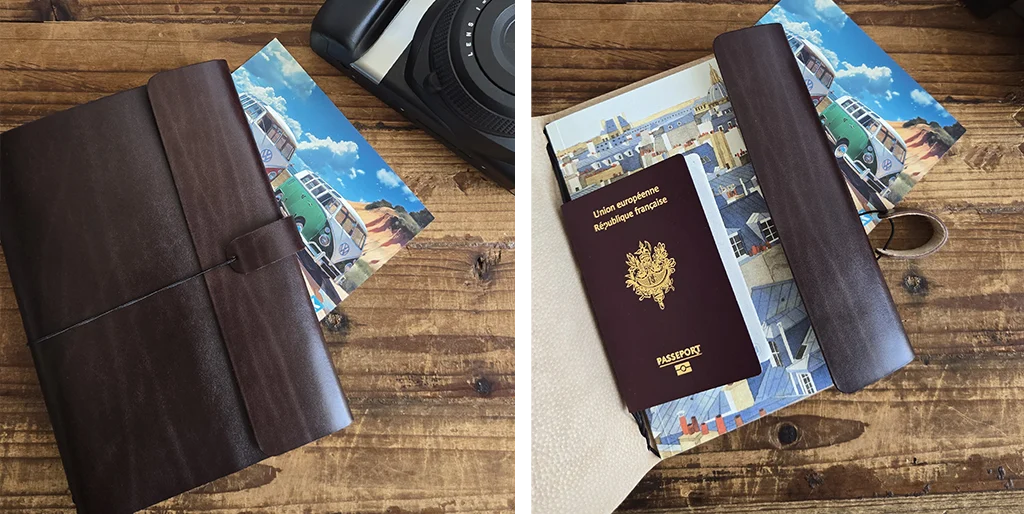
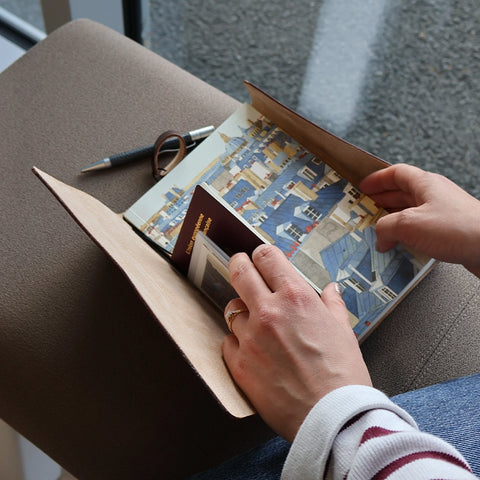
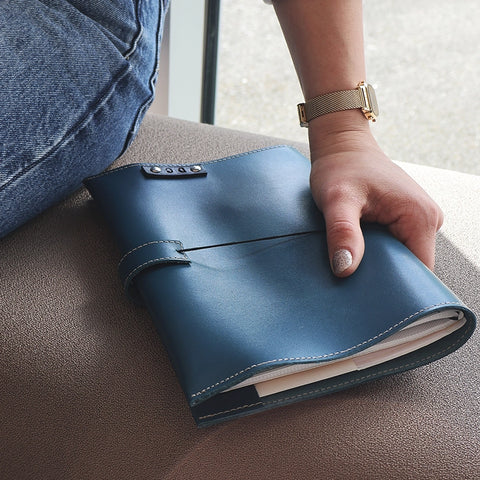
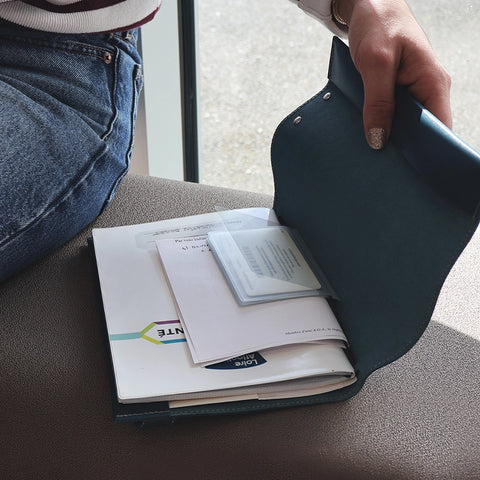
With the 4 elastic bands inside, you can slip in several notebooks, a passport or even add our transparent card holder (for sale on our website - Ref. )! You can also personalize your leather with a marking or add a piece of tricolor ribbon.


Video
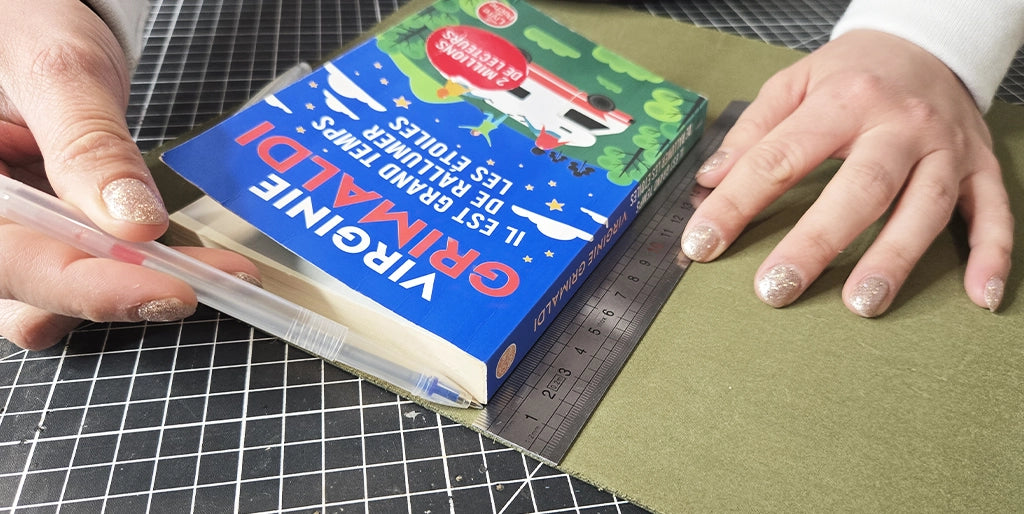
1. Pattern making
Dimension calculation: The ideal is to add at least 1 cm margin in height (i.e. 0.5 cm at the top and bottom) and to add 2x the width and 2x the thickness + 7 cm. We advise you to do tests before cutting.
For an A6 format:
Our notebook is 10.5 x 14.8 cm and 1 cm thick.
For the height: add 1 cm margin (i.e. 15.8 cm total height).
For the width: 30 cm will be needed (10.5 + 10.5 +1 +1 + 7 = 30 cm). This 30 cm includes the inner return (small flap) of about 6 cm.
Our cut therefore measures 15.8 cm x 30 cm. This version fits into a 20 x 30 cm piece of leather.
SMALL LEATHER TAB (on the front of the notebook).
There is also a second piece of 9 x 2 cm to cut from the leather scraps.
For an A5 format:
Our notebook is 14.8 x 21 cm and 1 cm thick.
For the height: add 1 cm margin (i.e. 22 cm total height).
For the width: 39 cm will be needed (14.8 + 14.8 + 1 +1 + 7 = 39 cm). This 39 cm includes the inner return (small flap) of about 6.5 cm.
Our cut therefore measures 22 cm x 40 cm. This version fits into a 30 x 40 cm piece of leather.
SMALL LEATHER TAB (on the front of the notebook).
There is also a second piece of 9 x 2 cm to cut from the leather scraps.
ASIDE
Do you have an A6 or A5 notebook and want a notebook protector without any effort and at a low price? Fall for one of our leather cuts!


For an A4 format:
Our notebook is 21 x 29.7 cm and 1 cm thick.
For the height: add 1 cm margin (i.e. 31 cm total height).
For the width: 51 cm will be needed (21 + 21 + 1 +1 + 7 = 51 cm). This 51 cm includes the inner return (small flap) of about 6.5 cm.
Our cut therefore measures 31 cm x 51 cm. This version fits into a leather hide of approximately 0.40 m2.
SMALL LEATHER TAB (on the front of the notebook).
There is also a second piece of 9 x 2 cm to cut from the leather scraps.
For the health record and paperback book, we preferred version N°2 with stitching (a little further down in the blog article) but you can also make a health record protector or a book cover without stitching (version N°1).
- For a paperback book cover (11x18 cm and about 350 pages - i.e. 2 cm thick) you will need a piece of about 19 x 35 cm and a tab of 2 x 13 cm.
- For a health record protector (15 x 21 cm and about 104 pages - i.e. 0.7 mm thick) you will need a piece of about 22 x 40 cm and a tab of 2 x 9 cm.
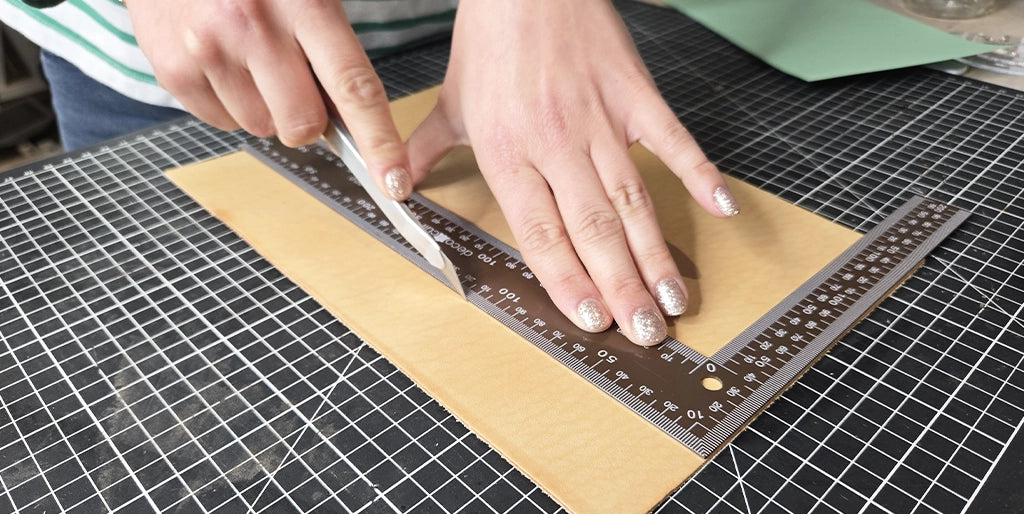
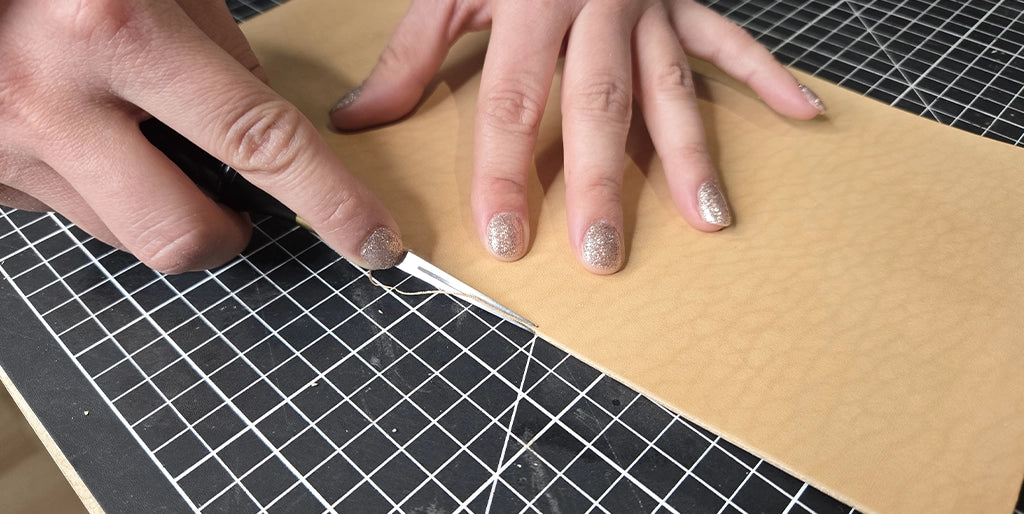
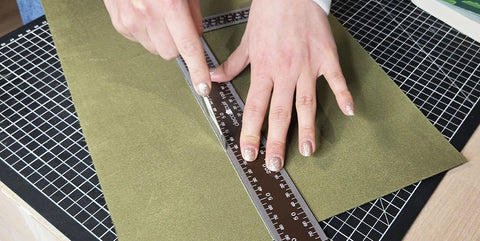
2. Cut the leather
Using a utility knife (and a new blade), cut the main rectangle according to the calculated dimensions. Then, also cut the tab from the remaining scraps.
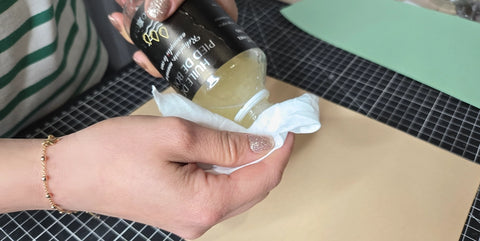
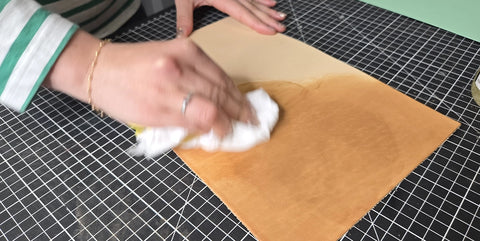
3. OPTION: Nourish the leather
If you choose natural vegetable-tanned leather, as in our A6 notebook example, we recommend nourishing the leather with neatsfoot oil. The oil will soften the leather, provide slight protection, and give it a slightly darker hue.
If your leather has mineral tanning or has already been finished, we invite you to skip this step.
 |
 |


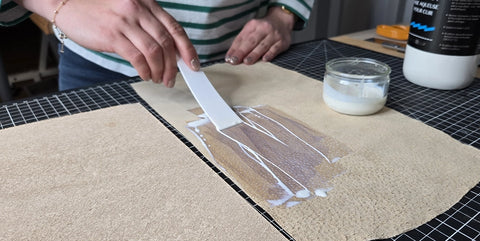
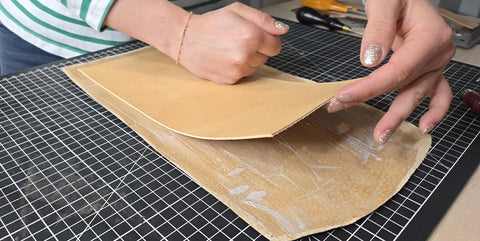
4. Line the leather with pig suede
Cut a piece slightly larger than the main piece from the pig suede leather. Apply contact glue to the back of the pig suede and to the back of the leather piece. Wait a few moments for the glue to set, then laminate.
 |
 |
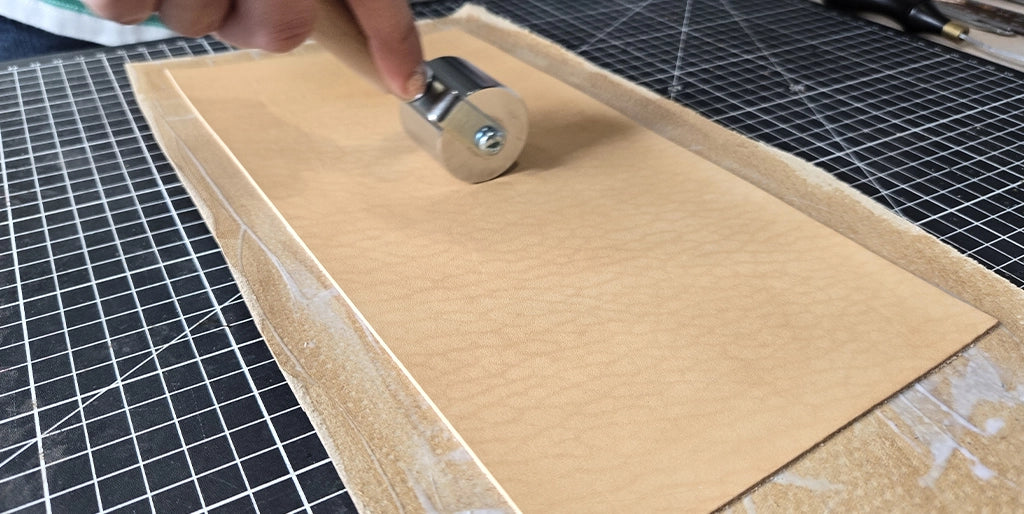
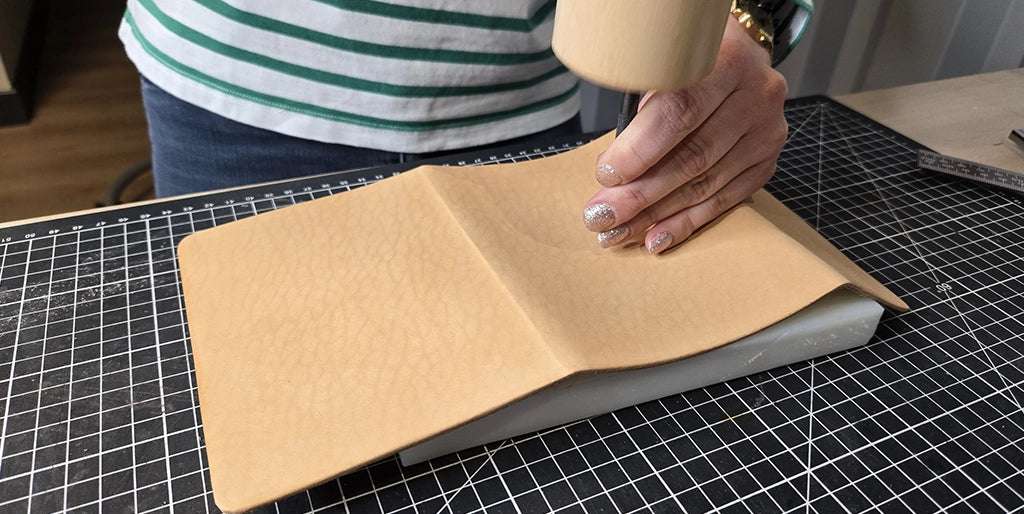
Flatten the glued pieces with a roller press.
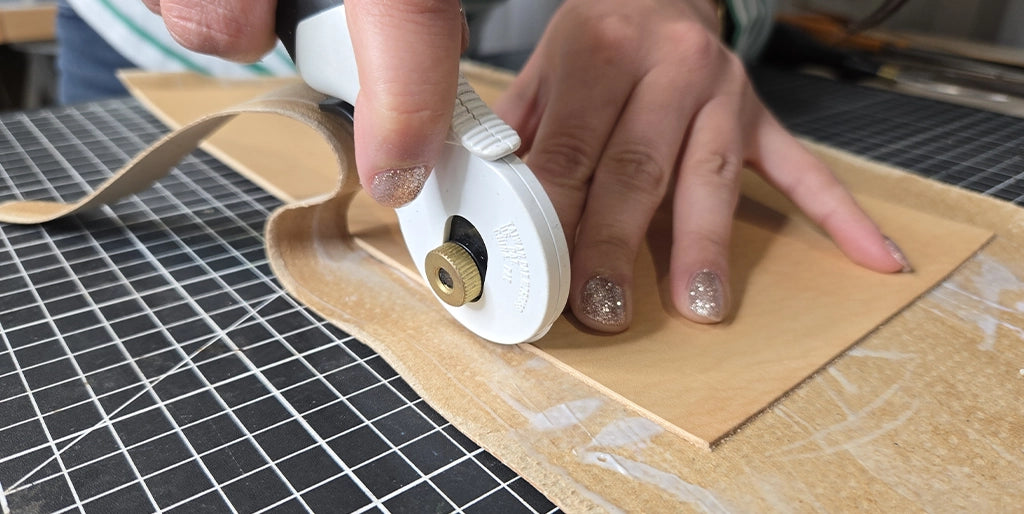
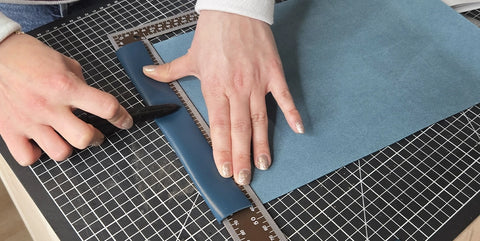
5. Trim the leather
Cut off the excess pig suede leather: cut flush with a rotary cutter.


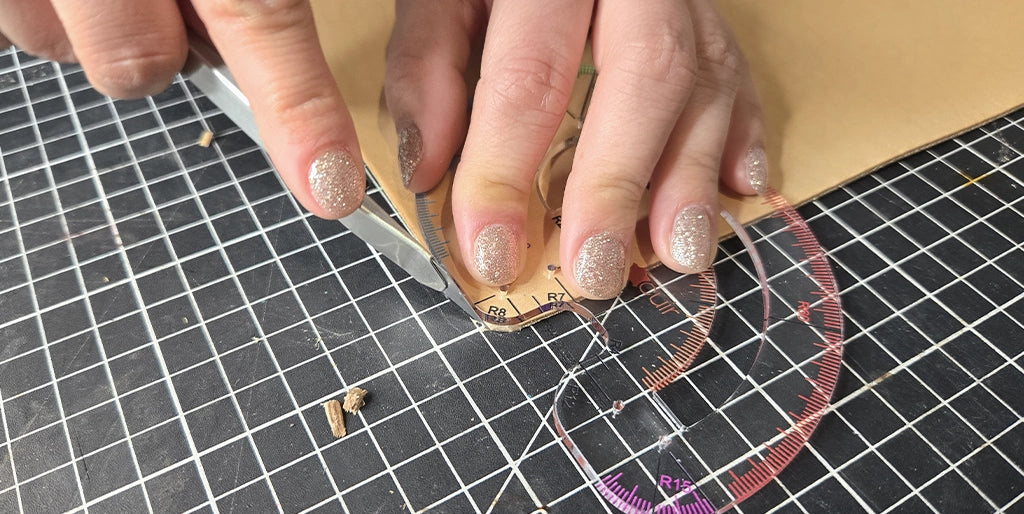
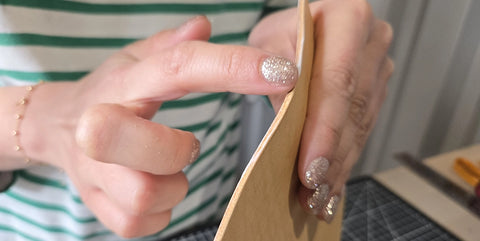
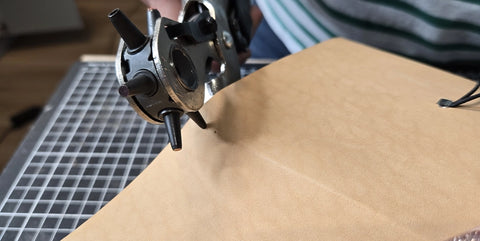
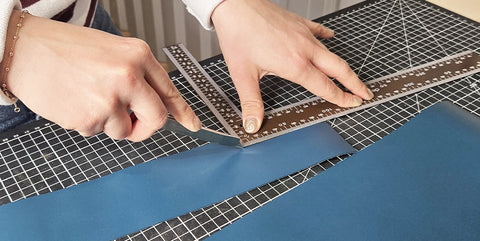
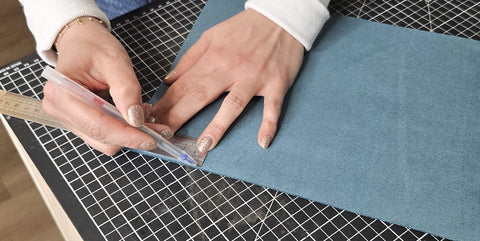
6. Round the corners
Using a template (paper or plexiglass), round the corners of the main piece and the tab. Here, we made 8 mm corners.
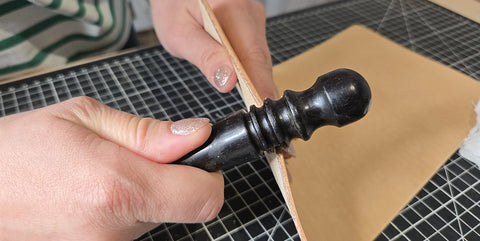
7. OPTION: Working the edges
Optionally (for a more finished result), you can work the edges of the leather.
For vegetable-tanned leather:
- Bevel the edges of the leather.
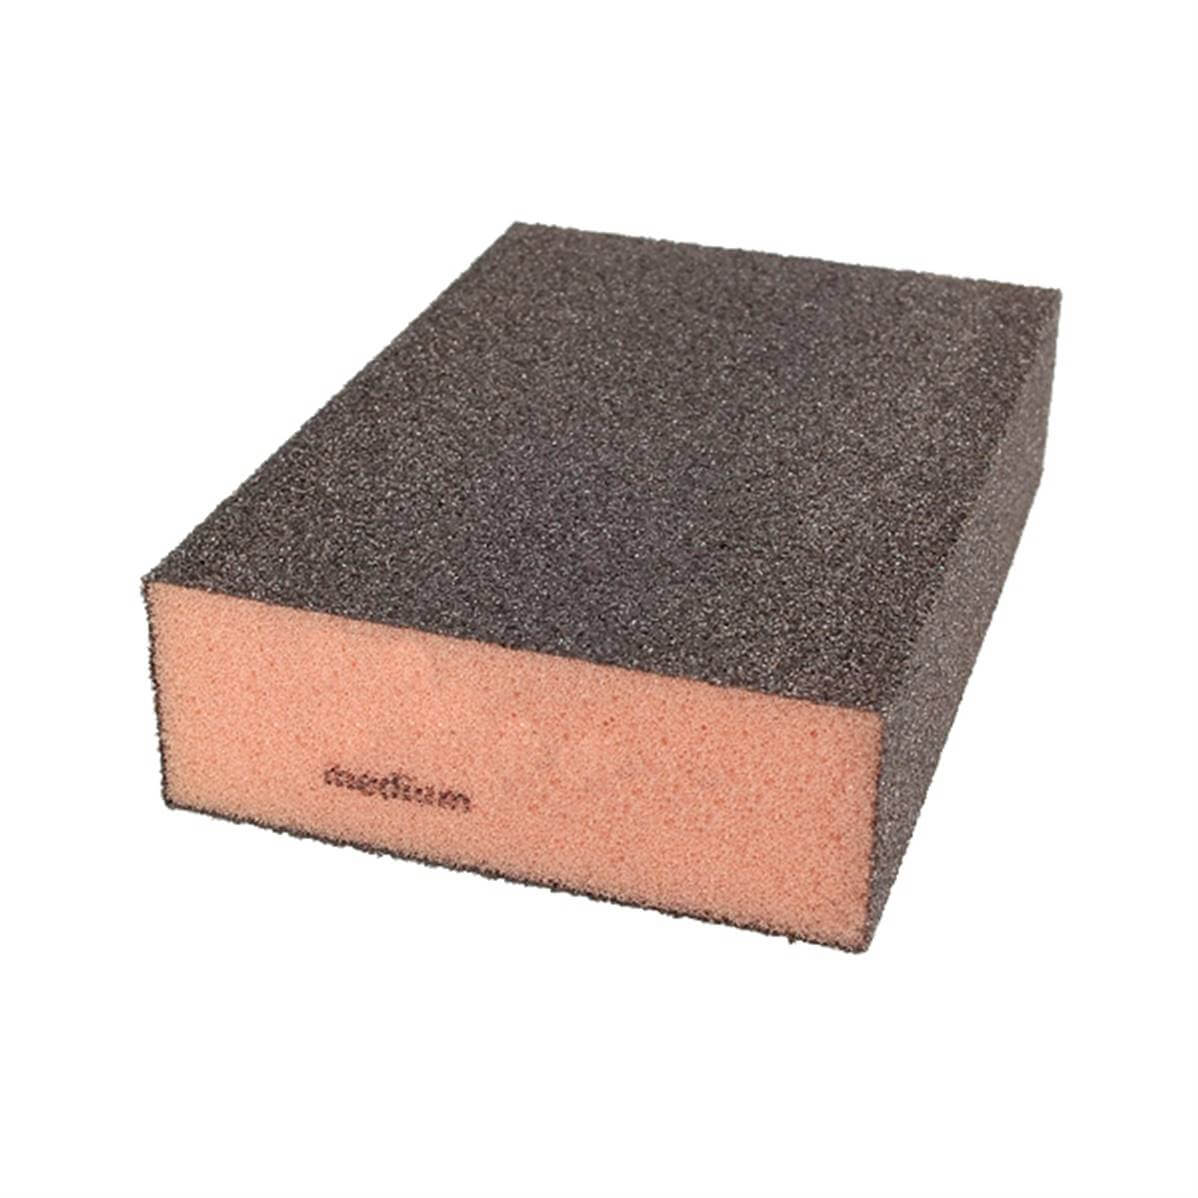
- Sand the edges with an abrasive sponge or a sanding block (always in the same direction).

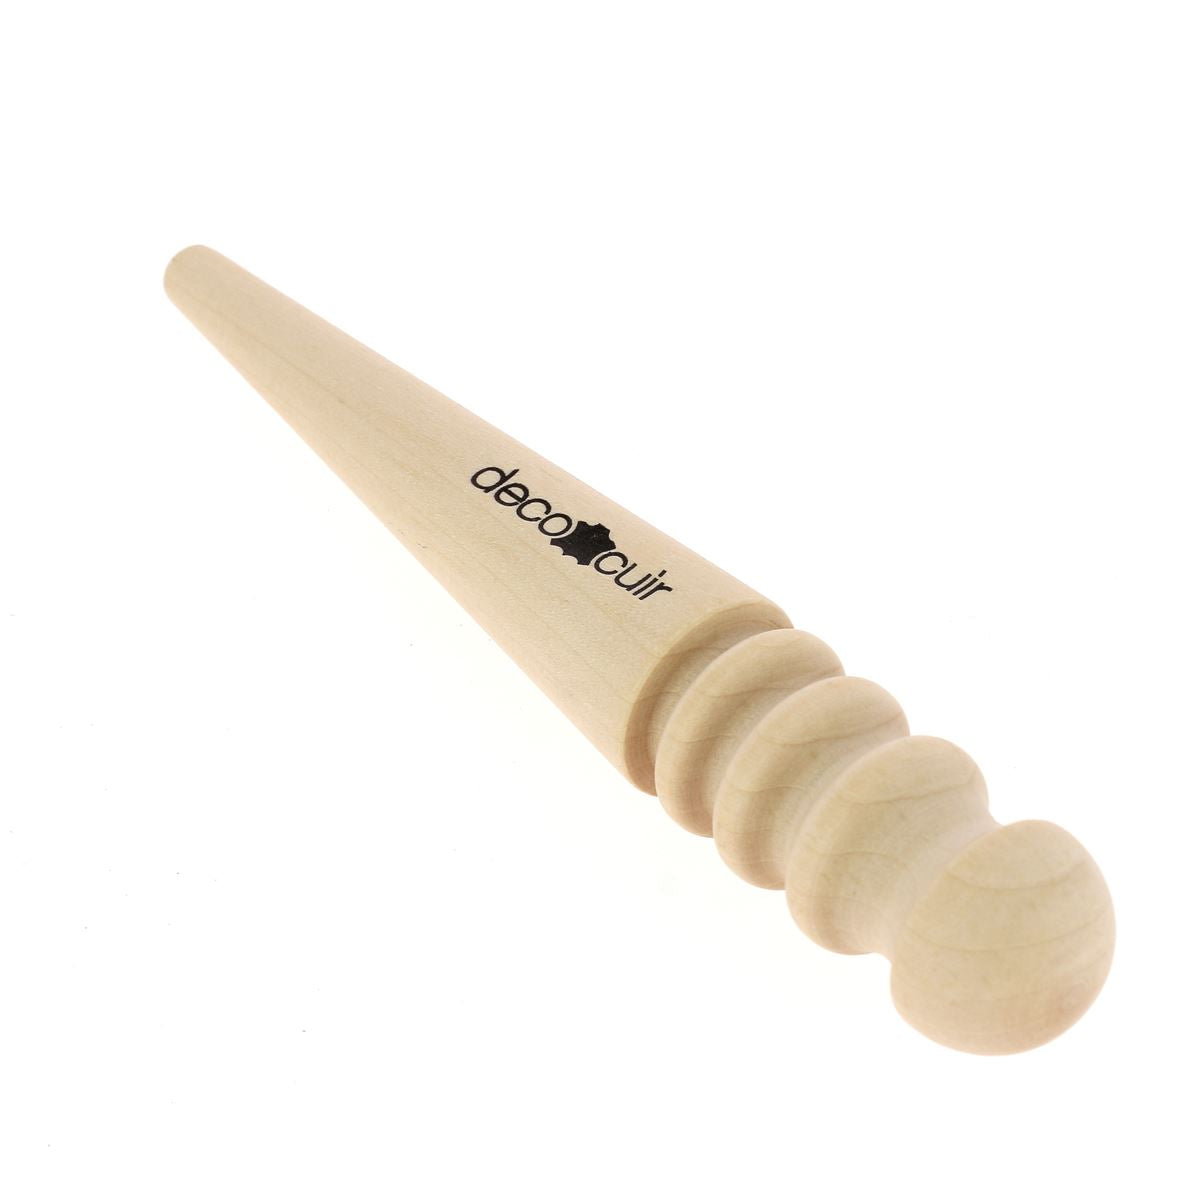
- Apply Tokonole (finishing gum) to the edge and rub vigorously with a cotton cloth or a slicker.
 |
 |


For mineral-tanned leather: work the edges with an edge finish (paint).
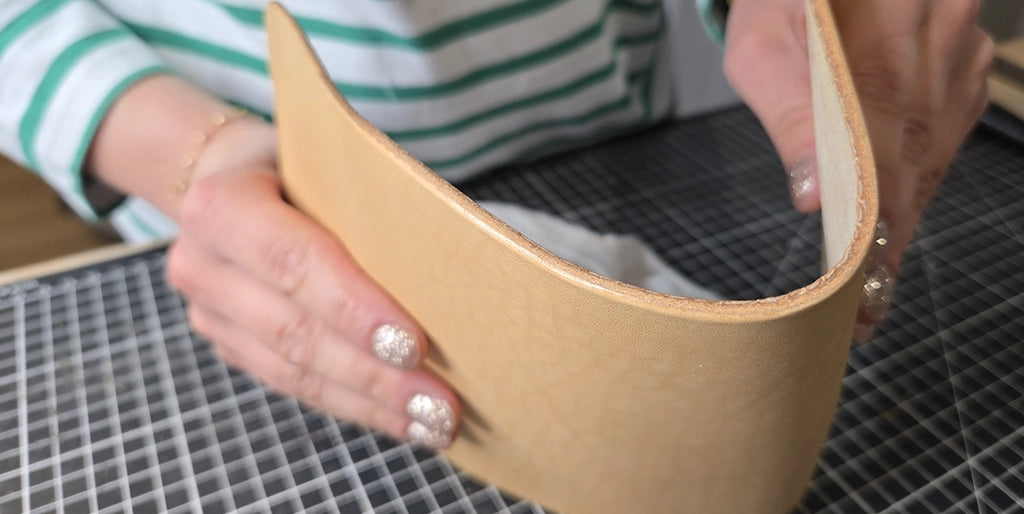
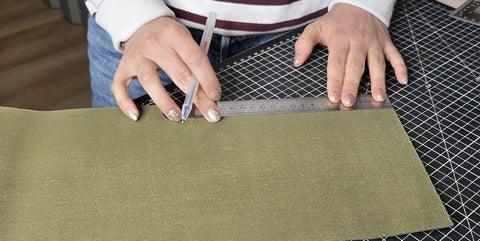
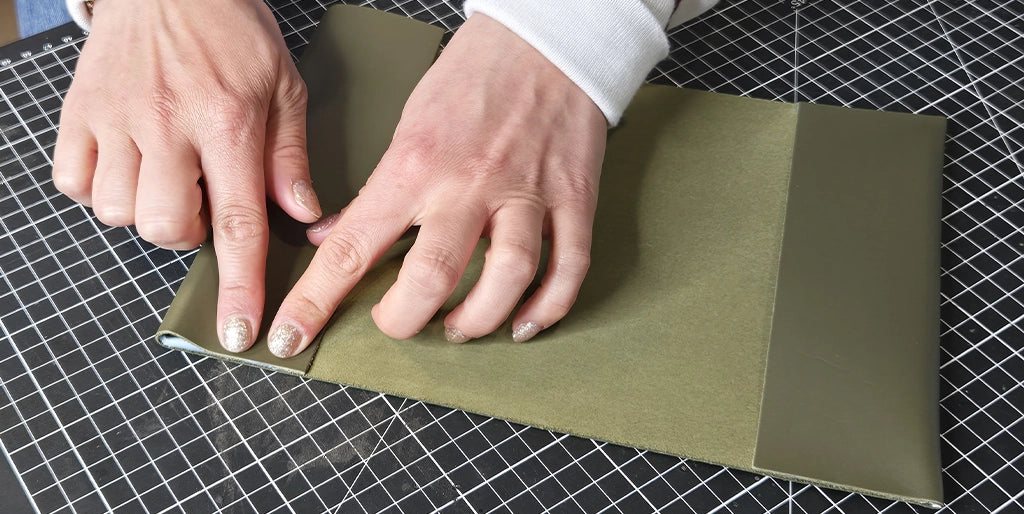
8. Mark the folds
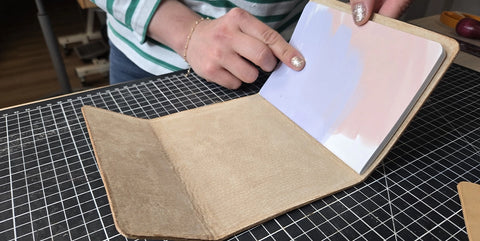
Take the notebook and position it in the leather piece: leave about 5 mm of margin all around the notebook. Mark the folds at the desired places to close the notebook. Use a slicker if necessary.
 |
 |
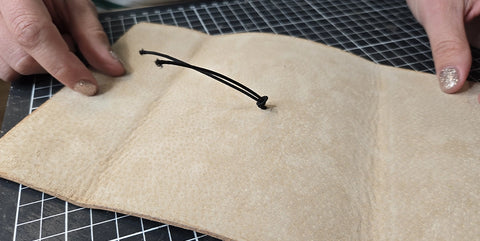
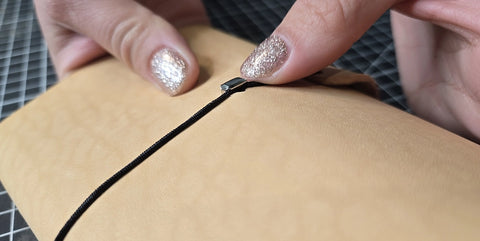
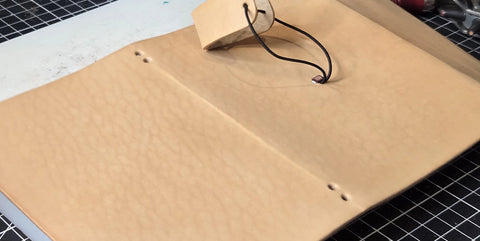
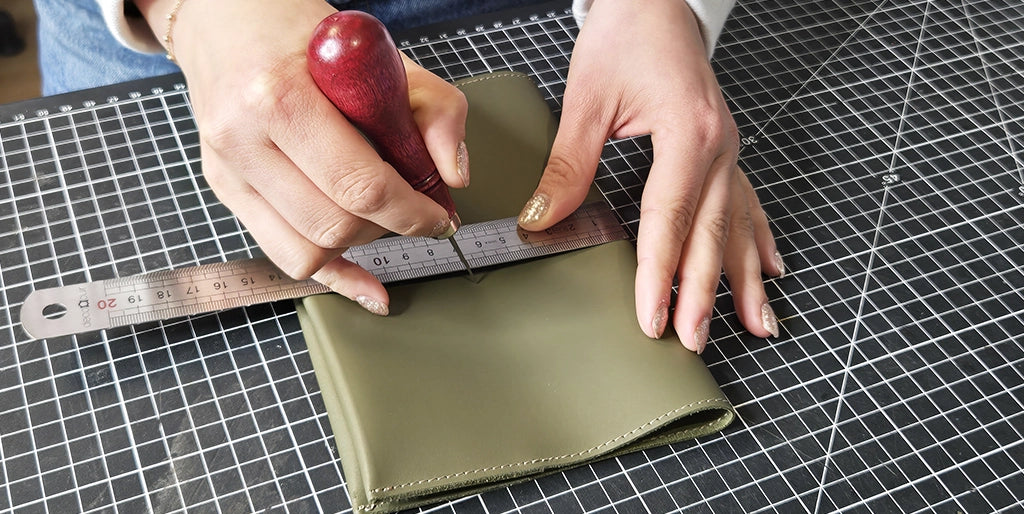
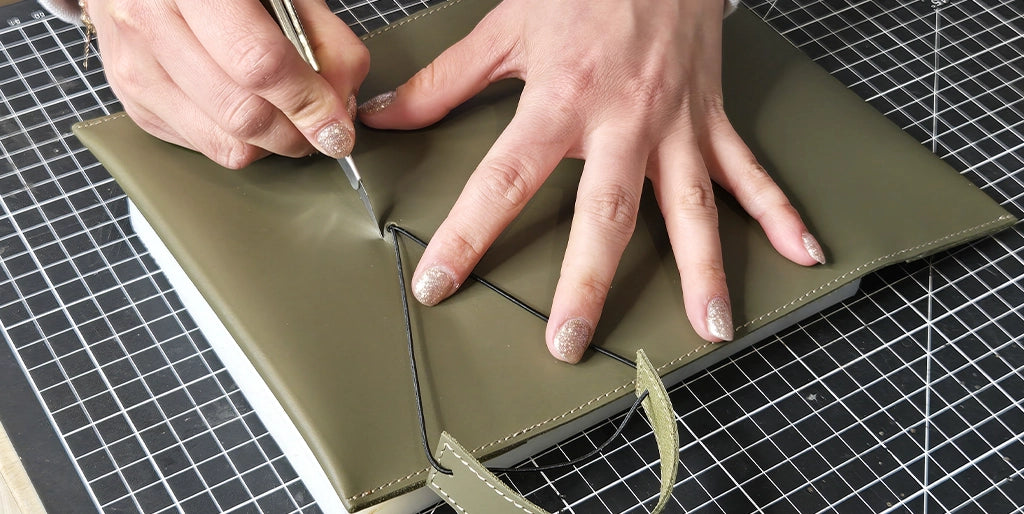
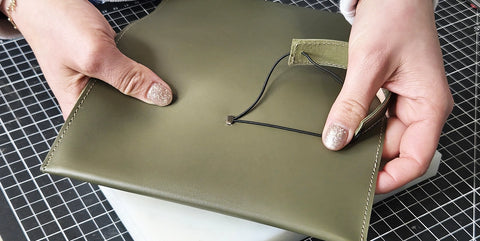
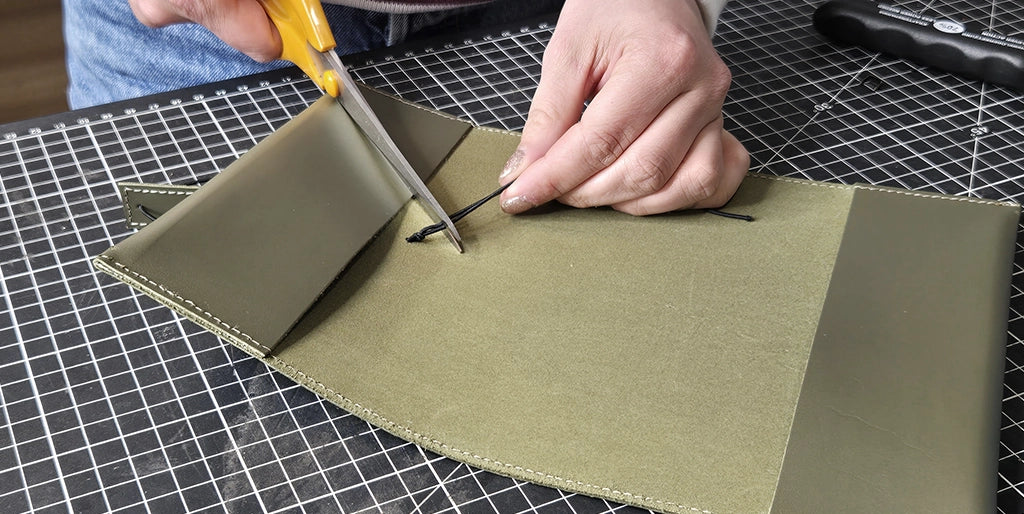
9. Secure the elastic
Close the notebook cover and mark a point in the center of the back of the notebook cover.
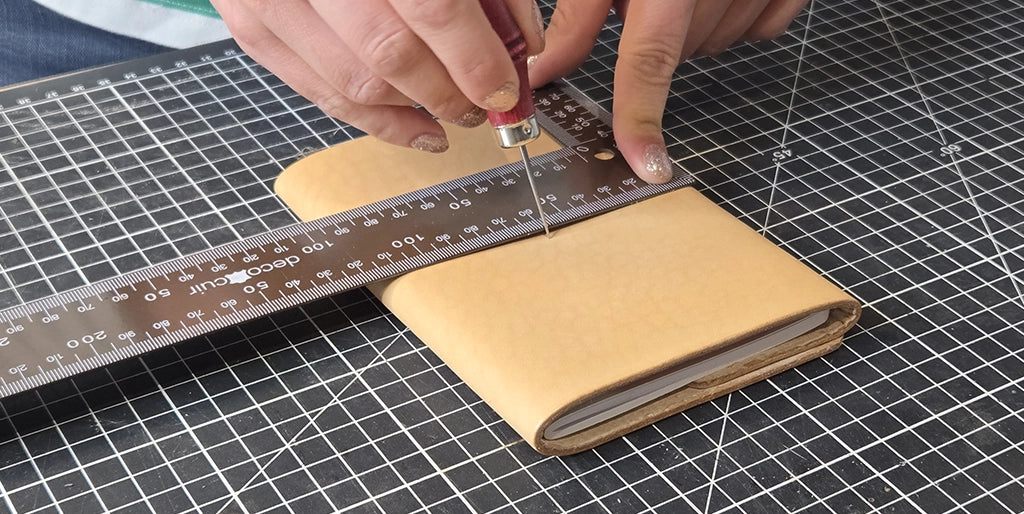
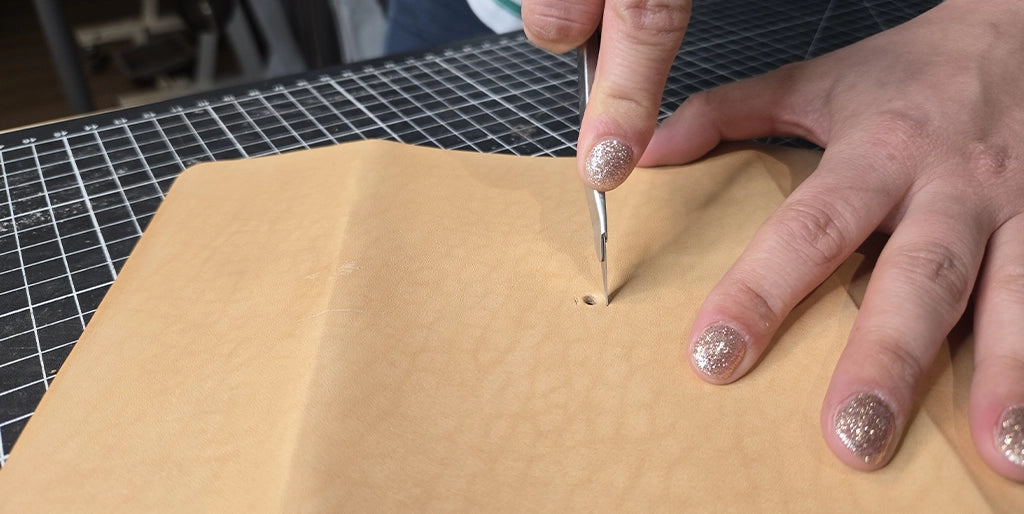
Make a Ø 3 mm hole at this location.
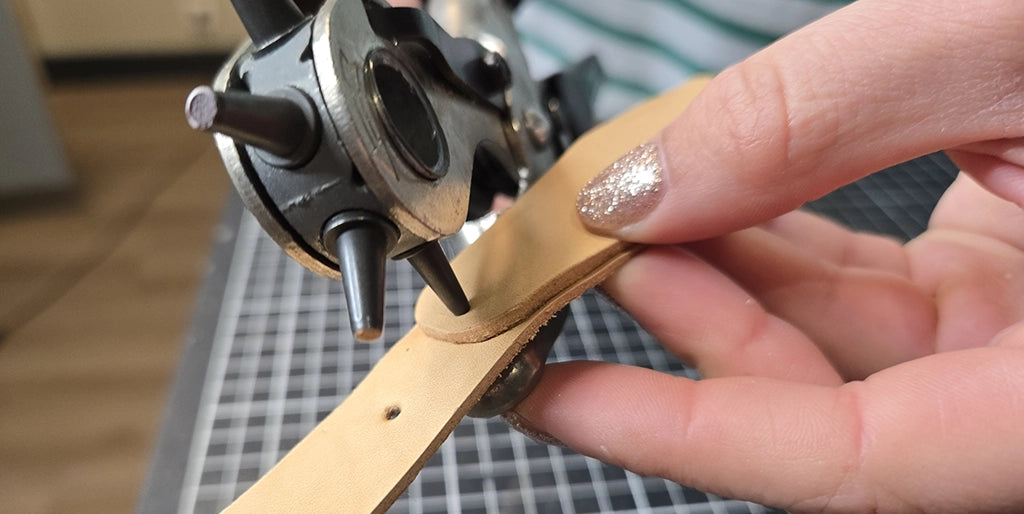
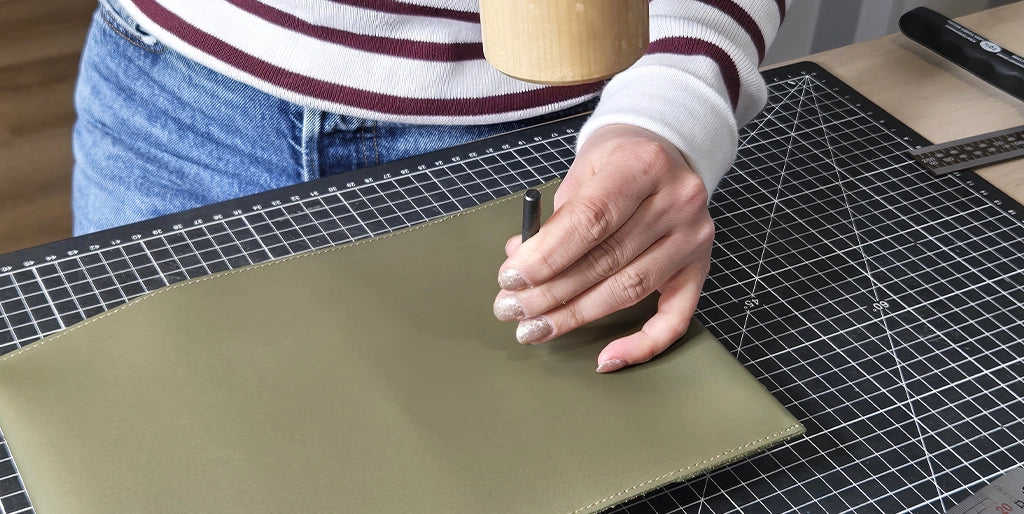
Mark the location of the staple prongs on each side of the Ø 3 mm hole.
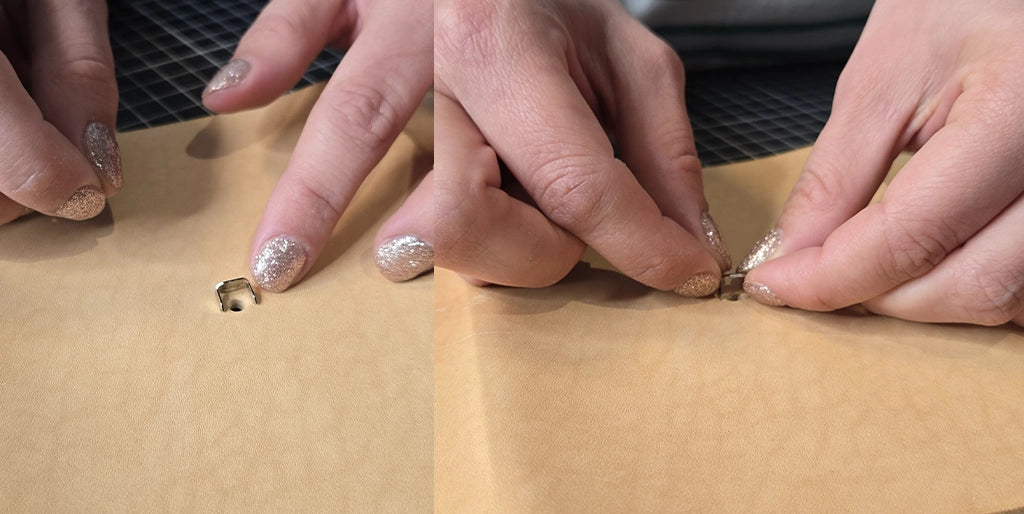
Then make 2/3 mm slits at the markings with a utility knife.
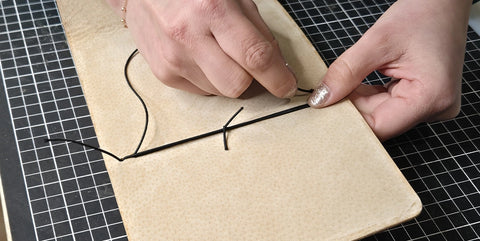
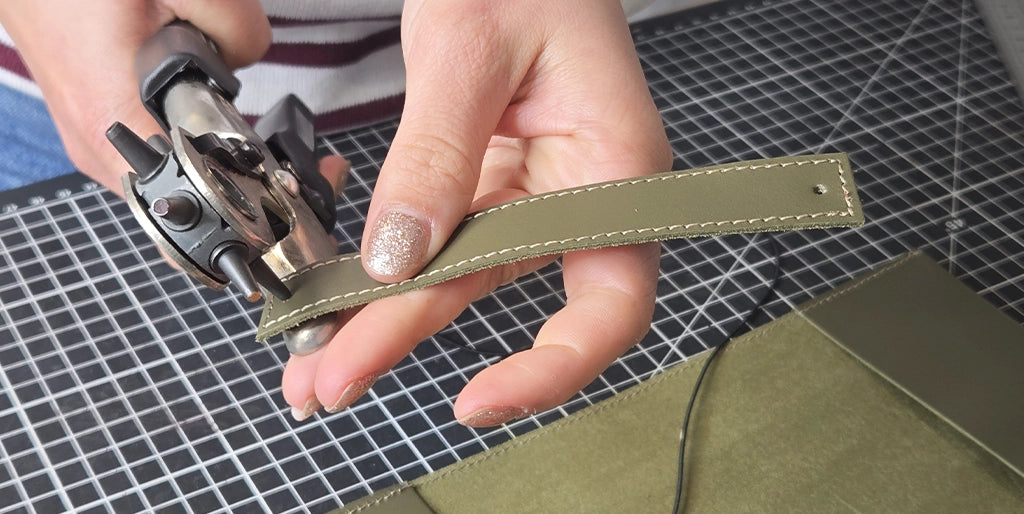
Take the tab and make a Ø 2 mm hole at each end of it.
Take an elastic band about 40 cm long and pass it through the holes at the ends of the leather tab.
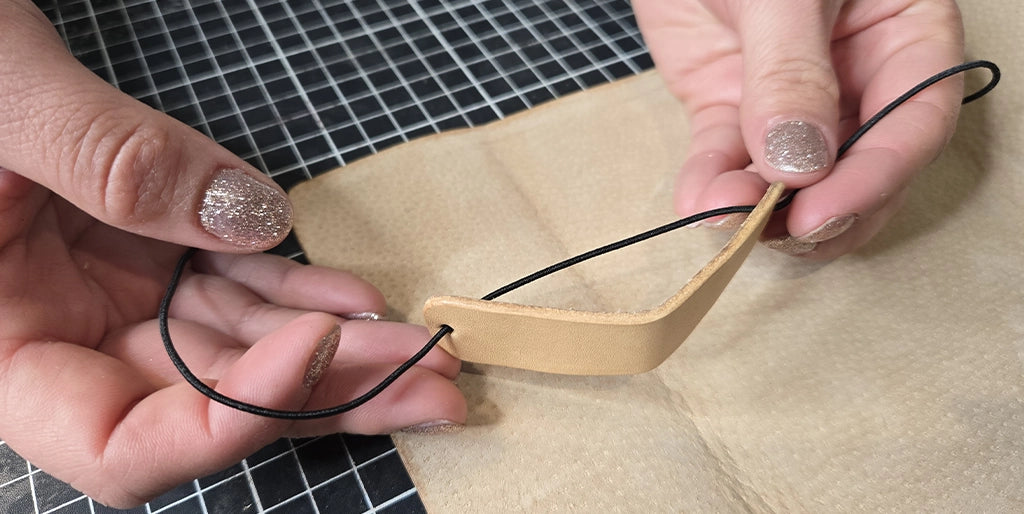
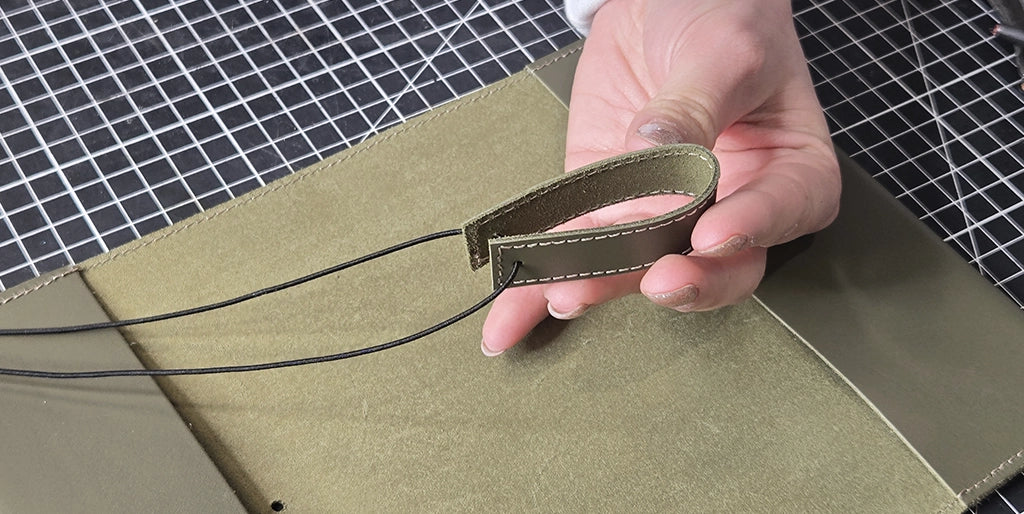
Fold the elastic in half and pass it through the hole, making sure both ends are inside the notebook.
Tie a loose knot and check the size by closing the notebook. Adjust the size of the elastic and tie a tight knot.
 |
 |
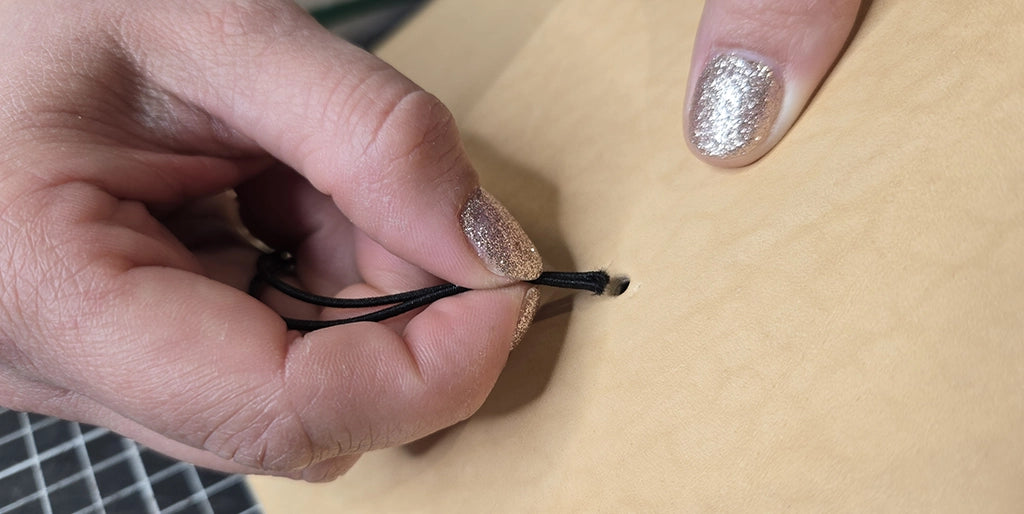
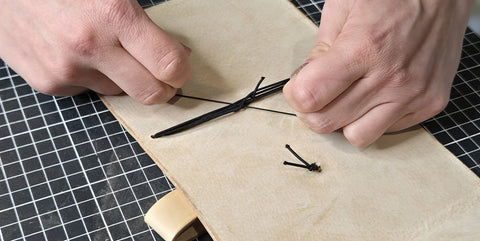
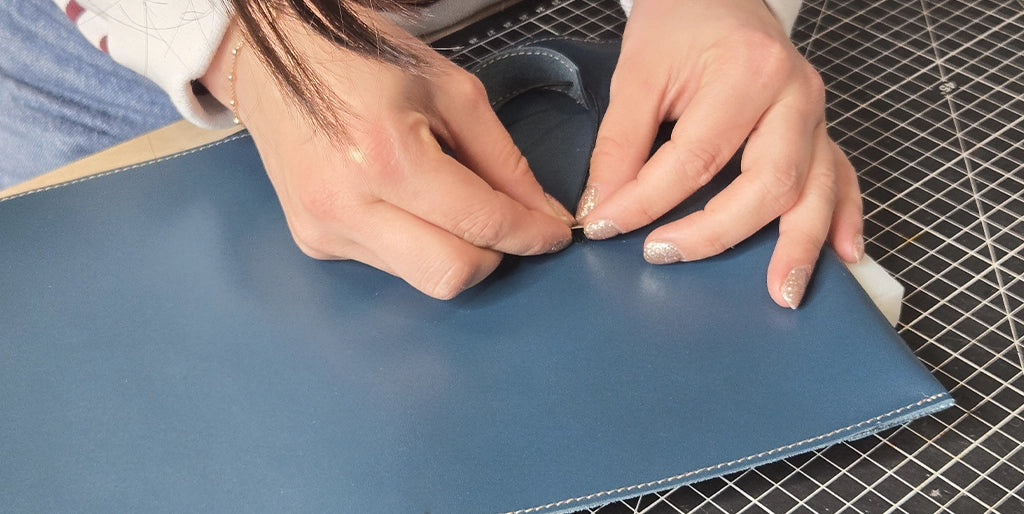
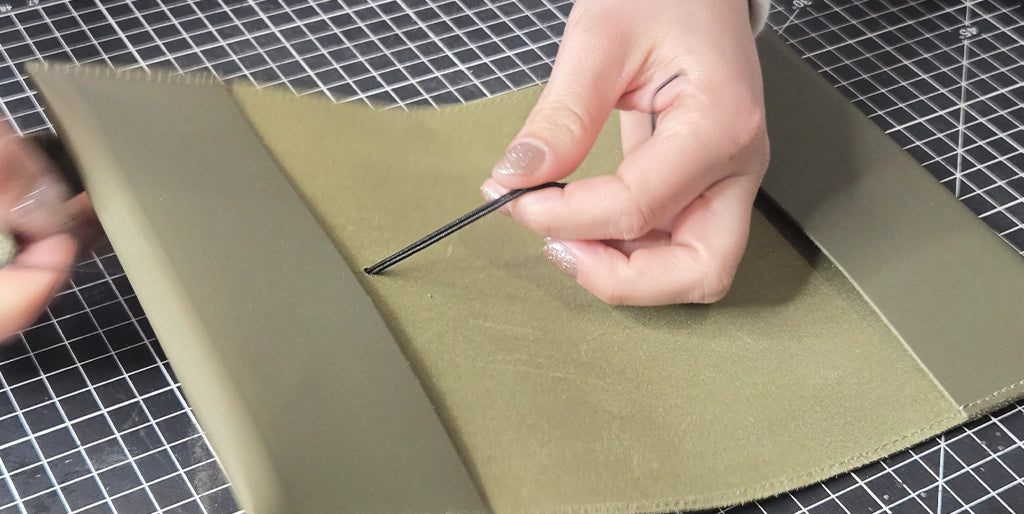
Insert the staple into the previously made slots, then fold down the staple prongs, being careful to secure the elastic underneath.
 |
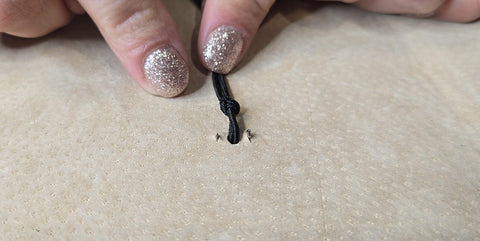 |
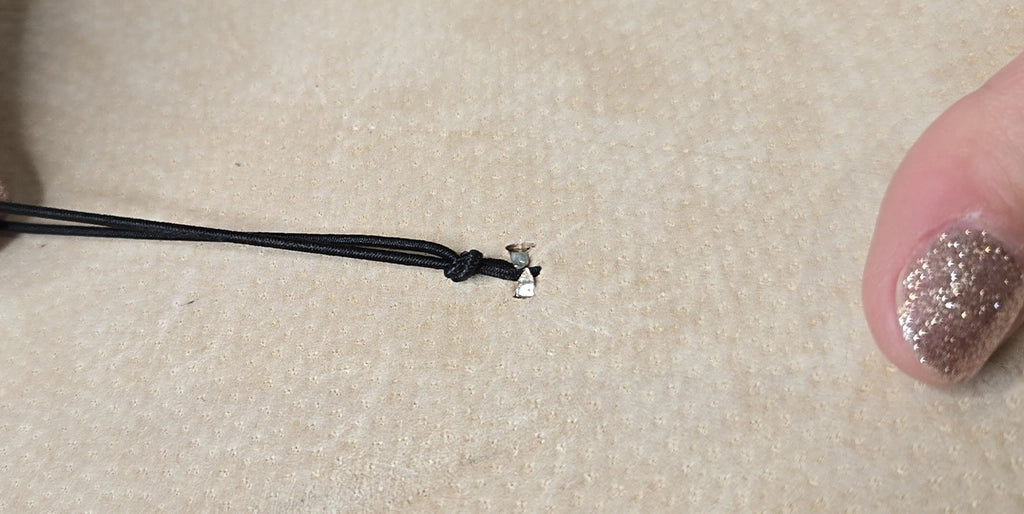
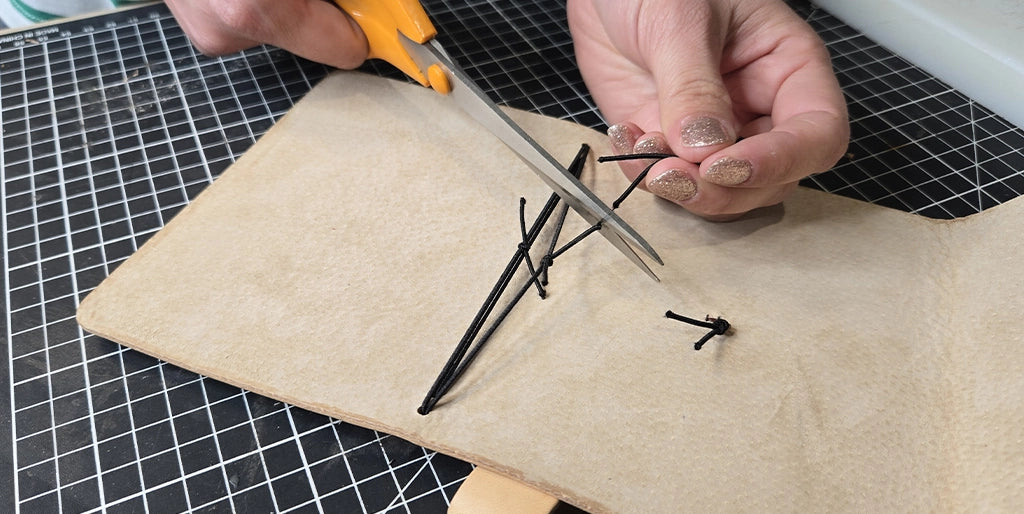
Cut off the excess elastic.

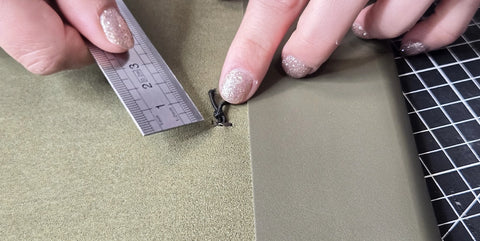
10. Place the middle elastic bands
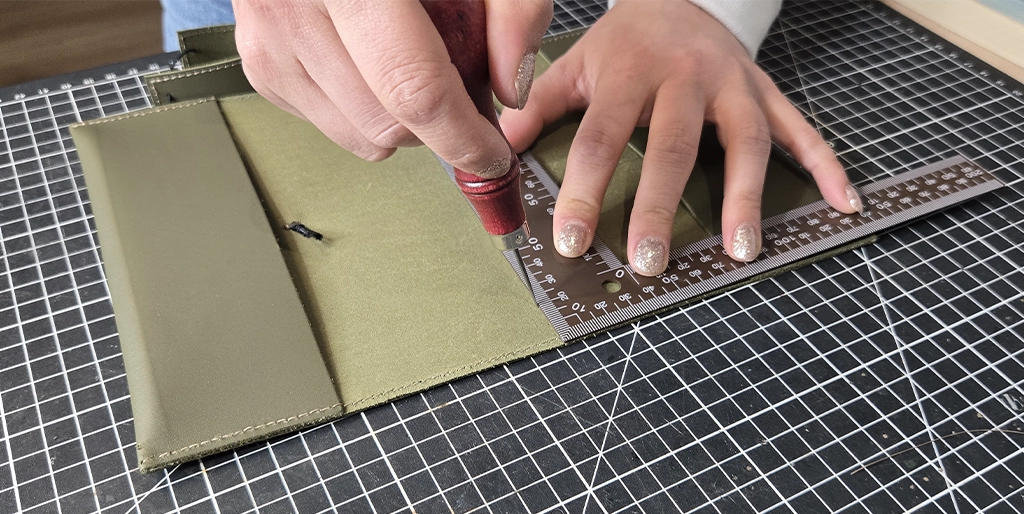
On the edge of the notebook: mark a first point 1 cm from the edge, then a second 2 cm from the edge. Do the same for the bottom of the notebook: a first at 1 cm and a second at 2 cm.
 |
 |
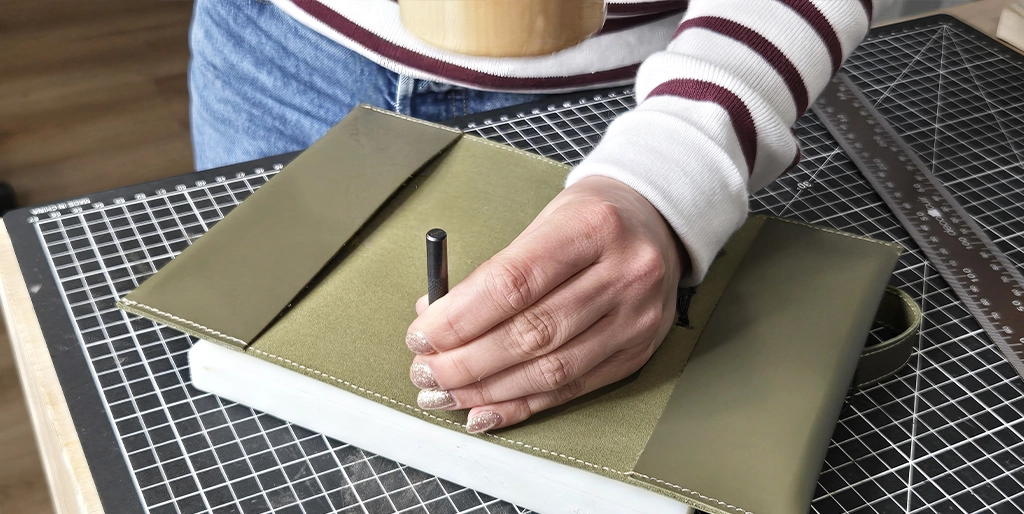
Drill Ø 3 mm holes at these locations.
 |
 |
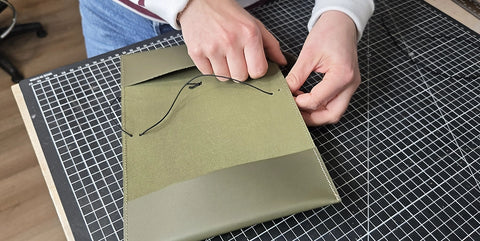
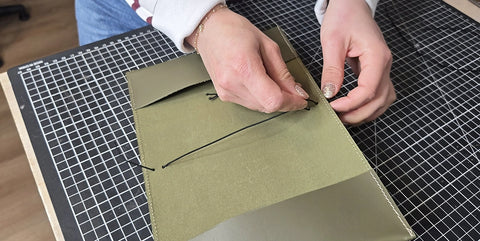
Take 40 cm of elastic. Pass the elastic through the first hole (from the inside), then through the second hole. Go to the third hole and exit through the last hole. Bring the two ends of the elastic together and tie a double knot.
 |
 |
Add several elastic threads depending on the number of items to be attached in the notebook (here we used 2 x 40 cm elastic threads).
11. OPTION: personalization
Please note that cold markings are only possible on vegetable-tanned leather.
Personalize the notebook with a marking either on the tab or directly on the leather.
SEE THE LEATHER MARKING GUIDE >
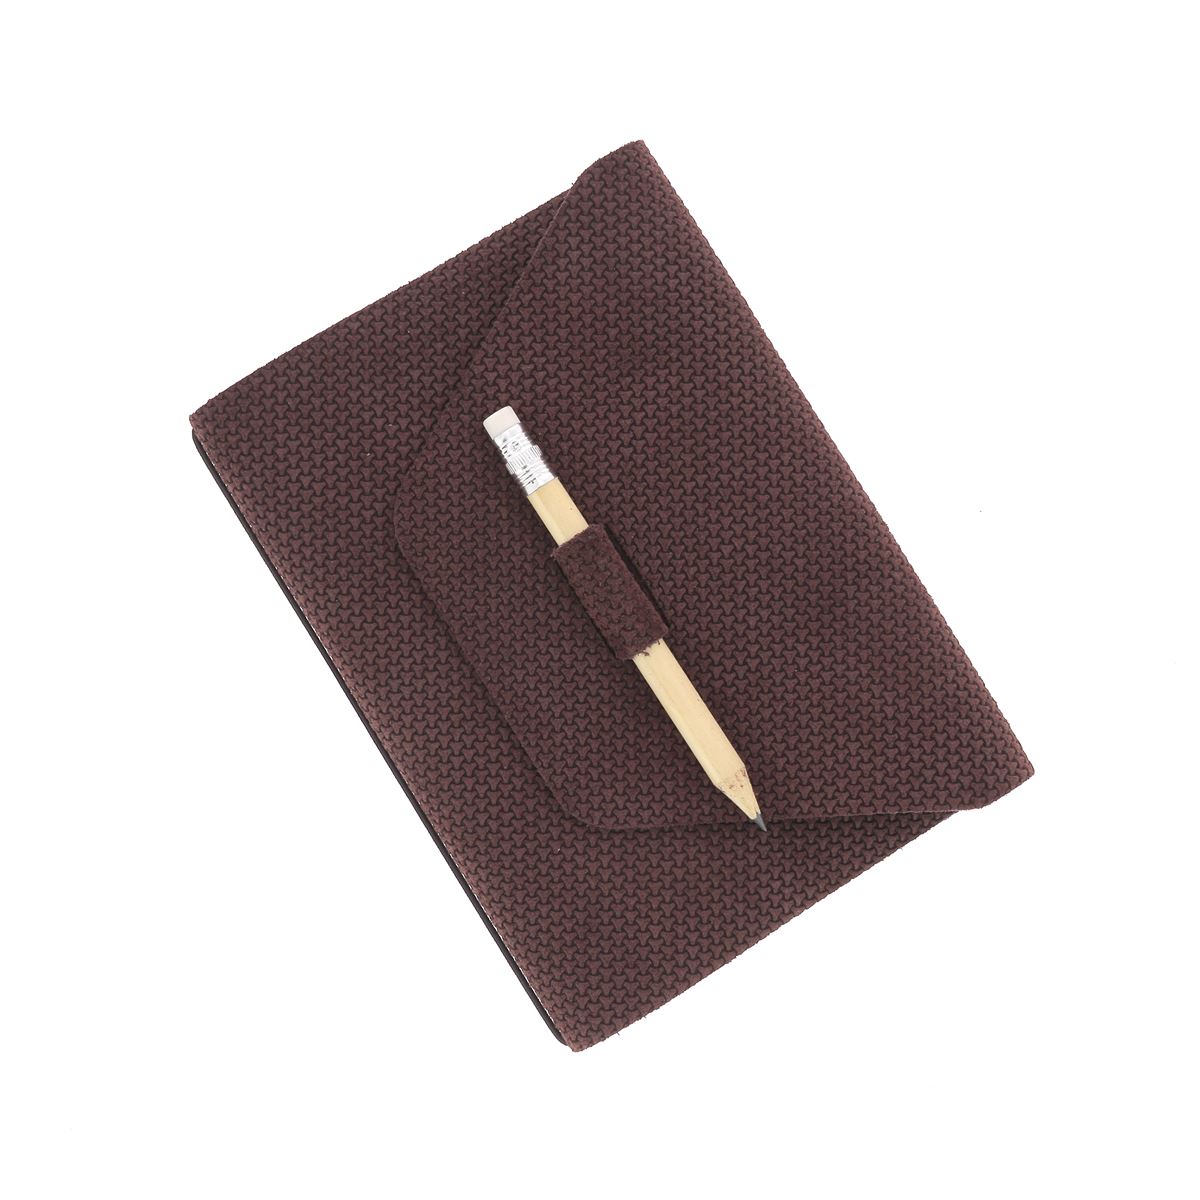
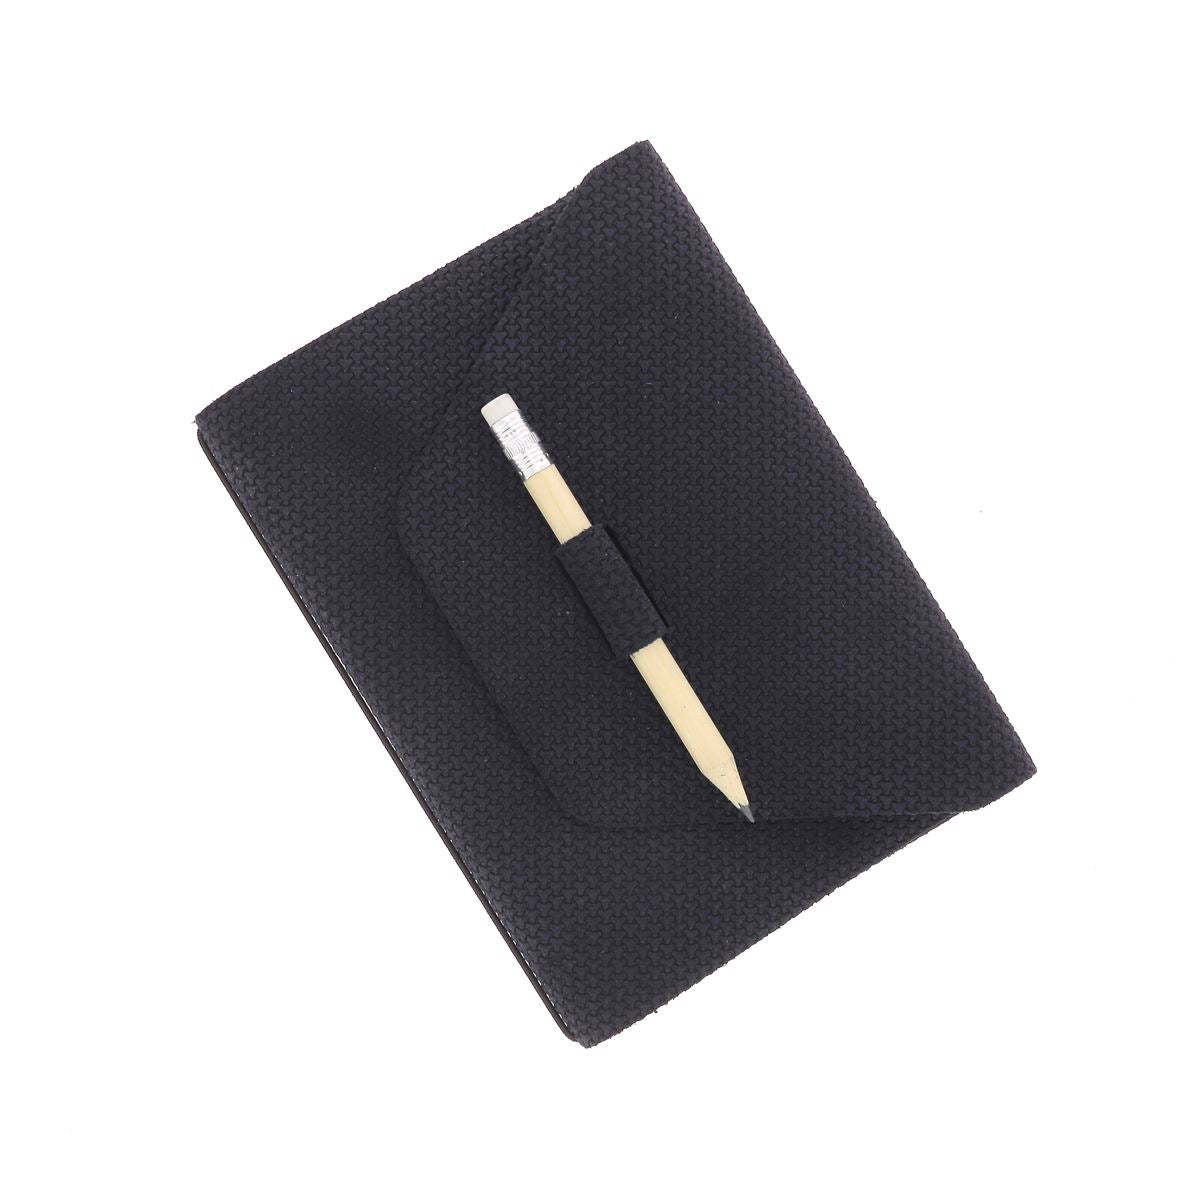
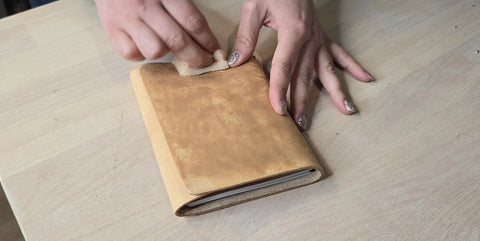
Here, we marked a small heart with a leather stamping tool (after uniformly moistening the leather).
 |
 |


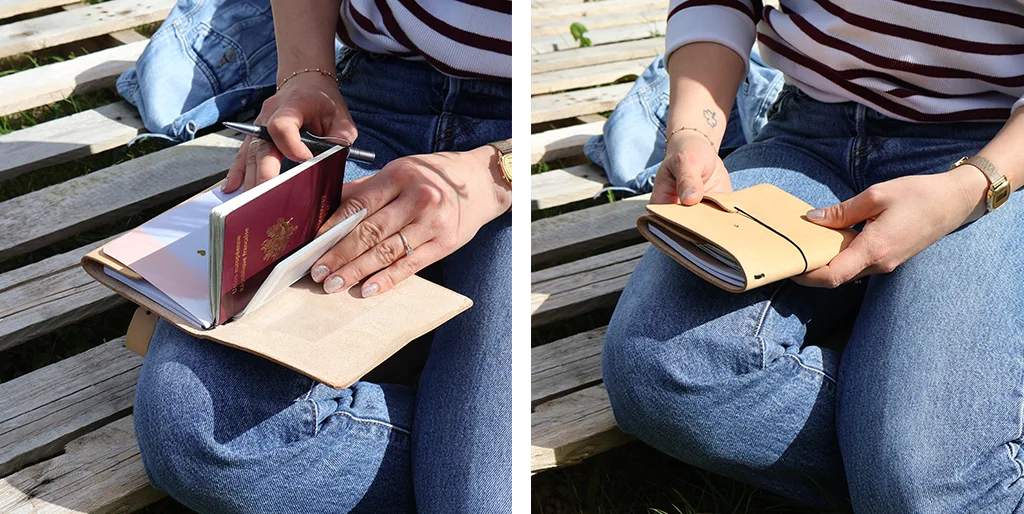
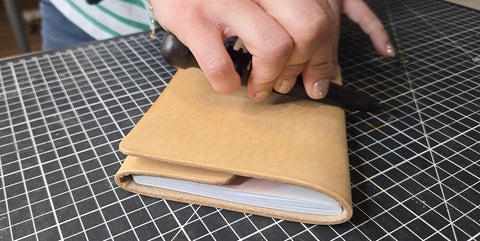
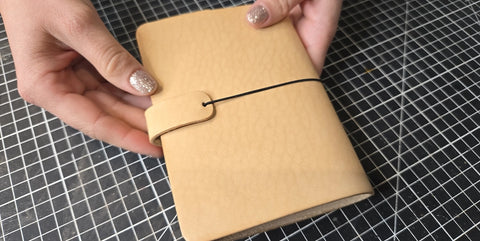
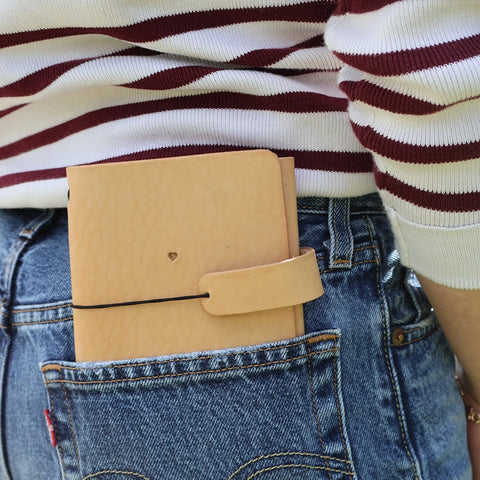
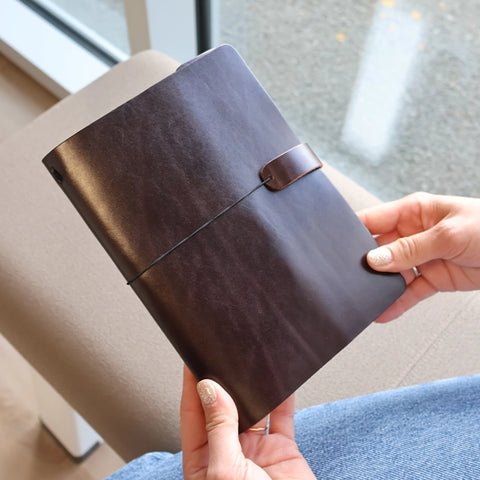
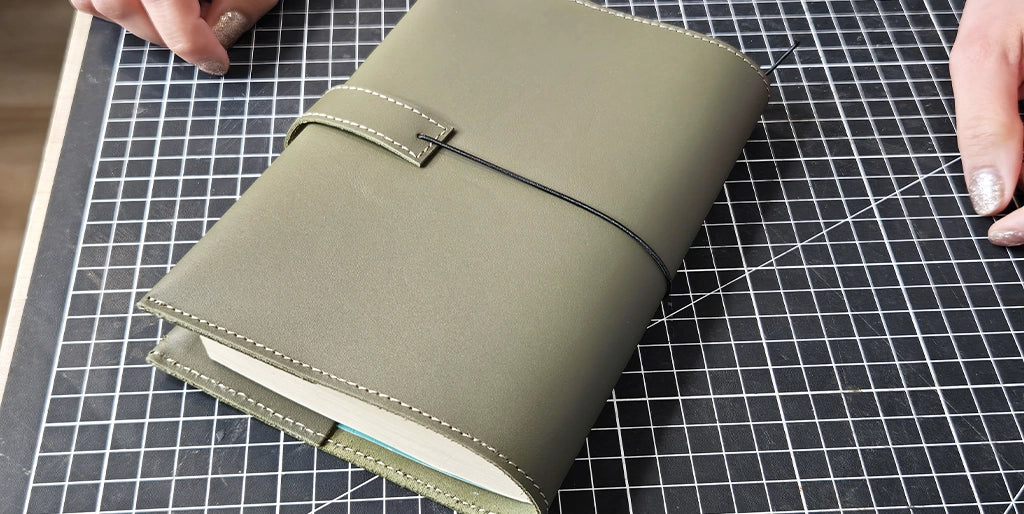
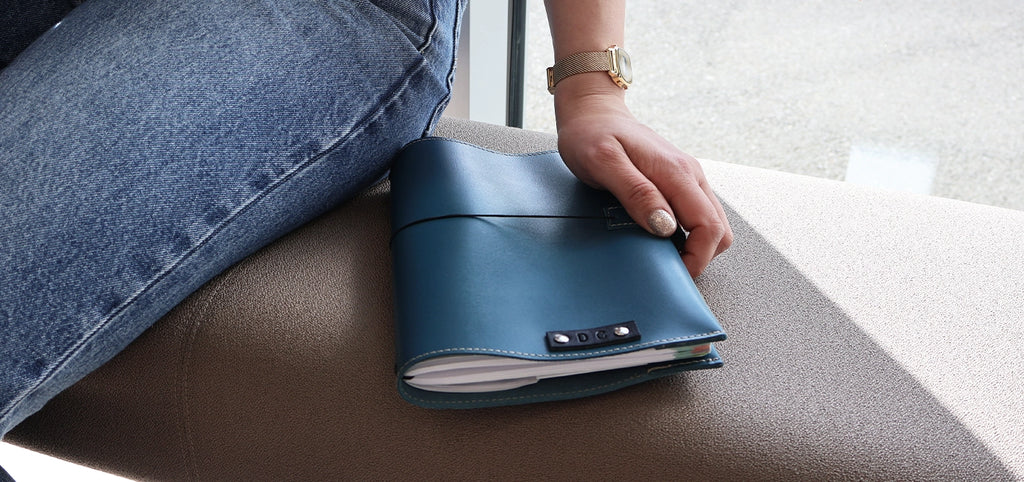
You're done!
 |
 |
 |
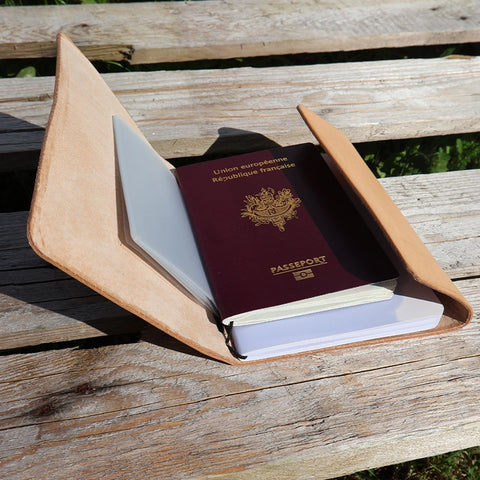 |
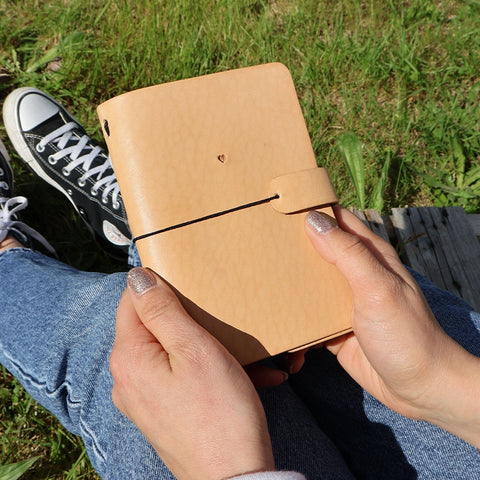
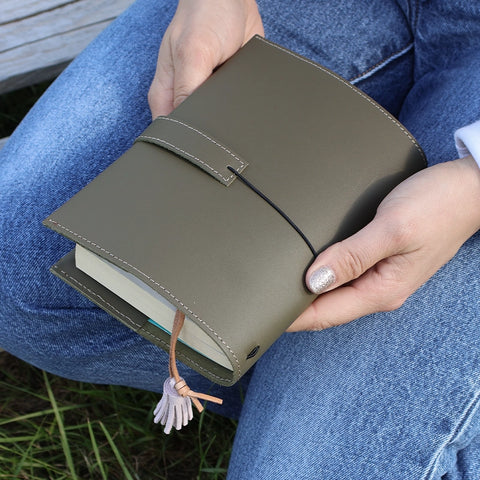
Here's the result for an A5 notebook and a leather from our SAUVAGE range:
 |
 |
VERSION N°2 - WITH SEWN FLAPS
This version allows you to tuck the covers of notebooks/books or health records into the flaps. This version is sewn by hand or with a sewing machine.
Book Cover Video
Health Record Protector Video
Necessary equipment


- 1 piece of leather approximately 1.2 mm/1.3 mm thick, semi-soft to semi-firm - Minimum dimensions for a health record or paperback book: 30 x 40 cm. For our examples, we selected leathers from the SATINATO and SATINLYS ranges.
- 1.5m of elastic cord - 1.5 mm diameter
- 1 staple for leather strap
And the following equipment:
- 1 cutter
- 1 round punch Ø 3 mm
- Machine or hand sewing thread
1. Pattern making
Dimension calculation:
Height : notebook/book height + 1.4 cm (+7 mm top + 7 mm bottom).
Width : (notebook width × 2) + notebook thickness + 13 cm for the flap.
Example for a health record:
The health record measures 15 x 21 cm and 0.7 mm thick.
For height: 21 + 0.7 + 0.7 = 22.4 cm
For width: 15 + 15 + 0.7 + 13 = 44 cm.
Our leather rectangle is therefore 22.4 cm x 44 cm. This version fits just right into our 30 x 40 cm pieces (it's possible to reduce the flap size or select a hide of approximately 0.40 sq m).
SMALL LEATHER TAB (on the front of the notebook).
There is also a second piece of 9 x 2 cm to be cut from the leather scraps.
Example for a 350-page paperback book:
The book measures 11 x 18 cm and 2 mm thick.
For height: 18 + 0.7 + 0.7 = 19.4 cm
For width: 11 + 11 + 2 + 13 = 37 cm
Our leather rectangle is therefore 19.4 cm x 37 cm. This version fits into our 30 x 40 cm pieces.
SMALL LEATHER TAB (on the front of the notebook).
There is also a second piece of 13 x 2 cm to be cut from the leather scraps.
2. Cut the leather
Cut the main rectangle according to the calculated dimensions, then cut the tab from the remaining scraps.
 |
 |
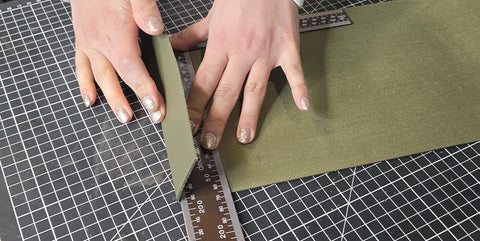
3. Form the flaps
Mark two reference points: one at 6 cm and another at 12 cm, at each end of the main piece. Be careful to check that the flap length is correct by positioning the book or notebook before gluing.
 |
 |
Form the folds using a slicker and a ruler/square.
 |
 |
Apply contact glue on the 6 cm of the fold and on the next 6 cm, so that both surfaces to be assembled have glue.
 |
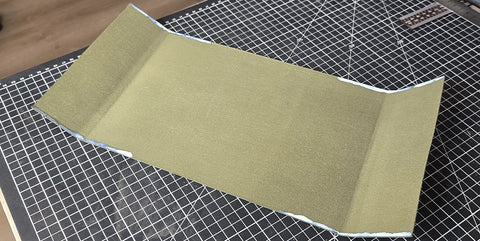 |
Form the flap by folding the leather over about 6 cm on each side.
4. Sew the lengths
Sew the top and bottom lengths of the notebook cover 3/4 mm from the edge maximum.

Also make a decorative stitch all around the tab 3/4 mm from the edge. This tab can be doubled (leather on both sides) to provide a bit more stiffness.

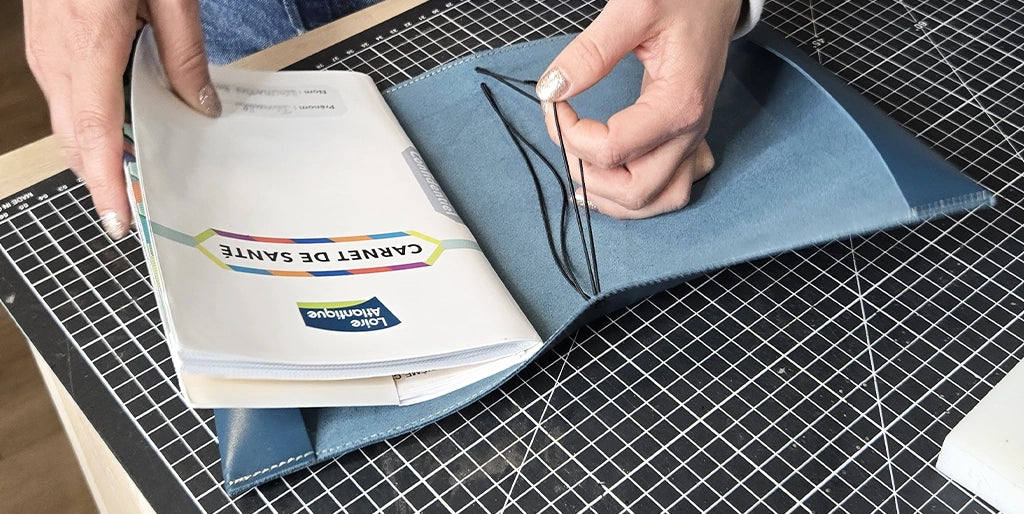
5. Secure the elastic
Close the notebook or book cover, then mark a point in the center of the back.
Drill a Ø 3 mm hole at this location.
Mark the position of the staple legs on either side of the Ø 3 mm hole.
Then make 2/3 mm slits at the markings with a cutter.
Take the tab and drill a Ø 2 mm hole at each end.
Take an elastic band about 40 cm long and thread it through the holes at the ends of the leather tab.
Fold the elastic in half, then pass it through the back hole, ensuring both ends come out inside the notebook.
Insert the notebook/book into the cover. Tie a loose knot at the end of the elastic and check the size by closing the notebook. Adjust the elastic size and tie a tight knot.
Insert the staple into the slits made earlier, then fold down the tabs, trapping the elastic underneath.
 |
 |
Cut off the excess elastic.
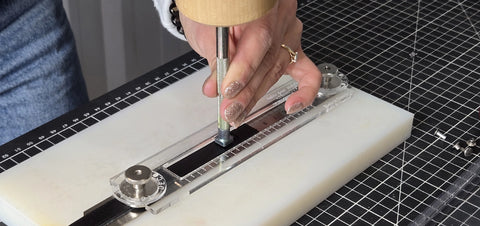
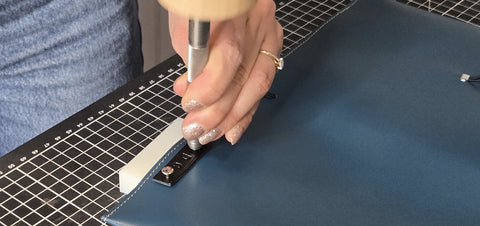
6. Attach the middle elastic
On the edge of the notebook: mark a first point 1 cm from the edge, then a second point 2 cm from the edge. Do the same for the bottom of the notebook: a first point at 1 cm and a second at 2 cm.
Drill Ø 3 mm holes at these locations.
Take 40 cm of elastic. Pass the elastic through the first hole (from the inside), then through the second hole. Go to the third hole and exit through the last hole. Bring the two ends of the elastic together and tie a double knot.
 |
 |
 |
 |
Add several elastic threads depending on the number of items to attach in the notebook (in our examples, we used 2 elastic cords of 40 cm).
11. OPTION: customization
Personalize the notebook with a marking, either on the flap or on a small piece of vegetable-tanned leather.
VIEW THE LEATHER MARKING GUIDE >
 |
 |
To be able to "carry" a vital card, we slipped a transparent card holder into our notebook covers:
You're done!
 |
 |

 |
 |
 |
 |

