


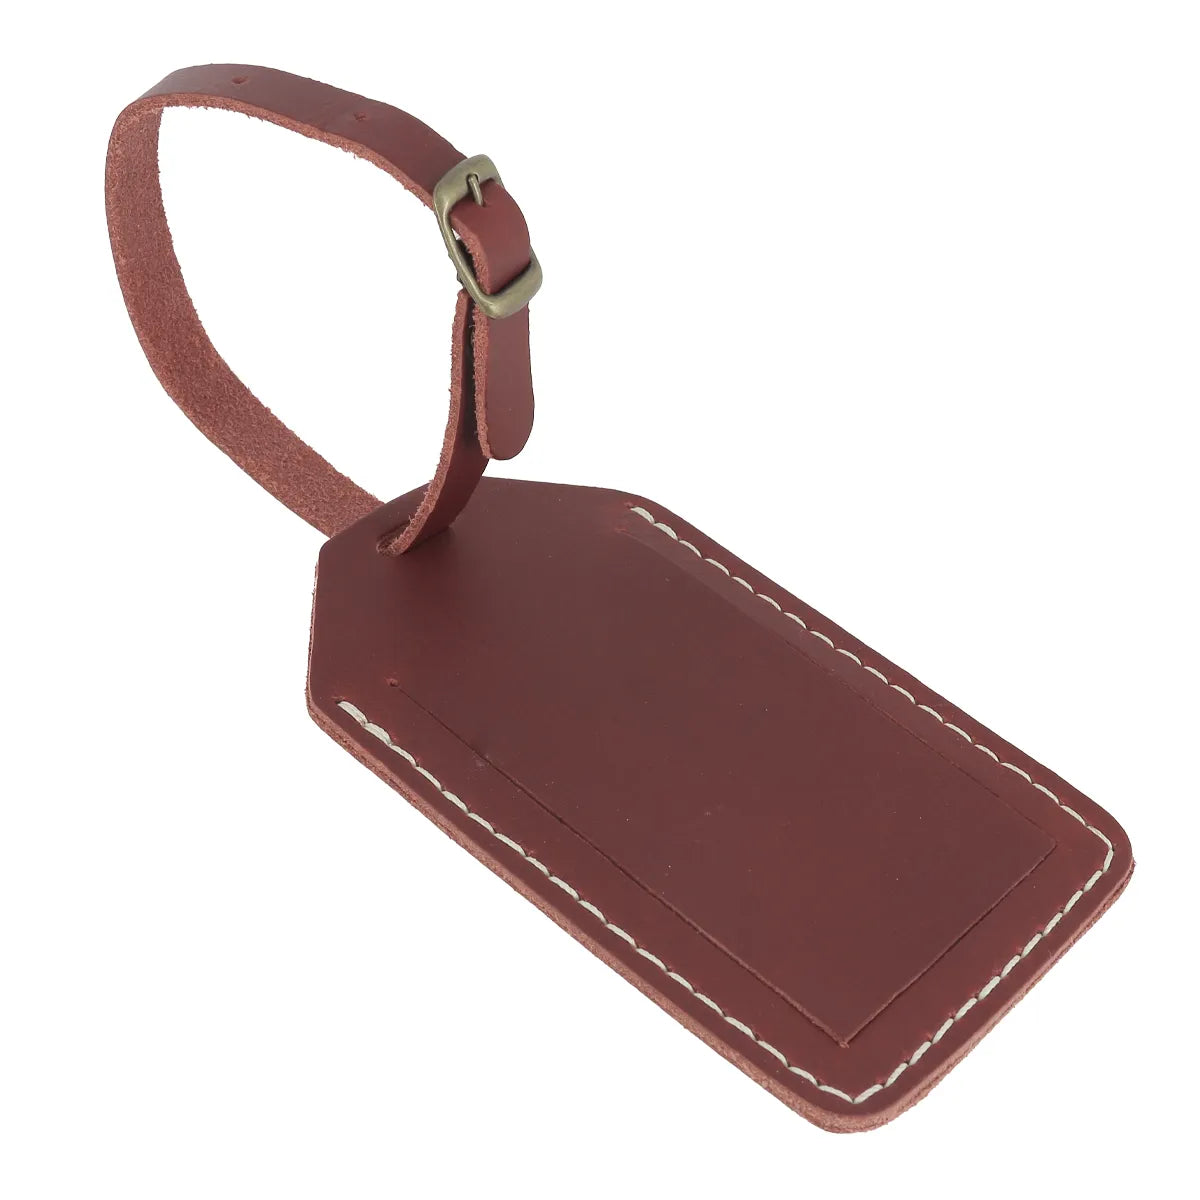


LUGGAGE TAG N°1

MATERIALS NEEDED
- 1 piece of leather 15 x 20 cm - Medium-soft to medium-firm - Thickness of about 1 to 1.4 mm
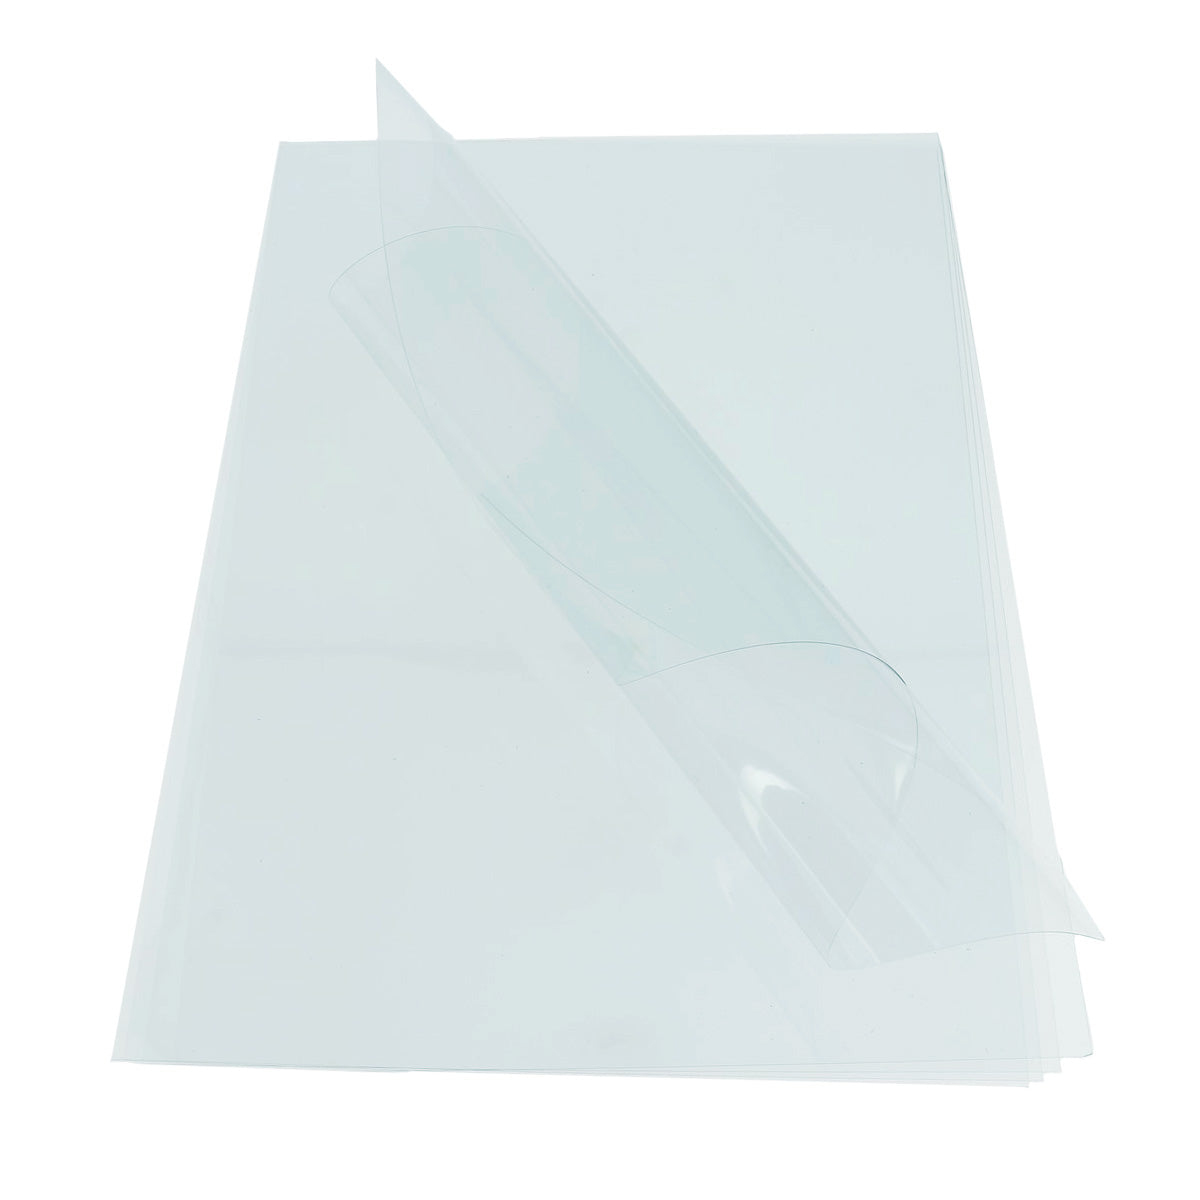
- 1 sheet of transparent MICA paper
- 1 paper tag
- Polyester or polyester-cotton thread
- Leather glue
- A craft knife


-
Blue
-
YELLOW
-
Brown
-
Red
-
Green


1. Cut the leather
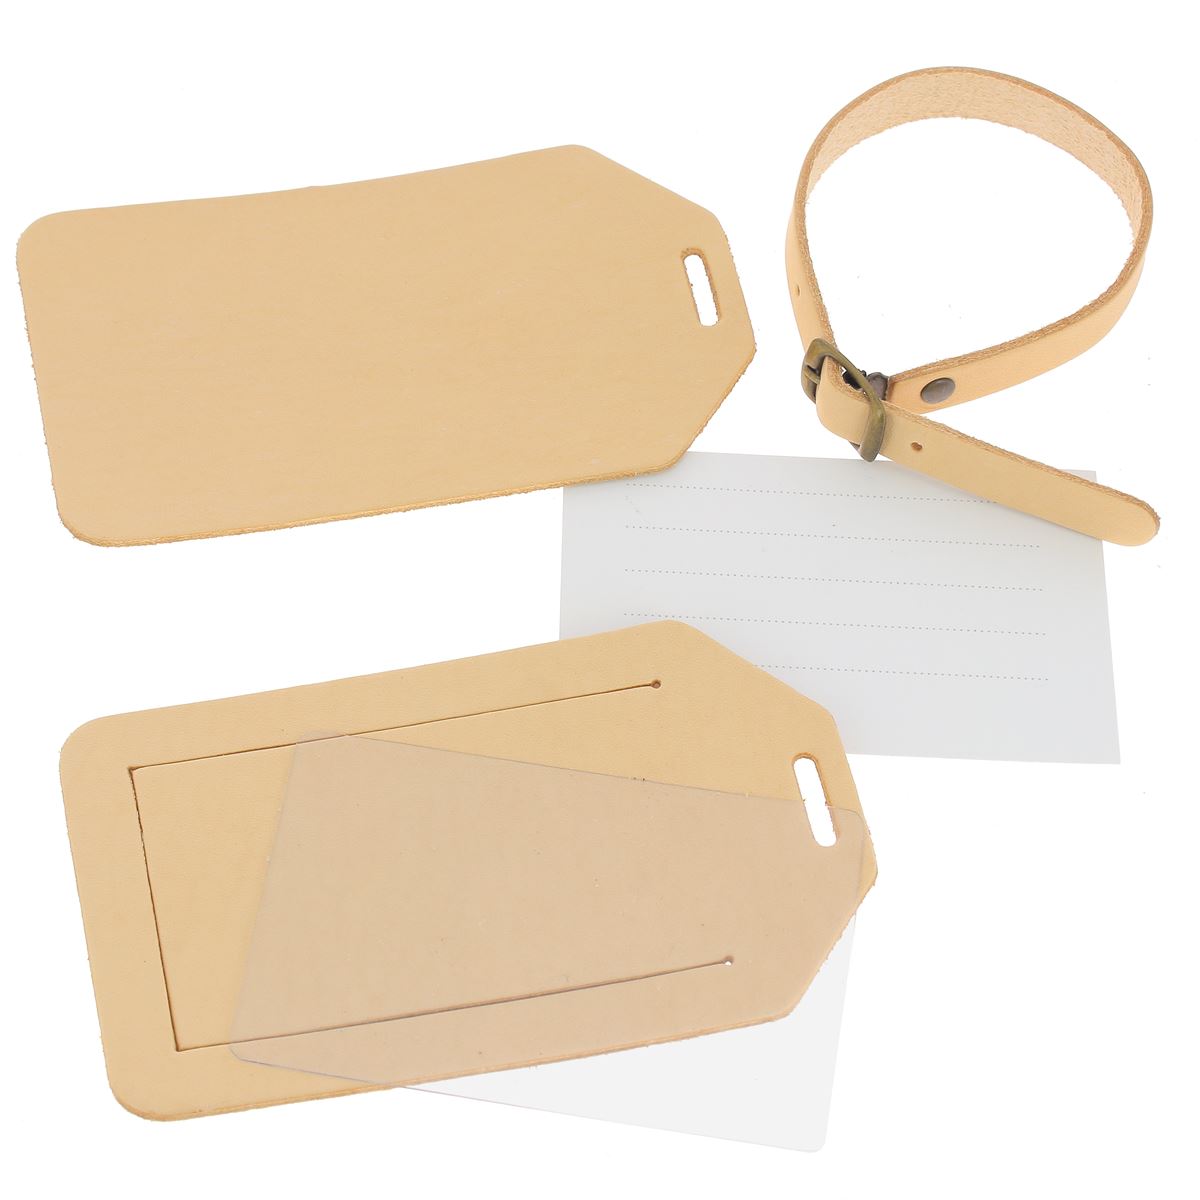
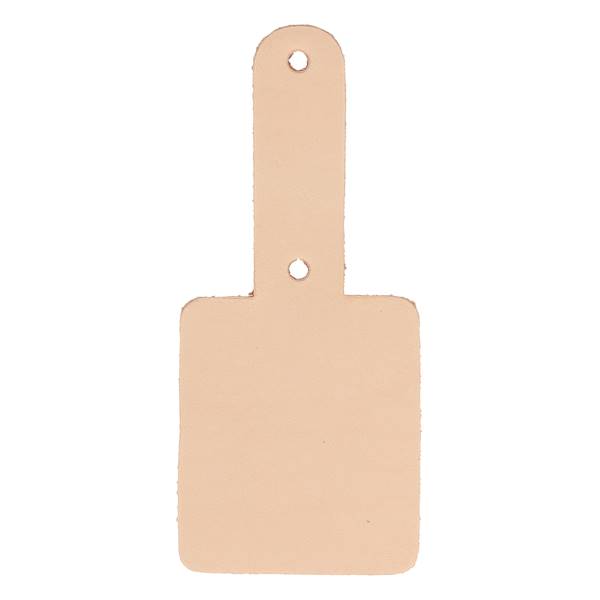
Download the pattern and transfer pieces P1 and P2 of the "Tag n°1" pattern onto the leather. Cut out the pieces using a craft knife or a pair of scissors.

2- Make the slits
On one of the P1 pieces, cut the tag window. On piece P2, make the slits. Punch 1mm diameter stopping holes at the ends of the 8.5 cm and 1.5 cm slits on P2, as well as those of the window on P1.
 |
 |
3. Assemble the P1 pieces
Glue the edges of the P1 pieces together back-to-back by 3 mm (only where there are stitch marks). Sew the P1 pieces following the stitch line (see pattern). For sewing, there are several options:
Hand sewing:
For experts: saddle stitch.
For beginners: simplified stitching. Punch sewing holes with a 1mm diameter punch.
Machine sewing:
Sew with a #40 polyester thread, 0.36 mm in diameter. Use clamps to hold the leather pieces in place while sewing.
 |
 |
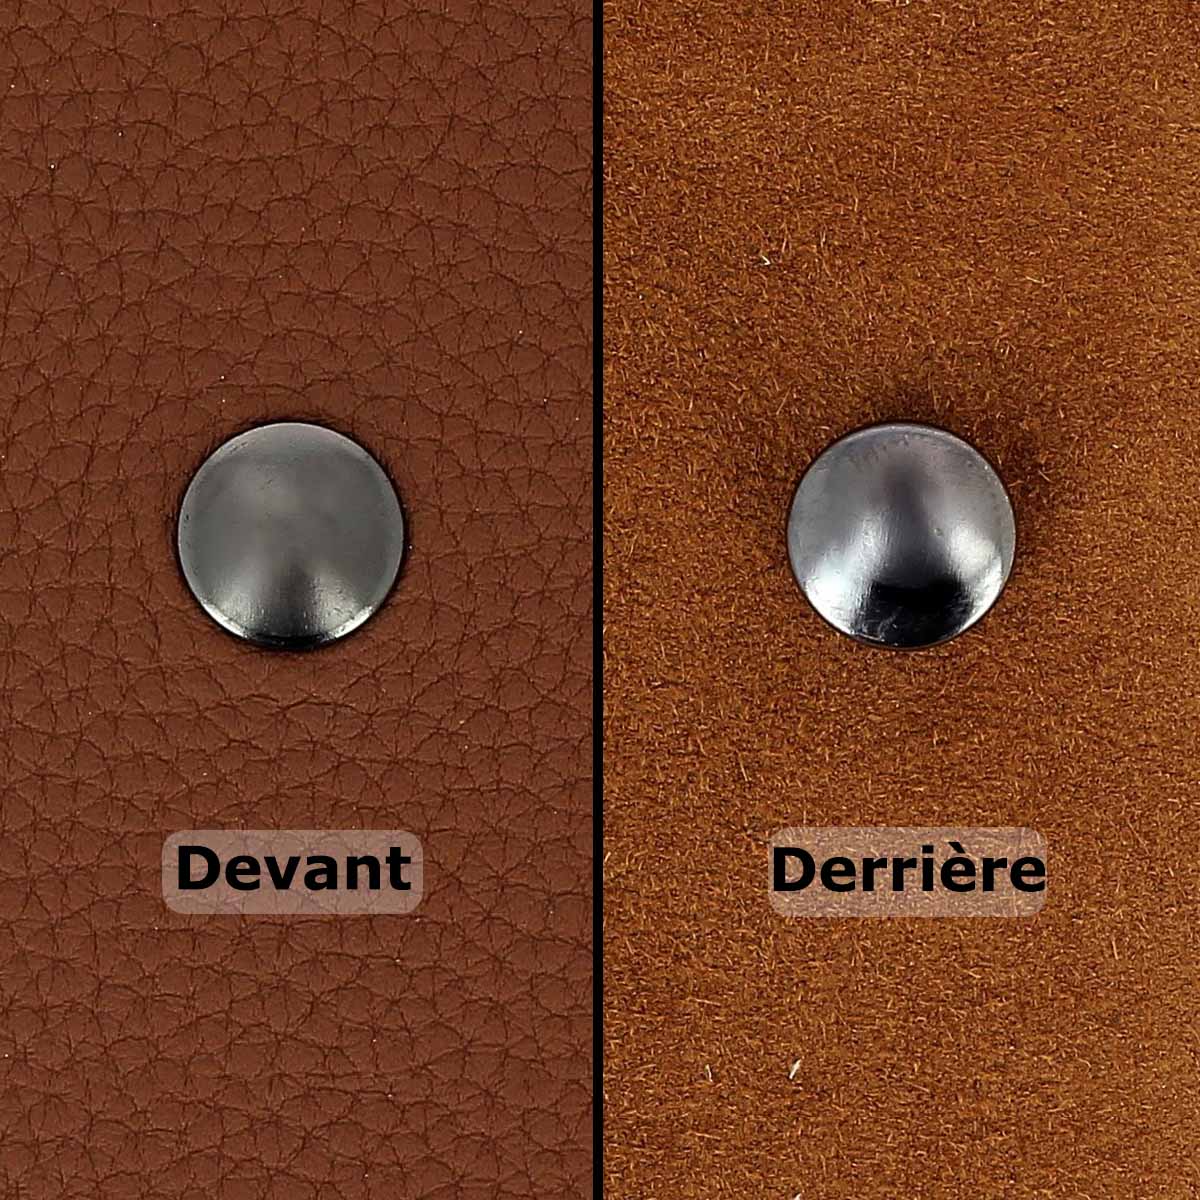
4. Punch the tab hole
Make the oblong hole in piece P1 to insert the tab (P2). Make 2 holes using a 3mm diameter round punch, then connect them with a craft knife and a ruler. Don't hesitate to watch the tutorial video.
 |
 |
OPTION: work the leather edges with an edge finish or an edge gum.
5. Insert the tag and tab
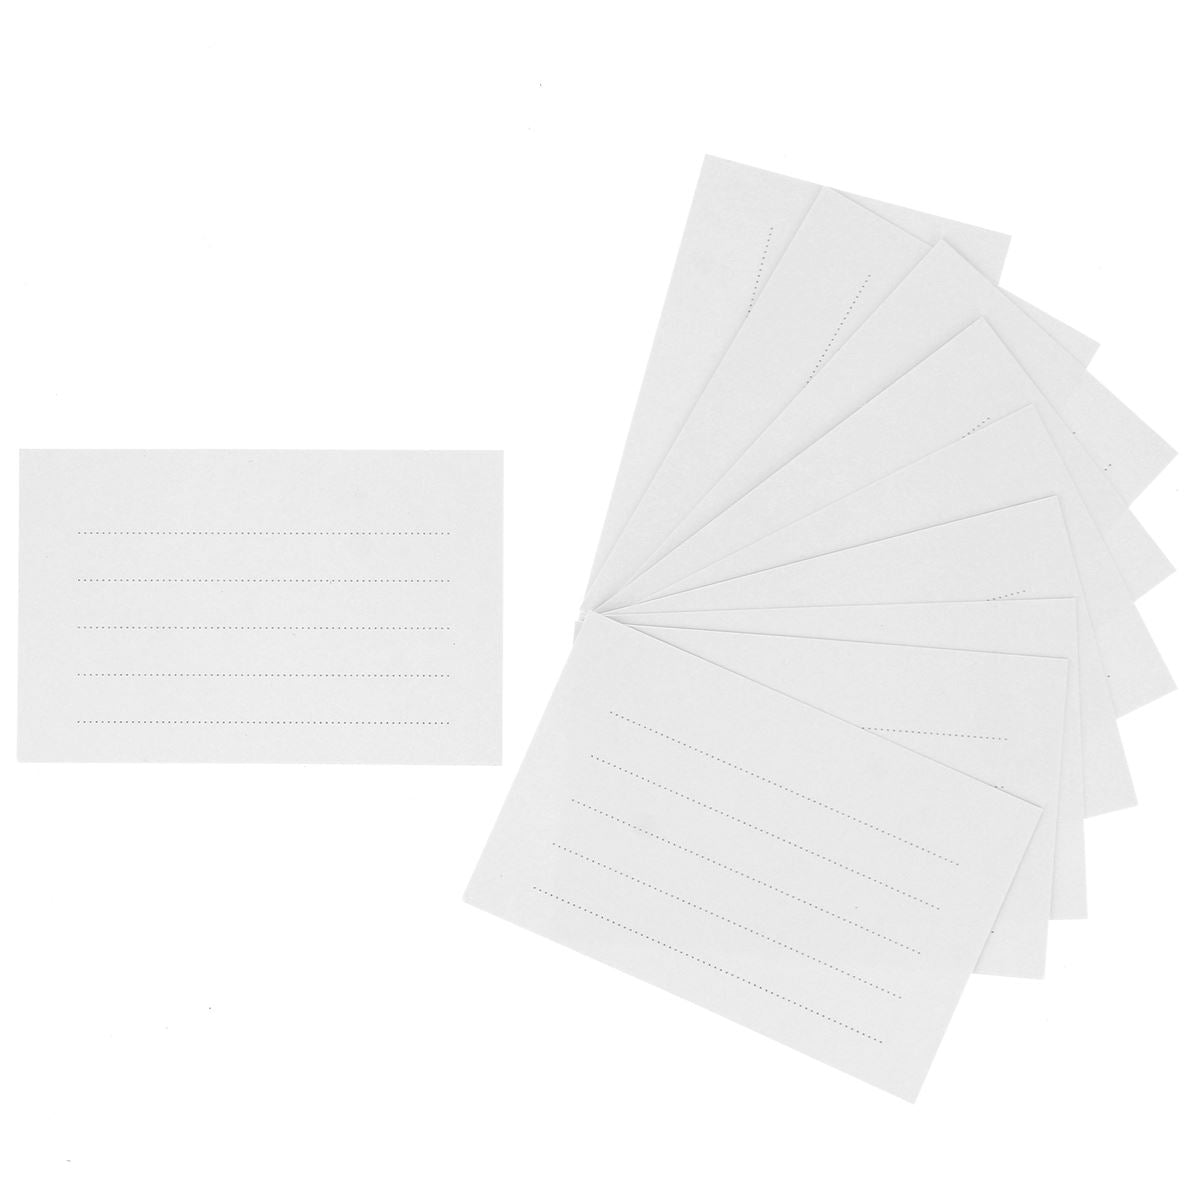
Slide a transparent plastic sheet into the case and a paper tag (name, contact details...). Dimensions: 8.5 x 5.5 cm. Pass tab P2 through the hole in piece P1 and secure it using the small slit. Then attach the tag to the desired luggage.
 |
 |
OPTION: personalize the luggage tag
Personalize the luggage tag with a date, a word, a name using our brass letters.

You're done!
Congratulations on this leather luggage tag: unique, robust and fully customizable. Perfect for easily identifying your belongings with style!
 |
 |
LUGGAGE TAG N°2


OPTIONAL:
1. CUT THE PIECES
- Using the silver pencil, trace the main piece of the "Tag n°2" pattern.
- Cut out the rectangle using a ruler and a craft knife.
- To cut the 1.5 x 22 cm strap, we used a strap cutter.
The pencil is erasable on most leathers with a simple eraser (do not use on vegetable-tanned leather). We advise you to test it beforehand to check the erasable function on your leather.
2. TRACE 2 LINES WITH A CREASER
To style the main piece, trace 1 line (a fillet) on each length using a creaser.
3. STAMP THE LETTERS AND NUMBERS
Moisten the leather with a sponge and a little water. Then stamp the letters and numbers using the stamping guide and a mallet.
4. MAKE AN OBLONG HOLE
Make an oblong hole using the punch.
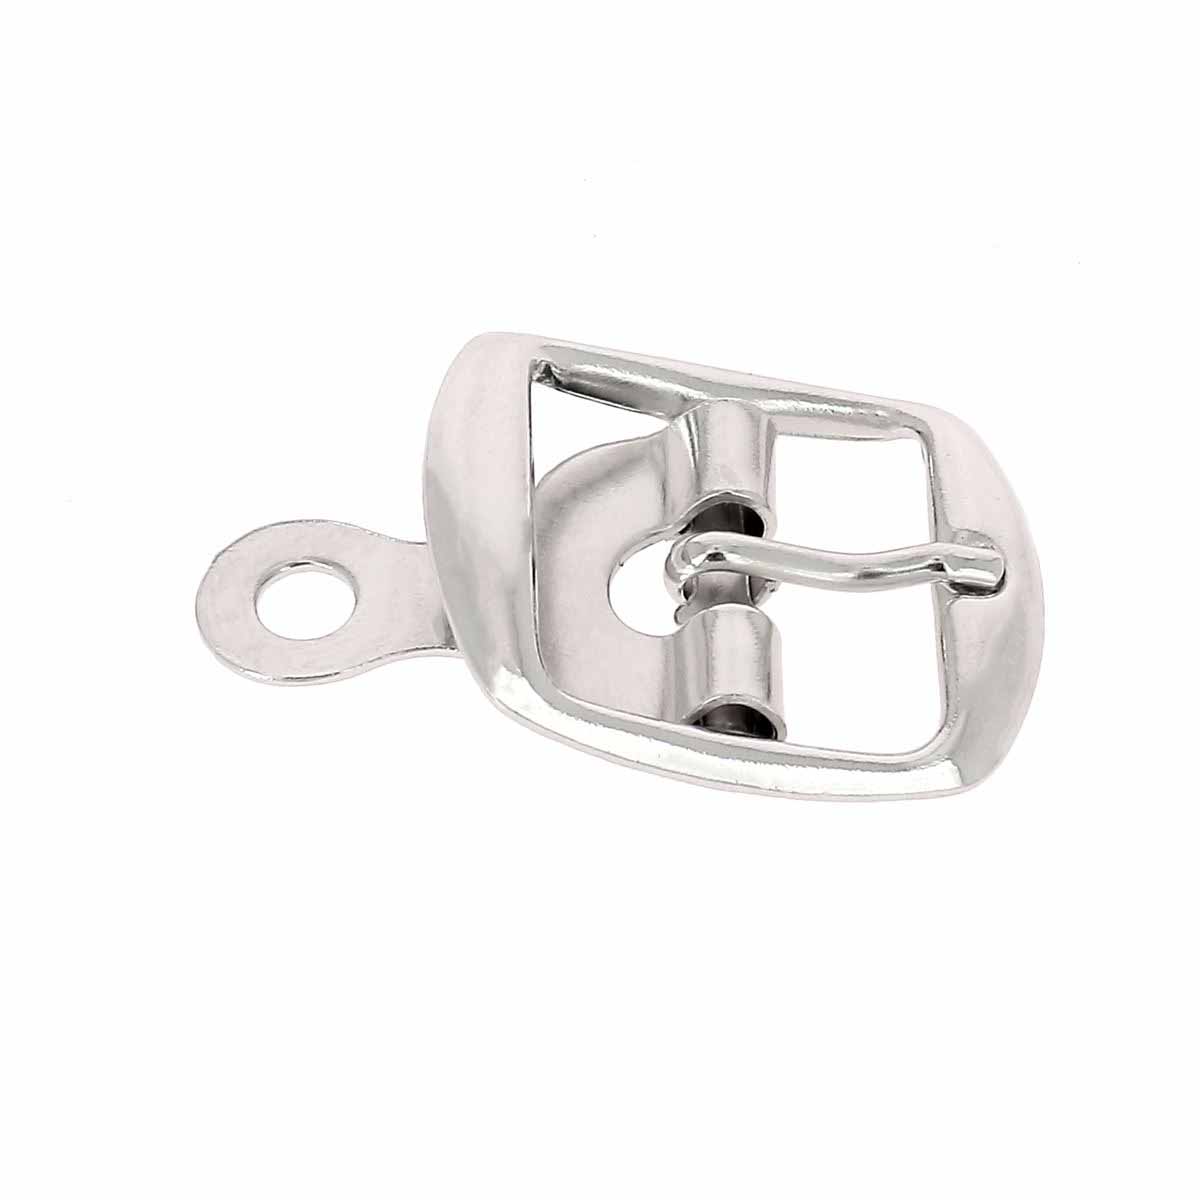
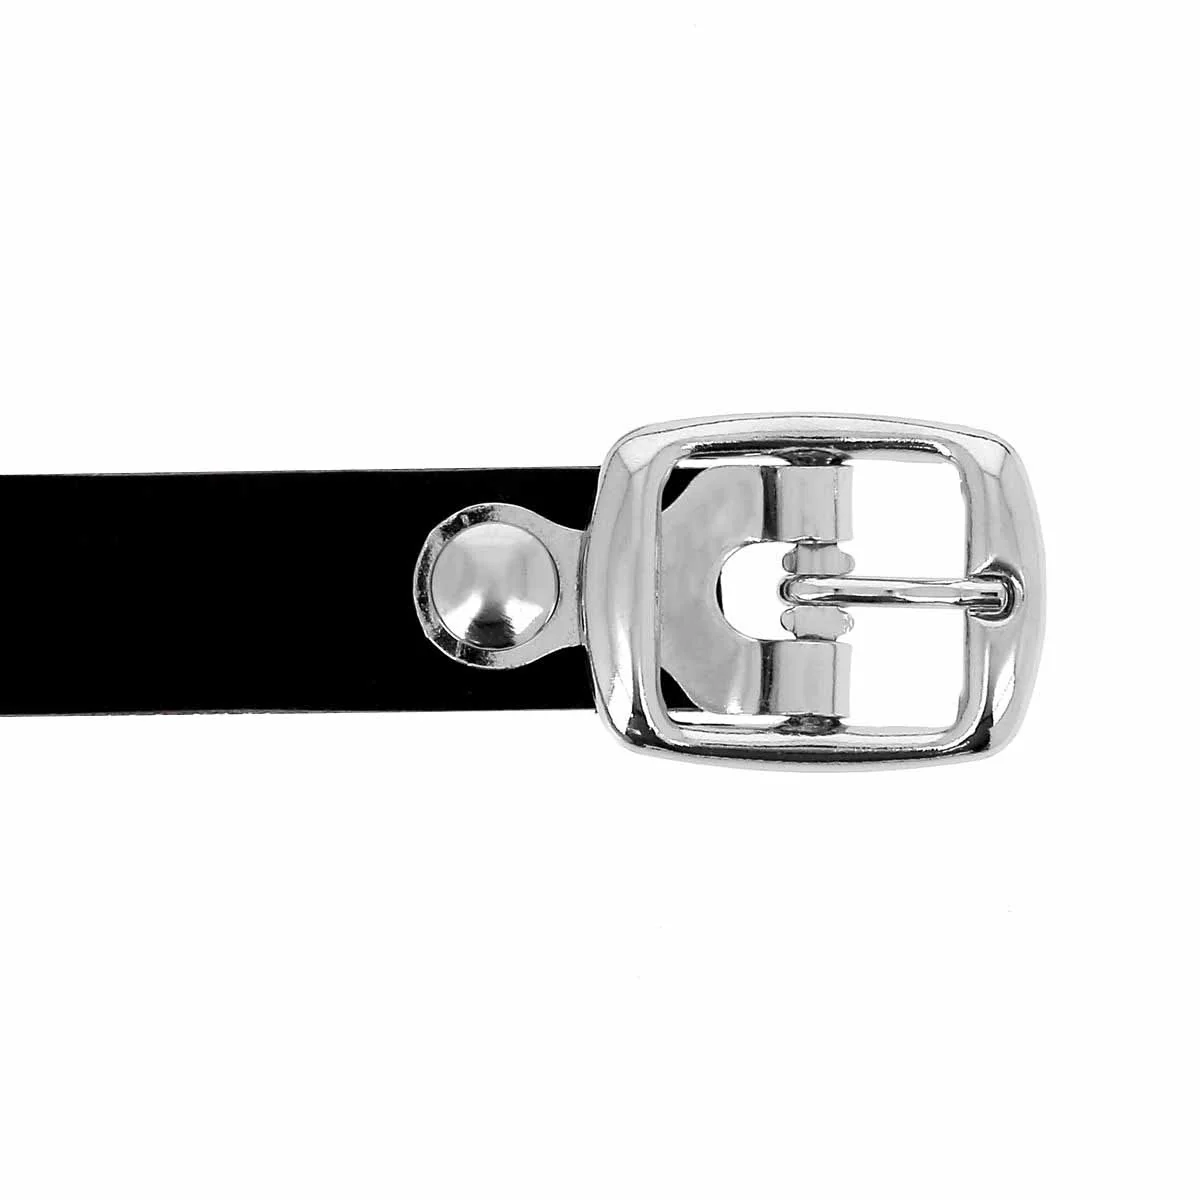
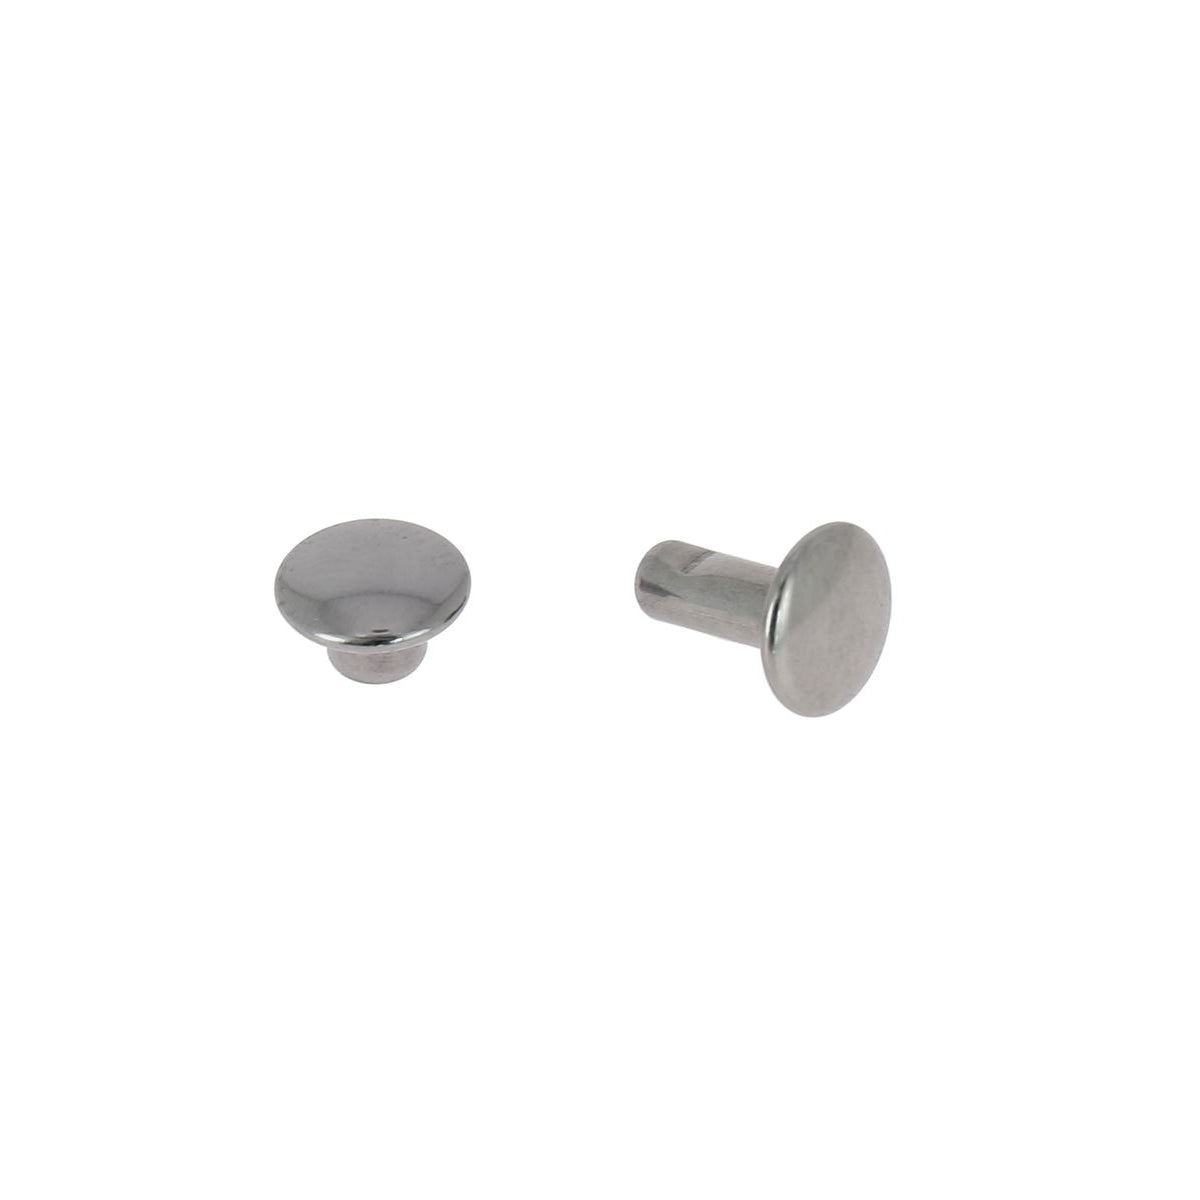
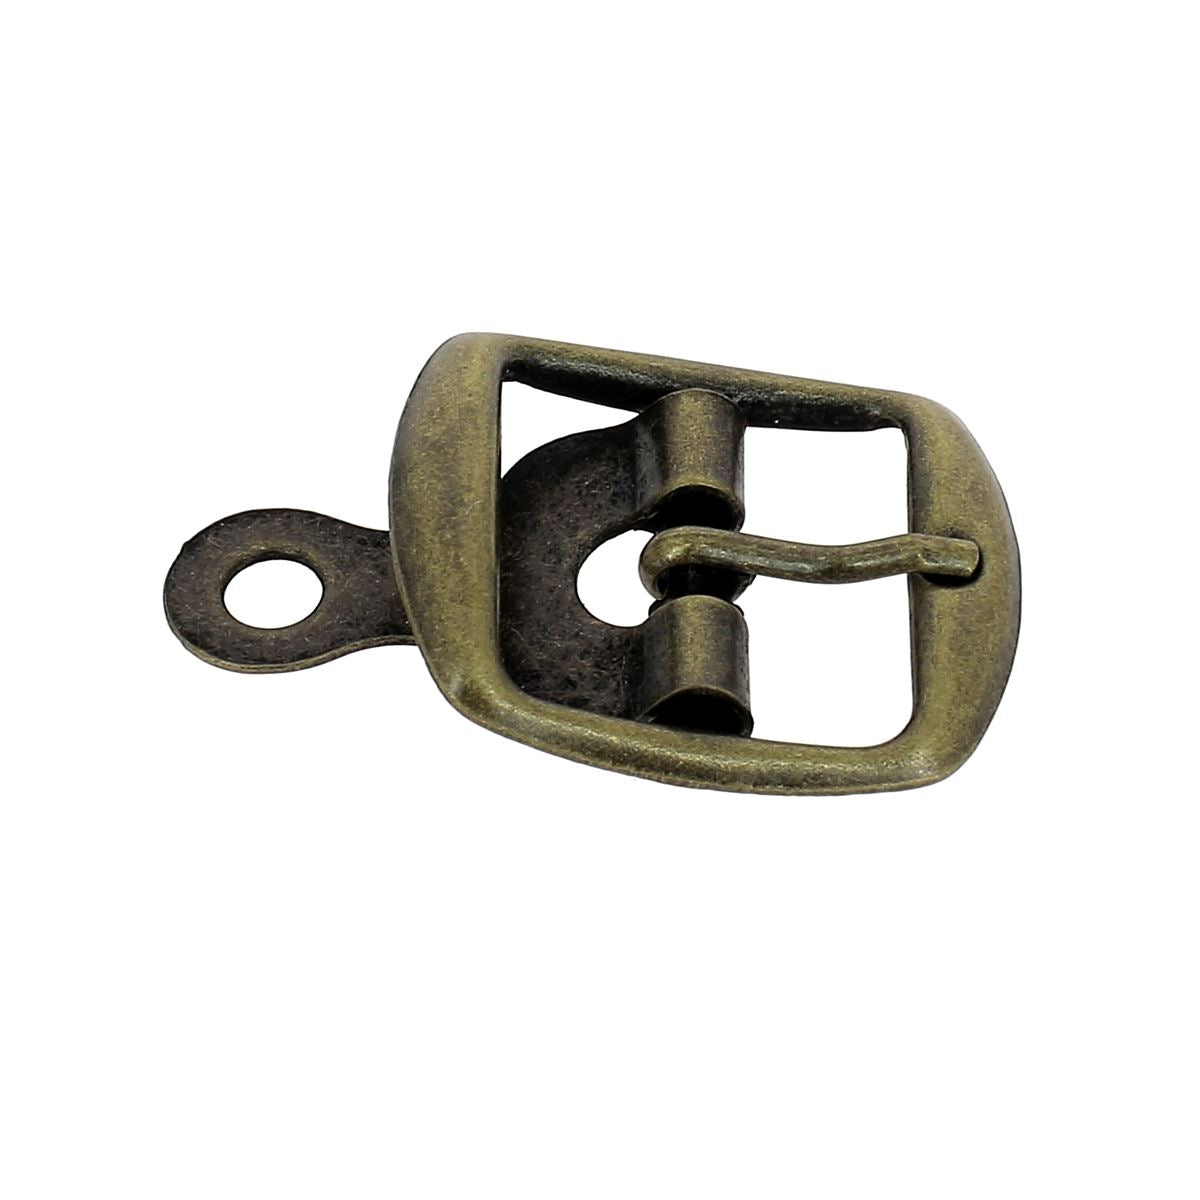
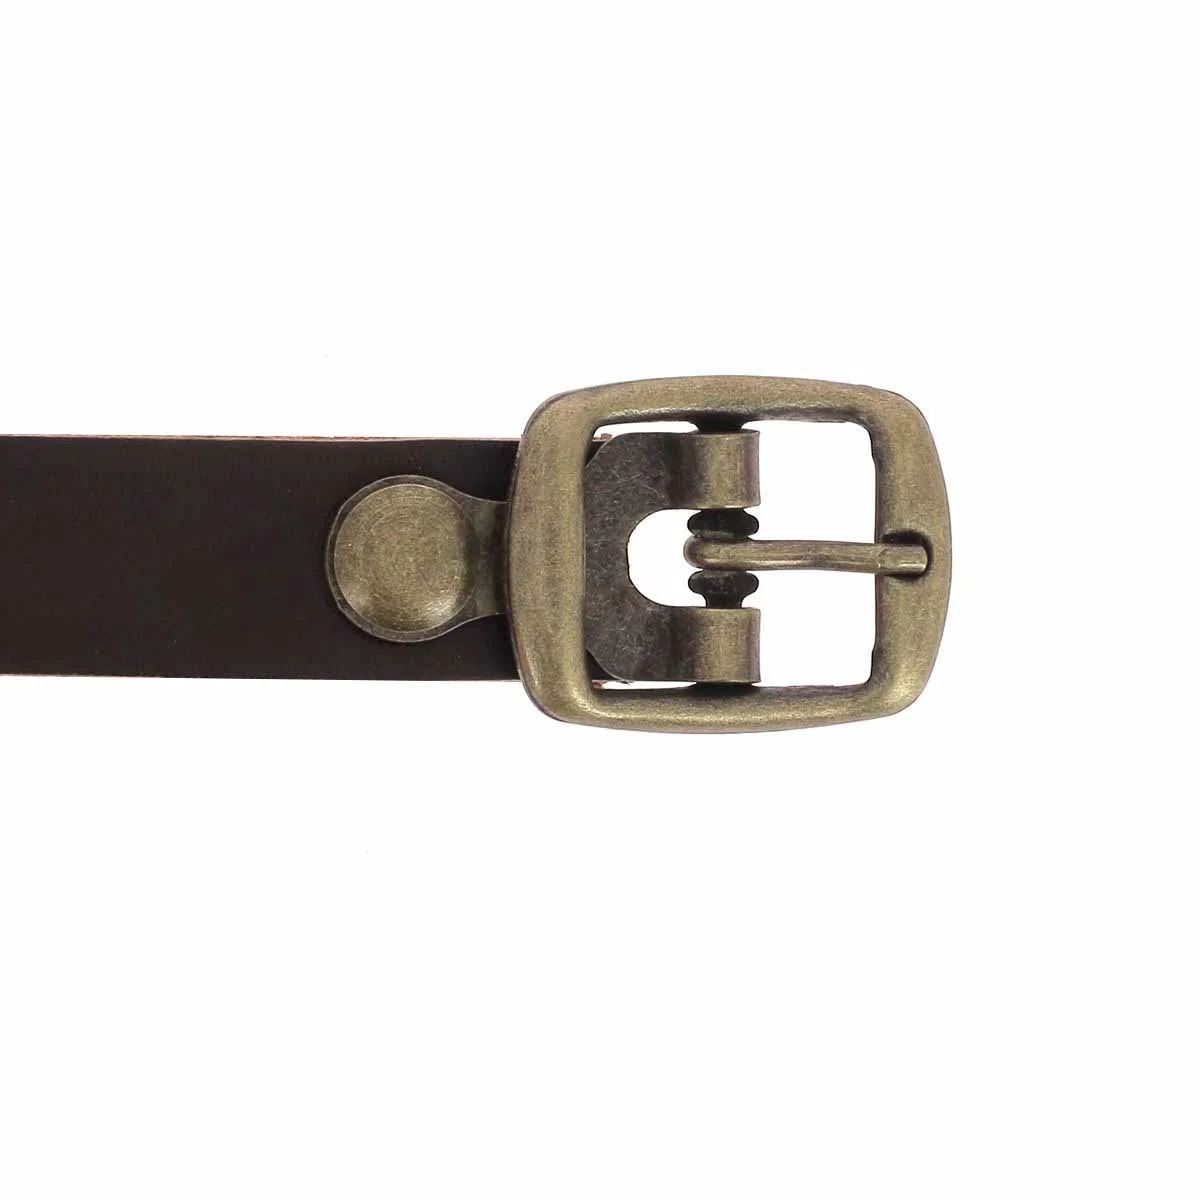
5. ATTACH THE BUCKLE WITH A CAP USING A RIVET
Using a setting tool (here, a hammering handle) and a 3 mm punch: attach the buckle with a T3 double-cap rivet.
6. MAKE 5 HOLES ON THE STRAP
Using a 3mm punch, make 5 holes at the other end of the strap (1st hole 1.5 cm from the edge, then every 2 cm).
7. STAMP THE MINI 3D STAMPER
Moisten the strap with a sponge and a little water and stamp the mini 3D stamper.
8. WORK THE LEATHER EDGES
Before applying an edge gum finish to the edges of vegetable-tanned leather, sand the edges at 45°.
9. FINISH THE EDGES
Apply tragacanth gum or Tokonole to the leather edges and rub vigorously with a cotton cloth or a slicker.
10. NOURISH THE LEATHER
Nourish the leather with a little neatsfoot oil or PANDA grease.
LUGGAGE TAG N°3
 |
 |


You will also need olive oil to dye the vegetable-tanned leather.
1. WET THE VEGETABLE-TANNED LEATHER
Wet the vegetable-tanned leather with a sponge and a little water.
2. STAMP THE TOOLS ON THE LEATHER
Stamp the letter and number tools using the stamping guide and a mallet.
3. DYE THE LEATHER WITH OLIVE OIL
Using a wide brush, soak the leather with olive oil.
Apply at least 2 coats, trying to use the same amount of oil everywhere.
Allow the oil to soak into the leather for at least one day, and if possible, in front of a sunny window.
4. PROTECT THE LEATHER WITH SATIN SHENE
Apply Satin Shene (matte finish) evenly over all the leather to protect it. Satin Shene is also available in a glossy version: Super Shene.
5. WORK THE EDGES WITH TOKONOLE
Work the leather edges with Tokonole or tragacanth gum and rub them vigorously with a wooden slicker (see the video on our blog).
6. ATTACH A T3 RIVET TO THE KEYRING
Fold the leather keyring tab back on itself then attach a T3 double-cap rivet.
7. FINISH THE LEATHER KEYRING
Add a round carabiner to the keyring so it can be attached to a suitcase.
Nourish the leather with a little neatsfoot oil or PANDA grease.


2 comments
Anonymous
Bonjour Hochart,
Totalement, nous vendons le plastique transparent ici : https://www.decocuir.com/products/100-feuilles-plastique-transparent-mica-a4
Bonne journée,
L’équipe Deco Cuir
Hochart
Pour l’étiquette n° 3 vous pouvez insérer un film plastique transparent pour protéger votre étiquette papier entre les 2 couches de cuir