


1. PREPARING YOUR WOODEN BOARD
Cut the wooden board to the desired dimensions using a jigsaw. Here, the shelf measures 50 x 20 cm.
Option: Round off the sides with a jigsaw and a sander.

2. NOURISH THE WOOD OF YOUR SHELF
Using a worktop oil (colorless vegetable oil), nourish the wood.
Apply 2 coats and sand between each coat.

3. CUT THE LEATHER STRAPS
Cut the leather straps according to the desired shelf height. The chosen width for our straps is 24 mm, and the thickness is between 3.3 and 3.6 mm.
VIEW ALL LEATHER STRAPS >

4. OPTION: FINISH THE EDGES OF YOUR LEATHER
Option: Finish the edges of the leather with an edge finishing gum (natural wax) to give them a smooth and shiny appearance.
You can choose between Tokonole, gum arabic, or gum tragacanth.
- Apply a thin layer of the product to the edge.
- Wait a few moments, then rub the edge briskly with a cloth or a burnisher.

 |
 |
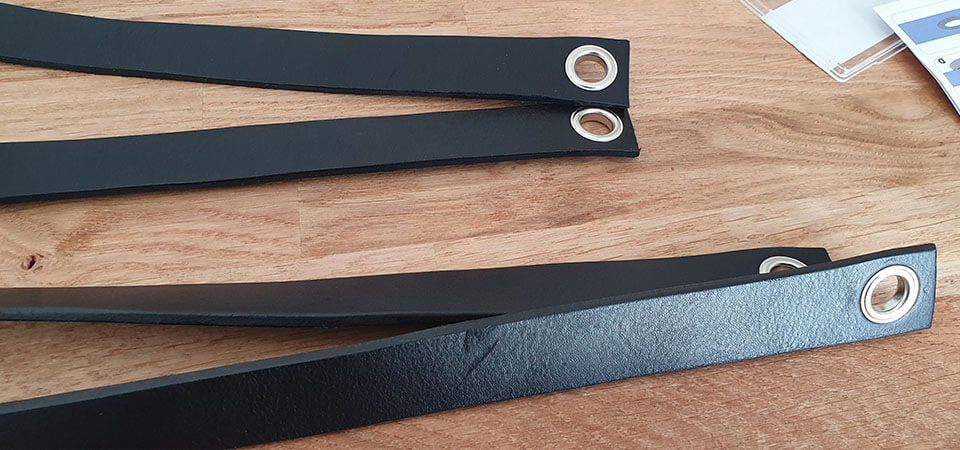
5. PUNCH A HOLE AT EACH END OF THE STRAPS
Punch a centered hole at least 1 cm from the edge at each end of the straps. The hole diameter should be chosen according to the size of the eyelets to be installed (here, 11 mm roll-set eyelets).
To punch a hole in leather, you need a round hole punch and a mallet.

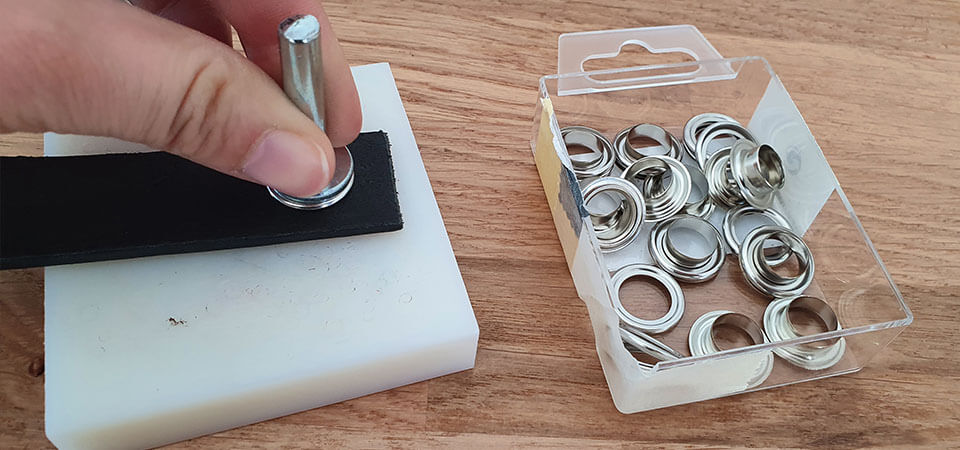
6. ATTACH THE EYELETS
Attach the 4 eyelets, 11 or 12.5 mm in diameter (your choice), to each end of the straps. We chose roll-set eyelets sold with their setting tool. You can also choose claw eyelets, which do not require a specific setting tool.
VIEW EYELETS >
7. DRILL THE WALL AND SCREW IN HOOKS
Using a drill, drill into the wall. All that's left is to insert a wall plug and a J-shaped screw hook!

8. CHECK THE SHELF LEVELS
Place the eyelets into the hooks and put the board between the straps. Check the levels.


9. STABILIZE THE BOARD WITH UPHOLSTERY NAILS
Stabilize the shelf using decorative upholstery nails (11 mm diameter - available on our website).
All that's left is to add decorations or plants, and your hanging shelf is complete!


